Aunt Emma's Apricot Cookies
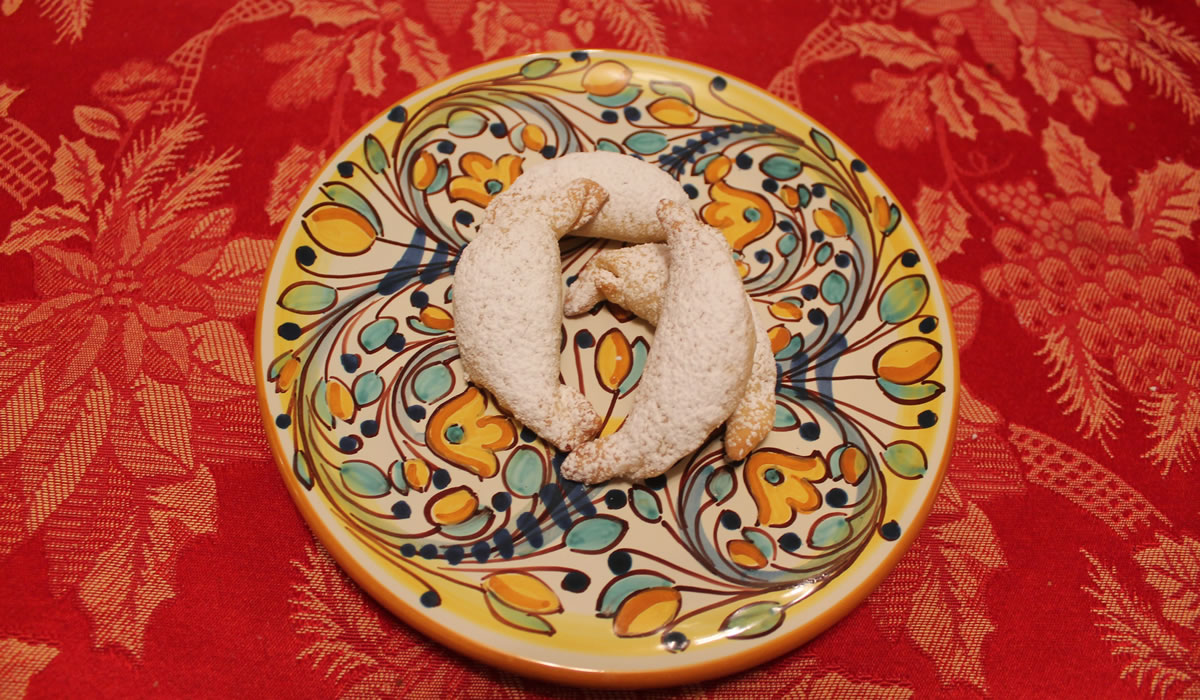 This one is the star of the family favorites - Aunt Emma's Apricot Cookie.
Aunt Emma was Emma Peditto, nee Monaco, and the 4th of 11 children - Victor's mom was the 10th. Emma was the cook - their parents both died at an early age and she took over the role of matriarch. The family gatherings all centered around her kitchen.
This particular cookie has always been a family favorite and, while many cousins today try and replicate them, we're the only ones who do them justice. Naturally, everyone else says that theirs are the best, also. However, ours are.
The recipe calls for lard. Yes. Lard. Crisco just doesn't work as well - it makes a tough cookie.
The filling was made yesterday and the dough needs to refrigerate at least a day, so we'll probably start them tomorrow...
Aunt Emma's Apricot Cookies
Filling:
- 1 pound dried apricots, chopped fine (soaked overnight – we soak in apricot brandy!)
- 3 cups sugar
- grated lemon rind (we use about a tablespoon – the amount was never specified)
Drain apricots. Place in saucepan with lemon rind, sugar, and water to cover. Bring to a boil, reduce heat and cook until water is absorbed. Be really careful — it burns easily. Cool.
Dough:
- 2 pkg dry yeast
- 5 cups flour
- 1/4 cup sugar
- 1/2 pound lard
- 4 egg yolks
- 1 cup sour cream
- 1 shot whiskey
- Juice and rind from 1 lemon
Proof yeast with 1 tsp sugar and 1/4 cup warm water. Cut lard into flour, as you would for a pie dough. Make a well in the mixture and add all the other ingredients, including yeast.
Work dough with your hands and form into a ball. (Don’t overwork. Use a light hand.) Refrigerate overnight.
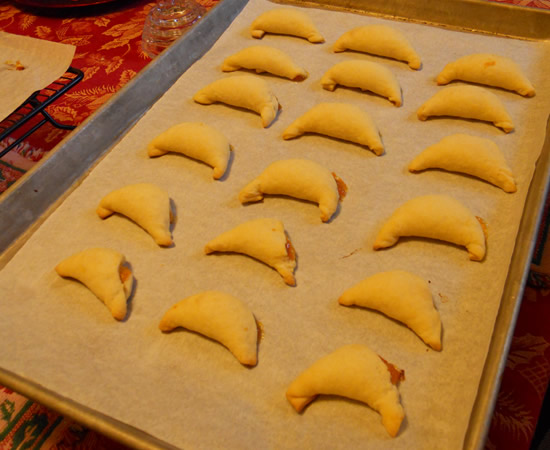
Roll cold dough to about 1/8″ thick. Aunt Emma would cut the dough into triangles, place a scant teaspoon of filling at the wide end, then roll up and shape into a crescent similar to a croissant. It takes a bit of practice. The easier way is to cut squares, fill, and fold over. Place scant teaspoon of filling, fold and seal. Shape into crescent.
Bake at 325° until golden brown on lightly greased sheets or ungreased parchment paper. (Investing in a box of parchment paper is the only way to fly!!)
Cool completely and dust with powdered sugar.
Make a well and add your ingredients.
It starts getting gooey.
Break up the egg yolks...
...and just start slowly incorporating the flour into the liquid.
In just a few minutes you have a completed ball of dough. Wrap in plastic and refrigerate overnight.
They do take time, but they really are worth the trouble.
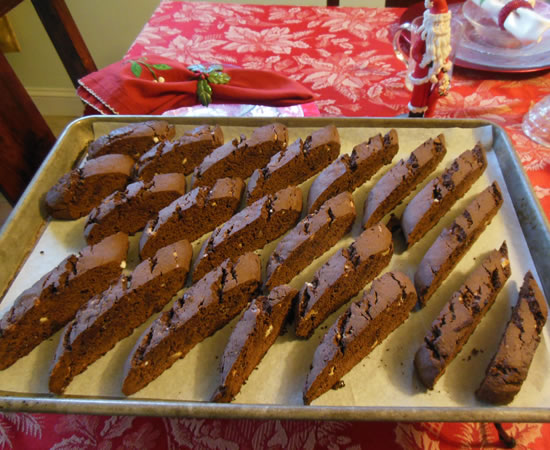
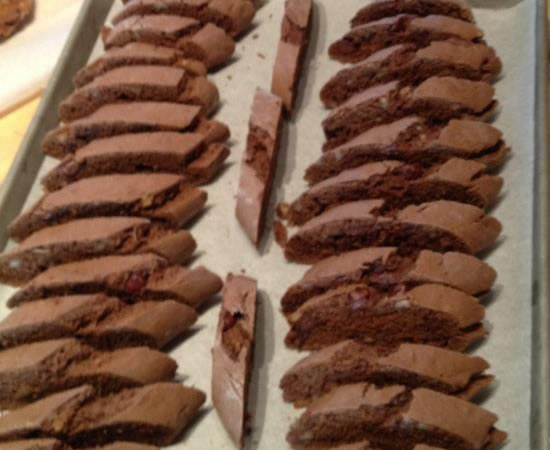
Chocolate Peppermint Biscotti
Cookie baking is a long tradition in our home. While I always made some cookies, it was Victor who elevated it to a mass-production art-form. I had a couple of family favorites - he had dozens. The cookie baking just kept growing and growing and growing until a couple of years ago, we decided it was time to scale back and concentrate on just a few favorites. We're back to having a lot of fun with it.
So... even though we're cutting back - or, at least, we're pretending we're cutting back - we always seem to find the time to make something new. My new one this year is a chocolate peppermint biscotti.
I usually leave the biscotti to Victor because he makes them so good I don't bother, but I had an idea for a chocolate peppermint version and decided to give it a go.
I'm glad I did. It worked well. Really well.
I used a chopped chocolate peppermint bark for the peppermint candy. Ghirardelli has a peppermint bark square that should be fairly readily available in most places, but it's also really easy to make - and just use the scrap pieces for the biscotti.
I also used a chopped up 72% chocolate to cut the peppermint - and added Jim Beam and no vanilla!
I think I may dip them in white chocolate - maybe half white, half dark. I dunno. I'll play and see what I like best.
Chocolate Peppermint Biscotti
- 2 1/4 cups flour
- 1/2 cup cocoa powder
- 2 tsp baking powder
- 1 cube (stick) butter
- 2/3 cup sugar
- 3 eggs
- 3 tbsp bourbon
- 1 cup chopped peppermint bark
- 1 cup chopped dark chocolate
Preheat oven to 350°.
Sift together dry ingredients. Cream sugar and butter, add eggs one at a time. Add bourbon.
Mix in flour. Mix in peppermint bark and chocolate.
Divide dough in half. With floured hands, shape into logs. Place on parchment-lined cookie sheets and bake for 20 to 25 minutes.
Cool completely. Slice into 1/4 to 1/2″ slices and toast on both sides in 350° oven for another 20 or so minutes.
Chocolate Peppermint Cookies
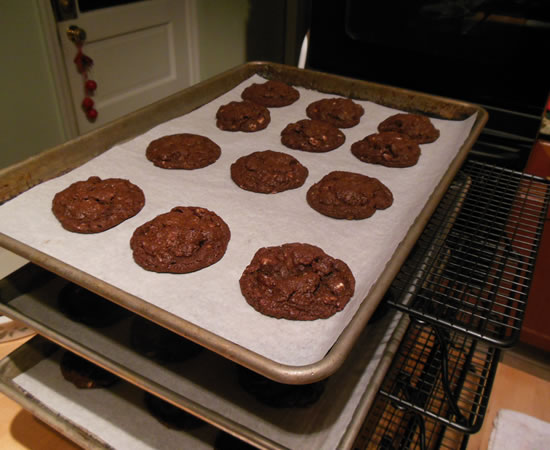
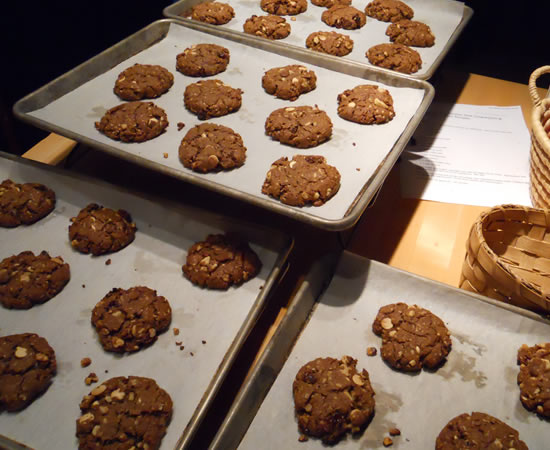
We're starting to get our Christmas Cookie Baking List together, so I thought I'd bake a batch of unrelated - but holiday-centric - cookies just for the heck of it. I really wanted to try out some chocolate peppermint chunks to see how they were because I have an idea for a chocolate peppermint biscotti this year. We've dramatically cut the amount of cookies we bake every year, but every year we also come up with some new ideas to augment the old standards - and a chocolate peppermint biscotti - dipped in chocolate - sounds like it may be a fun idea.
After tasting a couple of the peppermint chips I decided to up the chocolate content a bit and made a batch of chocolate chocolate chip cookies with a bit more cocoa and a heaping teaspoon of espresso powder. I also added more plain chocolate chips to offset the peppermint a bit.
The end result was a pretty festive cookie. Lots of chocolate with a goodly amount of peppermint. It gave me a good starting point for the biscotti. And if I dip them in a good dark chocolate, they'll be the perfect holiday treat - amongst all our other perfect holiday treats.
I used a #40 disher to scoop out the cookies. They hold 1.75 tablespoons of dough and are the perfect size for adult-sized cookies. It's also the perfect size for mini-muffins. A #60 disher is just barely a tablespoon and makes a great kid-sized cookie.
I highly recommend everyone putting several different sized scoops on their Christmas Wish List this year. They really make cookie, muffin, and even pancake-making, a snap! We have 7 or 8 different-sized scoops we use for a variety of things. We've also had them for years. They really do last forever.
Chocolate Chocolate Peppermint Cookies
- 1 1/2 cups all-purpose flour
- 3/4 cup unsweetened cocoa powder
- 1 teaspoon baking soda
- 1 heaping tsp espresso powder
- 1/4 teaspoon salt
- 1 cup butter, softened
- 1 cup granulated sugar
- 1/4 cup packed light brown sugar
- 1 large egg
- 2 tsp vanilla
- 2 cups chocolate peppermint chunks
- 1 cup semisweet chocolate chips
Preheat oven to 350°.
Sift together flour, cocoa powder, baking soda, expresso powder, and salt and set aside. Beat together butter and sugars until light and fluffy. Add egg and and vanilla and beat until combined well.
Beat in flour mixture until just combined.
Stir in chips.
Use a #40 scoop if you have one - and you should - and bake about 13 minutes or until cookies are just set and begin to crack on top. Remove from oven and cool.
Pumpkin Oatmeal Cookies
There's just nothing worse than sitting around the house waiting for a hurricane to strike. Whenever we find ourselves in a situation like that, one - or both - of us heads to the kitchen. This time, it was Victor.
He thought it prudent to get a batch of cookies in the oven before we lose power - and the oven. We're very actively involved in trying to get natural gas lines run into our neighborhood, but since that's not happening today, we're stuck with the electric ovens. I could probably bake cookies on the gas grill - I know I can bake bread on it - but if I don't have to... I do like to take the path of least resistance whenever possible.
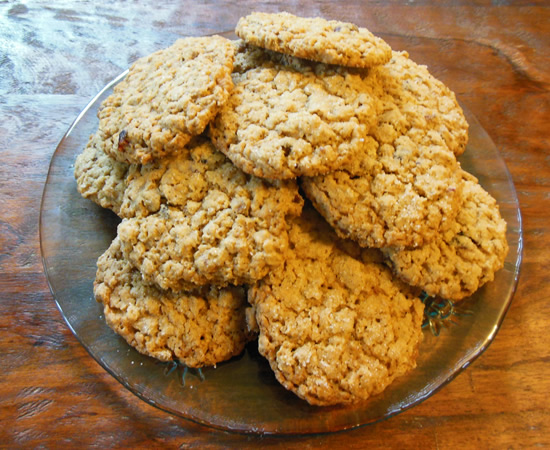
The pumpkin in these particular pumpkin cookies comes from instant pumpkin oatmeal. I do have to admit I generally don't eat instant oatmeal because it's always sweetened and as much as I love my sweets, I take my oatmeal and coffee straight up the way Mother Nature intended. But Victor likes it for the convenience in the winter and thought this one would mix well with regular oats to make a good cookie.
He was right, of course!
After having these, I imagine any of the numerous flavored instant oatmeals out there could work. Give it a try!
Pumpkin Oatmeal Cookies
- 3/4 cup butter, softened
- 1 cup packed brown sugar
- 1/2 cup granulated sugar
- 1 teaspoon baking powder
- 1/4 teaspoon baking soda
- 1/2 teaspoon ground cinnamon
- 2 eggs
- 1 teaspoon vanilla
- 1 3/4 cups all-purpose flour
- 1 cup rolled oats
- 1 cup pumpkin oatmeal
Preheat oven to 375°. Beat butter until light. Add sugars and beat until well mixed. Beat in eggs and vanilla until combined. Add flour, baking powder, baking soda, and pinch salt. Stir in oats.
Use 1/4 cup scoop and scoop onto parchment-lined cookie sheets. Bake about 15 minutes.
Now... if the Giants can do me a big favor and clinch the World Series tonight, I'll really be a happy camper!
Maple Coconut Cookies
Okay. I don't often read a recipe and immediately go into the kitchen and make it - well... not really often, anyway - but when my friend Ruth posted a recipe for Maple Coconut Cookies, that's exactly what I did.
And an I ever glad I did!
These rock, boys and girls - and they're totally easy to make. Grade B maple syrup - of course - and it really does go without saying that real maple syrup should only be used. actually, one should only have 100% real maple syrup in ones home, anyway. All that other stuff is garbage - including that gawdawful maple-agave syrup that should be banned.
But I digress...
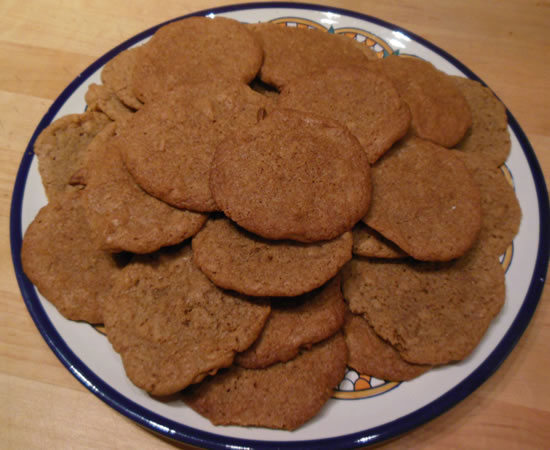
The cookies are rich, maple-flavored, chewy... they have everything going for them.
I see more of these happening!
Maple Coconut Cookies
adapted from Tasty Bits & Bites
- ½ c. butter at room temp.
- 1 c. packed brown sugar
- 1 egg
- ½ c. maple syrup
- 1 tsp. vanilla
- 1 ½ c. flour
- 2 tsp. baking powder
- ½ tsp. salt
- 1 c. flaked unsweetened coconut
In a mixing bowl cream the butter and brown sugar till fluffy. Beat in the egg, syrup and vanilla until well mixed.
Combine the flour, baking powder and salt and add to the creamed mixture.
Stir in coconut. Drop by tablespoonfuls 2” apart onto greased baking sheets.
Bake at 375° for 12-15 min or until lightly browned.
Chocolate Walnut Biscotti
We've been baking Christmas cookies forever.
At one point we were literally making thousands of them and buying flour and sugar in multiple 25-pound bags.
We probably still make more than the average family, but we have cut waaaaaaay back. Time, money, and old age are all catching up.
But what we lose in quantity, we definitely gain in quality. The cookies are better than ever.
We have the family favorites that we definitely have to make every year and we've had a niece and nephew come down and assist for the past few years. But while we always make the traditional cookies, we usually make a couple of different cookies each year, just because. Last year we went on a bit of a German binge and made Springerle cookies and Pfeffernüsse cookies - both excellent. This year, we're back in Italy with Chocolate Biscotti.
Victor reworked his Uncle Rudy's biscotti recipe for these. Actually, we have reworked that recipe a dozen times for a dozen different variations. The original is for a traditional anise cookie - that is still the family favorite - but the macadamia nut orange, the almond, and now chocolate are always big hits.
This variation is outstanding! And easy to make.
Chocolate Walnut Biscotti
- 2 3/4 cups flour
- 1/3 cup cocoa powder
- 2 tsp baking powder
- 1 cube butter (4 oz)
- 2/3 cup sugar
- 3 eggs
- 1 cup chopped walnuts
- 1 cup chopped chocolate or chocolate chips
- 1 tsp vanilla
Sift together dry ingredients. Cream sugar and butter, add eggs one at a time. Add vanilla. Stir in flour and cocoa. Stir in nuts and chocolate.
Divide dough in half. Shape into logs. Place on greased cookie sheets and bake at 350° for 18-20 minutes.
Cool completely. Slice into 1/4 to 1/2″ slices and toast on both sides in 350° oven.
These really did come out awesome! And they're simple to do.
There are more cookies on the horizon and a special Danish pastry I want to make for Christmas morning. I'm going to be experimenting with it this weekend...
50 years ago - and yes, that is a long time ago - I worked in a neighborhood donut shop/bakery/coffee shop and we made a Danish pastry called a Butterhorn. I have not seen this particular Danish for years and even doing a Google search hasn't resulted in the Danish I remember. I have a Danish Pastry recipe from Fantasia Bakery in San Francisco that I have made before and a butter streusel recipe so Saturday after work I shall be making pastry. It's an hours-long process of rolling, folding, and chilling.
But they're gonna be good! I just know it!
Everything But The Kitchen Sink Cookies
As the saying goes, Cooking is an Art - Baking is a Science.
Cooking can be very forgiving. Baking requires the right ratio of flour, eggs, fat, sugar, and leavening. It helps to have a bit of understanding of what the ingredients do. Flour and eggs - the proteins - provide the structure. Fat and sugar provide the tenderness and moisture. Too much or too little of anything can create a tough or dry product. Too much leavening can cause things to expand and collapse, too little and they won't rise. Proper proportions.
Lard is one of the best tenderizers. It also has a horrible reputation. It really does make a light, tender, and flaky pie crust. Butter works well but it needs to be whipped - and needs an emulsifier such as eggs. Olive oil has emulsifiers in it and works well in many cake recipes. But don't run out and start making cakes with olive oil and think you're eating healthy. It's still a cake.
Science. Chemistry. Math. There's more to baking than merely slicing the cookie dough roll.
This was a bit of a trial-and-error recipe developed over time. I wanted a cookie that had everything I could think of in it, and was also crisp but not dry. Just soft enough without being an under-baked Mrs. Field's. I think it came out rather well. There are 4 cups of add-ins - the nuts, chips, and raisins. You can vary these and mix and match things to what you have on hand and increase it up to about 5 cups, total. After that, there's not much dough to hold everything in place.
Everything But The Kitchen Sink Cookies
- 2 cubes butter (8 oz)
- 1 cup peanut butter
- 1/2 cup sugar
- 1 cup packed brown sugar
- 2 eggs
- 2 cups flour
- 1/2 cup cocoa powder
- 1 tsp baking soda
- 2 cups rolled oats
- 1 cup chopped nuts
- 1 cup raisins
- 2 cups chocolate chips
- 1 cup coconut
Cream butter and peanut butter. Add sugars and beat until light, then add the eggs one at a time. Add the flour, cocoa, and baking soda, and mix well. Then add the rolled oats. Stir in the rest of the ingredients. Mix well.
Use a 1/4 cup scoop and scoop out cookies onto ungreased cookie sheet. (I always line my sheets with parchment!) Press down slightly with damp fingers.
Bake at 350° for about 20 minutes.
I always use a scoop to dish out the cookies. It is infinitely easier than anything else and makes for uniform-sized cookies that bake evenly.
The recipe makes about 3 dozen large cookies.
Karabij
Barbara Romaine
It’s from a Lebanese cookbook entitled Food for the Vegetarian, by Aida Karaoglan, and it’s called karabij. A Jordanian friend once told me that another name for these is karabij Halab, which translates to “whips of Aleppo.” Sounds kinky, doesn’t it? I’m afraid I have no idea what whips have to do with anything here, though. What these really are is semolina nut biscuits. Here we go (I usually halve this recipe, by the way; otherwise, you end up with an awful lotta biscuits . . . but if you’re planning for a crowd, well . . . ):
- 6 cups semolina
- 1 pound butter
- 1/2 teaspoon baking soda
- enough milk to form a hard dough (very precise, no?)
Sift the semolina with the baking soda. Work the butter into the semolina with your fingers until it is well mixed. Gradually add the milk to form a stiff dough. Shape the dough into small balls the size of walnuts. Hollow them and fill them with the nut filling (see below). Close and seal. Place them on a large baking tray and bake in a 325-degree oven until golden. [Here the instructions say to serve with a special cream called “natef,” on the side, but this “natef” (which I think actually DOES mean something kinky, in other contexts–yeesh, what IS it with this recipe, anyway??) involves an ingredient called halawa wood . . . er . . .say what? I suspect that halawa wood, if it’s available anywhere outside of Lebanon, might be found in some obscure Arab food market in New York or Montreal, but nowhere else. So I’ve never attempted to make natef–instead I just use Haagen Dazs vanilla ice cream, which does beautifully as a substitute, thank you very much.]
Nut filling:
- 1 cup pine nuts, coarsely ground
- 1 cut walnuts, coarsely ground
- 1/2 cup sugar
- 1/2 teaspoon rose water
Mix the above ingredients to use as the filling for the karabij.
Enjoy!
- Amaretti
- Aunt Dolores’ Rum Balls
- Aunt Emma’s Apricot Cookies
- Butter Rum Biscotti
- Cannoli Biscotti
- Cedro/Citron Biscotti
- Chocolate Amarena Cherry Biscotti
- Chocolate Peppermint Biscotti
- Chocolate Peppermint Biscotti
- Chocolate Sambuca Biscotti
- Chocolate Snowballs
- Christmas Turtles
- Coconut Balls
- Cuccidati
- Debbie’s Ginger Snaps
- Frosted Nutmeg Logs
- German Spritzer Cookies
- Gina Lollobrigida’s Wreath Cookies
- Gingerbread Biscotti
- Joanna’s Wedding Rings
- Karabij
- Kwachy’s Cut-Out Cookies
- Kwachy’s Melt-A-Ways
- Lemon Coconut Cookies
- Marie’s Jelly Strips
- Orange Macadamia Biscotti
- Pecan Balls
- Peppermint Patties
- Pfeffernusse
- Pistachio Biscotti
- Quadruple Orange Biscotti
- Ricotta Cookies
- Rolled Cut-Out Cookies
- See’s Original Fudge
- Spice Christmas Cookies
- Springerle Cookies
- Tequila Mockingbird Biscotti
- The Justin Trudeau Biscotti
- Torrone
- Torrone al Cioccolato
- Uncle Rudy’s Pizzelle’s
- Uncle Rudy’s Biscotti
- Vanilla Almond Cookies
- Walnut Butter Cookies
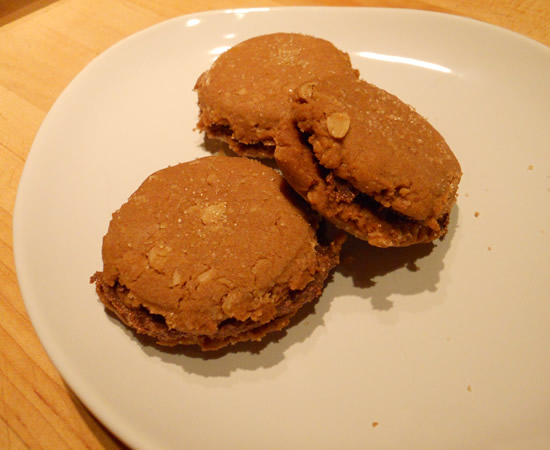
Nutella Sandwich Cookies
I LOVE La Cucina Italiana Magazine. Love it. Where else would one find a recipe to make homemade gianduja - a nutella-like spread - and in another issue, cookies using the spread as an ingredient and as a filling?
My tummy is smiling tonight!
The kudos for both recipes go to pastry chef Karen DeMasco. The cookie recipe is rather unique in that it calls for sauteing rolled oats in butter before adding them to the dough. What a great idea! The whole kitchen smelled great before I even started!
Both the gianduja and cookie recipe will be regulars at our house. The spread will last easily a month on the shelf and three times that in the refrigerator (not that it's likely to last that long around here!)
I used a 1 tablespoon scoop and got 54 cookies from the batch. Those will make 27 sandwich cookies. That's a lot of cookie. These guys are rich!
I used my homemade gianduja, but the recipe was created for off-the-shelf Nutella.
Nutella Sandwich Cookies
Recipe by Karen DeMasco
Ingredients
For the cookies:
- 4 tablespoons (1/2 stick) cold unsalted butter plus 12 tablespoons (1 1/2 sticks) unsalted butter, at room temperature
- 1 cup rolled oats (preferably Quaker)
- 3/4 cup Nutella
- 1/2 cup packed dark brown sugar
- 1/2 cup granulated sugar
- 2 cups unbleached all-purpose flour plus more for dusting
- 2 teaspoons baking soda
- 2 teaspoons kosher salt
- 1/4 cup Demerara sugar (see Note)
For the filling:
- About 1 cup Nutella
Special equipment: parchment paper
Instructions
For the cookies: Heat oven to 350º. Line 3 baking sheets with parchment paper.
In a large skillet, melt 4 tablespoons cold unsalted butter over medium heat. Add oats and cook, stirring frequently, until fragrant and lightly golden, about 5 minutes; transfer oats to a large metal bowl and set aside.
In the bowl of an electric mixer fitted with the whisk attachment, combine room temperature butter, Nutella, brown sugar and granulated sugar. Beat on medium speed, frequently scraping down the sides of bowl, until fluffy and well combined, 3 to 4 minutes.
In a separate bowl, whisk together flour, baking soda and salt. In two additions, add flour mixture to butter mixture, mixing on low speed until well incorporated, then add oats and mix until dough comes together and oats are incorporated.
Lightly flour the palms of your hands. Scoop 1 level tablespoon dough, roll into a ball, then flatten to about 1/8-inch-thick. Place on a prepared baking sheet. Repeat with remaining dough, spacing cookies at least 1 inch apart. Sprinkle with Demerara sugar. Bake, rotating the pans halfway through, until the cookies are puffed and golden, 12 to 15 minutes. Transfer cookies on parchment paper to wire racks to cool completely. (Cookies can be stored, unfilled, in an airtight container at room temperature for up to 3 days.)
To fill the cookies: Using an offset spatula or butter knife, spread about 1 tablespoon Nutella over the flat sides of half of the cookies. Sandwich with remaining cookies, flat sides together.
Once filled, cookies are best same day, but can be kept in an airtight container at room temperature for up to 2 days.
Note: Demerara is a natural brown sugar, an English version of turbinado sugar but with a slightly larger crystal size. When sprinkled on cookies and pie crusts, it adds sparkle and crunch. Turbinado is a good substitute while granulated sugar will work in a pinch.
Christmas Cookies
It's beginning to smell a lot like Christmas! It's almost semi-miraculous since the cold-from-hell had made my sniffer almost worthless. But Christmas Baking waits for no man, so Typhoid Timmy headed in to the kitchen with Victor to make a batch of Aunt Emma's Apricot Cookies.
This was supposed to be the weekend Gino and Elizabeth baked cookies with us, but they wisely chose to stay out of the quarantine area. There will be more cookies and other years.
(And yes, the hands were washed often and no sneezing or coughing over the cookies occurred.)
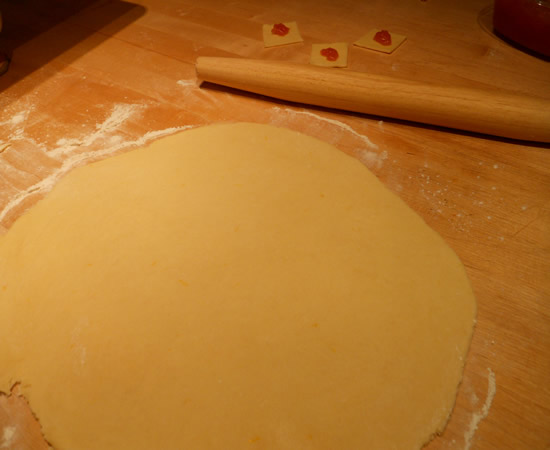
Victor had made the apricot filling yesterday and made the dough this morning. My job this year was to roll and cut. It's the easy part.
The dough was perfect. Very easy to roll and cut.
Victor did the filling and forming. Definitely the more labor-intensive part of the job. I know. It's the job I usually do. he had me roll this year. I immediately agreed!
Aunt Emma's Apricot Cookies
Filling:
- 1 pound dried apricots, chopped fine (soaked overnight – we soak in apricot brandy!)
- 3 cups sugar
- grated lemon rind (we use about a tablespoon – the amount was never specified)
Drain apricots. Place in saucepan with lemon rind, sugar, and water to cover. Bring to a boil, reduce heat and cook until water is absorbed. Be really careful — it burns easily. Cool.
Dough:
- 2 pkg dry yeast
- 5 cups flour
- 1/4 cup sugar
- 1/2 pound lard (Yes, lard. Shortening just doesn’t cut it.)
- 4 egg yolks
- 1 cup sour cream
- 1 shot whiskey
- Juice and rind from 1 lemon
Proof yeast with 1 tsp sugar and 1/4 cup warm water. Cut lard into flour, as you would for a pie dough. Make a well in the mixture and add all the other ingredients, including yeast.
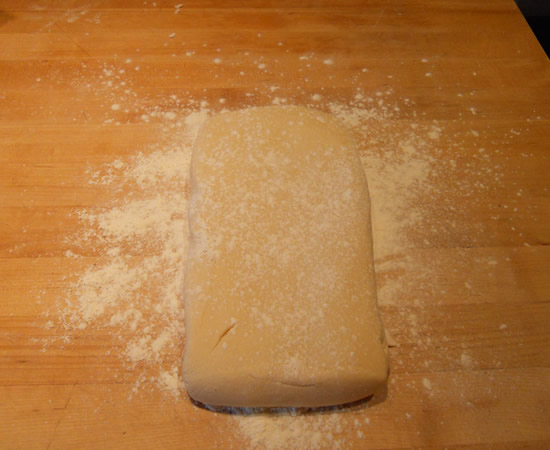
Work dough with your hands and form into a ball. (Don’t overwork. Use a light hand.) Refrigerate overnight.
Roll cold dough to about 1/8″ thick. Aunt Emma would cut the dough into triangles, place a scant teaspoon of filling at the wide end, then roll up and shape into a crescent similar to a croissant. It takes a bit of practice. The easier way is to cut squares, fill, and fold over. Cut into 2″ squares or circles. Place scant teaspoon of filling, fold and seal. Shape into crescent.
Bake at 325° until golden brown on lightly greased sheets or ungreased parchment paper. (Investing in a box of parchment paper is the only way to fly!!)
Cool completely and dust with powdered sugar.
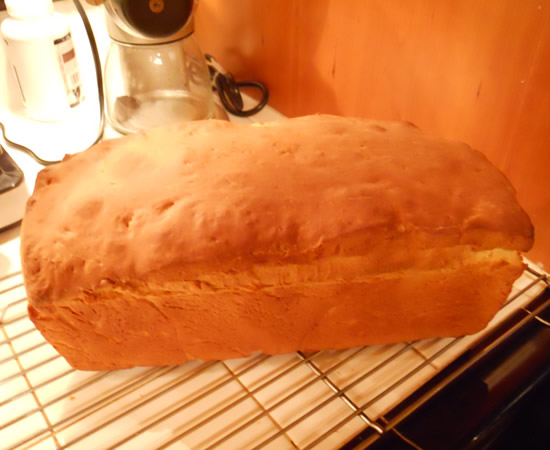
And since we were low on bread, I baked a loaf of the no-knead bread from my Mom's cook book that I made last week. It was really good and this one looks to be just as good - if not better!
German Spritzer Cookies
Laurie Balthazar
- 1 cup butter
- 2 1/2 cups flour
- 2/3 cup sugar
- 3 egg yolks
- 2 teaspoons vanilla extract
- 1/2 teaspoon salt
Cream butter and sugar together until waxy. Beat egg yolks until light brown. Add flour a tablespoon at a time until soft dough is formed. Put into cookie designer and press out shapes. Decorate. Bake in a hot oven until light brown.
As you’ve probably noticed, she hasn’t included an oven temperature or time. Great Gram cooked these in a wood burning oven so I guess “hot” was as accurate as she could get. Great Gram was born in Eagleville, PA in the late 1800’s! She moved to Conshohocken when she married. Her new home was next door to her mother-in-law. This is the same house that my mother grew up in.
Her married name was Laura Linda Shade (guess who’s Laurie Lynn). Apparently she only worked outside of the home one day in her life and wore pants one day in her life (the same day). She passed away when I was about 14 or 15. She was 98 years old. Perhaps I should repeat that: she was 98 years old!
From what my mother told me, Great Gram was the designated cookie baker at home until the job got passed on to her daughter, Doris (my grandmother). Eventually her daughter, Beverly (my mom) was the official cookie baker until she left home. I’ll be baking these cookies this year. I’ll probably bake them every year from now on.
- Amaretti
- Aunt Dolores’ Rum Balls
- Aunt Emma’s Apricot Cookies
- Butter Rum Biscotti
- Cannoli Biscotti
- Cedro/Citron Biscotti
- Chocolate Amarena Cherry Biscotti
- Chocolate Peppermint Biscotti
- Chocolate Peppermint Biscotti
- Chocolate Sambuca Biscotti
- Chocolate Snowballs
- Christmas Turtles
- Coconut Balls
- Cuccidati
- Debbie’s Ginger Snaps
- Frosted Nutmeg Logs
- German Spritzer Cookies
- Gina Lollobrigida’s Wreath Cookies
- Gingerbread Biscotti
- Joanna’s Wedding Rings
- Karabij
- Kwachy’s Cut-Out Cookies
- Kwachy’s Melt-A-Ways
- Lemon Coconut Cookies
- Marie’s Jelly Strips
- Orange Macadamia Biscotti
- Pecan Balls
- Peppermint Patties
- Pfeffernusse
- Pistachio Biscotti
- Quadruple Orange Biscotti
- Ricotta Cookies
- Rolled Cut-Out Cookies
- See’s Original Fudge
- Spice Christmas Cookies
- Springerle Cookies
- Tequila Mockingbird Biscotti
- The Justin Trudeau Biscotti
- Torrone
- Torrone al Cioccolato
- Uncle Rudy’s Pizzelle’s
- Uncle Rudy’s Biscotti
- Vanilla Almond Cookies
- Walnut Butter Cookies
Springerle Cookies
I am one happy baker today! Really happy!
The springerle cookies came out fantastic! Better than fantastic! They're really, really good!
For those not in the know (and that would have been me until a few weeks ago) a springerle cookie is a German cookie that is stamped with a design and then allowed to dry overnight. This sets the design so it doesn't "melt" during baking. They're baked at a low temperature until the bottom is barely browned. The cookie itself stays pretty white. They are also leavened with bakers ammonia - a leavening agent that only reacts with heat - not liquid.
I had never heard of them until our friend Luigi said she was making them. I've made her Oma's stollen for the past few years and love it.
They take a bit of time, but really not a lot of effort. The dough is velvety-smooth and easy to work.
Even a novice baker could make an acceptable cookie with this. The trick - and it's one I am learning - is the pressing and cutting. These cookies came out okay, but I can see where a couple of really good springerele molds would really make a lot of difference.
They really are works of art and while anything will taste good, the artistry is in the pressing and cutting. I shall enjoy practicing!
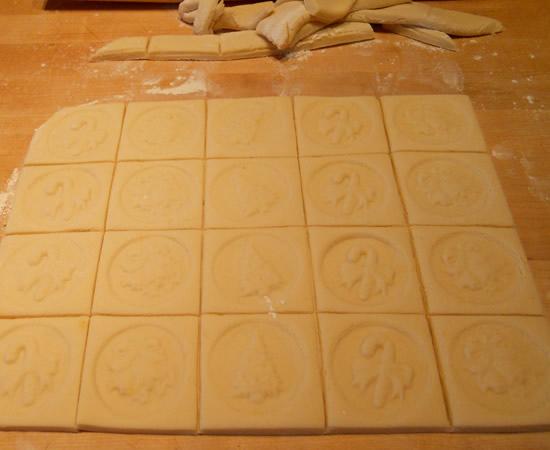
I did not have a wood-carved traditional springerle mold. I had three ceramic molds that did the trick this year, but I'm going to get a few real ones for next Christmas now that I know how wonderful the cookies are!
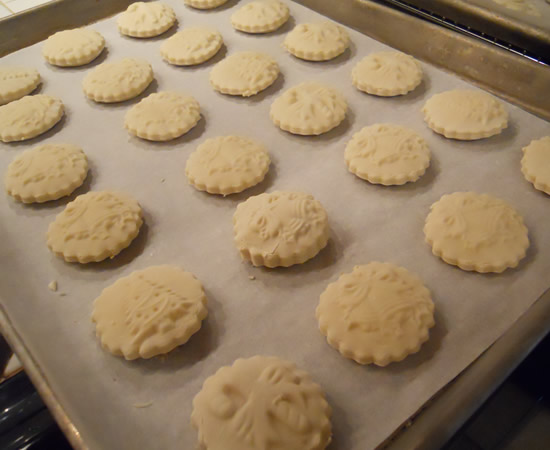
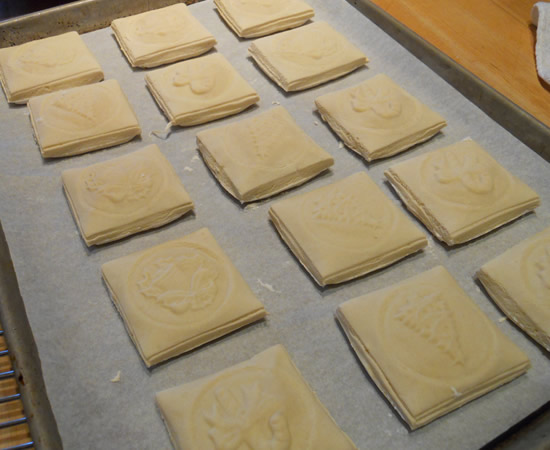
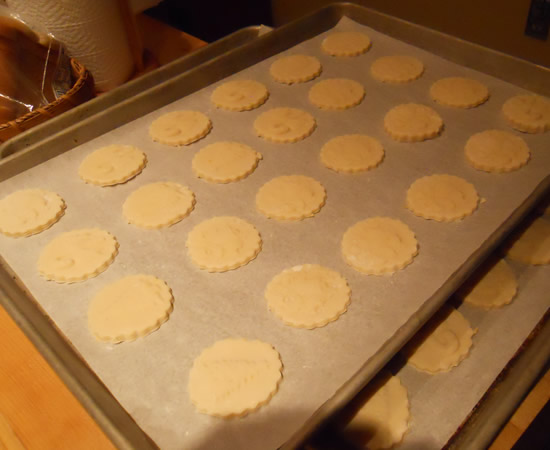
I made two shapes with the molds - round where I used a cookie cutter around the imprint and square where I just cut the dough sheet into blocks after pressing.
Both worked well, and while probably not exactly traditional, it does show that just about anyone cold make them at home without having to buy a lot of special equipment.
Luigi doesn't have her Oma's original recipe, but she said the recipe at House on the Hill was pretty close to what she used to make. And they have a ton of springerele molds of every shape, size, and design. Check them out!
This is Nini's Perfection Springerle Cookie Recipe from House on the Hill:
Nini's Perfection Springerle Cookie Recipe
These whisked-egg holiday cookies date back to at least the 1600′s and are made in Bavaria, Switzerland and the Alsace area of France. For eating quality, ease and quality of prints this recipe is just perfection!
What you’ll need:
- 1/2 teaspoon baker’s ammonia (Hartshorn) or baking powder
- 2 tablespoons milk
- 6 large eggs, room temperature
- 6 cups powdered sugar (1 – 1 1/2 #)
- 1/2 cup unsalted butter, softened but not melted
- 1/2 teaspoon salt
- 1/2 teaspoon of anise (if substituting fruit flavored oils, use 3 teaspoons)
- 2 lb. box sifted cake flour (Swansdown or Softasilk)
- grated rind of orange or lemon – optional (enhances flavor of the traditional anise or the citrus flavors)
- more flour as needed
Dissolve hartshorn in milk and set aside. Beat eggs till thick and lemon-colored (10-20 minutes). Slowly beat in the powdered sugar, then the softened butter.
Add the hartshorn and milk, salt, preferred flavoring, and grated rind of lemon or orange, if desired. Gradually beat in as much flour as you can with the mixer, then stir in the remainder of the 2 lbs. of flour to make stiff dough. Turn onto floured surface and knead in enough flour to make a good print without sticking.
Follow general directions for imprinting and drying cookies.Printing Cookies
Method #1 – For most cookies…
Dough will be rolled approximately 1/4″ to 3/8″ thick, like pie crust (deeper molds need thicker dough). Brush confectioner’s sugar or flour on the mold image, then imprint with your press (mold), cut out shape with knife or pastry wheel, dry and bake. Remember to “press and cut, press and cut” so that adjacent images are not distorted.Method #2 – For very deep or large cookies…
Roll out dough to desired thickness and, using a dry, clean pastry brush, apply flour or sugar and cut a piece of dough the approximate size needed for the mold. Press dough into the mold with fingers, working from center outward. You may lightly roll the back side of the cookie to smooth before turning out of the mold. Trim, dry and bake. To check your print, use light from the side – daylight or light from a floor lamp – so the shadows let you see if your prints are good.Drying
Most printed cookies are dried 2-24 hours before baking (depending on your schedule, humidity, etc.) Drying preserves the image during baking.
Baking
Bake on greased or baker’s parchment-lined cookie sheets at 255° to 325° till barely golden on the bottom, 10-15 minutes or more, depending on size of cookie.
Store in airtight containers or in zipper bags in the freezer. They keep for months, and improve with age. Yield 3 to 12 dozen.
The the drying and baking instructions are extremely vague. In one respect they have to be, because there are so many different sizes and shapes of molds and cookies. That didn't help this first-time springerle baker, however.
I preheated the oven to 255° and baked the smaller round cookies for about 22 minutes. I baked the larger squares almost 30 minutes.
As with any baking, a bit of close watching definitely doesn't hurt. Just keep a close eye and pull them when they're "barely golden on the bottom" and you'll have a perfect cookie!
I definitely want to thank the folks at House on the Hill for sharing their recipe! I can see myself making these for many years to come!

