Perfect Genoise
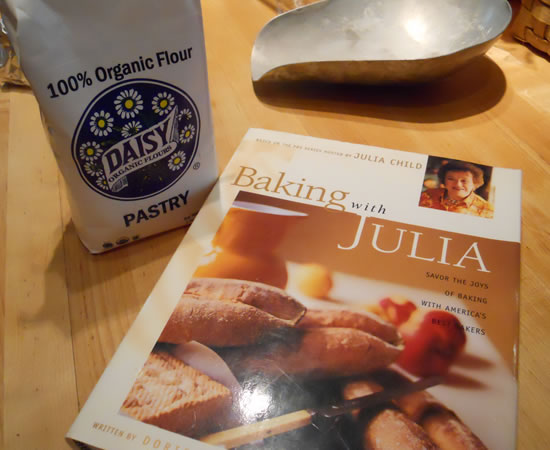
A couple of days ago I talked about ordering Daisy Flour.
It arrived! And the timing could not have been more perfect; I was charged with bringing a dessert to The In-Law's for the Labor Day Dinner.
I immediately pulled out Baking with Julia. It's definitely one of my more-favorite cook books and has lots and lots of really excellent recipes - some complex and others not-so. I vacillated between several, but finally decided on a variation of the French Strawberry Cake. I had raspberries. I decided to use the "Perfect Genoise" and make a raspberry cream. And maybe a little chocolate.
A genoise can be intimidating, at first, but this particular recipe really takes a lot of the angst out of it. A true genoise is an Italian sponge cake named after Genoa. It is also the foundation of many French cakes and desserts. It uses whole eggs - perfectly whipped - as leavening. No baking powder, baking, soda, or other leavening agents.
I thought it perfect for using the Daisy Pastry Flour. And, of course, it was!
The basic for a genoise is whipping whole eggs until they're tripled in volume, gently folding in flour, and then gently adding melted butter. It's not difficult - if you pay attention.
Perfect Genoise
Baking With Julia
makes enough batter for one 8-inch round cake
Ingredients
- 2 tbsp unsalted butter, melted
- 1 cup sifted cake flour
- 1/2 cup sugar
- 1/8 tsp salt
- 4 large eggs, at room temperature
- 1 tsp pure vanilla extract
Directions
Pour the melted butter into a 1-quart bowl; reserve. Return the sifted flour to the sifter or sieve and add 1 tbsp of the sugar and the salt; sift onto a piece of waxed paper and set aside.
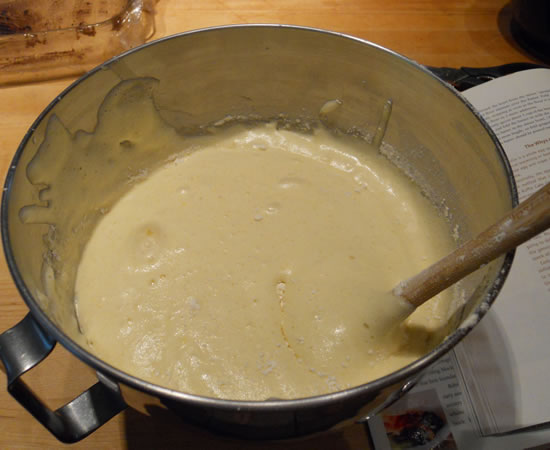
Put the eggs and the remaining sugar into the bowl of a heavy-duty mixer (or work with a hand-held mixer). Holding the whisk attachment from the mixer in your hand, beat the mixture to blend the ingredients. With the bowl and whisk attachment in place, whip the mixture on medium speed until it is airy, pale, and tripled in volume, like softly whipped cream, 4 to 5 minutes. You'll know that the eggs are properly whipped when you lift the whisk and the mixture falls back into the bowl in a ribbon that rests on the surface for about 10 seconds. If the ribbon immediately sinks into the mixture, continue whipping for a few more minutes. Pour in the vanilla extract during the last moments of whipping.
Detach the bowl from the mixer. Sprinkle about one third of the sifted flour mixture over the batter. Fold in the flour with a rubber spatula, stopping as soon as the flour is incorporated. Fold in the rest of the flour in 2 more additions.
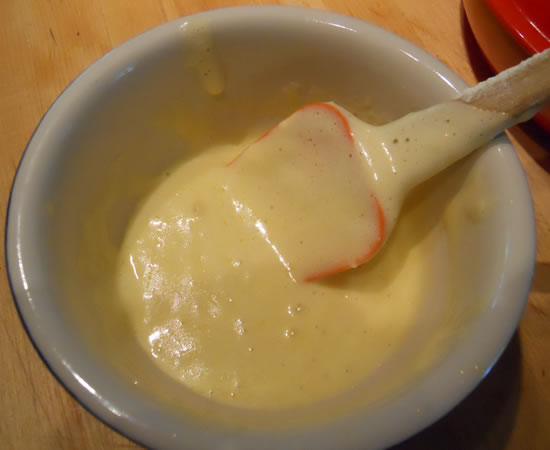
Gently spoon about 1 cup of the batter into the bowl with the melted butter and fold the butter in with the rubber spatula. Fold this mixture into the batter in the mixer bowl. (This is the point at which the batter is at its most fragile, so fold gingerly.) The batter should be poured into a prepared pan and baked immediately.
Bake at 350° about 25-27 minutes or until cake springs back when lightly touched and just begins to pull away from the sides of the pan.
Cool in pan about 10 minutes then remove, cooling right-side up on cooling rack.
May be prepared 24 hours in advance. leave on rack, uncovered, at room temperature.
Whip eggs until they're triple in volume and 'ribbon' back into the bowl when the beaters are lifted
Mix a cup of batter into the melted butter to lighten it - and then fold it into the main bowl.
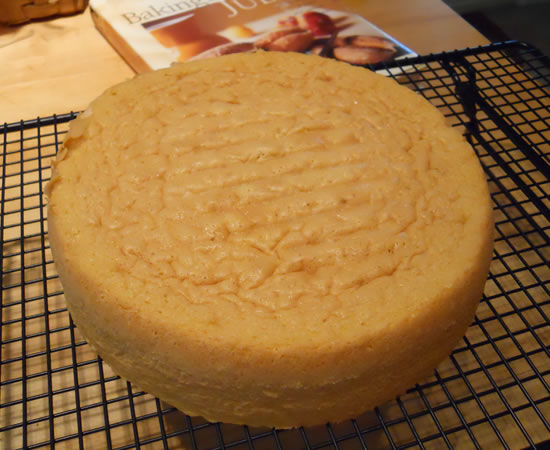
Baked for 27 minutes and cooled overnight. The cake came out perfect. It sliced perfectly. It just could not have been better.
I made a whipped raspberry cream by adding thawed, frozen raspberries to 2 cups of heavy cream along with a teaspoon of vanilla. I did not add any sugar.
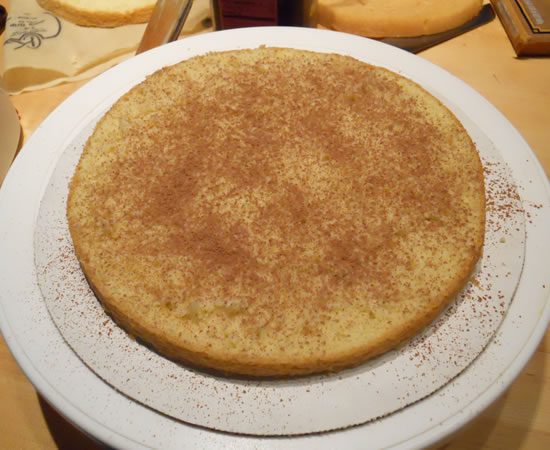
I split the cake into three layers and dusted the bottom layer with unsweetened cocoa.
I could have used more, but I wasn't sure how it would come out. I actually thought of making a cocoa simple syrup but decided this would work.
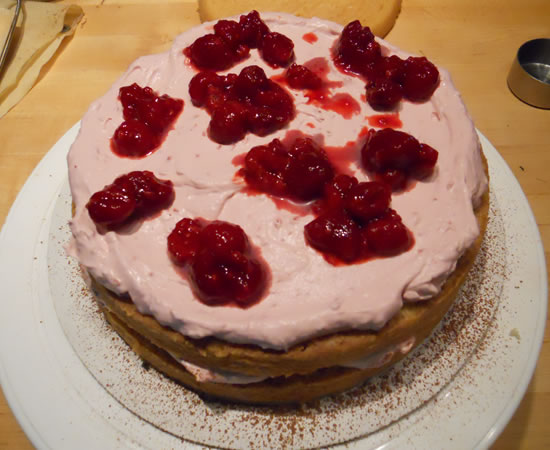
I spread the layer with the raspberry cream and then added more thawed raspberries.
I then repeated wuith the next layer.
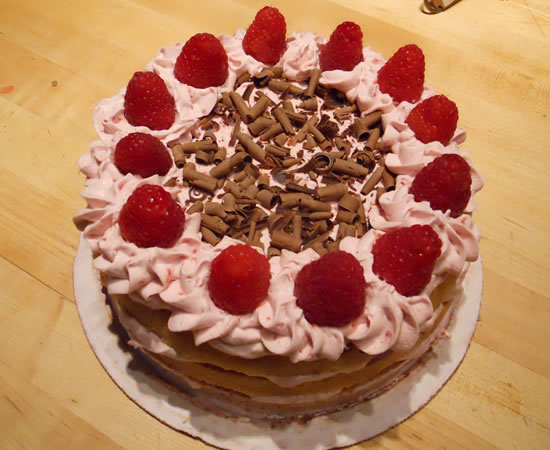
I topped the third layer with more raspberry cream and then piped rosettes along the outside edge. I added chocolate curls by using a potato peeler on a chocolate bar and added fresh raspberries for the final garnish.
Neither Daisy nor Julia disappointed! This cake came out great! It was light and airy without having an 'eggy' flavor that some sponge cakes can have. A genoise is a slightly dry cake by nature and the cream offset that dryness perfectly.
So... my first dessert with the Daisy Flour was a resounding success. There's a recipe in the book for a white bread that I haven't made in a few years. I think that may be my next project!
This is going to be a fun Fall and Winter!
Brownies and Cherries
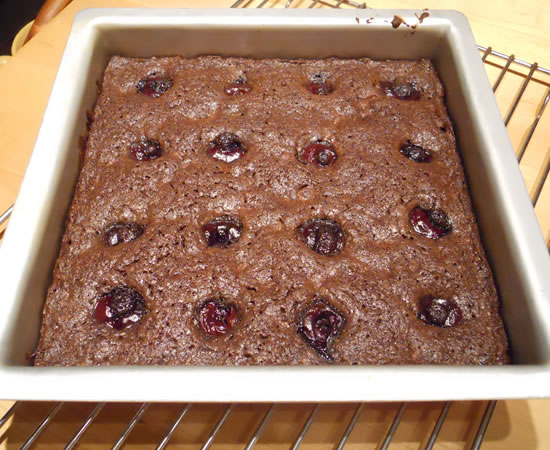
Fresh cherries + chocolate brownie mix = quick and easy dessert!
Brownies are totally easy to make from scratch but I almost always have a box in the cupboard for my lazier-than-lazy moments.
I still had a few fresh cherries left in the 'fridge, so, armed with my trusty cherry-pitter, I went to work.
 We swear that we don't buy single-use gadgets and the like although the kitchen does seem to be full of them. I bought this particular single-use gadget when I entered the San Leandro Cherry Festival Cherry Pie Contest in 2000. I won 2nd Place!
So my good-luck cherry pitter has been living in a drawer ever since, coming out now and again to say hi...
I do love a good batch of fresh cherries. And there really are so many different varieties that come to the market. One of my favorites are Rainier Cherries from Washington. The closer you are to them, the better they taste.
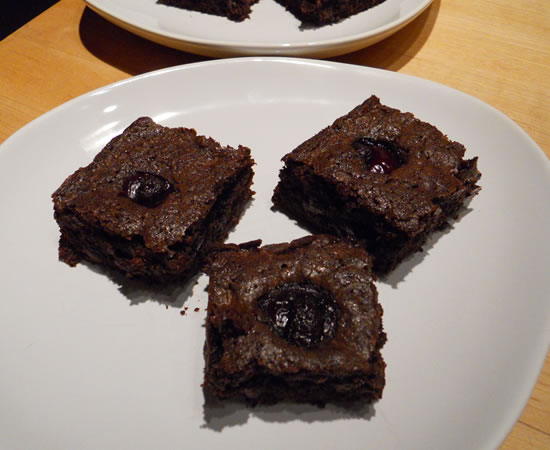
The cherries in the brownies were dark red cherries.
I added about 5 minutes to the box baking time to allow for the additional moisture.
They came out just fine...
And they cut much nicer once they cooled...
Coconut Rice Pudding
It's no secret that we're both huge dessert-junkies. It is seldom that there is not something sweet for an after-dinner treat. What can I say? I like dessert.
However, neither of our waistlines are shrinking. In fact, one could probably say the exact opposite is happening.
So... we've been trying to slow down on the desserts every night. Eating dinner later. A little handful of something as opposed to a huge slice of cake.
It's been working. More or less...
But last night the sweet tooth roared. Rice pudding came to mind and wouldn't leave.
In to the kitchen I went.
My mom made great rice pudding - she made a Baked Pudding that, even though I have her recipe, can never make quite as good. Victor's Aunt Emma also made a great rice pudding. It's another one that is not quite as good as the original. Both are really, really good. Our memories just see them as being better.
I'm sure it's because we didn't have to cook it. In my case, all I had to do was wait impatiently for it to come out of the oven. We never let it cool. Hot rice pudding was the nectar of the rice-gods.
So... faced with two recipes I knew I couldn't replicate, I decided to use up some of that coconut milk in the cabinet and the sweetened shredded coconut I bought for the Mother's Day Coconut Cake.
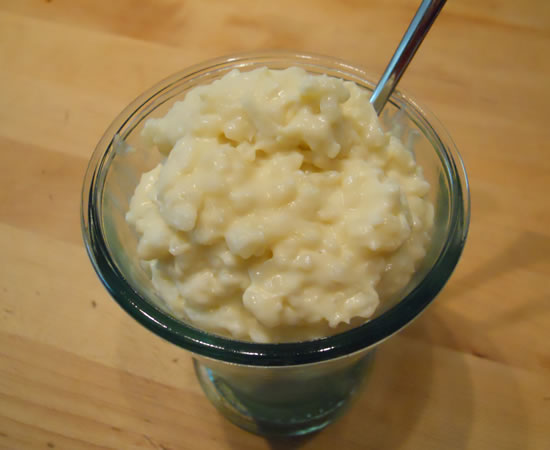
I went with a pretty basic concept - a coconut custard with rice.
Coconut Rice Pudding
- 1 cup uncooked basmati rice
- 1 cup sugar
- 2 eggs
- 3 egg yolks
- 3 tbsp cornstarch
- 1 tbsp vanilla
- 1 1/2 cups whole milk
- 1 cup canned coconut milk
- 1/2 teaspoon salt
- 1 cup shredded coconut
- heavy cream
Cook 1 cup rice in 2 1/2 cups water until done - about 20 minutes. Set aside.
Meanwhile, mix sugar, eggs, egg yolks, and cornstarch in large bowl.
Bring milk, coconut milk, and salt to boil. Slowly add about 1/3 of milk to eggs to temper. Add everything back to saucepan and cook until thickened.
Stir in cooked rice and coconut. Stir in vanilla.
Serve warm.
Refrigerate leftovers, pressing plastic wrap onto surface.
To serve cold, stir in heavy cream to bring it back to a pudding consistency.
Victor claimed it was the best rice pudding I have ever made. And who am I to argue?!?
It really was good and there's enough left for a few days worth of dessert-cravings.
Peach Blondies
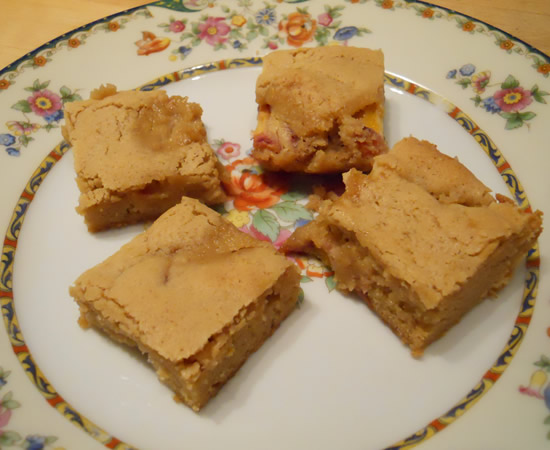
Just about the only good thing that came out of yesterday was the Peach Blondies!
I really like blondies, but - as with so many things - I forget about them or seldom make them.
I was determined that at least one thing would go right - and I succeeded! they really did come out good!
The recipe is straight from the Better Homes and Garden New Cook Book, circa 1981. It's my quick go-to book for easy baked things. The recipe calls for 1 cup chopped walnuts. I used 2 chopped peaches, instead.
Peach Blondies
- 2 cups all-purpose flour
- 2 tsp baking powder
- 1/2 cup butter
- 2 cups packed brown sugar
- 2 eggs
- 1 tsp vanilla
- 2 chopped peaches
Grease a 13x9x2 inch baking pan. Combine flour, baking powder, and 1/4 tsp salt. Melt butter; remove from heat. Stir in sugar. Add eggs and vanilla; stir until combined. Stir dry ingredients into sugar mixture. Add peaches and stir to combine. Bake in a 350° oven about 25 minutes.
Another great way to use up some peaches.
These are great. They're rich and butterscotchy with yummy peaches throughout.
I'm off to get more right now...
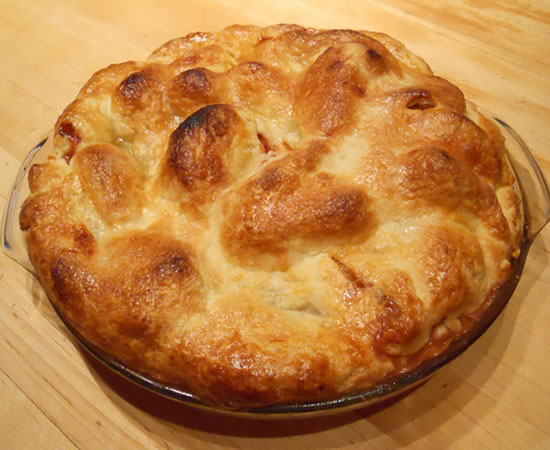
Peach Pie
Sometimes I can drive myself crazy.
If I could just relent and buy a pie crust, I could have a pie in the oven in minutes.
But no-o-o-o-o-o-o-o-o-o-o...... I have to make them from scratch because what would the neighbors think?!?
Or something.
Okay, that's not the real reason. Reality is, making a pie crust from scratch takes less time than thawing one. Messier, but quicker.
And infinitely better.
I have friends - even very accomplished cooks - who are intimidated by pie crusts. There's no reason to be. Even a tough homemade crust is better than a store-bought. And the food processor has made crust-making fool-proof.
I think part of the reason is advertisers really harp upon the perfection of their products versus a homemade product. They set up the intimidation by telling you right off the bat you can't make something as good as what they are selling you and then proceed to mock your efforts and telling you your family/friends/loved ones/whomever deserve the best and you can't deliver it on your own.
Balderdash, says I!
I caught a few minutes of Ina Garten on TV today. She was making a tiered chocolate cake with a butter cream icing. She was decorating it with pastry tubes and said "You don't want it to look like it just came from a bakery. What fun would that be?"
I thought those were some of the best words a person could ever say. Really. A little less emphasis on perfection and a little bit more on having fun can bring the confidence level way up!
I think one of the reasons I make a good pie crust is that I'm not afraid to make a bad one. That's not to say that I can't get neurotic at times and do things like forget to put the potatoes in the clam chowder that I'm serving to dear friends who have never stayed with us before... But they are few and far between.
My motto really is "The worst thing that can happen is we throw it out and call for pizza."
And in all these years I haven't called for pizza - yet. (That's not to say there haven't been a few meals that won't be repeated any time soon.)
The pie crust recipe I use started off as Julia Child's Food Processor Pie Dough and then just kept getting changed and tweaked over the years. This really is fool-proof. It makes enough for a generous 10" deep double crust.
Try it with 2/3 butter and 1/3 lard (not shortening) if you have it available.
Perfect Pie Crust
- 2 cups flour
- 1/3 cup pastry/cake flour
- 2 sticks butter, frozen
- pinch salt
- 2 tbsp sugar
- 1/2 cup ice water
Using a food processor, add flours, salt, and sugar. Pulse to mix.
Chop up frozen butter and add. Pulse until butter is incorporated and mixture looks grainy.
Slowly add ice water and pulse until mixed.
Turn out onto counter. Press and form mixture into two disks . Wrap in plastic and refrigerate about an hour to allow the flour to properly absorb the water and to relax the gluten.
Roll out crust and place in pie plate. Crimp edges and fill.
I have never been a good "edge-crimper." It's amazing for the amount of pies I've made in my life that it's a skill-set I've never really mastered. I've watched in awe as others have whipped around a pie in seconds flat. I'm just not one of them.
I still sleep well at night.
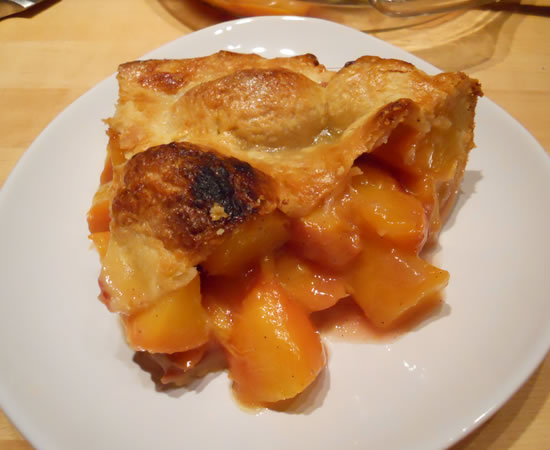
The peach filling for tonight's pie comes via Bon Appetit magazine. I've made this one before. It's really good.
Here's the recipe from Bon Appetit. I don't do the vanilla bean with the sugar and all that. I add a teaspoon of vanilla to the peaches. I also brush the crust with an egg wash.
Peach Pie with Cardamom
- 2/3 cup plus 2 teaspoons sugar
- 1/2 vanilla bean, cut crosswise into 1/2-inch pieces
- 3 tablespoons unbleached all purpose flour
- 1 teaspoon (scant) ground cardamom
- 3 3/4 pounds firm but ripe unpeeled peaches, halved, pitted, each half cut into 4 slices (about 10 cups)
- 2 Best-Ever Pie Crust dough disks
- 2 tablespoons (1/4 stick) unsalted butter, cut into 1/2-inch cubes
- Whipping cream (for glaze)
Position rack in bottom third of oven and preheat to 400°F. Combine 2/3 cup sugar and vanilla bean in processor; blend until vanilla bean is very finely minced. Sift vanilla sugar through strainer into large bowl; discard any large bits in strainer. Mix flour and cardamom into vanilla sugar. Add peaches to flour-sugar mixture and toss gently to coat.
Roll out 1 pie crust disk on floured surface to 12-inch round. Transfer to 9-inch-diameter glass pie dish. Trim dough overhang to 1/2 inch. Spoon peach mixture into crust; dot with butter. Roll out second pie crust disk on lightly floured surface to 12-inch round. Drape dough over peach filling; trim overhang to 1 1/2 inches. Fold top and bottom edges under, pressing together to seal. Crimp edges decoratively. Using small sharp knife, cut 2-inch-long X in center of top crust to allow steam to escape. Brush crust lightly with whipping cream; sprinkle with remaining 2 teaspoons sugar.
Place pie on rimmed baking sheet. Bake until crust is golden, peaches are tender, and juices bubble thickly through cut in top crust, about 1 hour 15 minutes. Transfer pie to rack and cool until lukewarm, about 2 hours.
I let it rest about an hour. I was in a hurry.
It was really good.
Really good.
It's prime peach season. Get yourself 4 pounds and get to work.
You won't be sorry!
Peach Ice Cream
Ice cream is one of my earliest food memories. One of the best is my grandmother feeding me homemade peach pie with vanilla ice cream on top - for breakfast. My mother, of course, was not pleased. My grandmother just looked at her sternly and said "peach danish and a glass of milk." Grandma always won.
There was a family gathering at Auntie Sis's house in Bakersfield circa 1955/56. Auntie Sis was my maternal grandfather's aunt, and if grandpa seemed old to me, Auntie Sis was downright ancient.
I remember a huge block of ice in the back porch sink and an ice pick. My brother and I just broke off huge chips of ice to suck on. No one screaming that we were using dangerous implements. No hovering parents trying to control our every movement or trying to ensure we were experiencing the day the way they wanted us to. Kids were kids back then.
And sometimes we had to work.
Back in those otherwise idyllic days, ice cream was made by hand. No Cuisinart ice cream makers, no plug it in and come back in 30 minutes. It was all hand-cranked.
And that was the kid's job.
Ice and rock salt and grandpa yelling not to get the salt on top and ruin the ice cream.
And cranking and cranking and cranking until I thought my arm would fall off. And then cranking some more.
The work was hell but oh, was it worth it! Rich and creamy - almost buttery. It was summertime perfection - even better than spitting seeds from hunks of ice-cold penny-a-pound watermelons.
Idyllic, indeed.
Peach Ice Cream
- 1 cup whole milk
- 1/2 cup granulated sugar
- 2 cups heavy cream
- 1 cup peach puree (from about 3 peaches)
Mix milk and sugar until sugar dissolves. Add peach puree and heavy cream. Pour mixture into your ice cream maker and mix according to manufacturer's instructions.
One note... If you're going to take the time to make your own ice cream - use the best ingredients you can. Look at the ingredient list on your carton of heavy cream. If there is anything in it other than "cream" put it back and go to another store. (You wouldn't believe the things they put in something as basic as whipping cream!)
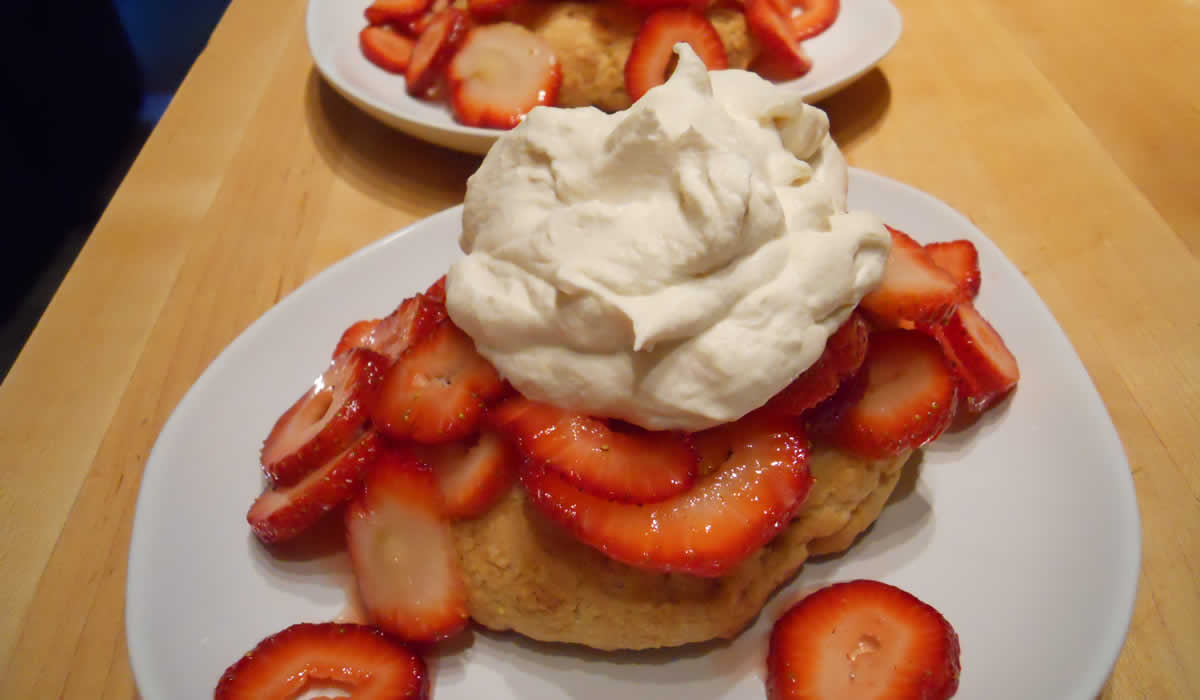
Strawberry Shortcake
Strawberry Shortcake may be one of my most favorite desserts. There's just something about sweet fresh strawberries, a light biscuit, and lots of whipped cream.
The nectar of the gods.
My father played a lovely trick on me one summer evening 60+ years ago when we were having strawberry shortcake for dessert.
We always ate as a family, and we all had our assigned places at the table. For whatever reason, I was at the opposite side of the table down by my dad as we started dessert. Pop looked down at his dessert with a big smile. He took a big whiff and said it smelled wonderful. He looked at me and said "smell how good it is." I bent my head down to smell it and "whomp!" he pushed my face right into it! I was so mad. My mother was furious but Pop just laughed and laughed. Evidently, his father had done the same thing to him and he always said he was going to do it to his son one day.
That was Pop. He was a jokester who never quite grew up. He teased us mercilessly but also enjoyed being the recipient of a good prank. He was a pretty special guy - and no kid could ask for a better role model. Pop could totally relate to kids because he was one, himself.
And if I had had kids, you can rest assured that one night at dessert, I would have looked over and said "Gee, that smells wonderful. You should smell it."
The nut doesn't fall far from the tree...
Strawberry Shortcakes
- 2 cups all purpose flour
- 1/3 cup sugar
- 2 teaspoons baking powder
- 1/2 teaspoon salt
- 5 tablespoons chilled unsalted butter
- 1 cup whipping cream
Preheat oven to 400°. Mix flour, sugar, baking powder, and 1/2 teaspoon salt in large bowl. Add butter; rub in with fingertips until mixture resembles fine meal. Gradually add 1 cup cream, mixing until dough comes together. Form into 6 balls and pat to 1/2-inch thickness. Bake shortcakes until brown, about 15-18 minutes.
I don't split these. I just pile the strawberries on top and cover in more whipped cream.
De-Lish!
I ♥ dessert.
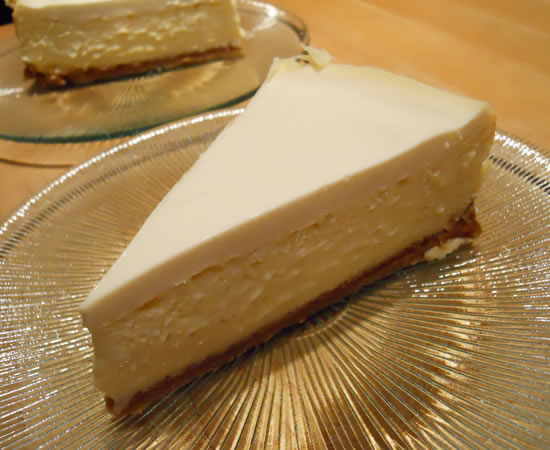
Lucille's Cheese Cake
For close to 30 years - until she passed away at much too young an age - Lucille Brown lived down the street from us on 46th Avenue.
Her kids were a bit older than us and they were already pretty established in the neighborhood when we moved in in 1958. It was a great neighborhood - tons of kids, 2 blocks from the beach and the zoo, and only a dozen blocks to Golden Gate Park. It was a neighborhood where everyone knew everyone. A neighborhood of moms who any one at any time could (and would!) smack a kid upside the head for acting up.
We had a lot of unrestricted freedom. Back in those pre-cell phone days, we just left the house with a vague "we're going to ride our bikes" or some such thing and be gone for hours and hours.
People say that it was a different world and to some extent I agree - but for different reasons. Our parents didn't hover over us, make play dates, or obsess over how popular we were - or weren't. Our parents let us be kids while allowing us to grow up. We were street-smart, knew not to get into cars with strangers, and more importantly, knew we were not the center of the universe. Our parents taught us to be independent by allowing us to be independent.
Our parents even said NO to us.
Lucille was one of the neighborhood parents who kids could talk to. If someone was having an issue with their parents - and all kids had issues with their parents at some point - you could talk to her about it. 99.999 times out of 100 she would agree with the parent - but she was really good at explaining things - or giving us ideas on how to change a parents mind.
Lucille was overweight, smoked like a chimney, was not the world's greatest housekeeper, but besides being one of the more favorite moms - was a great cook.
And one of her better deserts was her cheese cake. She gave the recipe freely to anyone who wanted it and I have the copy she gave my mom probably 50 years ago.
25 or so years ago I took her recipe and played with it and made a more dense version. It was easy to make and quite good - if I do say so m'self. I always called it a variation on Lucille's and a recipe I found in Bon Appetit.
And I pretty much forgot about Lucille's original.
Until this past Friday.
I was looking through a ridiculous folder of recipes I'll probably never make but keep anyway - when Lucille's original recipe came fluttering out.
The minute I looked at it I knew I had to make it. It was funny. All of the above and more came flooding back to me. My entire childhood passed before my cheese cake-starved eyes.
The only thing I changed was the baking time. She said 35 minutes, but I thought it way too loose and kept it in for 45. I probably could have let it go for 50, but it worked. It's going to seem more loose than you're probably used to. Just make sure to make it at least a day in advance so it has a minimum of 24 hours to set.
Lucille’s Cheese Cake
Crust
- 2 1/4 cups graham cracker crumbs
- 2/3 cup melted butter
- 6 tbsp sugar
Mix all ingredients well. Pack into 10″ spring form pan bringing it up on sides. Place in refrigerator while preparing filling.
Filling
- 3 8oz pkgs cream cheese
- 1 cup heavy cream
- 3/4 to 1 cup sugar
- 5 eggs
- 2 tsp vanuilla
Topping
- 2 cups sour cream
- sugar, to taste
- vanilla
To make
Cream cheese with sugar. Add unbeaten eggs. Mix well. Add unwhipped cream. Stir in vanilla.
Pour into graham cracker crust. Bake at 350° for 35 minutes.
Allow to cool on rack for 5 minutes. Then put on sour cream topping.
Return to oven for 5 minutes.
Thanks Lucille!
For everything.
Mother's Day Coconut Cake
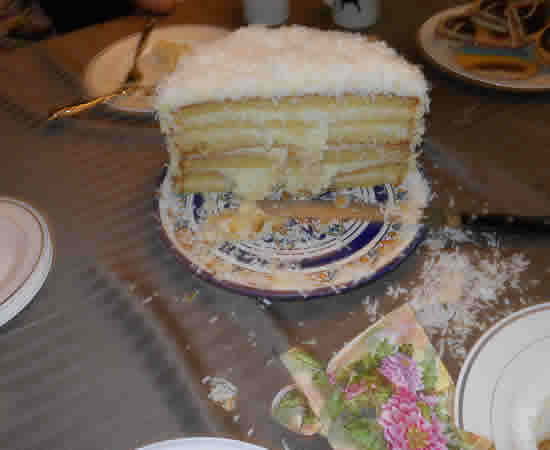
This is called The Ultimate Coconut Cake - and I have to say, it truly is. Ultimate in every sense of the word.
This is an "OMG I can't believe I'm eating this" cake.
This is an "OMG I'll never be able to finish this slice" cake.
This is an "OMG I'm going to die - but with a smile on my face" cake.
And, It's really good.
I was given the task of making a combination Mother's Day and Birthday cake for all the moms plus Victor's mom's birthday on May 11th. The request was a coconut cake because Nonna really likes coconut (who knew?!?) So... I went looking for a great recipe.
I thought it really needed to be fairly traditional - no key lime fillings, rum fillings, and the like. I went to Epicurious to see what they had and found a cake called The Ultimate Coconut Cake from a restaurant in South Carolina.. It sounded intriguing, but in reading the reviews, one woman stated this was NOT the real cake from The Peninsula Grill in South Carolina, but the recipe was posted on Martha Stewart's site. Over to Martha and I found it. Much better than the Epicurious version.
I have to say up front that this is NOT a recipe for the faint of heart. The entire cake calls for 2 1/2 pounds of butter, 6 1/2 cups of heavy cream, half a dozen eggs, and 12 cups of coconut.
It is one of the richest cakes I have ever made in my life - and while it was worth every artery-clogging calorie, I will probably not be making it again any time soon. If ever.
But OMG it was good.
There are 5 recipes for the entire cake, recipes for the cake, the filling, the icing, the simple syrup, and the instructions for putting it all together.
Because we had to travel 100 miles north, I made the cakes on Friday and froze them. I made the filling Friday as well, since it has to be made at least a day in advance of assembly. The frosting I made this morning.
Ultimate Coconut Cake
Robert Carter
The Peninsula Grill, Charleston, South Carolina
Ingredients
- 2 cups sweetened shredded coconut flakes
- Coconut Cake
- Robert Carter's Simple Syrup
- Coconut Filling
- Coconut Cake Frosting
Directions for assembly
Preheat oven to 375 degrees. Spread coconut flakes in an even layer on a parchment paper-lined baking sheet. Bake until golden, 5 to 7 minutes; set aside to cool.
Using a serrated knife, trim tops of cakes to make level; discard trimmings. Cut each cake into 3 even layers. Place four strips of parchment paper around perimeter of a serving plate or lazy Susan.
Place one layer on the cake plate. Brush with about one-fifth of the simple syrup. Spread over 2 cups of filling. Place a second layer on top. Repeat process with the next four layers and top with last remaining layer.
Spread top and sides of cake with frosting, keeping in mind you may not need to use all of it. Press toasted coconut into sides of cake; remove parchment paper strips. Chill cake at least 5 hours and up to 5 days. Slice immediately; bring to room temperature before serving.
Coconut Cake
Yield Makes two 10-inch round cakes
Ingredients
- Nonstick cooking spray with flour
- 1 pound unsalted butter, preferably European-style
- 3 cups sugar
- 6 large eggs
- 4 1/2 cups all-purpose flour
- 1 1/2 tablespoons baking powder
- 1/2 teaspoon salt
- 1 1/2 cups heavy cream
- 1 1/2 tablespoons pure vanilla extract
- 1 teaspoon coconut extract
Directions
Preheat oven to 325 degrees. Spray two 10-inch round cake pans with cooking spray; set aside.
In the bowl of an electric mixer fitted with the paddle attachment, cream together butter and sugar until light and fluffy, 5 to 6 minutes. Add eggs, one at a time, and beat until creamy, occasionally scraping down sides of the bowl using a spatula.
In a large bowl, sift together flour, baking powder, and salt. In a small bowl, mix together cream, vanilla, and coconut extract. With mixer on low speed, add flour mixture, alternating with cream mixture, beginning and ending with flour; beat until just combined.
Pour batter into prepared cake pans and bake until a toothpick inserted into the cake comes out clean, 40 to 45 minutes. Let cool completely on a wire rack before removing cakes from pans.
Simple Syrup
Yield Makes enough for one cake
Ingredients
- 3/4 cup water
- 3/4 cup sugar
Directions
Place water and sugar in a medium saucepan over medium-high heat. Bring to a boil, stirring occasionally, until sugar has dissolved. Remove from heat and let cool.
Coconut Filling
Yield Makes enough for 1 cake
Ingredients
- 5 cups heavy cream
- 3 cups sugar
- 1 pound (4 sticks) unsalted butter
- 1/4 cup cornstarch
- 1 teaspoon pure vanilla extract
- 9 cups shredded sweetened coconut
Directions
Place cream, sugar, and butter in a medium saucepan and bring to a boil over medium-high heat, stirring occasionally until sugar is dissolved
Meanwhile, in a small bowl, mix together cornstarch, vanilla, and 1 tablespoon water. Add to cream mixture, bring to a boil, and simmer until thickened, about 1 minute.
Place coconut in the bowl of a food processor. Pulse until coconut is finely chopped. Remove cream mixture from heat and stir in coconut until well combined. Transfer to a large baking dish; let cool.
Cover filling with plastic wrap and chill overnight. Just before using, place mixture in the bowl of an electric mixer fitted with the paddle attachment. Beat until smooth and creamy, 4 to 5 minutes
Coconut Cake Frosting
Yield Makes enough for 1 cake
Ingredients
- 1 cup (2 sticks) unsalted butter, room temperature
- 8 ounces cream cheese
- 1 teaspoon pure vanilla extract
- 5 cups confectioners' sugar
- 1 vanilla bean, scraped
Directions
Place butter and cream cheese in the bowl of an electric mixer fitted with the paddle attachment; beat until creamy.
With mixer on low speed, slowly add vanilla extract, seeds from vanilla bean, and confectioners' sugar. Continue beating until smooth and creamy, about 3 minutes.
It's worth making once - if you have a really big crowd. This is definitely not the type of cake you would make for a weeknight dessert with the immediate family.
And I followed the recipe. I didn't try to cut butter or cream, substitute lighter versions of anything. This is the type of dessert that you make just as it is designed to be made, or don't bother.
Oh... and I found out while putting it together that the cake was featured as a Bobby Flay Throwdown! Food Network stated:
Bobby takes on a South Carolina chef known for his calling card, a six-layer, 12-pound, luxuriously rich Ultimate Coconut cake. When Bobby goes cake to cake, who will take home the win?
I didn't look at Bobby's recipe. This one was good enough for me.
And I did have to show a picture of the table and the mess.
It was worth it.
Apple Cake
Apple Cake. One of my favorite desserts.
Okay... all desserts are my favorite desserts and the one I'm eating at the moment is my most favorite dessert. I just love dessert. I'll pass up the whole buffet and head straight to the sweets table.
And I'm not particular. I hold a bowl of rice pudding to the same high esteem as a homemade apple pie or a gooey 6-layer cream cake. Or a cookie. Or a tart lemon tart.
I think my only real criterion is that they be hand-crafted. Yes, there are lots of store-bought and/or packaged products out there and not all of them are engineered with ingredients whose sole purpose is to trick our taste buds into thinking we're eating something good. But I really do prefer my desserts - and food in general - to be real.
Enter the Apple Cake.
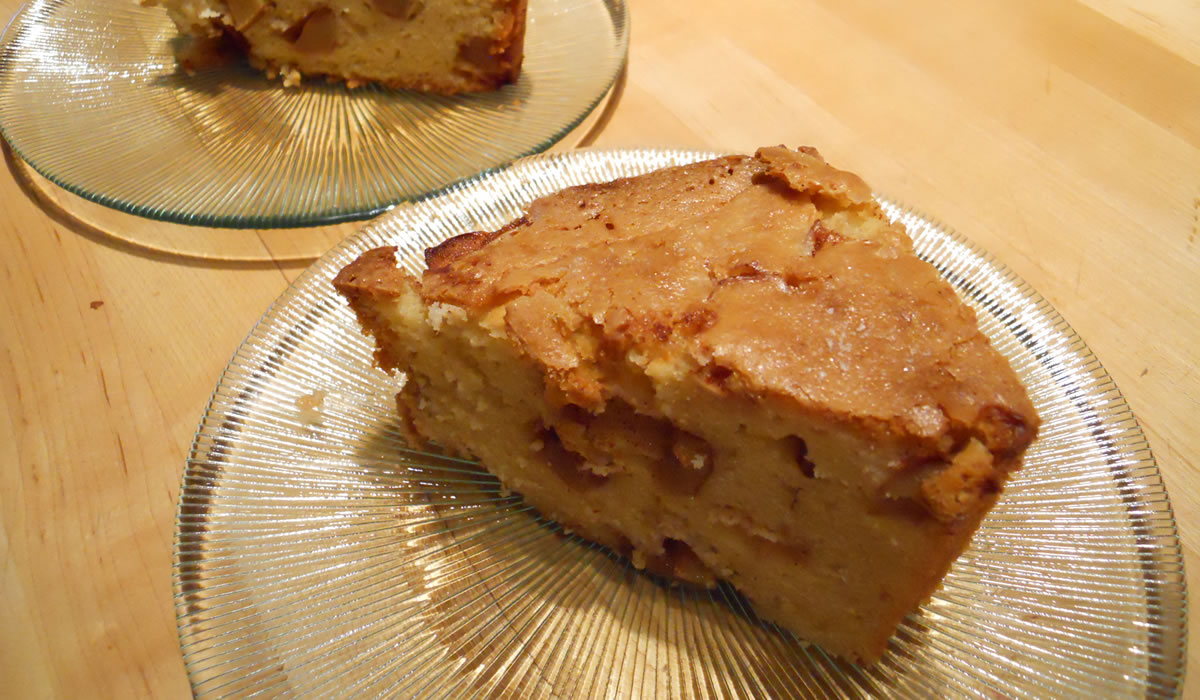
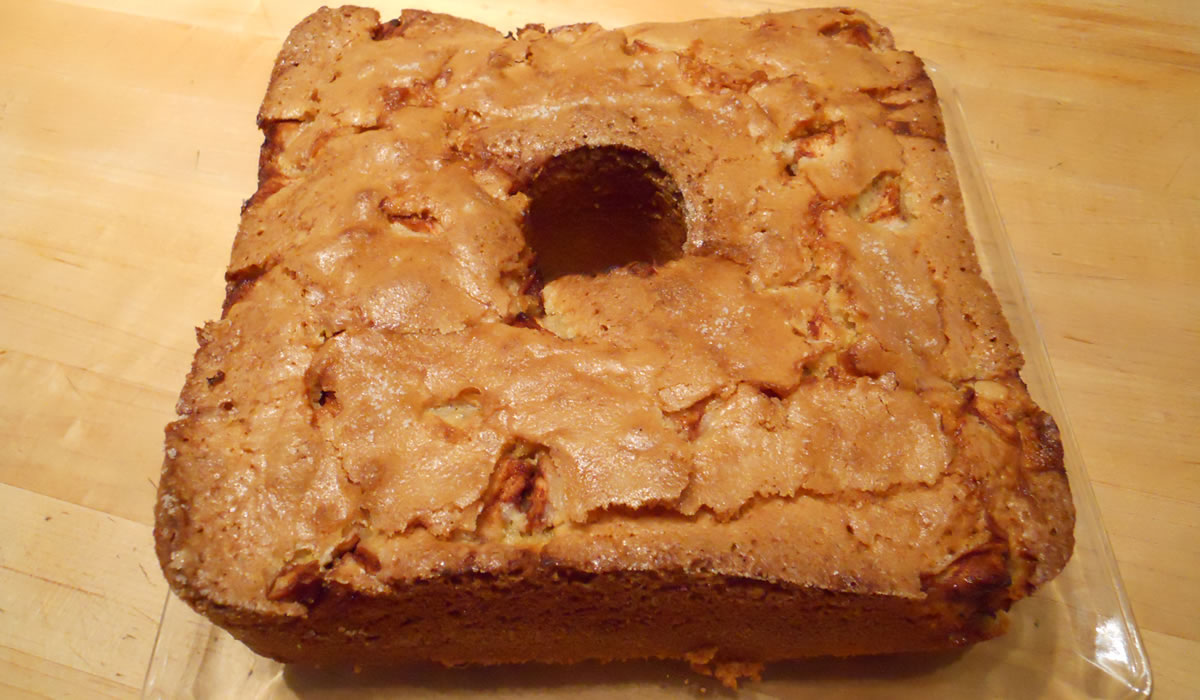
It's beauty is in its simplicity. It's a fantastic dessert and it's a wonderful Sunday Morning Coffee Cake. You seriously get to have your cake and eat it, too.
Apple Cake
- 3 cups flour
- 2 cups sugar
- 1 cup oil
- 2 tsp cinnamon
- 4 tsp sugar
- 1/2 cup orange juice
- 4 eggs
- 2 tsp vanilla
- 3 tsp baking powder
- 5 large apples
Preheat oven to 350°. Peel and cut apples into small chunks. Add 4 tsp sugar and 2 tsp cinnamon and stir together.
Combine flour, sugar, baking powder and set aside.
Beat together eggs, OJ & vanilla. Add oil, mix in flour mixture.
In a well-greased tube pan, pour alternate layers of batter and apples. Sprinkle cinnamon and sugar on top.
Bake at 350° for 1 1/2 hours or until cake tests done.
Cool before slicing.
Enjoy!
Easter 2011
It takes weeks of planning, a week of prep, and it's over before you know it.
But what fun we have!
Easter, this year was a bit extra-special because it's 2 days before Victor's birthday.
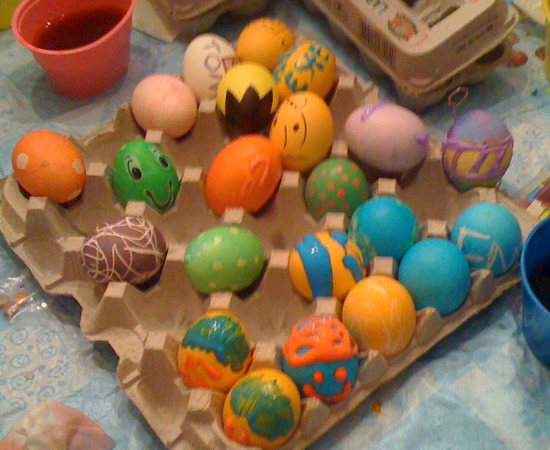
Every year his family gets together on Saturday night for the annual pizza-and-egg-coloring-eggstravaganza. This year they surprised him with a birthday celebration, as well.
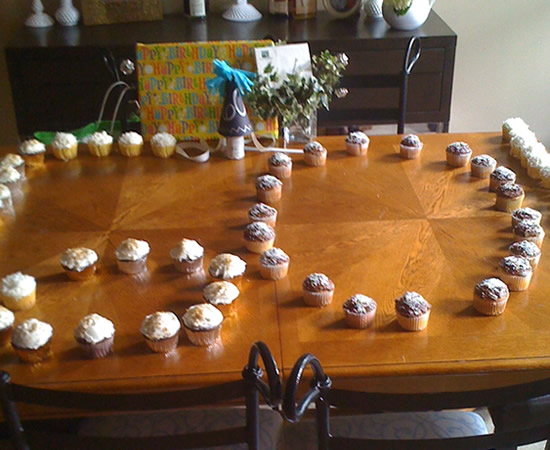
They baked a lot of cupcakes! And yes, the number is correct.
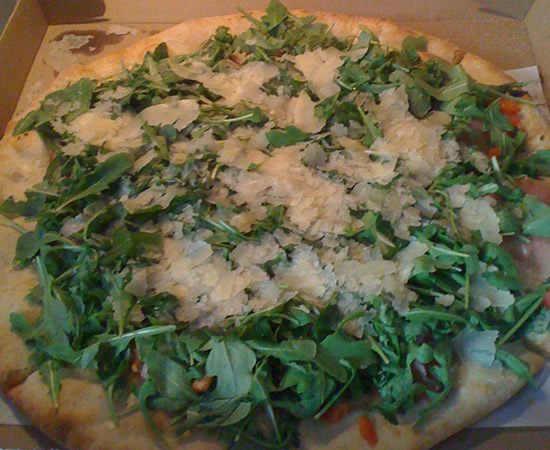
The pizza was great. There were five different varieties. This one was topped with arugula. Back in the day when I made pizza, I was such a purist I probably would have turned my nose up at something like this. Over the years I've learned to appreciate things a bit more. And I definitely appreciated this!
I ate more than I should - but then... when don't I?!? Especially when faced with something like this - and 60 cupcakes.
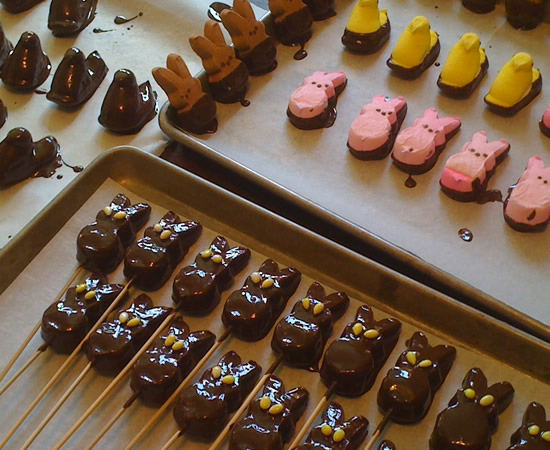
Earlier in the week I started the Peep-Dipping.
I personally cannot abide Peeps but they are fun to play with. And one of these days I'm going to get serious about playing with them. Every year I see the contests, creativity, and extremes people go tt with Peeps. Some of them are just outstanding. A far cry from a mere chocolate dip!
On to the eating!
Today, we started early - 1pm - with enough food to feed many more than the 15 assembled. We really tried to cut down. We really did. Somehow, though, things just kept multiplying.
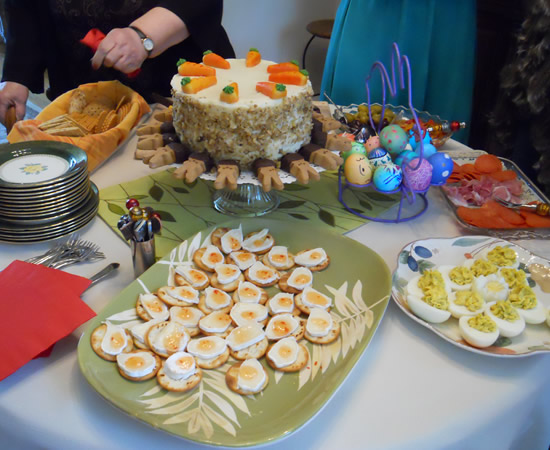
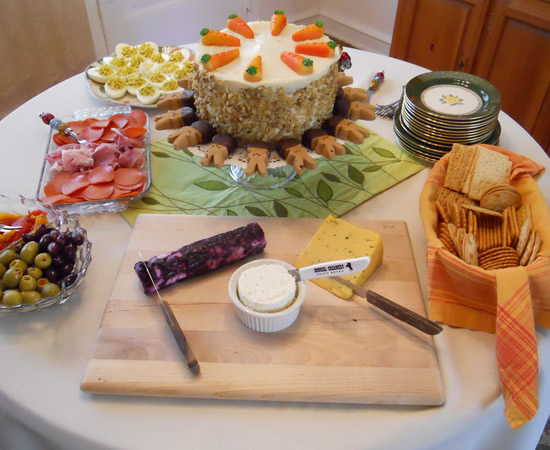
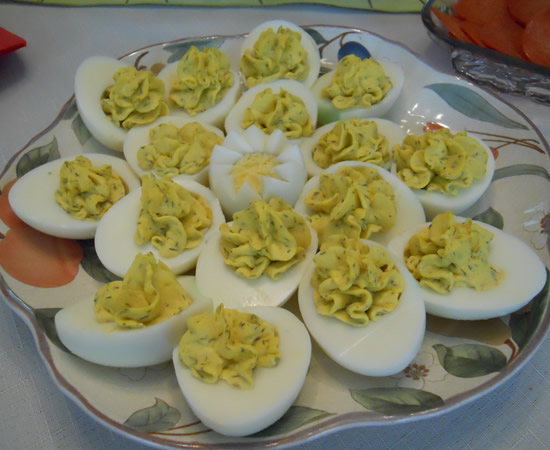
We started off with appetizers, of course... Meat balls, stuffed eggs, cheeses and crackers, olives, peppers, prosciutto...
The stuffed eggs were really simple. Mayo, turmeric, dill, salt, and pepper.
We decided to do a bit of a picnic theme this year. We did cold turkey, ham, and beef tenderloin with rolls and croissants for sandwiches, lingonberry sauce and aioli for spreads, and potato salad, pasta salad, green bean and red onion salad, and a green salad.
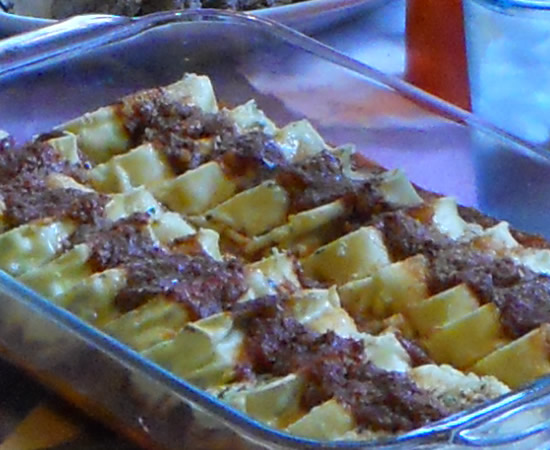
And we had two hot dishes - Marie's pineapple bread pudding and Ricotta Rollatini - a pasta dish Victor made with homemade pasta and homemade ricotta cheese!
He made a variation a few weeks ago that was excellent - but today's was stellar. He used fresh peas instead of the spinach and the homemade ricotta.
Yum.
The ricotta is no-brainer easy to make and what a difference in flavor!
Fresh Ricotta
- 1 cup heavy cream
- 3 cups whole milk
- 1 1/2 cups buttermilk
- 1/2 tsp salt
Add all ingredients to a heavy pot and simmer 15-20 minutes. Remove from heat and allow to sit for 30 minutes.
Scoop curds into a cheesecloth-lined sieve and drain about 30 minutes. Squeeze to remove as much whey as possible.
Cover and chill.
It really is easy to make and it's totally worth the time!
And then it was Dessert Time!
It pretty much doesn't matter how much I've eaten - when dessert is ready - I make room.
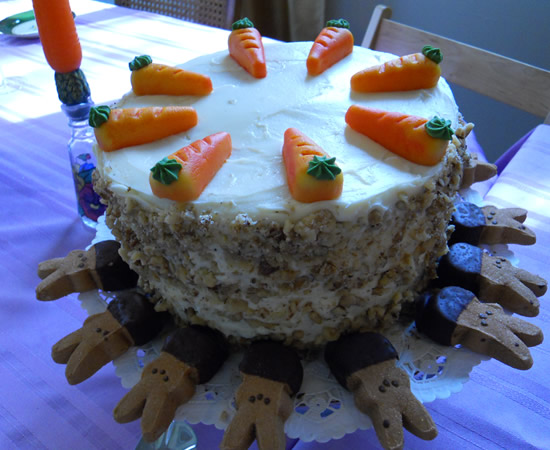
We started off with Victor's Carrot Cake.
Carrot Cake
- 2 1/4 cups flour
- 2 cups sugar
- 2 tsp baking soda
- 1 tsp cinnamon
- 1/2 tsp salt
- 2 cups shredded carrots (about 4 medium)
- 1 1/2 cups oil (neutral oil like grapeseed – not olive)
- 4 eggs
- 1 cup chopped walnuts
- 1 cup raisins
- 1 cup coconut (optional)
Heat oven to 350°. Grease and flour 2 9″ cake pans.
In a large bowl, blend all ingredients (except nuts, etc) on low speed until moistened. Beat 3 minutes on high speed. Stir in nuts, raisins, and coconutr, if using.
Pour into pans and bake for 35 to 45 minutes or until toothpick comes out clean.
Cook cake 10 minutes before removing from pans.
Cool completely before frosting.
I made cream cheese frosting, split it into 4 layers, and decorated it with marzipan carrots we bought at Cost Plus when we were in San Francisco last month. They were festive, i couldn't resist.
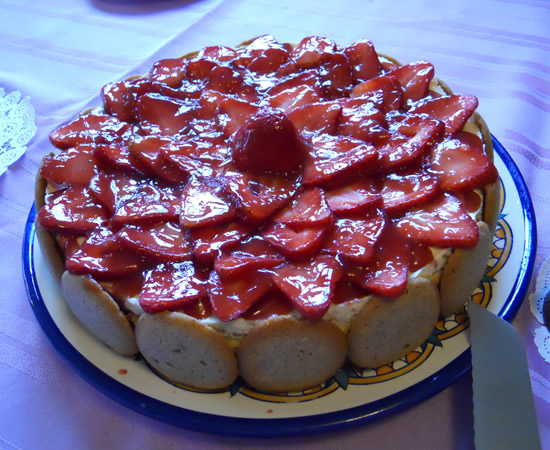
And I made a Strawberry Cheesecake...
It was a variation on my most favorite recipe.
Strawberry Cheesecake
The Crust:
- 3/4 cups walnuts, finely ground
- 3/4 cup vanilla wafer crumbs
- 3 1/2 tbsp butter, melted
The Filling:
- 4 pkgs cream cheese, room temperature
- 4 eggs
- 1 1/4 cups sugar
- 1 tbsp vanilla extract
- 1/4 cup whipping cream
The Topping:
- 16 oz sour cream
- 1/4 cup sugar
- 1 tsp vanilla extract
The Glaze:
- 4 cups strawberries
- 1 10 oz jar red raspberry jelly
Putting it together: Preheat oven to 350º. Mix crust ingredients and press evenly into bottom of 10″ springform pan. Set aside.
Cream the cheese until light and fluffy. Mix in eggs one at a time, mixing well after each addition. Add sugar, vanilla, and whipping cream, mixing until smooth and light. Pour into pan and bake 60 – 70 minutes. Remove from oven and cool about 15 minutes. Keep oven on.
Mix topping ingredients and spread onto top of cheesecake to within about 1/2 inch from edge. Return to oven and bake about 7 more minutes. Cool completely, cover, and refrigerate at least 24 hours (as I said, 2-3 days is best.)
On day you’re going to serve, make glaze. Simply melt jar of jelly over low heat.
Remove cake from pan. Press graham cracker crumbs onto sides, if desired.
Arrange sliced strawberries on top of cheesecake, covering the whole thing. Brush glaze on strawberries, allowing it to run down and pool on cake.
Refrigerate until ready to serve.
It really is the best.
Marie brought a crostata di frutta that was outstanding!
A tender crust with a pastry cream, topped with sliced strawberries. Excellent.
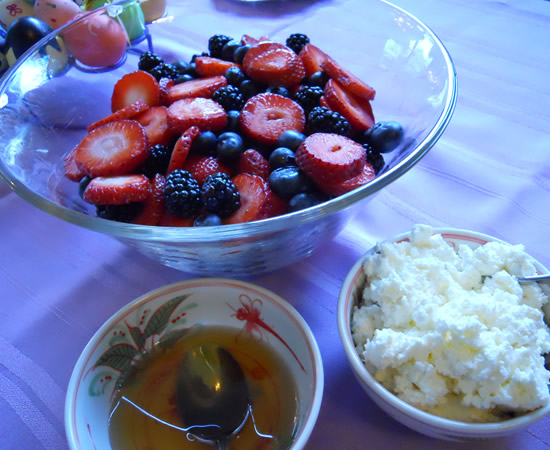
And, finally, fresh fruit with honey and more fresh ricotta.
Totally simple and totally good.
The honey is local that I pick up down at Gentile's Market in Newtown Square. I've heard that eating local honey is supposed to help with seasonal allergies. It actually may be working. I haven't felt as bad recently as I have since moving back here!
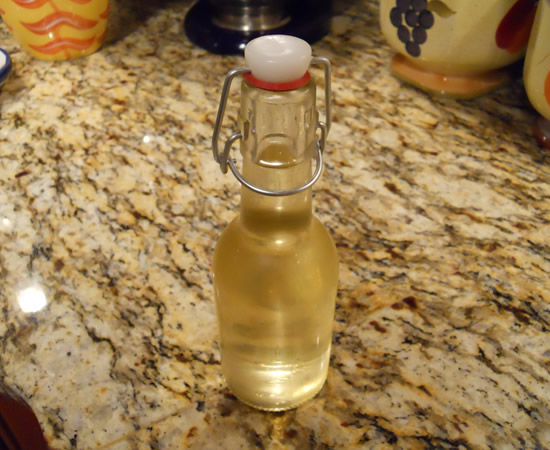
Our final things were gifts we made for everyone to bring home with them - Limocello and Strawberry White Balsamic Vinegar.
Both are really good and really easy to make.
The vinegar is simple crushed strawberries steeped in white balsamic and then strained and filtered. It can be accomplished in a couple of hours.
The limoncello takes a bit longer. Weeks longer.
Limoncello
- 15 organic lemons, well scrubbed
- 2 (750 ml) bottles 100-proof vodka
- 4 cups sugar
- 5 cups water
Wash the lemons well and pat dry. Carefully zest the lemons with a zester or vegetable peeler so there is no white pith on the peel.
Step One:
In a large glass jar (1-gallon jar), add the vodka and the lemon zest. Cover the jar and let sit at room temperature for at least 10 days and up to 40 days in a cool dark place. The longer it rests, the better the taste will be. (There is no need to stir – all you have to do is wait.) As the limoncello sits, the vodka slowly take on the flavor and rich yellow color of the lemon zest.Step Two:
In a large saucepan, combine the sugar and water; cook until thick and syrupy, approximately 5 to 7 minutes. Cool the syrup and then stir into the limoncello mixture. Allow to rest for another 10 to 40 days.Step Three:
After the rest period, strain and bottle: discarding the lemon zest. Keep in the freezer until ready to serve.
It was a lot of fun. And a lot of food.
It doesn't get much better.
Malt Shoppe Pie
In one of our Family Reunion Cook Books, my aunt and my cousin submitted a recipe for "Malt Shoppe Pie." Essentially, ice cream, cool whip, and crushed malt balls spread into a chocolate cookie crust. Very simple, and very yummy!
The cook books are well over 20 years old and none of us use cool whip, anymore, (or store-bought cookie crusts, for that matter) but a substitute of whipped cream and a homemade cookie crust took mere seconds.
And so worth those few seconds!
As with any cooking, the quality of the ingredients dictates the final result. One can make an acceptable dessert using acceptable ingredients, or make a superior dessert using superior ingredients.
I have my feet planted in both worlds. Sometimes "acceptable" is perfectly fine. Other times, one wants to take it over the top. I made a variation of this a few years ago and put a chocolate ganache on top. That was taking it over the top.
This version used really good ingredients - premium vanilla ice cream, real heavy cream (look at the ingredients on the next carton of heavy cream you buy - if it lists anything other than cream - don't buy it!) malt balls without partially hydrogenated fats or high fructose corn syrup, and vanilla bean vanilla wafers.
It makes a difference.
Malt Shoppe Pie
- 2 cups vanilla wafer cookie crumbs
- 3 tbsp butter, melted
- 1 qt vanilla ice cream, softened
- 1 cup heavy cream, whipped
- 10 oz malt balls, crushed
Mix crumbs and butter and press into bottom of a 9" springform pan. Bake at 350° about 10 minutes. Cool.
Soften ice cream. Whip cream and blend with ice cream. Mix in malt balls.
Spread into cooked crust, cover with wrap and freeze.
You can cover with a ganache, sprinkle more crushed malt balls on top, or just serve it as-is.
It really does rock!

