Mad Men Monday - Dessert
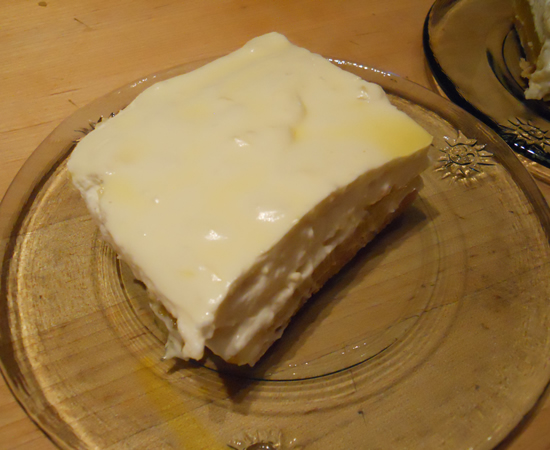
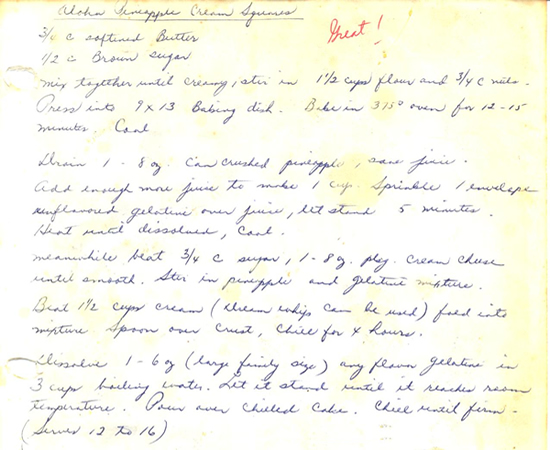
I have to admit it's been a while since I bought Jell-O, but two small boxes of the artificially-flavored Island Pineapple made it into my shopping cart today. They were a necessary ingredient for the Aloha Pineapple Cream Squares we had for dessert tonight while watching the second-to-last episode of Mad Men. I have just loved this show - and it's been a lot of fun culling through my mom's recipe books looking for fitting foods to match the times.
This dessert epitomizes the '60s - from the Jell-O to the fact that it actually takes time to prepare. This really would have been considered a time-saving recipe in its day, but because of refrigeration and cooling times, it took several hours from start to fork.
This really is the kind of stuff my mom used to make - and this particular recipe is written out in her hand. I don't know how or where it came from. It may have been on the back of a Jell-O box or she may have taken three recipes and combined them. She was good at doing that. All I do know is it was really good!
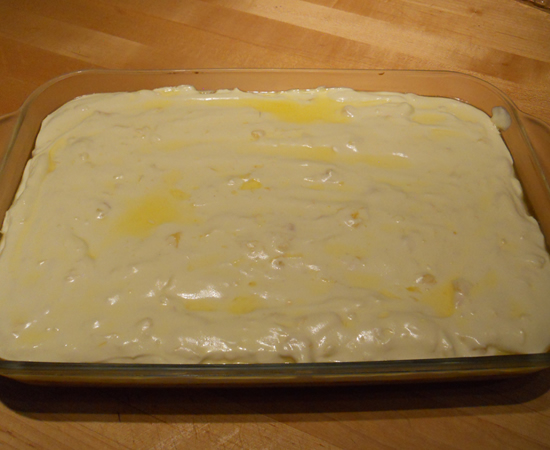
There was a surprise for me, though. The final step is to pour a "family-sized" box of cooled Jell-O over the cream layer after it has refrigerated for 4 hours. I thought it would add a top layer of Jell-O. It actually seeped under the cream and created a layer between the cookie crust and the cream. 1960s magic.
The recipe states any flavor of Jell-O. I went with pineapple to stay with my theme.
And it does make a lot.
Only one more week of Mad Men. I guess I'll just have to drown my sorrows with Italian Food. In Italy!
Blackberry Quinoa Pudding
We had a bit of an Iron Chef Cook-Off at work the other day.
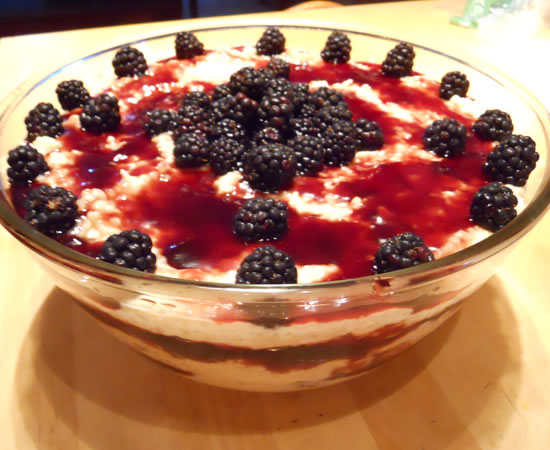
I never win these things - didn't win this one, either - but I did have fun coming up with the recipe. Blackberry Quinoa Pudding. Leave it to me to take an otherwise healthy ingredient and add butter, milk, sugar, and eggs to it.
It's a knack I have.
While it didn't win, it was well-received and I had a couple of requests for the recipe. So here goes...
I used blackberries and strained blackberry jam, but any fruit will work.
Blackberry Quinoa Pudding
- 1/2 cup quinoa - cooked according to package instructions
- 2 cups whole milk
- 1/2 cup sugar
- 2 tbsp cornstarch
- 1 egg
- 1 tbsp vanilla
- 2 tbsp butter
- blackberries
- blackberry jam
Mix sugar and cornstarch in saucepan. Add milk and whisk until smooth. Cook over medium heat until thickened - about 3-4 minutes. beat egg in small bowl. Add a bit of the hot milk mixture to the egg to temper. Add it all back to the pot and cook until thickened - another 3-4 minutes. Remove from heat and stir in vanilla and butter - stirring until butter is melted.
Stir in cooked quinoa, mixing well.
Layer pudding with blackberries or fruit of choice.
Serve warm or cold.
It really is a simple dessert and takes no time at all to make.
David Lebovitz's Lemon Bars
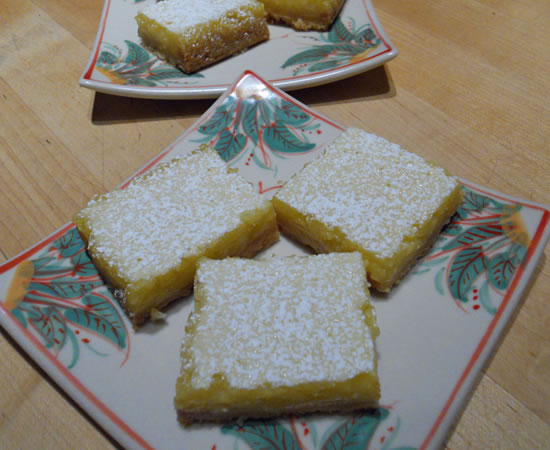
Oh.My.Goodness.Gracious.
I'm being polite, here, because what I really want to do is shout expletives - in the nicest way possible, of course. I have just had the best lemon bar I have ever had. And they were sooooo easy to make!
Thank You David Lebovitz!
I've been a fan for years, but it was not until our friend Ann sent me a copy of his book The Sweet Life in Paris - that I really began to understand the person behind the recipes. He's a hoot! An extremely talented hoot.
I've always loved to bake and, while I will never be a Chef de pâtisserie, I've knocked a couple out of the ballpark in my day...
So off to his website I went... My original thought was a lemon cake with a lemon curd filling. Making the lemon cake isn't difficult, but I decided I needed to see what else was out there.
I really enjoy David's writing style so I read a few posts, looked at a few pictures, and then typed in the word "lemon" in the search box. The very first result was Whole Lemon Bars. I immediately knew it was what I was going to make.
I looked through several other recipes - I really do want to make some Moroccan Preserved Lemons to have on hand - but it was back to Recipe Number One. The cake idea was gone.
I cannot say enough about these.
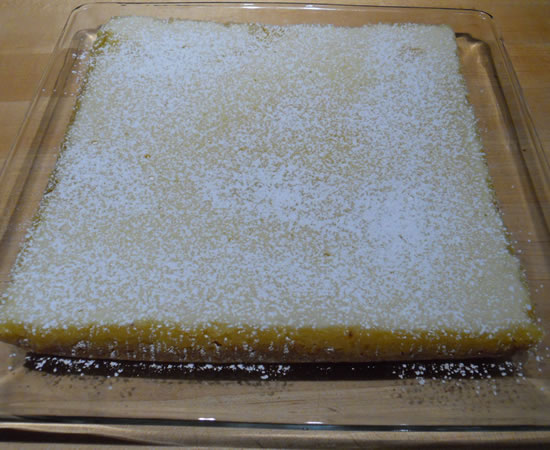
I am actually fighting myself to keep from heading back into the kitchen for more. They are seriously that good.
Here's the recipe - adapted from David Lebovitz...
David Leboviz's Lemon Bars
Crust
- 1 cup flour
- 1/4 cup sugar
- 1/4 tsp salt
- 1/2 cup melted unsalted butter
- 1/2 tsp vanilla extract
Lemon Topping
- 1 organic lemon
- 1 cup sugar
- 3 tbsp freshly squeezed lemon juice
- 3 large eggs, room temperature
- 4 tsp corn starch
- 1/4 tsp salt
- 3 tbsp melted unsalted butter
1. Preheat the oven to 350º.
2. Line an 8" square pan with foil.
3. Mix flour, 1/4 cup sugar, 1/4 teaspoon salt, 1/2 cup melted butter, and vanilla, in a medium bowl, stirring just until smooth.
4. Smooth the batter into the bottom of the pan getting it as level as possible.
5. Bake the crust for 25 minutes, or until it’s deep-golden brown.
6. While the crust is cooking, slice the lemon, remove the seeds, and cut the lemon into chunks.
7. Put the chunks of lemon in a food processor or blender along with the sugar and lemon juice, and let it run until the lemon is completely broken up. Add the eggs, corn starch, 1/4 teaspoon of salt, and 3 tbsp melted butter and blend until almost smooth.
8. When the crust comes out of the oven, reduce the heat of the oven to 300º. Pour the lemon filling over the hot crust and bake for 25 minutes or just until the filling is barely set.
9. Remove from the oven and let cool completely. Once cool, carefully lift out the bars grasping the foil. Cut the bars into squares or rectangles. Sift powdered sugar over the top just before serving, if desired.
This is one of those situations where you just don't improve perfection. There is nothing I could add, no trick or tweak, to improve upon these.
Unless it was a dollop of whipped lemon cream on top.
Not a lot... Just a tad...
Lemon Meringue Pie
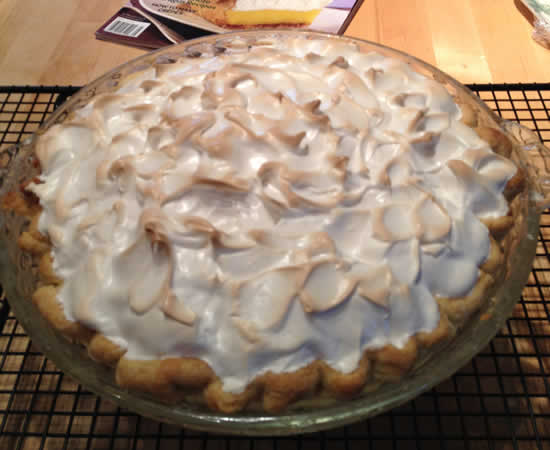
For the past few days I've been staring at the cover of the latest Fine Cooking magazine. A Lemon Meringue Pie with a piled-high meringue. Today I decided staring was getting me nowhere. I bought some lemons.
I love a good Lemon Meringue Pie. I have to admit it has been a while since I made one, though. Done right, they are a bit time consuming. But... I had the time today.
I was a bit intrigued by the recipe because it pretty much stated it was the ultimate.
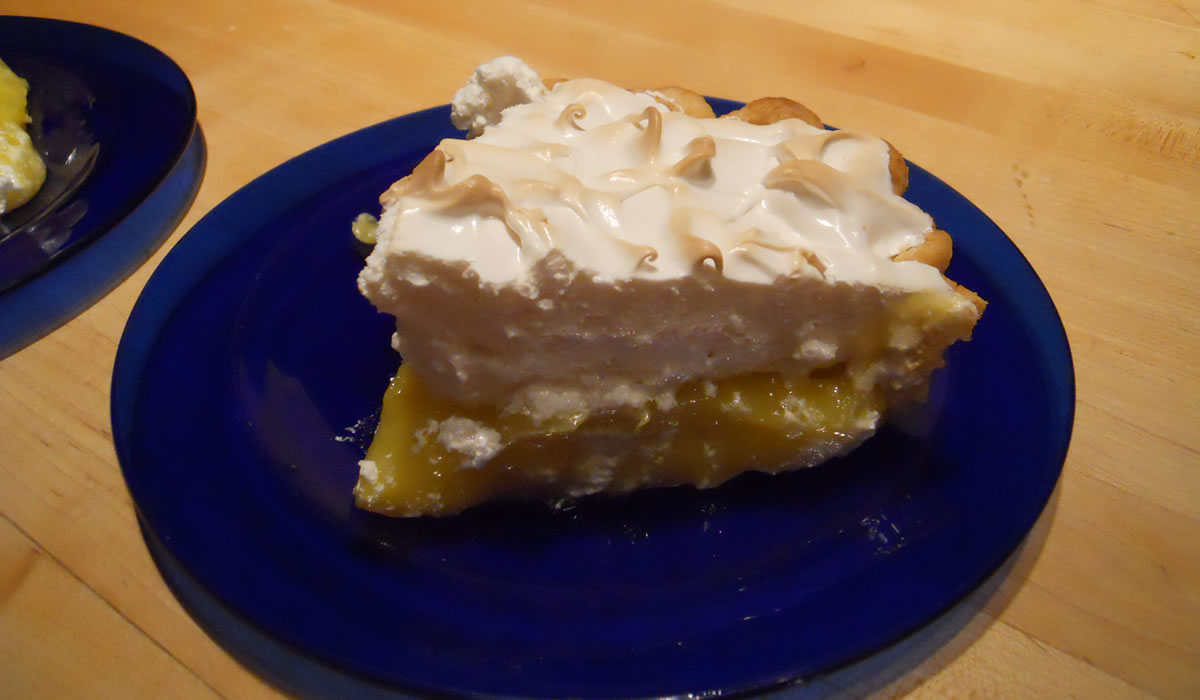
In reality, it came out beautiful, tasted great, but didn't slice nearly as well as it should have. I did follow the recipe - and it's one of those way-too-much-minutiae-recipes - and had things at the temperatures proscribed. Of course, as I'm being critical, Victor is telling me it's excellent, he loves it, the filling is great, crust is flaky... So... I'll take his word for it. I can be a bit overly critical of my own cooking now and again,.
That is definitely not the cover photo but it did taste good - and that is the important part! Here is the full recipe. My only two changes is I used all butter in the crust as I don't use shortening and was out of lard, and I didn't use the gingersnap cookies.
Lemon Meringue Pie
by Carole Walter
Homemade lemon meringue pie can't be beat, but it is notoriously tricky to make. This recipe includes all the secrets for a flaky, crisp crust, a silky but gelled filling, and a billowy meringue that doesn't weep. Serves 8 to 10
For the crust:
- 6 oz. (1-1/4 cups plus 2 Tbs.) unsifted all-purpose flour
- 2 tsp. granulated sugar
- 1/4 tsp. table salt
- 1/4 tsp. baking powder
- 3 oz. (6 Tbs.) chilled unsalted butter, cut into 1/2-inch cubes; more for the plate
- 2 oz. (4 Tbs.) frozen vegetable shortening, cut into 1/2-inch pieces
- 2 to 4 Tbs. ice water
For the filling:
- 1-1/4 cups granulated sugar
- 2 oz. (1/4 cup plus 2 Tbs.) cornstarch
- 1/4 tsp. table salt
- 5 large egg yolks
- 1 oz. (2 Tbs.) unsalted butter, cut into 4 pieces and softened
- 1-1/2 Tbs. finely grated and minced lemon zest, plus 1/3 cup strained juice (from 3 medium lemons)
- 1 oz. (3 Tbs.) finely ground gingersnap cookies
For the meringue:
- 5 large egg whites, at room temperature
- 3/4 cup superfine sugar
- 3/4 tsp. pure vanilla extract
- 1/2 tsp. cream of tartar
Make the dough:
Combine the flour, sugar, salt, and baking powder in a zip-top bag; shake to mix and chill in the freezer for about 30 minutes. Add half of the butter and shortening to the bag and toss to coat with flour. Transfer the mixture to a food processor. Give it four 1-second pulses and then process for 3 to 4 seconds. Add the remaining butter and shortening and pulse again 4 times; then process until the mixture has the texture of coarse meal with some pea-size pieces of butter and shortening, 3 to 4 seconds.
Empty the mixture into a large bowl. Drizzle 1 Tbs. of the ice water around the side of the bowl and use a fork to push the flour mixture from the edges towards the center; repeat with a second tablespoon of ice water. Clusters of dough will form and become larger with each addition of water. After adding 2 Tbs. water, test the dough by pressing a small handful of clusters clusters together and then breaking them apart. If they feel dry and crumble easily, add more water, 1 Tbs. at a time (up to 4 Tbs. total), until the clusters feel moist and bind together.
Gather and press the dough into a ball, flatten it into a 4- to 5-inch disk, and dust with flour. Wrap with plastic and refrigerate until cold but still pliable enough to leave a slight imprint when pressed with a fingertip, about 1 hour.
Shape the crust:
Butter the bottom, sides, and rim of a 9-inch glass pie plate.
On a floured pastry cloth or lightly floured work surface, roll the dough with a floured rolling pin (preferably covered with a rolling pin sleeve) into a 13-inch circle that’s about 1/8 inch thick. Roll the dough around the rolling pin, unroll it over the pie plate, and gently fit it into the plate without stretching. Trim the dough with scissors to a 3/4- to 1-inch overhang. (Reserve the dough scraps, without pressing them into a ball, in case you need to patch the shell later.) Roll the overhang under itself and flatten it slightly to cover the rim of the pie plate completely. Chill for at least 30 minutes before baking.
Bake the crust:
Position a rack in the lower third of the oven and heat the oven to 425°F. Using a fork, lightly prick the bottom and sides of the crust at 1-inch intervals (without going all the way through the crust). Fit a buttered 12-inch piece of aluminum foil over the crust, buttered side down. Fill 1/2 to 3/4 inch deep with dried beans or pie weights—do not overfill.
Bake the crust on a rimmed baking sheet until the edges begin to brown, 15 to 18 minutes. Let stand on a cooling rack for about 30 seconds, and then carefully remove the foil and beans. If the foil doesn’t release easily, don’t force it—bake for a few minutes more and try again. If any holes or tears appear, patch them by placing small pieces of the reserved dough scraps over the holes, let stand for a few seconds, and then gently tap them with your finger until they adhere. Reduce the oven temperature to 375°F and continue to bake the crust until deep golden-brown all over, 16 to 20 minutes more. Cool on a rack for at least 15 minutes. (Keep the oven on.)
Make the filling:
In a heavy-duty 3-quart nonreactive saucepan, whisk together (preferably with a tapered sauce whisk) the sugar, cornstarch, and salt. Whisk in 1/4 cup cold water until the mixture is smooth. Then whisk in another 1-1/4 cups cold water until combined. Cook over medium to medium-low heat, stirring occasionally at first with a heatproof spatula, then continuously as the mixture comes to a boil (you will see a few large bubbles pop), turns glossy, and thickens into a semi-translucent gel, 4 to 6 minutes. Whisk briefly to smooth out the mixture; then reduce the heat to low and cook 1 minute more, gently pulling the mixture from the sides to the center with the spatula to prevent scorching. Remove the pot from the heat.
In a medium bowl, lightly whisk the egg yolks. Gently whisk about 1/2 cup of the gel into the egg yolks; repeat with another 1/2 cup gel. Pour the yolk mixture into the pot and gently whisk to combine. Over low to medium-low heat, cook the filling, gently pulling it from the sides to the center with the spatula, until it begins to boil (you will see a few large bubbles pop), 4 to 6 minutes. Continue to cook, stirring as before, until the mixture thickens further(don’t worry if it clumps at this point), about 1 minute more. Remove the pot from the heat and dot the filling with the butter, pushing it under the surface; let stand for a minute to melt. Gently whisk in the lemon juice and zest until smooth.
Sprinkle the ground gingersnaps over the bottom of the pie crust; pour the filling over the crumbs and smooth the top with the spatula. Let cool to room temperature before making the meringue, at least 30 minutes.
Make the meringue:
Bring 1/2 inch of water to a simmer in a pot that will hold the bowl of a stand mixer without letting it touch the water. Reduce the heat to low. Put the egg whites in the bowl off the heat and whisk (preferably with a balloon whisk) until frothy. Add the sugar about 2 Tbs. at a time, whisking for about 5 seconds between additions.
Put the bowl over the pot and whisk gently but constantly (you are not trying to incorporate air, but to keep the whites moving so they don’t cook) until the whites are very warm to the touch (they will register 115°F to 120°F on an instant-read thermometer) and the sugar is thoroughly dissolved (lift a ribbon of whites from the bowl with the whisk and rub the whites between your fingertips—you should feel no grit), 2 to 4 minutes.
Add the vanilla and cream of tartar, transfer the bowl to the stand mixer, fit with the whisk attachment, and beat, gradually increasing the speed from low to medium high over the course of 1 minute, until the egg whites form thick, glossy medium-firm peaks (they should hold their shape but curl at their tips), 3 to 5 minutes total.
Using a soup spoon, drop some of the meringue in mounds in a ring around the edge of the filling. With the back of the spoon, gently spread the dollops of meringue over the entire surface of the filling and all the way to the crust’s edge. It is essential that all of the filling be completely covered by the meringue, without any air pockets, and that the edge of the meringue be anchored to the rim of the crust. Mound the remaining meringue on top and press with the back of the spoon to eliminate any air pockets without deflating the meringue. Make decorative peaks with the back of the spoon.
Bake the pie until the meringue peaks brown, 5 to 7 minutes. Cool the pie on a rack away from drafts to prevent the meringue from shrinking. Let stand at least 1 hour before serving.
To slice, rinse a sharp, thin-bladed knife in hot water and shake off the excess before making each cut.
Make Ahead Tips
- Lemon meringue pie is best eaten the day it’s made, but leftovers will keep, loosely tented with aluminum foil and refrigerated, for up to 3 days. Never cover with plastic wrap—too much condensation will form under the wrapping. Do not freeze.
- The disk of pie dough will keep for up to 3 days in the refrigerator or 3 months in the freezer. Thaw frozen dough in the refrigerator for at least 12 hours; then let stand at room temperature until pliable.
nutrition information (per serving):
Calories (kcal): 430; Fat (g): 18; Fat Calories (kcal): 160; Saturated Fat (g): 8; Protein (g): 5; Monounsaturated Fat (g): 5; Carbohydrates (g): 63; Polyunsaturated Fat (g): 2; Sodium (mg): 180; Cholesterol (mg): 115; Fiber (g): 1;
photo: Scott Phillips
From Fine Cooking 116 , pp. 78-83
March 1, 2012
Crab Cakes and Pound Cake
By the time Saturday afternoon rolls around, I'm one tired puppy. It's the end of my work-week and after a long day of being charming, all I want to do is vegetate. It's much more difficult to be upbeat and pleasant at 60 than it was at 49. Hell. Tying my shoes is more difficult at 60 than it was at 49.
Eating is not more difficult. And it is always so nice to come home to a dinner already planned and dessert just coming out of the oven. Really nice.
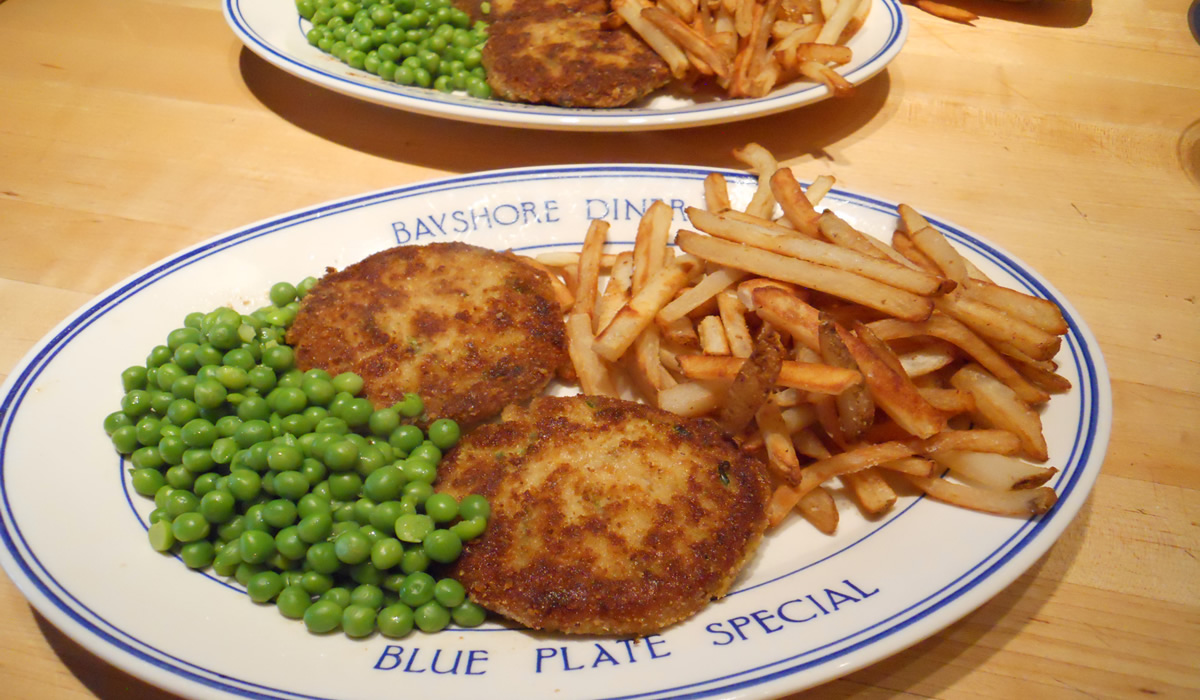
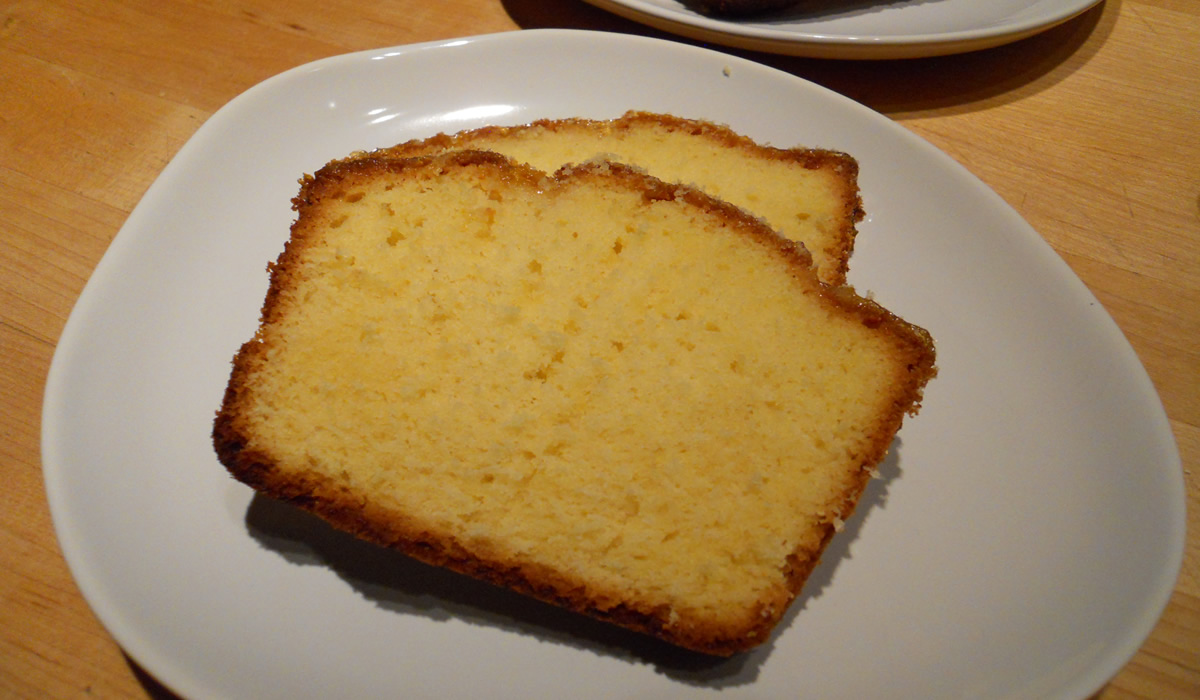
I was planning a meatloaf tonight but when I got home Victor had pulled Crab Cakes out of the freezer and had a pound cake in the oven. He said he was cooking. I said I was eating. A perfect match!
The store-bought crab cakes can be a bit loose, so he breaded them to add a bit of extra crunch. Fries out of the freezer, peas out of the freezer. He made a quick tartar sauce of mayonnaise, pickles, and a splash of worcestershire sauce. It was perfect.
And the Pound Cake was just divine!
The recipe comes from his standby cook book - Better Homes and Gardens. It's an old one that has been around forever. He tweaks it to suit his mood. It suited my mood, perfectly!
Pound Cake
- 1 cup butter
- 4 eggs
- 2 cups flour
- 1 cup sugar
- 1 tsp vanilla
- 1 tsp baking powder
- 1/4 tsp baking soda
- pinch salt
- juice of 1 orange
Cream butter and sugar. Add eggs 1 at a time. Mix flour, salt, baking powder and soda. Mix ricotta and juice. Add slowly alternating with the juice.
Spread into a loaf pan and bake at 325° for 55-65 minutes.
To make it even better, he melted some orange marmalade and glazed the top.
Yum.
It was moist and tender with a perfect crumb and crust.
And there's more for tomorrow!
Pear Pecan Buttermilk Upside Down Cake
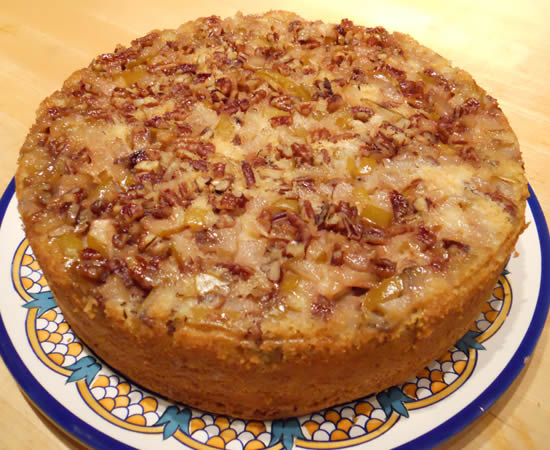
This cake has an interesting history. Unfortunately, I don't remember it, very well.
I got the original recipe from a woman I worked with - somewhere. I remember her, I just don't remember where it was we worked. Her name is escaping me but I can see her face. She worked in payroll/accounting.
I just don't remember which payroll/accounting office. It's not exactly surprising, I guess. In trying to narrow it down, I realized I have worked for 11 different companies since 1976 when I first started with Hyatt. (I'm not counting the 9 jobs I had prior to that - or my military service...)
That's quite a few jobs - and it gets even crazier when you realize how many hotels 14 of those years accounted for. All over the USofA. I dealt with a lot of Payroll Departments.
And I just remembered. The Westin Indianapolis. The last hotel I ever worked for. She brought the cake in for something - a birthday, something, and I got the recipe. She had made it in a 9"x13" pan but said she made it as a layer cake, as well and as a pineapple upside down cake. At least, I think so. When I first remember looking at the recipe, I had scribbled illegible notes all over it - the kind of notes that only make sense that instant you put them to paper. The moment you look up, the meaning is gone.
I have played with the recipe a bit over the years. I've made it as an 8" layer cake and as a 9"x13" cake. I've made it as a single-layer 10" cake.
Today was as an upside down cake.
But not just any ol' pineapple upside down cake. Something different.
The cake itself is extremely tender and light - as one would expect from buttermilk - and I wanted a light topping to go along with it. I had a single pear and I had just bought pecans. The concept was there.
I also thought brown sugar was more overpowering than I was looking for, today, although it would have been a fine alternative to the white sugar I used. I also didn't add any additional spices to the topping - this time.
The cake, itself, is just so good I don't think you could screw it up with any topping.
Pear Pecan Buttermilk Upside Down Cake
- 1 1/2 cubes butter
- 2 1/3 cups cake flour
- 1 1/3 cups sugar
- 1 1/2 tsp baking powder
- 1/2 tsp baking soda
- 1/2 tsp salt
- 3 eggs
- 2 tsp vanilla
- 1 tbsp Cointreau
- 1 cup buttermilk
- 1 cup pecans, chopped
- 1 pear, cubed
- 1/4 cup sugar
Preheat oven to 350°. Butter 10" pan. Line with parchment and butter parchment.
Mix pecans, pear cubes and sugar. Sprinkle onto bottom of pan.
Sift dry ingredients. Cream butter and sugar until light. Add eggs, one at a time, mixing well after each addition. Add vanilla and Cointreau.
Mix in flour and buttermilk in three additions. Spread over pears and pecans. (Batter is thick.)
Bake about 1 hour, or until toothpick comes out clean.
Cool about 10 minutes in pan and then remove to plate. Cool completely.
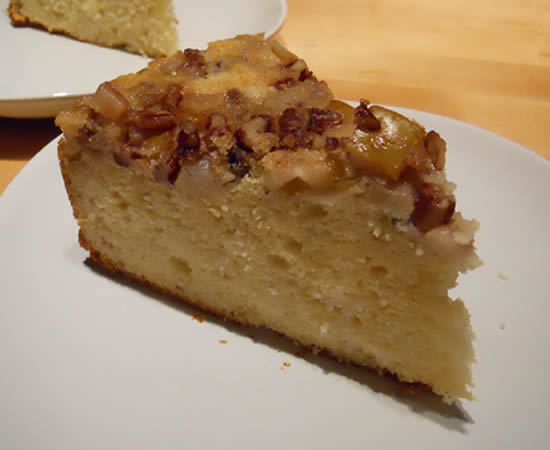
I'm going to have to keep this one towards the top of the recipe pile. I forgot how much I like it - and how easy it is to make!
And I think next time a coconutty topping like from a German's Chocolate Cake might really be good.
So many desserts, so little time...
Christmas Stollen
I love walking into the house and finding Victor in the kitchen. It always means we're in for a gastronomic treat. I tend to get most of the credit for cooking, but Victor is a fantastic cook. It's not unlike when Ruth and I worked together. Being the showman, I tended to get a lot of the credit for things, but it was Ruth who consistently came up with the brilliant ideas.
And it happens at home, too. Victor and I are very different cooks, but we're fortunate that we like to do different things. We have different "patience levels" and generally complement one another's styles.
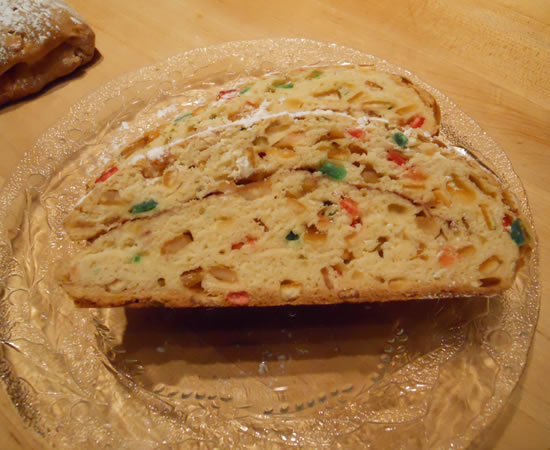
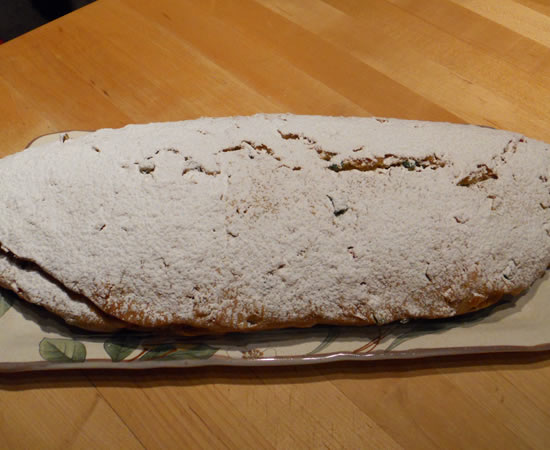
Walking into the kitchen, I was greeted with a very slowly-rising Christmas Stollen! I love stollen but hadn't made my favorite Stollen recipe from our friend Luigi this year. That recipe makes about 8 loaves. Victor found another recipe online and decided to give a single loaf a try.
I had a container of fruitcake fruit - I hadn't made my fruitcakes or Christmas Pudding, either - so he used that along with some raisins.
It came out fantastic!
The recipe calls for a marzipan center. We did have almond paste in the cabinet - for the amaretti I didn't make - but he decided to go without.
It was perfect, nonetheless.
The original recipe comes from the Dorchester Hotel in London... Victor's heading off to London in a couple of weeks and will be staying in Mayfair not far from the Dorchester... (I'm not jealous. Really. I'm. Not. Jealous.) But I digress... Perhaps he can pop in and see if they have any available at High Tea... Or something.
(DEEP breath... Not jealous. Not jealous. Not jealous...)
Christmas Stollen
Ingredients
- 1 tablespoon active dry yeast
- 2/3 cup warm milk (110 degrees F/45 degrees C)
- 1 large egg
- 1/3 cup white sugar
- 1/2 tablespoon salt
- 1/3 cup butter, softened
- 2 1/2 cups bread flour
- 1/3 cup currants
- 1/3 cup sultana raisins
- 1/3 cup red candied cherries, quartered
- 2/3 cup diced candied citron
- 6 ounces marzipan
- 1 tablespoon confectioners' sugar
- 1 teaspoon ground cinnamon
Directions
In a small bowl, dissolve yeast in warm milk. Let stand until creamy, about 10 minutes.
In a large bowl, combine the yeast mixture with the egg, white sugar, salt, butter, and 2 cups bread flour; beat well. Add the remaining flour, 1/4 cup at a time, stirring well after each addition. When the dough has begun to pull together, turn it out onto a lightly floured surface, and knead in the currants, raisins, dried cherries, and citrus peel. Continue kneading until smooth, about 8 minutes.
Lightly oil a large bowl, place the dough in the bowl, and turn to coat with oil. Cover with a damp cloth and let rise in a warm place until doubled in volume, about 1 hour.
Lightly grease a cookie sheet. Deflate the dough and turn it out onto a lightly floured surface. Roll the marzipan into a rope and place it in the center of the dough. Fold the dough over to cover it; pinch the seams together to seal. Place the loaf, seam side down, on the prepared baking sheet. Cover with a damp cloth and let rise until doubled in volume, about 40 minutes. Meanwhile, preheat oven to 350 degrees F (175 degrees C).
Bake in the preheated oven for 10 minutes, then reduce heat to 300 degrees F (150 degrees C), and bake for a further 30 to 40 minutes, or until golden brown. Allow loaf to cool on a wire rack. Dust the cooled loaf with confectioners' sugar, and sprinkle with the cinnamon.
It's a very dense dough and doesn't rise the same way as a traditional yeast bread does, so don't panic if it's not looking exactly how you think it should.
It should still come out just fine.
We had two power outages while this was in the oven and it still came out perfect!
Fantasia Confections, Revisited
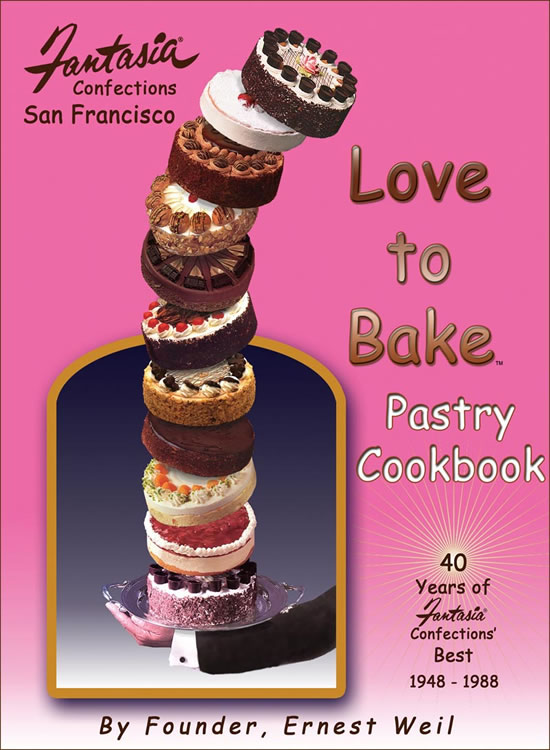
Six years ago I sent away for a cook book straight out of my childhood.
My very first job was in a neighborhood bakery out in the Sunset District of San Francisco - The Donut Center and European Bakery. On the other side of the park in Laurel Village was Fantasia Confections. We made donuts, Danish pastries, fantastic coffee cakes, cookies, and a few cakes. Fantasia made the high-end stuff. Fancy-looking, over-the-top decorated cakes, tortes, tarts, tea cakes... The owner, Ernest Weil, worked at Blum's downtown and created the famous Blum's Coffee Crunch Cake before opening Fantasia in 1948. I also worked at Blum's circa 1967 and it holds the distinction of being the very first job I was ever fired from. (I was a mouthy smart-ass even back then...)
But I digress...
The cook book was everything I hoped it would be - and more. Recipes written by a baker - not a cook book author. The layout could be a bit disconcerting at first for someone who has not worked in a production bakery before. The "instructions" for creating something are a collection of "recipes" for the different components. But once you see the logic, it's extremely easy to navigate. Another nice thing is you may create several different recipes to assemble the finished product. You actually get to focus on each recipe independently. It's much less intimidating!
In a bakery, you don't make pastry cream for cream puffs. You make pastry cream, and pull it out of the refrigerator when you're going to fill cream puffs - or make a Boston Cream Pie, fill Maple Bars, or whatever. One item is used in many different concoctions. The cook book is set up that way and it's a pleasure for me to recall those days of yesteryear when that's the way I worked. It's also great for people who aren't master chefs. As Ernest Weil states, "Not everyone is born to be a perfect pastry chef, so just relax and enjoy the learning experience."
So... the reason for this walk down Memory Lane?!? We have friends coming over next weekend for our annual Christmas Get-together and we decided to do a Brunch. And I thought homemade Danish pastries would be fun to make. Homemade Danish means the recipe from Fantasia - since I don't have the one from The Donut Center. It's extremely versatile and is used for everything from classic Danish to butterhorns, bear claws, and coffee rings - a breakfast cake I haven't seen in years. It is a classic recipe requiring lots of butter, folding, rolling, and refrigeration - and it has to be made the day before.
I have several ideas running around the ol' brain right now - including coffee rings for Christmas...
The possibilities are endless...
The cook book is currently out of print, but you can download a full 248-page .pdf version of the book for making a $25.00 donation to one of several non-profit chlidren's organizations in the bay area and beyond. Details are on their website: www.lovetobakecookbook.com.
It could be a great Christmas gift for your favorite baker and a worthwhile donation at the same time!
Fancy Mac & Cheese
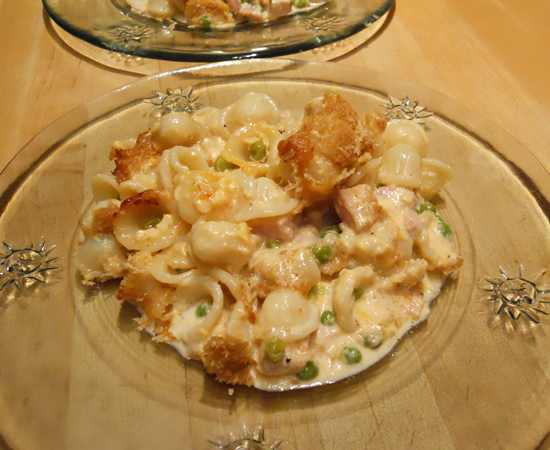
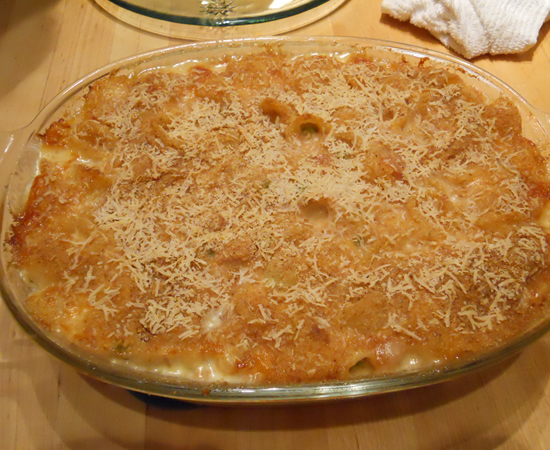
This is what I came home to last night... a fabulous casserole of ham, cheeses, peas, and orecchiette pasta. Oh my goodness gracious was it good. As in really, really good!
It was so good, in fact, we had it again, tonight.
It was the perfect dinner for a couple of reasons. First, because it tasted so good, and second, because reheating it was about all I had energy for after my marathon day in the kitchen.
Okay... It wasn't really all that much - I just made 48 cupcakes - 24 each of two different kinds plus different icings, a cheesecake, 4 pie crusts, and sourdough croutons for the Turkey Day Bird... But I knocked it all out in just a couple of hours. It was a lot of multi-tasking.
Victor usually curls up on the couch in a fetal position when I get into Manic Cooking Mode. I do have a knack for getting flour - or anything else - into every nook and cranny in the kitchen and adjoining rooms.
It's a gift I have. A true talent.
But I fooled him this time. I kept my messes to a minimum and actually had the entire kitchen cleaned and put back together before I started dinner.
One of the secrets for staying together for so long (our 17th Anniversary is Wednesday) is doing the unexpected. Keeping him slightly off-balance by doing the unexpected works wonders.
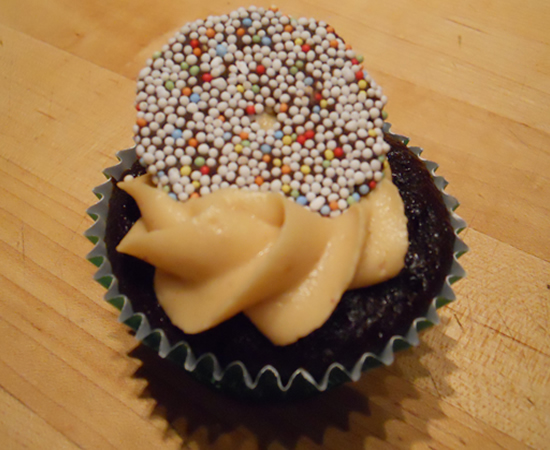
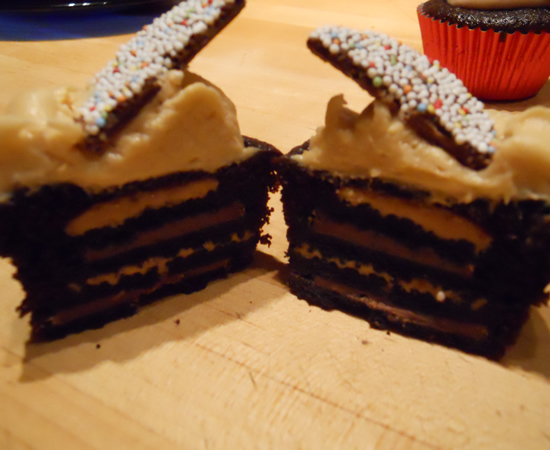
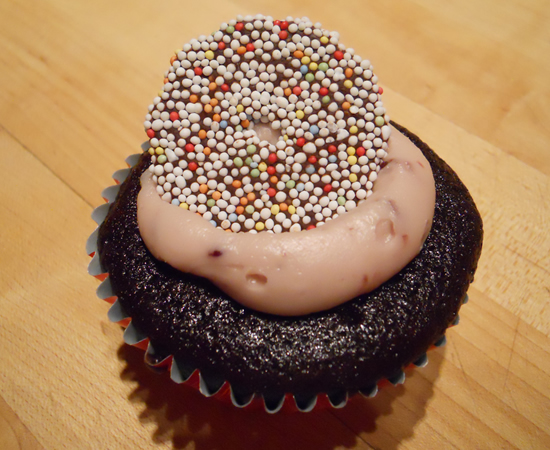
The cupcakes are for a pot-luck at work tomorrow. The recipe came via our friend Sara. The concept is Oreo cookies layered with peanut butter, covered in brownie batter and baked in cupcake cups. Ingenious.
I made them the other night and it was an epic failure. I didn't have muffin liners so I made them right in the well-greased cupcake tins.
What a mess. I couldn't chisel them out of the tins. A total mess.
I bought liners today to do it right. And then I frosted them, because, well... they needed a cream cheese and peanut butter frosting!
And I made a big batch with boysenberry jam between the cookies and a cream cheese boysenberry icing. Frosting? Icing? I'm confusing myself. It's like dressing and stuffing. I use both interchangeably.
I didn't use Oreo's because... well... I'm not an Oreo-Eater so I used a chocolate cream sandwich cookie, instead.
Peanut Butter Brownie Cookie Cupcakes
- 1 box brownie mix
- 24 sandwich cream cookies
- 1/2 cup creamy peanut butter
Preheat oven to 350° and line a 12 muffin cup pan with paper liners.
Prepare brownie mix according to package directions. For each cupcake top each cookie with peanut butter and stack them on top of each other. Spoon batter over each stack making sure it runs down the sides of the cookies. Bake about 15-18 minutes.
Yummy stuff.
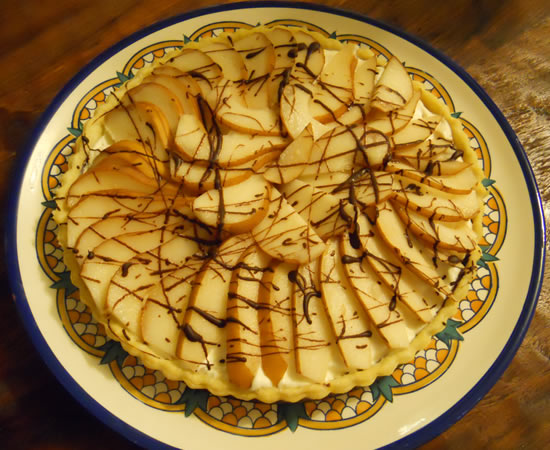
Ricotta Cream Pear Tart
I just love it when Victor disappears into the kitchen after dinner. Actually, I love it any time Victor is in the kitchen, but when it's after dinner, that means dessert is being made. And I ♥ dessert.
We had a pie crust left over from the other day when I made the walnut pie (if I'm making a crust, I'm making two of them!) so last night Victor decided on a pear tart - since we also had a couple of pears that were really ripe.
What was especially good about this was instead of making a custard for the filling, he whipped heavy cream and ricotta cheese together! Really!
He whipped about a cup of heavy cream with about 3/4 cup ricotta, a quarter-cup of sugar and 1 1/2 teaspoons of vanilla. Our measuring skills can leave a bit to be desired, at times. He eyeballed it all but this is is approximation.
He first par-baked the crust in a tart pan for about 20 minutes. When it was cool, he brushed it with melted chocolate. Next went the whipped ricotta cream, and then he topped it with thinly-sliced pears. And a bit of a chocolate drizzle for fun.
It really was outrageously good!
And even better - there's more for tonight!
Sometimes the most simple things really are the best. I love to get crazy and complicated now and again, but, really... it's especially nice to be able to taste and enjoy every ingredient on its own and as part of the whole. The tart was just that - I could taste everything, but everything blended perfectly.
I'm trying to keep this as my mantra for Thanksgiving Dinner.
I'll let ya know on the 25th if I was successful...
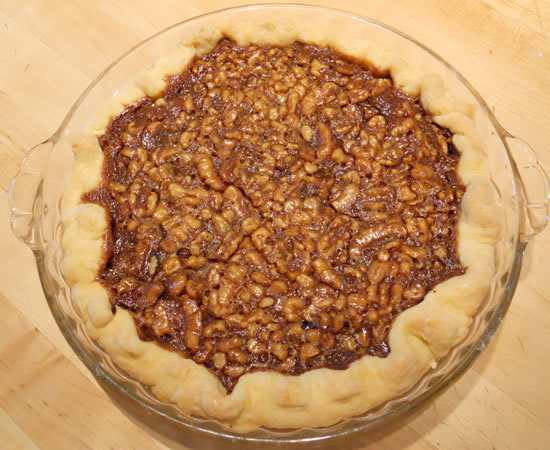
Chocolate Brandy Walnut Pie
I was charged with making something "chocolatey-nutty" for my sister-in-laws birthday a couple of weeks ago. Alas, there was this little snow-storm and we didn't have electricity for a couple of days.
The situation was rectified last night when we went over their house for Sunday Dinner.
The recipe is bits and pieces of several pecan and/or walnut pie recipes we have around the house, starting with one my mom used to make years ago...
Use your favorite pie crust. I make mine because it is my firm belief that any homemade pie crust is better than a store-bought.
Chocolate Brandy Walnut Pie
- 1 single-crust pie shell, unbaked
- 8 large egg yolks
- 1 tsp vanilla
- 1/2 cup packed light brown sugar
- 1/4 cup maple syrup
- 2 tbsp cocoa powder
- 4 oz butter
- 1/2 cup light corn syrup
- 1/2 cup heavy cream
- 3 Tbs brandy
- 1/2 tsp salt
- 2 cups walnut halves and pieces
- 2 oz chocolate melted with 1 tsp neutral oil
Blend egg yolks and vanilla and set aside.
In small saucepan, heat brown sugar, maple syrup, cocoa powder, butter, corn syrup, heavy cream, brandy, and salt until mixture is slightly warm and butter is melted. Do not boil.
Slowly whisk warm syrup into eggs and vanilla. Strain into large measuring cup.
In a separate pan or bowl, melt chocolate with oil.
Brush unbaked crust with melted chocolate. Add walnuts, spreading evenly.
Slowly pour filling over walnuts.
Bake in a pre-heated 350° oven about 45 minutes or until filling is firm and no longer wobbles in center.
I do have to admit this came out pretty good. However, next time, I may add a few chunks of chocolate in with the walnuts just for the heck of it!
Adluh Sweet Potato Apple Cobbler
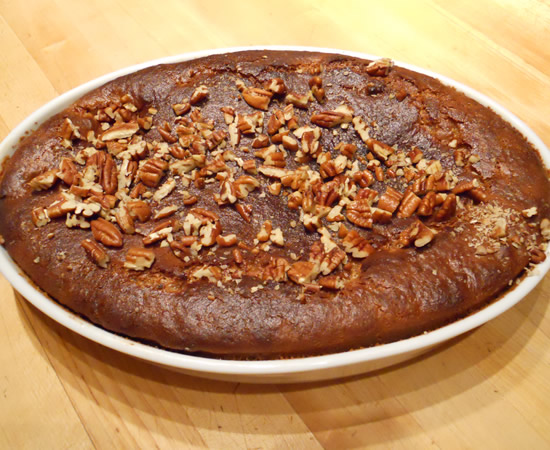
Tonight was my very first experience with my Adluh Gift Package. I had zeroed in on the Sweet Potato Mix. I was totally intrigued. And what a fun dessert it made!
I wasn't sure what it was going to do, but I had faith it was going to be good. It was more than good. It was excellent!
I followed the directions exactly, using McIntosh apples, sugar, cinnamon, cloves, nutmeg, ginger, sugar, butter, and a sprinkling of flour for the filling.
Sweet Potato Apple Cobbler with Pecans
- 1 pound Adluh Sweet Potato Mix
- 1/2 cup chopped pecans
- 3/4 cup light brown sugar
- 16-32 oz fresh, frozen, or canned apples or apple pie filling
- 1 1/2 cups milk
- 1 stick melted butter
Mix the sweet potato mix, milk, pecans, and brown sugar until the thickness of pancake batter. pour the apples/filling into an 8x10 or 9x13 baking pan. Pour the sweet potato mix over the apples. Bake at 400° conventional (350° convection) or 40 minutes or until golden brown. Take out and pour melted butter on top. Let butter soak in and then sprinkle with chopped pecans.
And that's just what I did!
The flavor of the Sweet Potato Mix is vaguely ginger-breadish. Really, really good. It just went perfect with the apples. I could see it topping a pear cobbler, as well. I could also see it with any one of the sheet of recipes I received with my gift box. Really, really good.
And I really liked the cake-like cobbler topping as opposed to the drop biscuits I usually make. My mom used to make a cobbler like this although it was of the white-flour variety. I haven't had one like this in years. It really did evoke a simpler place and time for me. I guess this is what the good folks at Adluh mean when they talk about "Same Today, Same Always." You really can make grandma's biscuits. And your grand-kids will be able to make yours.
Quality has been the one feature that has allowed this plant to flourish while others have closed. As in 1900, stones are still used today to produce the specialty grits items. Without this emphasis on "Same Today, Same Always" quality, the company could never have survived the shift in consumption from local to regional to national brands over the last 100 years. Generations of customers know that they can always trust their prized recipes to come out right using Adluh products.
Really, really good.
You can order online at AdluhStore.com.
Really, really good.

