Sweet Potato Casserole
This is a perfect example of how thought-process-to-meal actually works, sometimes...
I was going to make a cassoulet of sorts for dinner. A quick version. We were decorating and I just wanted to get something in the oven I didn't have to think about. I had a pork tenderloin and a couple of Hungarian sausages that were thawing, pulled down the beans, crumbs at the ready...
And then I opened the 'fridge for butter. And saw the leftover dressing.
The cassoulet started morphing into something completely different. ::: insert Monty Python tagline here :::
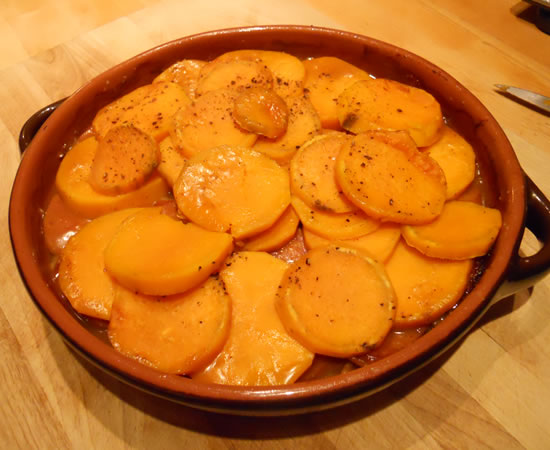
There were two big sweet potatoes in the potato basket. I started thinking of layering things...
Into the casserole dish went a layer of stuffing. A bit of gravy went on top just to keep it moist. Atop that went the sliced Hungarian sausages. The pork tenderloin went back into the 'fridge.
I peeled and sliced one of the sweet potatoes and layered it on top. I drizzled it with about a quarter-cup of maple syrup, sprinkled it with salt and pepper, covered it, and put it in the oven at 350° for about an hour and fifteen minutes.
I purposely used the sausage instead of turkey (or the pork tenderloin) to make it seem less a Thanksgiving leftover and more a stand-alone casserole. It had the flavors of fall - with just enough of a twist to make it unique.
I can see a lot of variations on this theme.....
Strascinati ai Broccoli
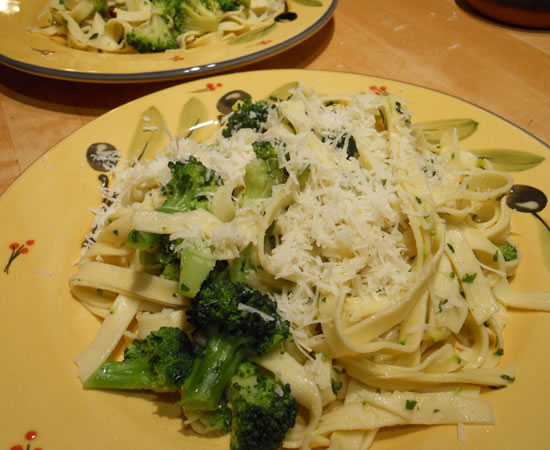
We made a change in the recipe tonight. I know, I know... we're supposed to follow the recipe exactly, but Victor made homemade pasta yesterday for his niece's birthday, so we had the leftover already made. And I'll take leftover homemade pasta over any packaged pasta. Any time.
This is a definite winner and proves the beauty of following simple recipes. If I had been in the kitchen, I would have looked at the recipe and then cleaned out the vegetable bin. And I'm sure it would have been a good pasta dish, but it wouldn't have had the crisp clean flavors this had. And two little chiles added just the right amount of heat. Not too much - just enough.
Another thing is the recipe calls for cooking the broccoli for 7 minutes. That is a really long time. Victor pulled it out of the water after 5 minutes and it was getting close to being overcooked for our way of thinking. I definitely believe you don't want crunchy broccoli, but 7 minutes would probably result in mush. Use your own judgment.
The recipe is written for the strascinati pasta.
Strascinati ai Broccoli
Ingredients
- Fine sea salt
- 1 1/4 pounds broccoli
- 1 pound strascinati or other short pasta
- 1/2 cup extra-virgin olive oil
- 1/2 cup finely chopped flat-leaf parsley
- 2 dried red arbol chiles, or red pepper flakes to taste
- 1 garlic clove, minced
- Freshly grated Pecorino Romano, Caciocavallo, or ricotta salata cheese for serving (optional)
Instructions
Bring a large pot of salted water to a boil. Meanwhile, cut broccoli into 1-inch florets; peel stems. Cut stems into 1-inch pieces, then cut pieces in half or quarters lengthwise, depending on size.
Cook broccoli florets and stems in the boiling water until tender, about 7 minutes. Reserving water, transfer broccoli to a colander to drain, then rinse under cold water to stop cooking.
Return water to a boil. Add pasta and cook until al dente. Meanwhile, combine oil, parsley, chiles and garlic in a small skillet. Heat over medium heat, stirring occasionally, for 2 minutes. Remove from heat; stir in 1½ teaspoons salt.
When pasta is al dente, drain pasta and return to pot. Immediately add broccoli and oil mixture. Heat over medium heat, stirring to combine, for 30 seconds; adjust seasoning, if necessary. Serve immediately, with cheese if desired.
We're getting close to the end of the pasta issue, but I have a feeling we will be continuing this for a while.
Au Gratin Potatoes
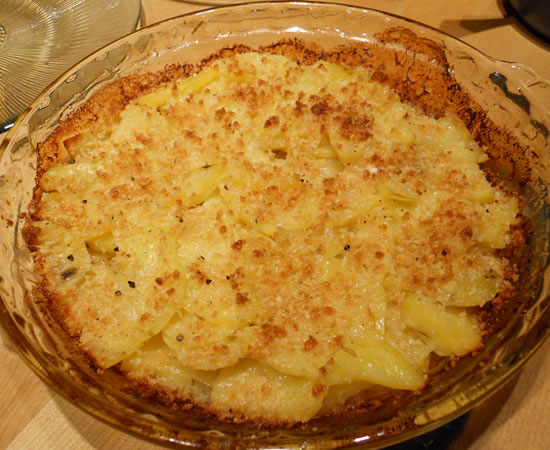
When Victor first took these out of the oven, my first thought was the immortal words of Oliver Twist... "Please, sir, I want some more."
Without having tasted them, I knew they were going to be wonderful. And, of course, I was right!
Soft, buttery potatoes with a crunchy-cheesy topping... They were perfection in a pie-plate.
He started out with a buttered pie plate and thick slices of yukon gold potatoes. A layer of potatoes, a drizzle of melted butter and grated parmesan cheese, more potatoes, butter, and cheese, and more potatoes, butter, and cheese until all the potatoes were used. And then about a 1/2-cup of milk went in. He covered the plate with foil and into a 350° for 30 minutes. Meanwhile, he made a crumb topping of panko bread crumbs, more cheese, garlic powder, and butter. This went on top and back into the oven they went - uncovered this time - for 20 minutes to get crunchy.
There are no set amounts of anything. It's merely building layers. Low-and-wide gives the best crunchy-topping and tall and narrow will give more silky potato.
Simple and simply wonderful.
Campanelle con Salsa di Olive
It's La Cucina Italiana Pasta Monday! Victor would have been in the kitchen cooking tonight, except he was at the doctors office. He threw his back out making the bed yesterday. 30 hours of excruciating pain later, he went for the drugs. Perfect. It means I will be able to sleep tonight, as well. We've both had back problems over the years. The first time I hurt my back was in a car accident when I was 18. A guy ran a red light on Van Ness as I was crossing on Geary. In the ensuing 40 years, I've managed to screw it up every few years. It's been a while. I'm probably due.
But I digress...
My first two thoughts when seeing this recipe were how wonderful it sounded and how much Ruth would hate it. (It was fabulous. You would have hated it.)
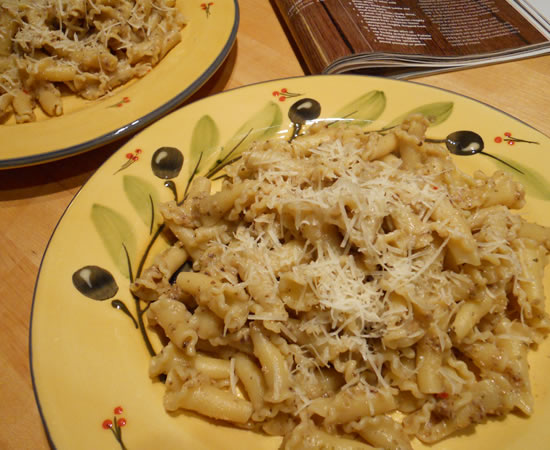
Gaeta olives can be either brine-cured or dry-cured. I found the brine-cured. (Brine-cured Kalamatas can substitute for brine-cured gaetas.) I also found pitted picholine olives. I have a pitter, but if I don't have to use it..... It made for easier work.
The only actual change from the printed recipe is I used the food processor to make the olive paste. I know the arguments for mortar and pestle. I'm neurotic enough to use a burr grinder for my coffee beans at home instead of chopping them with a little Braun. I fully understand the benefits. The mortar and pestle got sold a year or so ago at the yard sale.
Food processor worked just fine.
The recipe made a goodly amount. We used about a third of it for our two generous portions and the rest is going to become bruschetta or something. Maybe a Thanksgiving appetizer...
Another cook note: I did not salt the water for the pasta. The unsalted pasta balanced the olives and the cheese .
Campanelle con Salsa di Olive
4 servings
Olive pesto, delicious over pasta, also makes a great spread for crostini and pizza.
Ingredients
- Coarse sea salt
- 1 cup Gaeta olives, pitted
- 3/4 cup Picholine or other mild green olives
- 2 scallions, thinly sliced (white and light green parts)
- 1 small fresh red chile, thinly sliced, or pinch red pepper flakes
- 1 tablespoon plus 1 teaspoon roughly chopped fresh marjoram leaves
- 1 tablespoon roughly chopped fresh thyme leaves
- 1/4 cup extra-virgin olive oil
- 1 cup freshly grated Grana Padano or Parmigiano-Reggiano cheese plus more for sprinkling
- 1 pound campanelle
Instructions
Bring a large pot of salted water to a boil.
Meanwhile, put olives, scallions, chile, marjoram and thyme into a mortar. Using the pestle with a rotary movement, grind mixture against wall of mortar until combined. Working with 1 to 2 tablespoons at a time, drizzle in oil, grinding and mixing to incorporate as you go, until pesto is combined and smooth. Add cheese and grind to combine.
Cook pasta in the boiling water until al dente. Reserving ¼ cup of the pasta cooking liquid, drain pasta and return to pot. Immediately add pesto and toss to combine, adding as much of the pasta cooking liquid to moisten as desired. Serve immediately with a sprinkle of cheese.
Mushrooms and Cheddar
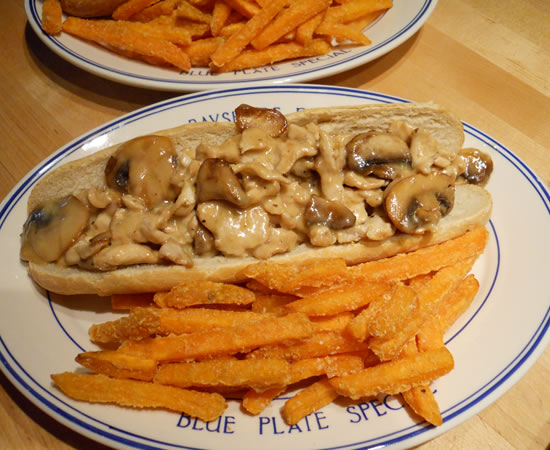
The concept for this sandwich was a mushroom, caramelized onion, and cheddar sandwich at one of the local pubs - Kildares, I think. Ruth made it up using mushrooms and a caramelized onion cheddar cheese. On ficelle rolls.
I have made it a score of times, sometimes playing with it, and other times making it as it was originally intended. It pretty much rocks the casbah no matter how it's made.
The concept is quite simple - and pure brilliance. Sauteed mushrooms, caramelized onion cheddar cheese melted into them after they're browned really well, and then stuffed into a roll.
Did I say brilliance?!?
Two variations on a theme have been cooking the mushrooms with some ground beef, and adding in some slices of chicken breast as I did last night.
With sweet potato fries.
It really is a simple dish and the mushroom and cheese combination with the onions just makes everything right with the world.
If you don't have a cheddar cheese that already has the caramelized onions in it, just cook up a handful and add it in with the 'shrooms.
Rock your casbah.
Sweet Potato Latkes and Portobello Mushroom Gravy
It's amazing that dinner ever made it from concept to reality tonight. I had too many concepts.
Sunday tends to be a bit of a clean out the refrigerator day in preparation for the Monday Shopping Trek. I had a lot of choices and a lot of ideas today. I have a single pie crust left from making the pumpkin pie the other night that would have gone great on my Mom's Steak Pie. But I needed to use brussels sprouts. And that yam. And those last few mushrooms.
There is chicken in the freezer - and several varieties of sausage. A pork tenderloin...
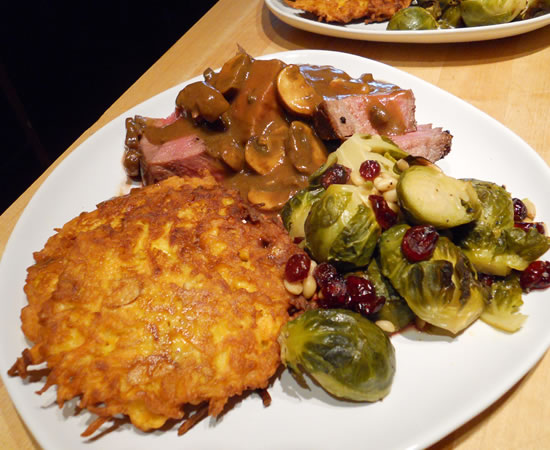
Leafing through the latest copy of Wegmans magazine, I saw a recipe for Apple Almond Yam Cakes. A sweet potato latke by any other name... That set the tone for dinner. Sweet potatoes go great with brussels sprouts, and tri-tip roasts and mushroom gravy go with everything.
A dinner was born.
The tri-tip went into the oven at 425° along side the brussels sprouts. I halved the sprouts, put them into a casserole dish with about a half-cup of chicken stock and just let 'em cook down. About 5 minutes before they came out of the oven I added dried cranberries and pine nuts.
While the roast was resting, I made a pan gravy using the drippings, a handful of sliced baby bella mushrooms, a splash of brandy and a carton of condensed portobello mushroom soup. Really. Condensed soup. Me.
It was something new and I thought I'd give it a try. I have to admit that the last time I used condensed soups in anything was back in the '70s when I lived at Lake Tahoe. I used to make a stuffed chicken breast dish with a champagne mushroom sauce for crowds (we always had crowds at that house!) but over the years just stopped using them. Since Victor just said my gravy is better, I probably will continue to stop using them.
The sweet potato latkes were good. Nice balance of potato with apple and onion. I used sliced almonds as the recipe stated, but will use probably use slivered almonds next time I make them for a bit more pronounced crunch. The recipe makes a dozen large potato cakes, so be forewarned. We'll have a couple for breakfast tomorrow and more are going into the freezer.
Apple Almond Yam Cakes
- 1 1/4 lbs yams, peeled, coarsely grated (about 7 cups)
- 1 medium Granny Smith apple, peeled, cored, coarsely grated
- 4 oz Chopped Onions
- 1 1/2 Tbsp Sour Cream
- 4 large Eggs, lightly beaten
- Salt and ground white pepper to taste
- 1 1/4 cups All-Purpose Flour
- 1/2 cup sliced almonds
- 1/2 cup Vegetable Oil
Directions:
- Combine yam, apple, and onion in a large mixing bowl. Add sour cream and eggs; season to taste with salt and white pepper. Stir to combine. Slowly fold in flour. Stir in almonds. Mix well. Form yam mixture into patties by scooping up portions with ice cream scoop (about 1/2 cup) and pressing firmly with hands. Set aside.
- Heat oil in large skillet on medium-high, 1-2 min, not allowing oil to reach smoking point. Reduce heat to medium.
- Add yam patties to pan (pan should hold 5 patties). Cook, 7-8 min until edges begin to brown. Gently turn patties over. Cook 5-6 min until browned and tender. Drain on double thickness of paper towels.
- Repeat with remaining yam patties, heating additional vegetable oil if necessary.
Can be made a few hours ahead and reheated in a 350 degree oven for 20 min.
It was an easy dinner to put together, but I did seen to dirty an awful lot of stuff. Fortunately, we have a great system. When I cook, Victor cleans and when Victor cooks, Victor cleans.
It really is a great system!
Linguine con Asparagi
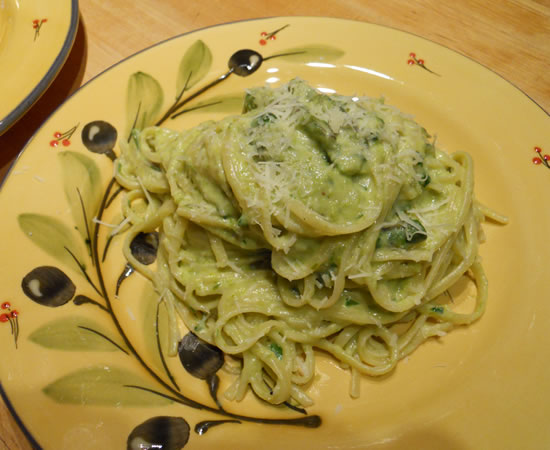
I know I keep saying this every week, but OMG! This was fantastic! It's hard to believe that week-after-week-after-week, the meals just keep getting better.
This has been one of the most wonderful culinary adventures I have ever had the pleasure to partake of. Pastas of every imaginable style in every imaginable sauce. This is gastronomic heaven on earth.
Tonight's feast was another simply-prepared with simple ingredients found in most any home. Nothing exotic. Nothing hard to find.
The beauty of most of these recipes has been just that - locally-available ingredients. Granted, guanciale is not going to be something one finds easily, but pancetta can be used as a substitute - and that can be found almost anywhere.
The goal of this endeavor has been to recreate the recipes exactly as written. That has not been easy, as both of us are instinctive cooks - adding a bit of this or a bit of that and making a recipe our own along the way. It's actually difficult at times to read a recipe and know that a certain ingredient would compliment the dish - and not use it. But...
Victor chose linguine tonight, but any pasta would work - especially a broad noodle such as papardelle or tagliatelle.
Linguine con Asperagi
Ingredients
- Fine sea salt
- 1/2 pound asparagus, trimmed
- 1 large shallot, finely chopped
- 2 tablespoons unsalted butter
- 2/3 cup heavy cream
- 14 ounces linguine
- 1/2 cup freshly grated Grana Padano or Parmigiano-Reggiano cheese
- 1/4 cup finely chopped flat-leaf parsley
Instructions
Bring a large pot of salted water to a boil. Meanwhile, cut 1½ inches of asparagus tips from stalks. Steam tips for 3 minutes, then cut in half lengthwise. Cut stalks crosswise into ¼-inch rounds.
In a medium saucepan, combine asparagus rounds, shallot and butter; cook over medium heat until butter is melted, then add 1/2 cup water, bring to a boil and cook for 3 minutes.
Add cream, bring to a simmer and cook for 5 minutes. Season with ¼ teaspoon salt. Transfer pan contents to a blender and purée until smooth.
Add pasta to the boiling water and cook until al dente (about 3 minutes for fresh pasta). Reserving ¼ cup pasta cooking liquid, drain pasta and transfer to a large bowl.
Pour purée into a skillet; bring to a boil. Add asparagus tips, cheese and parsley; return to a boil, then add to bowl with pasta and toss to combine. Adjust seasoning and moisten with a little pasta cooking liquid, if desired.
Serve immediately.
I tasted every ingredient. The asparagus added a fresh flavor with just the right crunch. The cream and cheese added a richness that worked perfectly. The linguine held the sauce perfectly.
Victor has now made 14 of the 20 pasta recipes in the magazine. I need a plan for when he hits recipe 20.
This can't end.
Pumpkin Butter
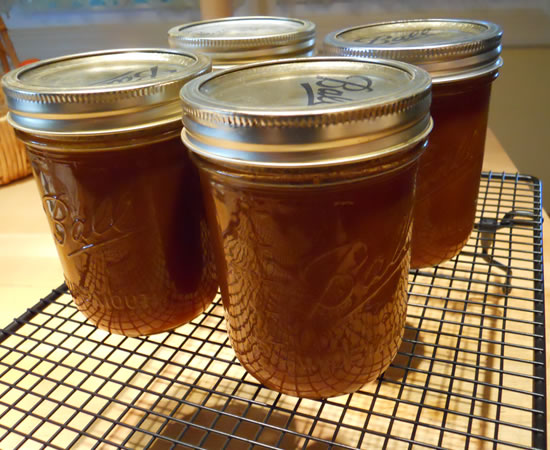
I know that I can buy pumpkin butter at the store. I can buy canned pumpkin at the store, too. And canned, packaged, and/or prepared just about anything else.
But buying something pre-made is just not the same as making it myself. Yes, it is easier to open up a jar. To me, it's not nearly as rewarding. There is something mystical and magical about cooking. About blending flavors. About taking something and making it different. About watching eyes light up and smiles on faces as people see and try different foods.
Pumpkin.
Most people know it as something that comes out of a can that says Libby Libby Libby on the label label label. Or as a frozen Mrs Smiths pie. Or carved into a jack o'lantern on halloween.
I don't think a lot of people even know what to do with a pumpkin other than carve it or use it as a fall centerpiece on a dining table that never gets used.
It's too bad, because besides tasting great, pumpkins are actually good for you, too. It's low-calorie, high in beta carotene, potassium, fat-free, sodium-free... And really versatile.
From soups and stews to pies and flan, salad dressings to a sauce for meatballs, sweet or savory, it can go with just about anything.
My Uncle Dick - half Irish and half-Mexican - made a Jalapeño Pumpkin Soup that was outstanding. I made a pie last night.
And Pumpkin Butter, today.
I have to admit I had no intention of making pumpkin butter, today, but I was perusing David Lebovitz' blog and followed a link to Hedonia and that became my inspiration. Two guys in San Francisco cooking? Sounds like Victor and me before we moved east.
The fun guys at Hedonia got their inspiration from About.com.
The only difference was About.com called for "pumpkin pie spice" and Hedonia made his own blend. As did I.
This is the recipe I used:
Pumpkin Butter
Ingredients:
- 4 cups cooked and pureed pumpkin
- 1 (1.75-ounce) package powdered pectin
- 4-1/2 cups sugar
- 2 tsp cinnamon
- 1/2 tsp ginger
- 1/2 tsp cloves
- 1/2 tsp allspice
- 1/2 tsp nutmeg
- 1/2 tsp cardamom
- 1/2 teaspoon unsalted butter
Preparation:
Place pumpkin in a heavy kettle. Stir in pectin. Place over high heat and bring to a boil, stirring constantly. Stir in sugar, spices, and butter. Continue stirring and bring to a full rolling boil. Boil hard exactly 4 minutes. Remove from heat. Stir 5 minutes.Ladle jam into 1/2 pint hot, sterilized jars, leaving 1/4 inch head space. Adjust caps according to manufacture's directions. Process 10 minutes in boiling water bath. After cooling, check seals.
Yield: 6 (1/2-pint) jars.
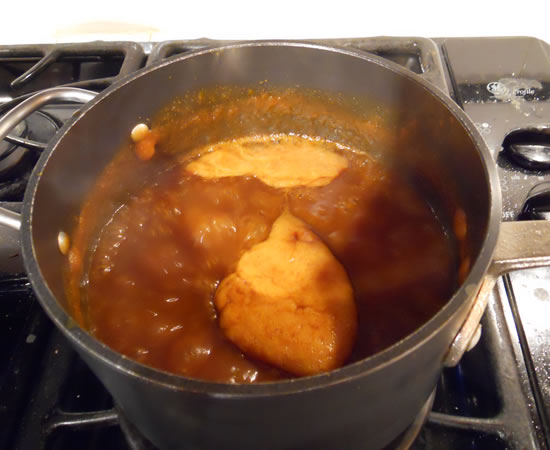
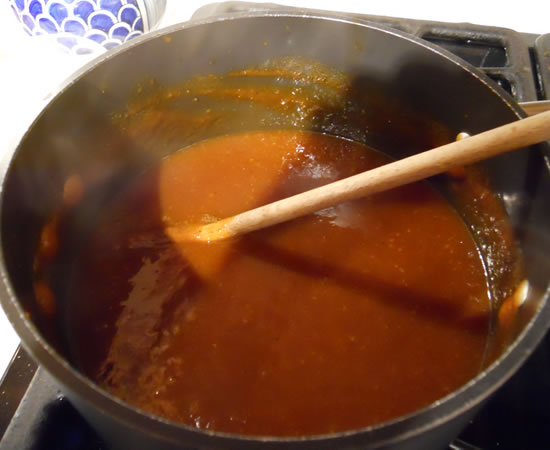
I did get slightly more than what the recipe called for, but I probably used a bit more pumpkin. (You know me and measuring...) It still came out great.
Love it!
**Update
Just got an email from Sean at Hedonia... He says:
Fairytale Pumpkin
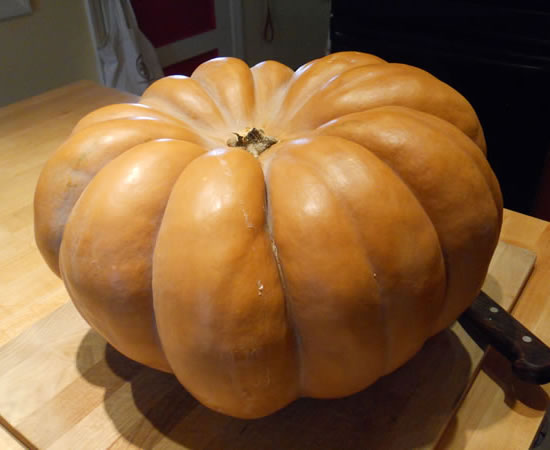
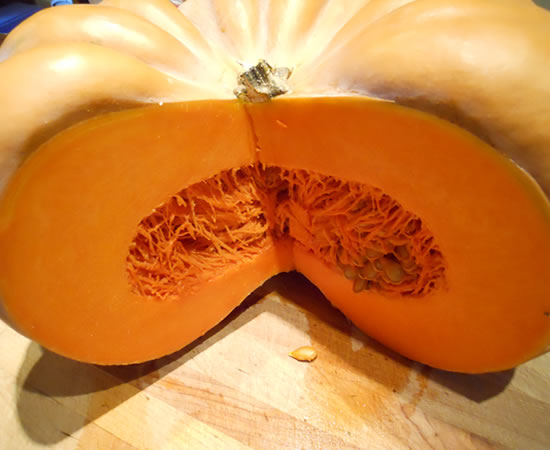
I decided today was the day to address the fairytale pumpkin I bought last month.
One of the great things about big ol' squash like this is they can sit around and look pretty for weeks before you have to do anything with or to them!
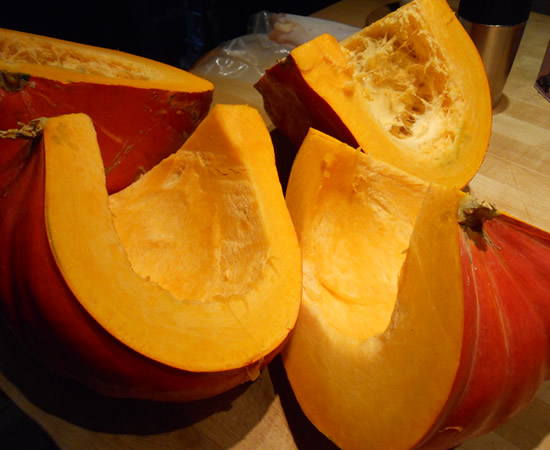
Fairytale pumpkins are some of the best-eating pumpkins around.
They're deeply ridged with a bright orange flesh that just screams to be roasted, pureed, and made into soups, stews, and pies!
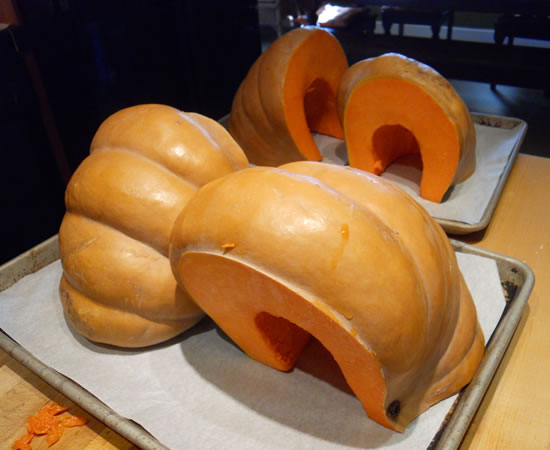
I quartered this particular beast and placed it on two sheet pans and put them into 350° ovens.
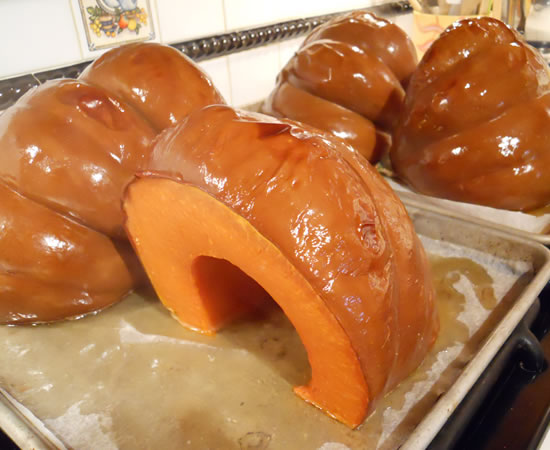
I didn't put anything on them at all, nor did I cover them. They roasted for about an hour and a half.
When a skewer went in and out with no problem, they were done.
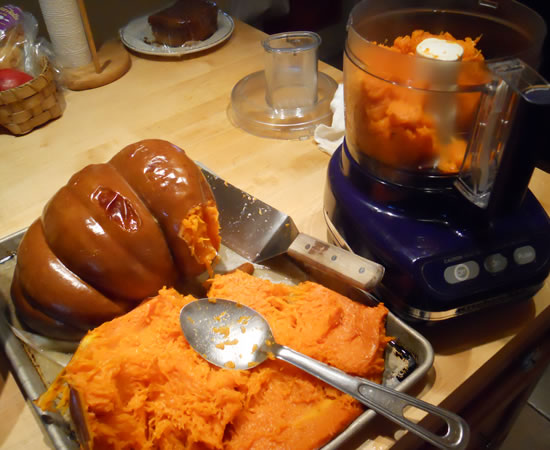
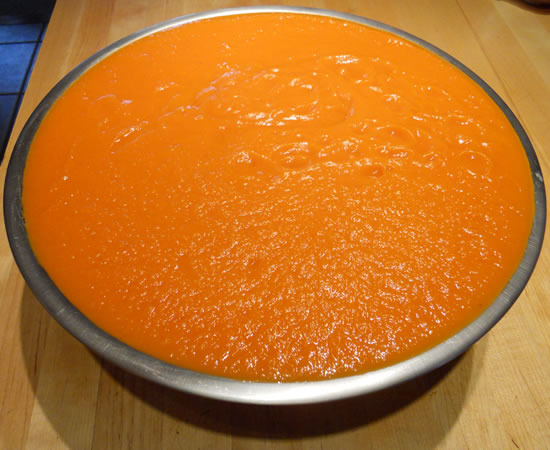
I scraped the flesh into the food processor and made a lot of puree.
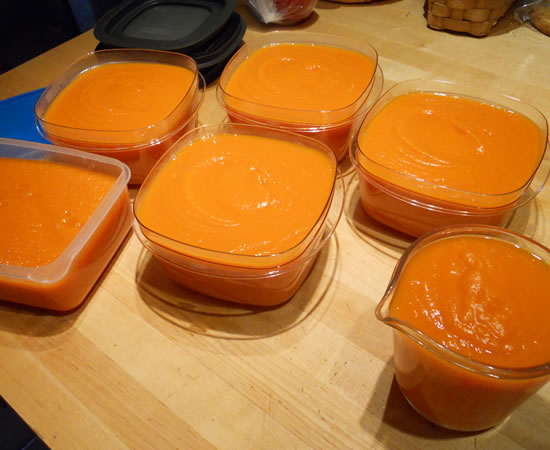
A LOT of puree. Probably about 20 cups or so. Enough for about a dozen pies.
It's all nicely portioned. The two-cup measure is for a possible pie tonight. The rest will go into the refrigerator and freezer.
It's a lot of pumpkin for $7.99.
Pear Pastry
Since we can't be at AT&T Park watching the game live and eating garlic fries, we needed something to start tonight's baseball game. We keep seeing our former season ticket seats... It is such an awesome ball park. I miss those seats. Those were fun days.
But I digress...
I picked up a couple of great-looking pears yesterday, thinking they would lend themselves to a fun dessert. They did - except I didn't make the dessert!
We had puff pastry in the freezer...
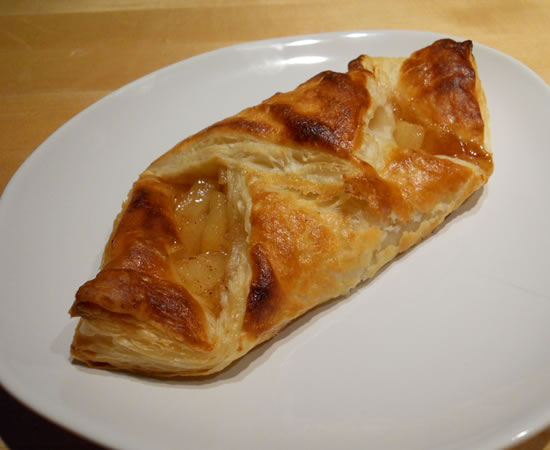
Victor peeled and cubed the pears and coated them with maybe a quarter-cup of sugar. Into a skillet they went with a tablespoon of butter, a bit of flour, cinnamon and nutmeg.
When they caramelized a bit, he added a splash of apple cider and let that cook down.
Onto the pastry, folded up 2 sides, and baked at 425° for about 15 minutes.
Yum.
Cinderella Pumpkin
I picked up a big ol' Cinderella Pumpkin today. Big.
The Cinderella Pumpkin is a Vin Rouge D' Etampes - an heirloom pumpkin from France. They have a deep orange-red skin and are slightly ribbed and flat. And they taste fantastic! Naturally sweet without being sweet, if you know what I mean. Great for eating because they're meaty and not totally full of water.
I didn't think to take a picture of this beautiful pumpkin until after I had cut it open. What can I say... I'm not always the brightest color in the crayon box. But they really are cool-looking. Did I mention they taste fantastic?
I cut it up, peeled half of it and cut it into cubes. The other half I roasted skin-on. 4 sheet-pans of pumpkin went into the ovens at 425° for about 25 minutes.
With all this pumpkin around, it was a no-brainer to figure pumpkin was going to play a role in tonight's dinner.
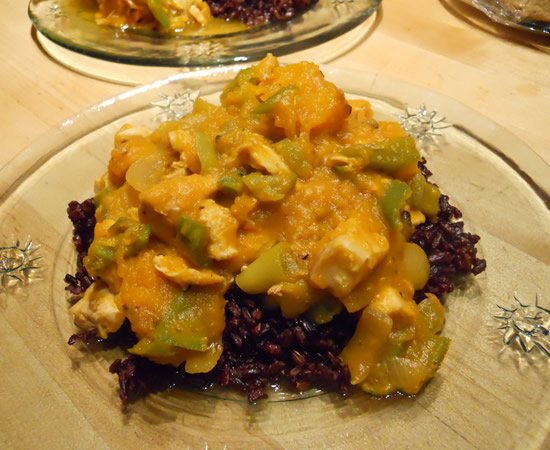
We had 7 Hungarian peppers from the back yard that needed eating, so I seeded and sliced them, and then sauteed them with a small chopped onion.
Next into the skillet went a cut-up boneless, skinless chicken breast and then a pinch of salt, pepper, and cumin.
I added about a cup and a half of pumpkin puree and maybe 2 cups of cubed pumpkin.
Mixed it all together and served it over whole-grain black rice.
A classic fall flavor tweaked with mildly-hot peppers and served over rice. It worked on a variety of levels. I tried to play off the minimalist recipe creation we've been experiencing with the Monday Italian Pasta dishes. This was an easy one to let go on its own... the peppers added the balance to the pumpkin and the cumin - just a dash - brought the two flavors together. It actually would have worked just fine without the chicken and could easily become a vegetarian or vegan dish.
I'm psyched. We're gonna have pumpkin around for a while. And when this one is gone, I have a Fairytale Pumpkin to cook up, next.
I love fall. Now... if the weather would just cooperate.....
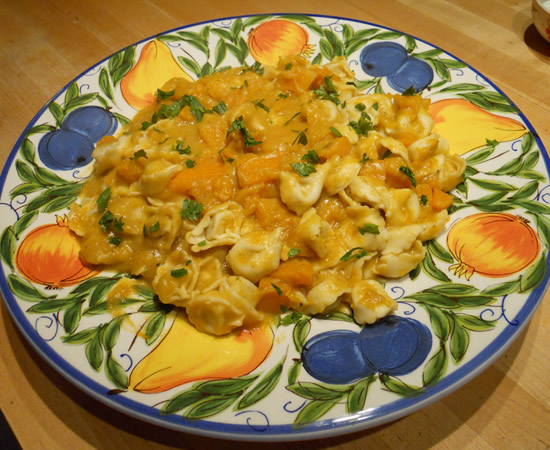
Roasted Butternut Squash with 6-Cheese Tortellini
After playing tourist in Philadelphia all day, we needed sustenance when we got home.
We had seen this recipe concept in the latest Wegmans magazine. It was a throw-together using packaged soup and pre-cut squash. We liked the idea, but not of using pre-made ingredients.
We started from scratch!
Butternut Squash Soup
- 1 butternut squash, roasted
- 1 onion, chopped
- 1 clove garlic, minced
- 4-6 cups chicken (or vegetable) broth
- 1 tsp sage
- salt and pepper, to taste
Saute onion and garlic in a bit of olive oil. Add roasted squash and mash into pot. Add about 4 cups of broth and sage and, with an immersion blender, puree everything to a smooth soup. Add more broth as needed to come to your desired consistency. Taste for salt and pepper and add, as desired.
Roasted Butternut Squash with 6-Cheese Tortellini
- 1 butternut squash, peeled, seeded, and cubed
- 3-4 cups butternut squash soup
- 1 tsp sage
- tortellini or pasta of your choice
- salt and pepper, to taste
Heat soup. Add roasted squash, and sage. Check fopr seasoning and add S&P, as desired.
Cook tortellini according to package instructions. Drain, mix with sauce, sprinkle with cheese, and enjoy!
This is one of those dishes that is simplicity to make - but dayum, is it good!
It can easily be made vegetarian, and, depending on the type of pasta used, can be a vegan entree, as well.
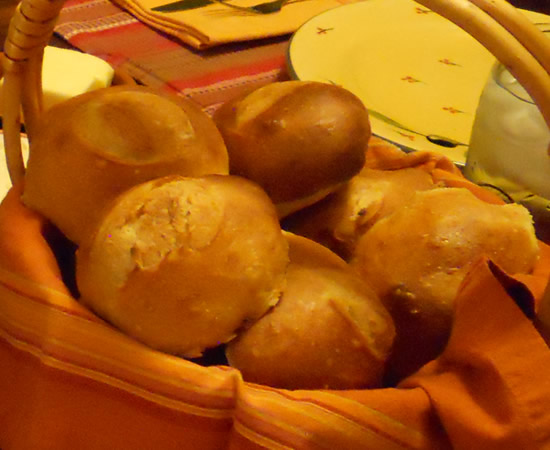
The final part of the meal was homemade rolls.
Y'all have heard me wax poetically about the no-knead artisan bread. I make variations of it all the time.
The latest variation is to add three egg whites to the water - still making it three cups of liquid - to the 6 1/2 cups of flour. Follow the basic instructions. forming the dough into rolls. Let rise, brush with egg white, slice top, and bake at 450° for 25 minutes.
These are really good - perhaps my favorite, yet. The egg white makes for a slightly lighter interior, and a really crunchy crust.
They were so much of a hit, I just made a couple more for tonight!

