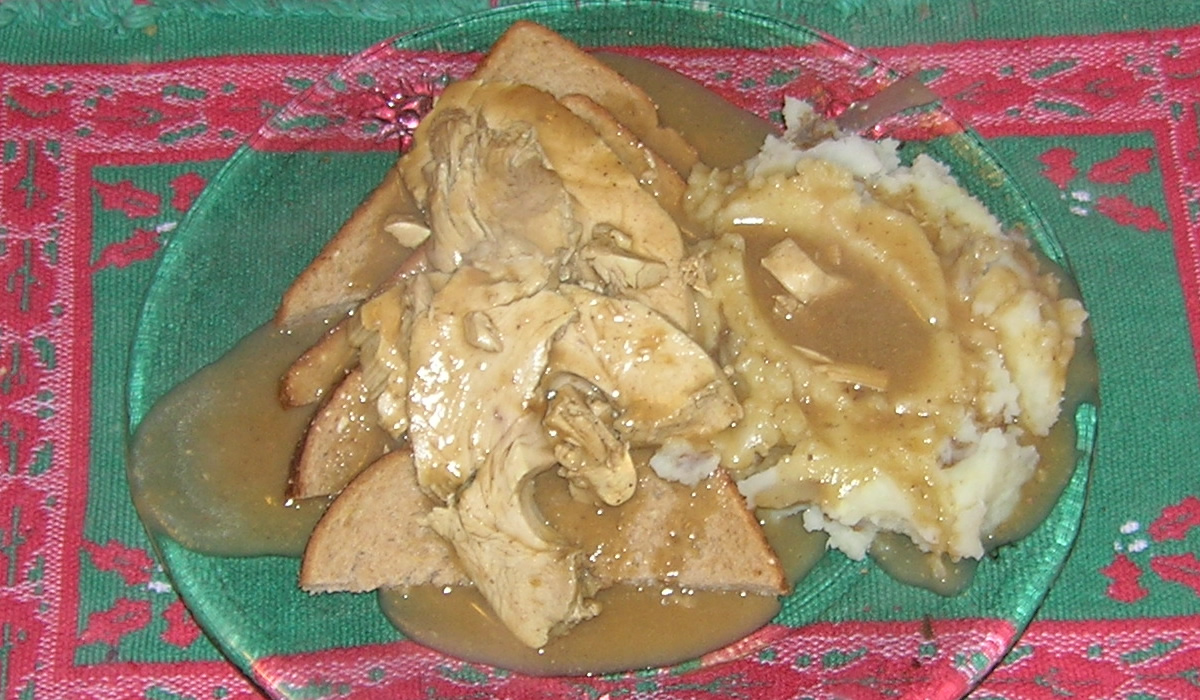
Thanksgiving is Officially Over
The last of the turkey was consumed tonight. Considering I bought such a (comparitively) small bird this year, I'm surprised it lasted as long as it did.
Hot turkey sandwiches were the appropriate finishing meal. Unfortunately, I forgot the cranberry sauce.
Oh well...
I just had a memory of Turkey Dinner when I was in Uncle Sam's Yacht Club. Christmas Day, 1972... Gulf of Tonkin.
I was a baker and five of us made something like 700 pies, while the cooks in the galley cooked off something like 500 BRT turkeys. (BRT=Boned, Rolled, and Tied.) Mashed potatoes, sweet potatoes, green beans, dressing... The forward bakeshop made 5000 or so dinner rolls. Gourmet, it was not.

So after baking all those damned pies, I got to serve them, as well. I don't remember who sent the Santa outfit to me - one of my sister's probably - but there I was dressed as a pretty lame Santa in a flannel Santa outfit serving those thousands of slices of pie.
The ice mold on the counter there was also a thing to behold. My best buddy Tim - who later became my brother-in-law - and I filled up a small mixing bowl with water and floated plastic holly, tinsel, and lord knows whatever other holiday-type stuff one could find while floating off the coast of Viet Nam. Into the freezer it went, and we had instant holiday ice sculpture. They loved it.
The only thing I really remember well - 36 years after the fact - is just how uncomfortable and hot I was. I think I actually weighed about 150 pounds in that picture and had tons of padding on me. (I wouldn't need the padding, today!) The galley and the bakeshops were always incredibly hot to begin with - and there I was dressed in layers and layers.
And how about those Navy-Issue glasses?!? What a stud.
Pork Chops with Pears
I always like it when I have a semblence of a plan for dinner when I leave the house in the morning. I had pulled pork chops out of the freezer before going to bed last night and had an idea I might make Lidia's Pork Chops with Pears and a balsamic reduction.
Lidia's Pork Chops with Pears and Caramelized Red Onions
- 2 cups balsamic vinegar
- 3 tablespoons extra-virgin olive oil
- 6 garlic cloves, peeled
- 4 center-cut pork rib chops, each about 12 ounces and 1 1/4 inches thick
- 1 large red onion, cut into 8 wedges
- Salt
- Freshly ground pepper
- 2 ripe but firm Bosc pears, peeled, cored and each cut into 8 wedges
- 1/4 cup red wine vinegar
- 2 tablespoons honey
In a small saucepan, bring balsamic vinegar to a boil over high heat. Adjust the heat to a gentle boil and boil until the vinegar is syrupy and reduced to about 1/3 cup. Set aside.
Preheat oven to 425 degrees. Heat the oil in a large, heavy skillet with a flameproof handle over medium-high heat. Whack garlic cloves with the flat side of a knife and scatter over oil. Cook, shaking the skillet, until brown, about 2 minutes. Lay the pork chops in and cook until the underside is browned, about 6 minutes. Remove and reserve the garlic cloves if they become more than deep golden brown before the chops are fully browned.
Turn the chops, tuck the onion wedges into the pan and continue cooking until the second side of the chops is browned, about 6 minutes. Season with salt and pepper. About halfway through browning the second side, tuck the pear wedges in between the chops.
Stir the red wine vinegar and honey together in a small bowl, until the honey is dissolved. Pour the mixture into the skillet and bring to a vigorous boil. Return the garlic cloves to the skillet if you have removed them. Place the skillet in the oven and roast until onions and pears are tender and the juices from the pork are a rich, syrupy dark brown, about 30 minutes. Once or twice during roasting, turn the chops and redistribute the onions and pears. Handle the skillet carefully -- it will be extremely hot.
Remove skillet from the oven. Place a chop in the center of each warmed serving plate. Check the seasoning of the onion-pear mixture, adding salt and pepper if necessary. Spoon the pears, onion and pan juices around the chops. Drizzle the balsamic vinegar reduction around the edge of the plate.
Makes 4 servings.
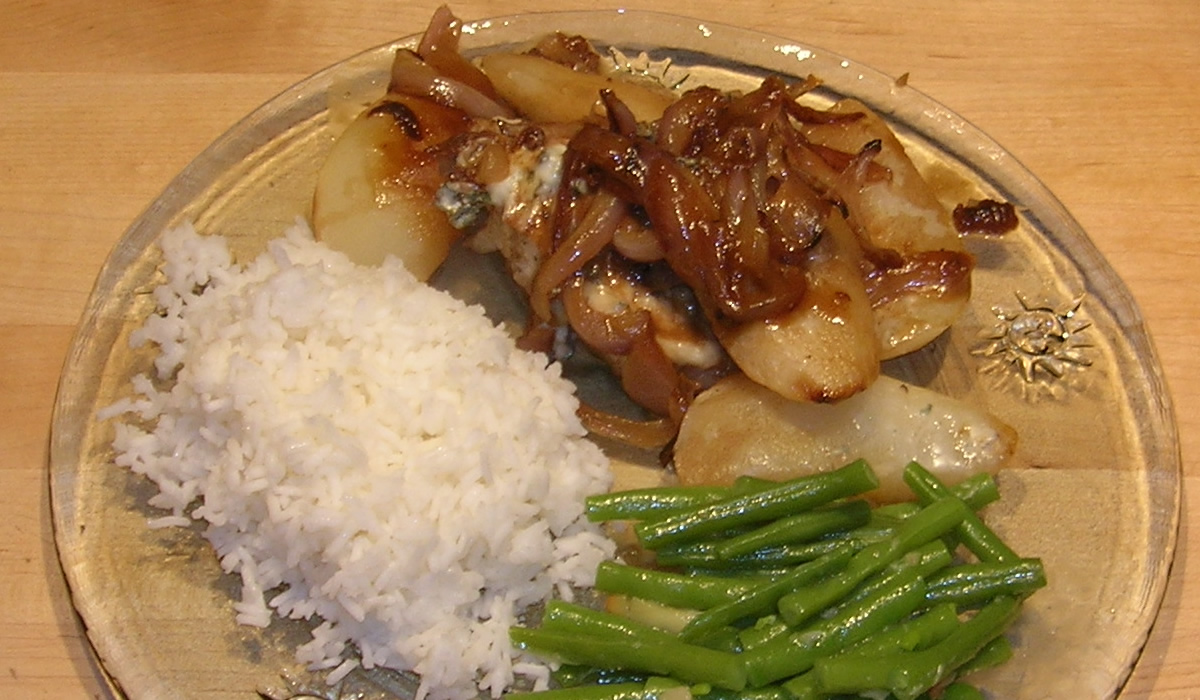
While at work, though, I thought that some gorgonzola cheese instead of the basamic reduction would probably be good, so, when I got home, I followed the basic premise of the recipe - the pork chops, red onions, and pears, but when juuuuust about done, I crumbled some gorgonzola over everything and then drizzled some 10 year old balsamic over all.
WOW! The gorgonzola really played off the pears and onions well. And the little hint of balsamic brought it all together. It was yummy.
Fresh green beans and Carolina Plantation Aromatic Rice finished the plate.

The Carolina Rice is a bit of an un-wedding gift from our friends Mike and Barbara down in South Carolina. It should have been thrown at the wedding-that-wasn't (even though we explained to them that at our advanced ages, the last thing we needed were fertility rituals.) It's a medium grain rice with a great flavor. Definitely better eaten than thrown.
They also sent up a nice big bag of Carolina Plantation grits. I'm working on a Sunday Breakfast idea...
Happy Thanksgiving, Part Deux
After a great sleep in our own bed last night, I woke early and refreshed - and ready for Thanksgiving Dinner. Of course, that meant shopping. Lancaster County Farmer's Market, here I come. It was great getting down there - my schedule pretty much keeps me from being able to shop down there regularly. I miss not having Wednesday off anymore. I made up for it, today!
First thing I needed was a turkey. I got one about 12 1/2 pounds - almost a third of the size I normally get (last year was 33.3 lbs.) And potatoes, sweet potatoes, fresh peas, rolls, and bread to make my stuffing. I had cranberries in the freezer.
Now... generally, our tradition is we decorate for Christmas the day after Thanksgiving. We've been doing it for 14 years... But... since we neither cooked Thanksgiving or were home, we had to do both today - cook dinner and decorate.
It went really easily. First thing was putting on Christmas Music. I cut up and toasted the bread for the dressing and made the cranberry sauce. While it was cooking away, we brought up decorations from the basement. And brought up decorations. And brought up decorations. We have LOTS of Christmas decorations.
I made a simple sausage stuffing, stuffed the bird, and into the oven it went.
Up went the tree and we started decorating.
And we decorated...

Victor did most of the kitchen...

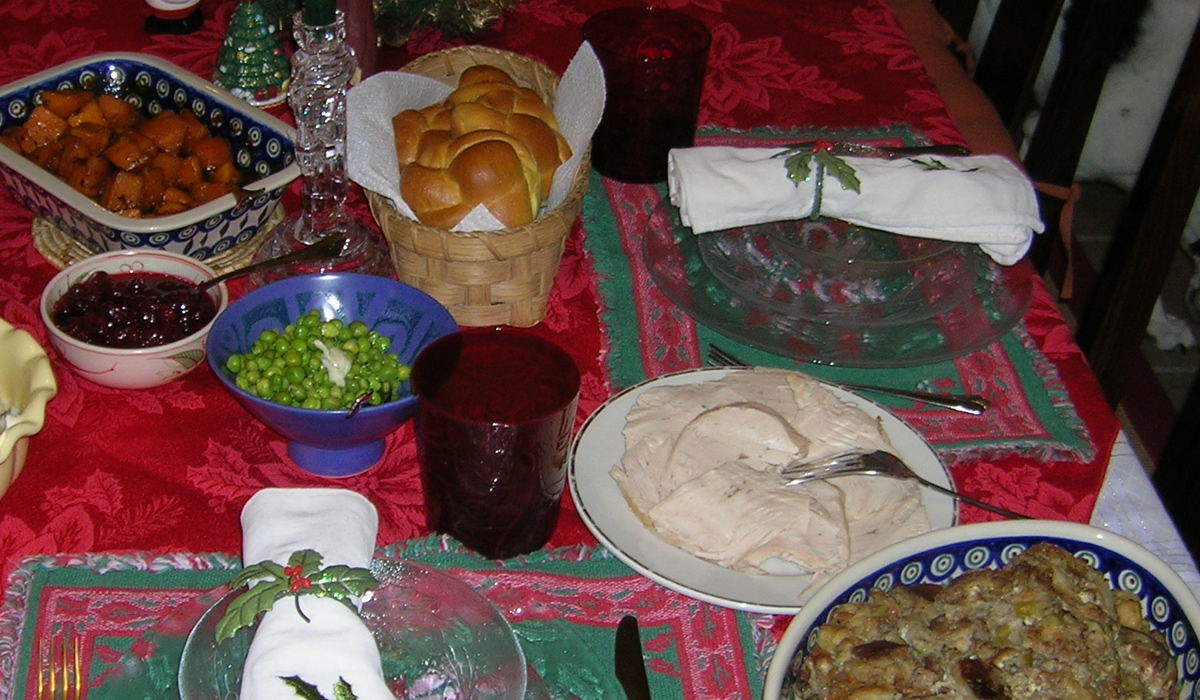
In between decorating, I'd go back into the kitchen and check on things. I pulled the turkey out and while it was resting, I made the gravy and left it on a low simmer while I did the sweet potatoes. I cubed and boiled them, then after draining them, I added butter, brown sugar, ample syrup, and a pinch of mace and cinnamon. Into the oven they went. Peas were boiled then drained and reheated with a bit of butter, salt and pepper. Made simple mashed potatoes. I almost always leave the skins on the potatoes and mash them up, but Thanksgiving calls for peeled potatoes. It's a rule. And there was only two of us. Two potatoes.

We have lots of fun Kitchen-type decorations. We usually do an apple tree every year and we have several Cooking Santa's...
And then the rest of the house becomes a free-for-all.
I do the dining room. Another tradition. And it never is the same year to year. We've been collecting Santa's for years, but as we were unwrapping stuff today, we realized that somewhere alomng the line, we've started collecting Christmas Trees, as well. No idea how that happened. After Christmas sales, I guess... So... The top of the buffet became a Christmas Tree farm this year.

And there's still another dozen in different places around the house...
The dining room table and chandelier also get over-the-top treatment. Nothing is too gaudy for this room. It's fun.

The tree is the most fun - and the first thing we actually do. Almost every ornament has a story. From family heirlooms to the first ornaments we exchanged, handmade by nieces and nephews, Waterford crystal to paper. Ecclectic doesn't even begin to describe it.

Here's a bit of a closeup...

Here are more Christmas Trees... And Santa's. Since there's no mantle, the stockings get hung with the fireplace poker. Santa understands...

The whole front window is Santa's. Scores of them. Actually, the entire living room is Santa. He's everywhere.We've never counted, but we have lots.
Tomorrow we start outside. And we have a couple of projects we'd like to get to if we have the time and energy. Ya never know.
I boiled the carcass for soup and will make that Monday. Tomorrow night is going to be Apple and Gorgonzola ravioli I bought at the Farmer's Market today. I'm thinking a simple cream sauce. We shall see...
It's great to be home!
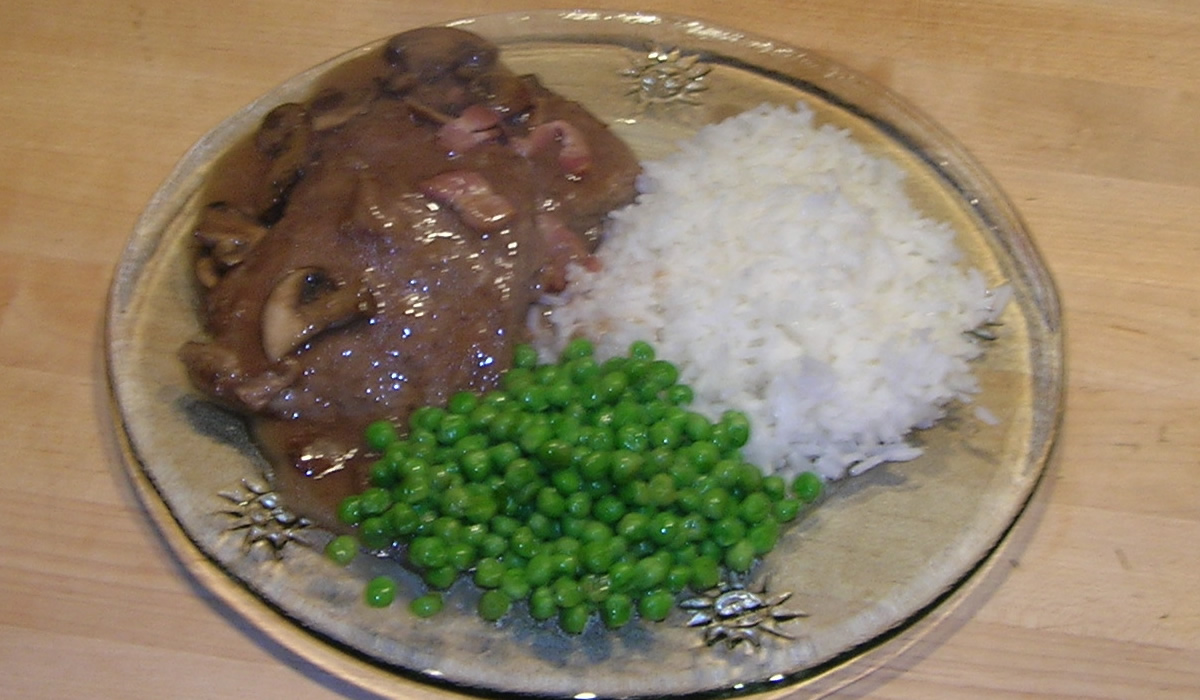
Cleaning out the 'Fridge
It's been fun getting creative with what's in the house and not going shopping! Tonight was a really simple affair - Swiss Steak with mushrooms and bacon, rice, and peas.
I had three slices of bacon sitting in the 'fridge from Sunday's breakfast, a carton of mushrooms, there are always frozen peas in the freezer, and rice is an automatic - as is the flour to make the gravy. Instant dinner.
In cooking tonight, though, I realized I was a bit too good at clearing things out... Our dog-sitter, Donna, will be here, as will Victor's mom for a couple of days this weekend. I have to make sure there's at least milk, bread, and eggs - as well as some quick meals for Nonna to just heat and eat. Nonna and Donna. Cybil the wonder-dog is going to be quite spoiled while we're away.
Methinks I shall be doing a bit of shopping after work, after all...
Plus... I plan on cooking Thanksgiving Dinner on the Saturday after... It's our traditional weekend to decorate for Christmas, so I think turkey in the oven and Christmas Carols on the stereo will be the perfect welcome home for us!
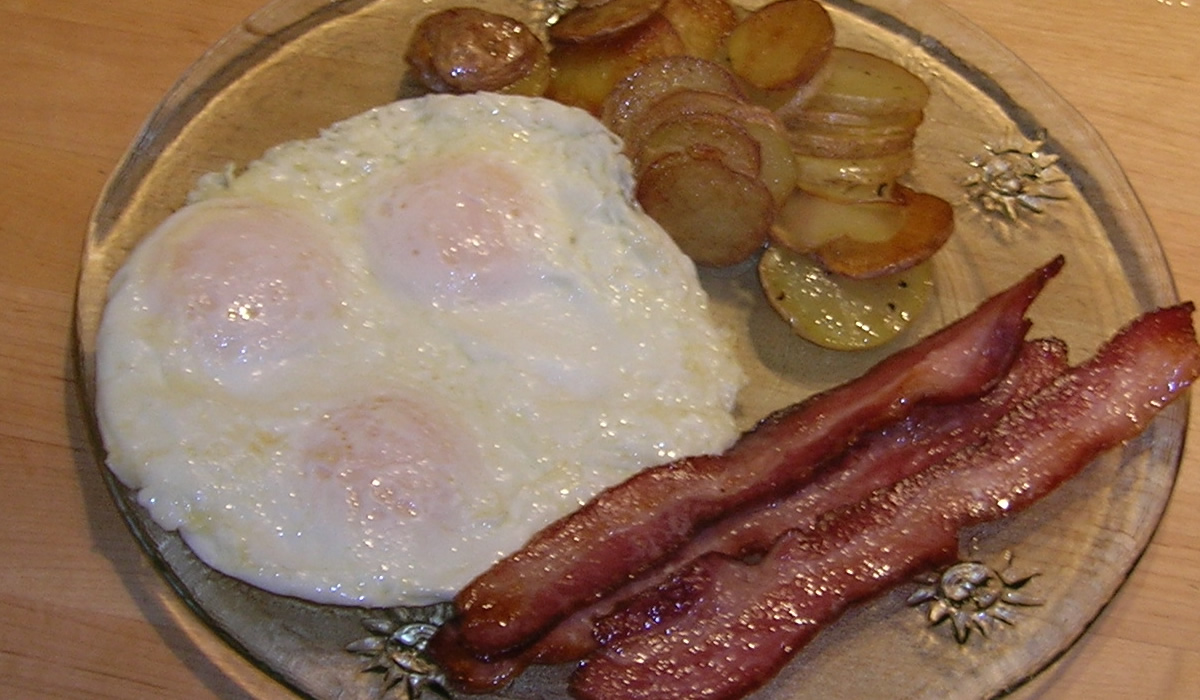
Dunky Eggs
When Victor was a little kid, his mom called fried eggs "Dunky Eggs" because they could dunk their toast into the yolks. When his nieces and nephews were born, the tradition continued. Of course, for the grand kids, she would actually cut the toast in strips for them to dunk. Grand kids always rank higher. You can spoil them and then give them back. And smart kids don't pull temper-tantrums with grandparents.
My father's version of fried eggs were cooked in a cast iron skillet in a gallon of bacon grease. They were almost deep-fried. And damn, were they good! His breakfasts were legendary. Piles of fried potatoes, bacon and toast. Not to mention the endless cups of Lady Lee coffee... But I digress...
This morning I started out with my favorite Niman Ranch bacon. I love Niman Ranch. Bill Niman started his business some 35 years ago in Marin County. It is proof that we don not need factory farms. It has grown to a network of family farms supplying quality meats. If you buy Niman Ranch meat, you can be sure the animal was humanely treated and slaughtered, that it was pasture-raised and lived outdoors in a traditional farm setting, and that it was not fed growth hormones or antibiotics. Real food, raised naturally. It's what it's supposed to be all about.
The potatoes were baby yukon gold's, sliced and fried in a bit of grapeseed oil. garlic, salt, and pepper. The eggs were fried in butter - Plugra, of course - and the whole wheat bread used for the toast was free of partially-hydrogenated fats and high-fructose corn syrup. I don't care what those commercials - put out by the corn industry - say; high-fructose corn syrup is evil and I will not consume it in any way, shape, or form.
Real food, real ingredients, minimally processed... Breakfast was great!
Pheasant with Figs and Apricots
Back when we lived in San Leandro, our next door neighbor, Bruce, belonged to a hunting club. Every now and again during season, he would show up on our doorstep with fresh pheasants. I LOVED those birds. They were all cleaned and dressed. All I had to do was figure out how I was going to cook them. I loved it. We found one particular recipe from Lidia Bastianich that we liked and made it often. We made it for my family one holiday and my nieces and nephews asked for it every time we had them over for dinner. It was a hit.
Alas, we moved and the free birds were no more. Until today.
I've been chatting with one of our customers, Bob, for quite a few years, now. Bob is a fairly local guy who has been hunting locally all of his life. He's watched the area go from wide open and wild to housing developments, and the animals go from free range and wild to hemmed in by housing and traffic. He's a fun guy to talk with. I'm not a hunter myself, and am generally anti-gun, but understand the difference between hunting and eating the catch, and shooting animals out of airplanes and helicopters. Hunting rifles and AK-47's are different. And I most definitely like the taste of food that didn't come from a refrigerated dislpay case in a supermarket.
So... enter Bob today, with six beautiful pheasant breasts! I was psyched! There was no question that we were eating pheasant tonight. My only dilemna was how...
The Lidia recipe is fairly time consuming, I think - it's been a while since I made it (Victor's mom's 75th Birthday party. I paid $20 bucks a piece for 4 pheasants at Genuardi's...) Soi I did a quick search on Epicurious. This recipe came up:
Roasted Scottish Pheasants with Apricots and Dates '21' Club
Gourmet | November 1995
- 1/2 cup dried apricots
- 1/2 cup dry white wine
- 1/4 cup Grand Marnier or other orange liqueur
- 1/4 cup fresh lime juice (from about 2 large limes)
- 2 tablespoons sugar
- two 2 1/2- to 3-pound pheasants (preferably wild Scottish)*
- freshly ground black pepper to taste
- 2 teaspoons dried thyme, crumbled
- 2 bay leaves
- vegetable oil for brushing pheasants
- 1/2 cup pitted dates, chopped
- Garnish: fresh thyme sprigs
In a small heatproof bowl cover apricots with boiling water and soak 10 minutes. Drain apricots and cut into quarters. In a small saucepan simmer wine, liqueur, lime juice, and sugar 5 minutes.
Preheat oven to 375°F.
Cut off legs of pheasants and reserve for another use. Sprinkle pheasants inside and out with pepper and salt to taste. Put 1 teaspoon thyme and 1 bay leaf in cavity of each pheasant and close cavities with skewers or toothpicks so that pheasants hold their shape.
Brush pheasants with oil and in a roasting pan arrange, breast side down. Roast pheasants 20 minutes and discard any fat in roasting pan. Turn pheasants over and to pan add apricots, wine mixture, and dates. Roast pheasants, adding about 1/2 cup water if all liquid evaporates, 25 minutes more, or until thermometer inserted in thickest part of breast registers 160°F. Let pheasants stand 10 minutes.
Transfer pheasants to a cutting board and cut each in half. Serve pheasants with apricot date sauce and garnish with thyme.
A typical Gourmet recipe. Convoluted and time-consuming. But I liked the sauce concept. I'm a sweet/savory kind of guy.
So..... here's what I did:
I pulled the meat from the bone, checking for shot (Bob said there may be a little, so be wary.) Into a skillet it went with a bit of olive oil and shallots.
After it browned a bit, I added:
- 2 cups red wine
- 1/2 cup brandy
- juice of 1 orange
- splash of lime juice
- 1/2 cup dried apricots
- 1/2 cup dried figs
- 2 bay leaves
- 1 tsp herbs d'provence
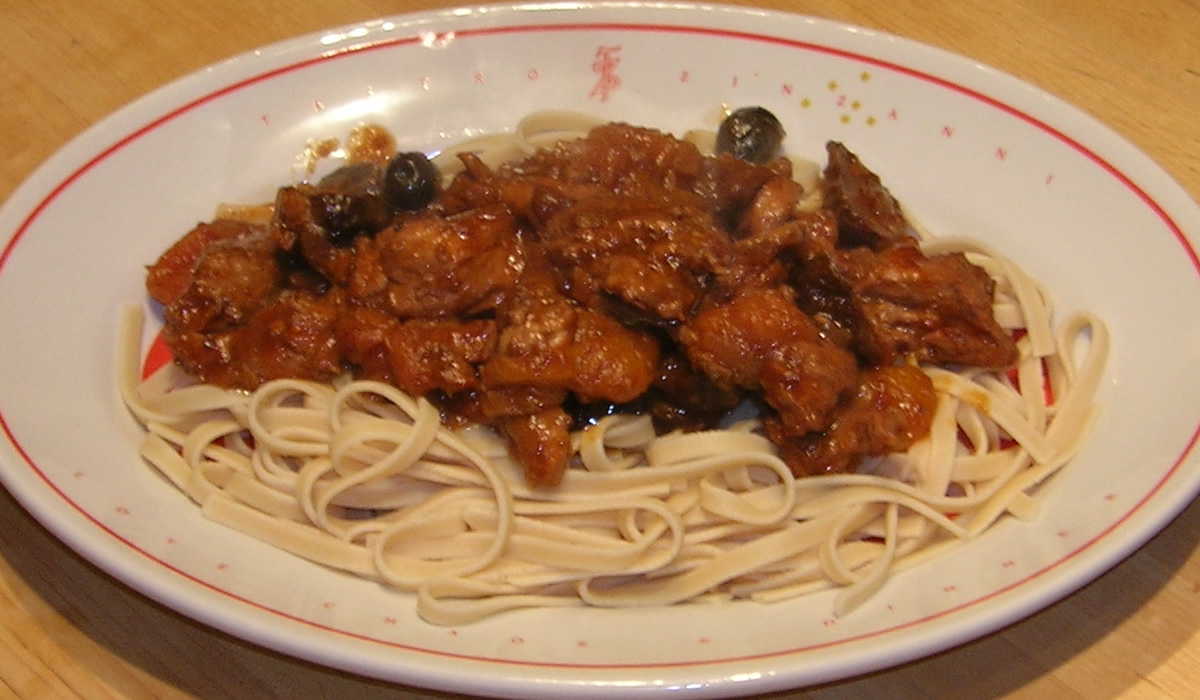
I let it simmer a bit but it wasn't quite there. I added an 8oz can of tomato sauce and a handful of oil-cured olives to cut the sweetness a bit, and let it cook down and thicken.
All I can say is "wow." It came our really good! I wanted to serve it over spaghetti - and didn't have any in the house! (I had angel hair, 2 types of fettuccine, ziti, mostaccioli, and half a dozen others - but no spaghetti.) So, fettuccine it was. And a damn fine choice, I might add!
There is enough left for Victor to have lunch tomorrow, too. Always a bonus. Thanks, Bob!
Now I think I'm going to go in and make a pumpkin pie.
Thanksgiving in a Skillet
I think I've mentioned that we're going to be in Chicago for Thanksgiving. Well... at Union Station, anyway, changing trains with a three hour layover on our cross-country trek from San Francisco back to Philadelphia. Our friends Kate and Lori are going to meet us there for dinner. It's going to be a great time.
But celebrating Thanksgiving in Chicago means no Thanksgiving dinner at home. No leftover turkey, no turkey soup, no turkey sandwiches on squishy white bread...
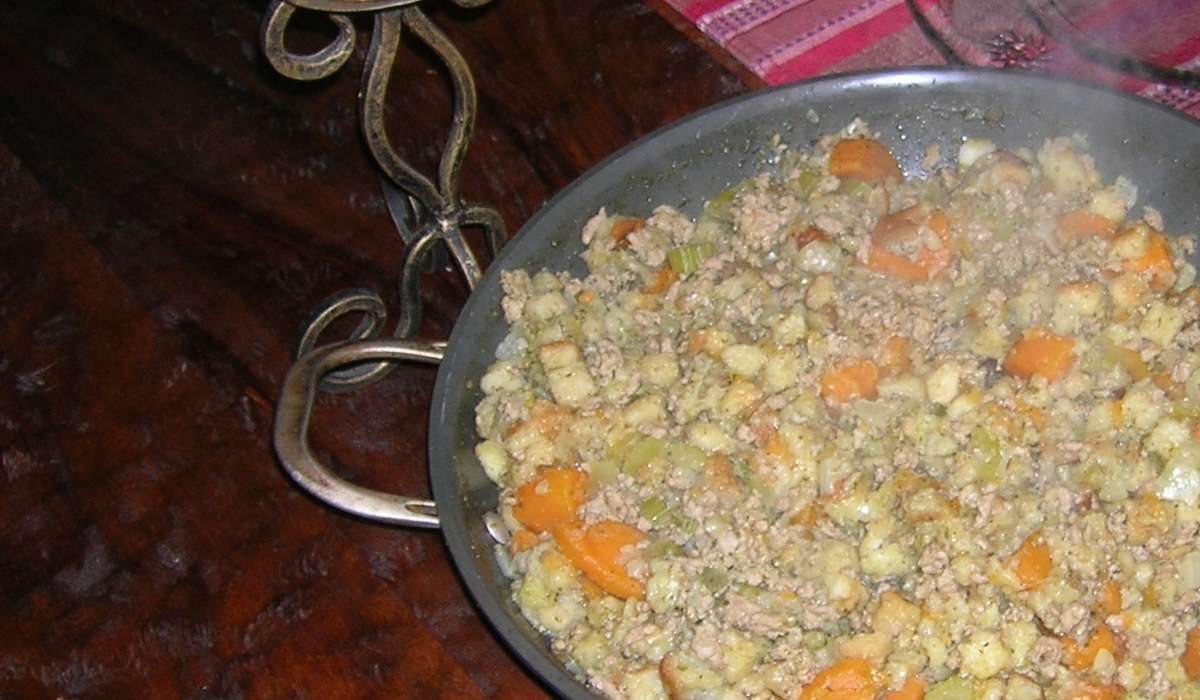
Enter Thanksgiving in a skillet. It's the perfect combination for those who want the taste of Thanksgiving without the hassle.
- 1 pkg Ground Turkey
- 1 medium Onion, diced
- 1/2 stick butter
- 1 or 2 sweet potatoes, diced
- 1 pkg Stuffing Mix
- 3 cups broth
Melt butter in skillet with cover. Add onion and ground turkey. Cook until onions are soft and turkey is cooked through.
Add diced yams, broth and stuffing seasoning packet. Cover and bring to a boil. Simmer until yams are cooked through.
Add stuffing. Turn off heat. leave skillet covered for 3-4 minutes. uncover and stir.
It's a great nosh. Ans makes enough for those all-important leftovers!
Pumpkin Soup
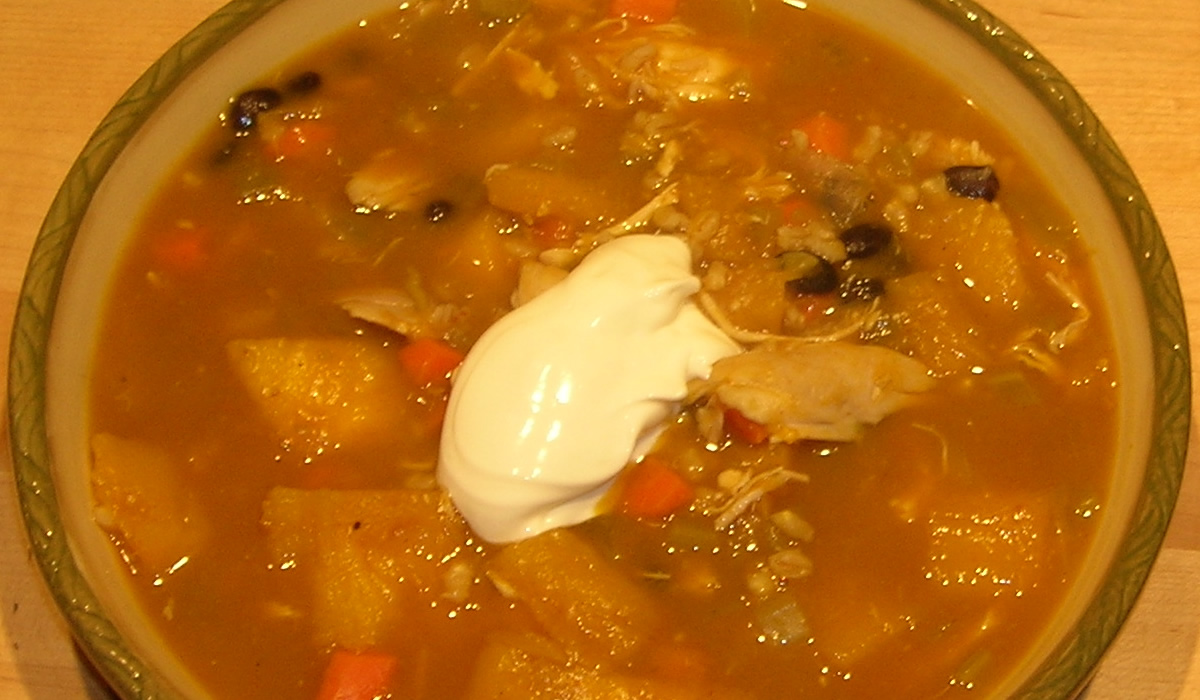
Dinner tonight was just soooo good! Pumpkin Soup with chicken, barley, black beans... big chunks of fresh pumpkin... YUM!
It's Autumn. I've had a pumpkin fixation for a while, now... Pumpkin pie, pumpkin cake, an earlier pumpkin soup... but yesterday I saw the canned pumpkin had finally arrived at work, the green chilis had finally arrived, and I was ready for more pumpkin soup! I made three variations at work and settled on a vegetarian version to demo in a couple of weeks. In the meantime, I brought a chicken home to make a heartier version at home.
I sauteed some onions and garlic and added the bird, covered with wine and water and let simmer a few hours. I pulled out the bird, reduced the broth a bit more, then everything went into the 'fridge after it cooled.
Today when I got home, I made soup:
- 4 carrots, peeled and diced
- 1 cup barley, cooked separately
- 1 sugar pumpkin, roasted
- 2 cans pumpkin
- 2 cans green chilis
- 1 can black beans
- 4 stalks celery, diced
- cumin
- chipotle powder
- garlic powder
- salt and pepper
Finally, I cubed the fresh pumpkin and added it. I checked for seasoning and into bowls it went with a dollup of Sour Cream on top.
I cut the pumpkin in half, scooped out seeds and roasted about 40 minutes at 350°.
In my soup pot, I sauteed the celery and carrot about 5 minutes, added a splash of white wine, and then the chicken stock. I let it simmer and then added 2 cans of pumpkin and 2 cans of green chilis, cumin, chipotle powder and garlic. And a bit of salt and pepper.
I shredded the chicken and added to the pot. Then the cooked barley went in... and the beans.
I made a BIG pot - enough for dinner tomorrow night, too!
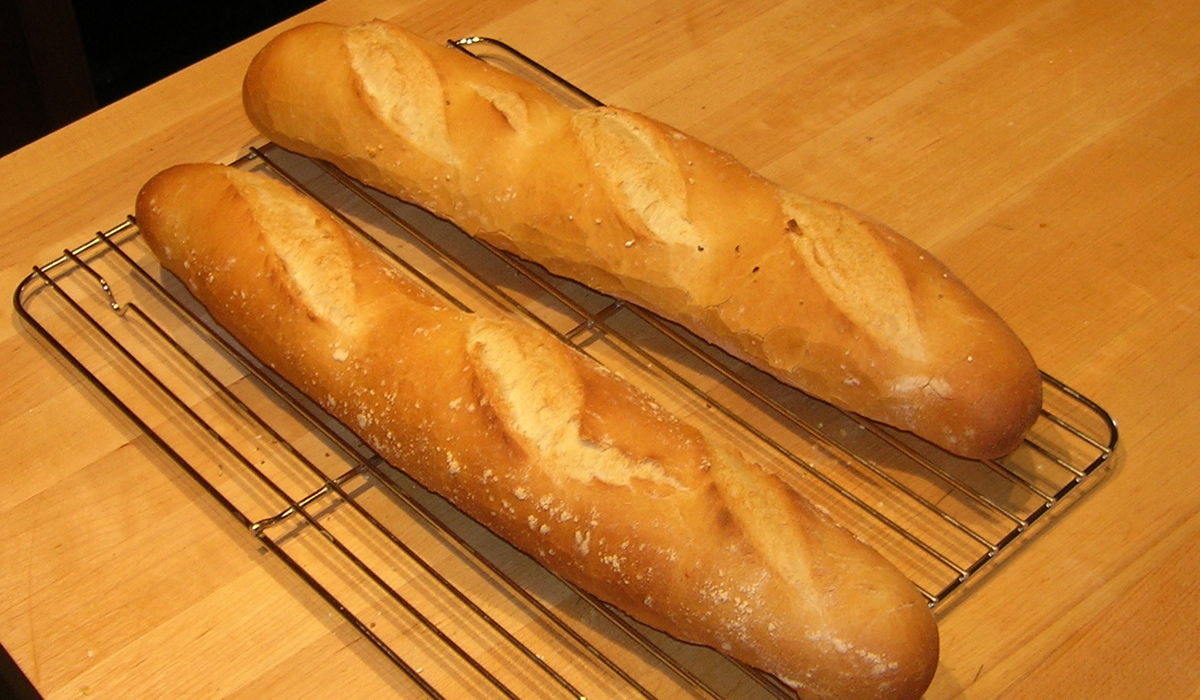
Fresh French Bread
I brought home a ton of cheese yesterday. It happens every time I work the cheese section in the morning. I just go crazy. I want everything and... well... I like cheese. It's one of the most versatile foods in the universe.
I decided that good cheese needed good bread, so I set out this morning to make Julia Child's French Bread. It's a bit of a long recipe...
Pain Francais (French Bread)
(From Mastering the Art of French Cooking: Volume Two by Julia Child and Simone Beck)
Recipe Quantity:
3 - baguettes (24” x 2”) or batards (16” x 3”) or
6 – short loaves, ficelles, 12 – 16” x 2” or
3 – round loaves, boules, 7 – 8” in diameter or
12 – round or oval rolls, petits pains or
1 – large round or oval loaf, pain de menage or miche; pain boulot
Recipe Time: 7 – 9 hours
Additional Information About the Recipe Flour: French bakers make plain French bread out of unbleached flour that has gluten strength of 8 to 9 per cent. Most American all-purpose flour is bleached and has slightly higher gluten content as well as being slightly finer in texture. It is easier to make bread with French flour than with American flour.
Bakers’ Oven Versus Home Ovens: Bakers’ ovens are so constructed that one slides the formed bread dough from a wooden panel right onto the hot, fire-brick oven floor, a steam injection system humidifies the oven for the first few minutes of baking. Steam allows the yeast to work a little longer in the dough and this, combined with the hot baking surface, produced an extra push of volume. In addition, steam coagulating the starch on the surface of the dough gives the crust its characteristic brown color. Although you can produce a good loaf of French bread without steam or a hot baking surface, you will a larger and handsomer loaf when you simulate professional conditions.
Stand Mixer Mixing and Kneading of French Bread Dough: French bread dough is too soft to work in the electric food processor, but the heavy-duty mixer with dough hook works perfectly. The double-hook attachment that comes with some hand held mixers and the hand-cranking bread pails are slower and less efficient, to our mind, than hand kneading. In any case, when you are using electricity, follow the steps in the recipe as outlined, including the rests; do not over-knead and for the heavy duty mixer, do not go over a moderate speed of number 3 or 4, or you risk breaking down the gluten in the dough.
Equipment Needed: Unless you plan to go into the more elaborate simulation of a baker’s oven, you need no unusual equipment for the following recipe. Here are the requirements, some of which may sound odd but will explain themselves when you read the recipe.
- 4 to 5 quart mixing bowl with fairly vertical rather than outward slanting sides
- a kneading surface of some sort, 1 1/2 to 2 square feet
- a rubber spatula or either a metal scraper or a stiff wide metal spatula
- 1 to 2 unwrinkled canvas pastry cloths or stiff linen towels upon which the dough may rise
- a stiff piece of cardboard or plywood 18 – 20 inches long and 6 – 8 inches wide, for unmolding dough from canvas to baking sheet
- finely ground cornmeal or pasta pulverized in an electric blender to sprinkle on unmolding board so as to prevent dough from sticking
- the largest baking sheet that will fit in your oven
- a razor blade or extremely sharp knife for slashing the top of the dough
- a soft pastry brush or fine spray atomizer for moistening dough before and during baking
- a room thermometer to verify rising temperature
Making French Bread:
Step 1: The Dough Mixture – le fraisage (or frasage)
- 1 cake (0.6 ounce) (20grams) fresh yeast or 1 package dry active yeast
- 1/3 cup (75ml) warm water, not over 100 degrees F/38C in a glass measure
- 3 1/2 cup (about 1 lb) (490 gr) all purpose flour, measured by scooping dry measure cups into flour and sweeping off excess
- 2 1/4 tsp (12 gr) salt
- 1 1/4 cups (280 - 300ml) tepid water at 70 – 74 degrees/21 - 23C
Both Methods: Stir the yeast in the 1/3 cup warm water and let liquefy completely while measuring flour into mixing bowl. When yeast has liquefied, pour it into the flour along with the salt and the rest of the water.
Hand Method: Stir and cut the liquids into the flour with a rubber spatula, pressing firmly to form a dough and making sure that all the bits of flour and unmassed pieces are gathered in. Turn dough out onto kneading surface, scraping bowl clean. Dough will be soft and sticky.
Stand Mixer: Combine the ingredients using the dough hook.
Both Methods: Turn dough out onto kneading surface, scraping bowl clean. Dough will be soft and sticky. Let the dough rest for 2 – 3 minutes while you wash and dry the bowl (and the dough hook if using a stand mixer).
Step 2: Kneading – petrissage
The flour will have absorbed the liquid during this short rest, and the dough will have a little more cohesion for the kneading that is about to begin. Use one hand only for kneading and keep the other clean to hold a pastry scrapper, to dip out extra flour, to answer the telephone, and so forth. Your object in kneading is to render the dough perfectly smooth and to work it sufficiently so that all the gluten molecules are moistened and joined together into an interlocking web. You cannot see this happen, of course, but you can feel it because the dough will become elastic and will retract into shape when you push it out.
Hand Method: Start kneading by lifting the near edge of the dough, using a pastry scraper or stiff wide spatula to help you if necessary, and flipping the dough over onto itself. Scrape dough off the surface and slap it down; lift edge and flip it over again, repeating the movement rapidly.
In 2 -3 minutes the dough should have enough body so that you can give it a quick forward push with the heel of your hand as you flip it over.
Continue to knead rapidly and vigorously in this way. If the dough remains too sticky, knead in a sprinkling of flour. The whole kneading process will take 5 – 10 minutes, depending on how expert you become.
Shortly after this point, the dough should have developed enough elasticity so it draws back into shape when pushed, indicating the gluten molecules have united and are under tension like a thin web of rubber; the dough should also begin to clean itself off the kneading surface, although it will stick to your fingers if you hold a pinch of dough for more than a second or two.
Stand Mixer: Knead.
Both Methods: Let dough rest for 3 – 4 minutes. Knead by hand for a minute. The surface should now look smooth; the dough will be less sticky but will still remain soft. It is now ready for its first rise.
Step 3: First Rising – pointage premier temps (3-5 hours at around 70 degrees)
You now have approximately 3 cups of dough that is to rise to 3 1/2 times its original volume, or to about 10 1/2 cups. Wash and fill the mixing bowl with 10 1/2 cups of tepid water (70 – 80 degrees) and make a mark to indicate that level on the outside of the bowl. Note, that the bowl should have fairly upright sides; if they are too outward slanting, the dough will have difficulty in rising. Pour out the water, dry the bowl, and place the dough in it (Mary and Sara Note: Very lightly grease the bowl with butter or kitchen spray as well to prevent the risen dough from sticking to the bowl).
Slip the bowl into a large plastic bag or cover with plastic, and top with a folded bath towel. Set on a wooden surface, marble or stone are too cold. Or on a folded towel or pillow, and let rise free from drafts anyplace where the temperature is around 70 degrees. If the room is too hot, set bowl in water and keep renewing water to maintain around 70 degrees. Dough should take at least 3 – 4 hours to rise to 10 1/2 cups. If temperature is lower than 70 degrees, it will simply take longer.
When fully risen, the dough will be humped into a slight dome, showing that the yeast is still active; it will be light and spongy when pressed. There will usually be some big bubbly blisters on the surface, and if you are using a glass bowl you will see bubbles through the glass.
Step 4: Deflating and Second Rising – rupture; pointage deuxieme temps (1 1/2 to 2 hours at around 70 degrees)
The dough is now ready to be deflated, which will release the yeast engendered gases and redistribute the yeast cells so that the dough will rise again and continue the fermentation process.
With a rubber spatula, dislodge dough from inside of bowl and turn out onto a lightly floured surface, scraping bowl clean. If dough seems damp and sweaty, sprinkle with a tablespoon of flour.
Lightly flour the palms of your hands and flatten the dough firmly but not too roughly into a circle, deflating any gas bubbles by pinching them.
Lift a corner of the near side and flip it down on the far side.
Do the same with the left side, then the right side. Finally, lift the near side and tuck it just under the edge of the far side. The mass of dough will look like a rounded cushion.
Slip the sides of your hands under the dough and return it to the bowl. Cover and let rise again, this time to not quite triple, but again until it is dome shaped and light and spongy when touched.
Step 5: Cutting and resting dough before forming loaves
Loosen dough all around inside of bowl and turn out onto a lightly floured surface. Because of its two long rises, the dough will have much more body. If it seems damp and sweaty, sprinkle lightly with flour.
Making clean, sure cuts with a large knife or a bench scraper, divide the dough into:
- 3 equal pieces for long loaves (baguettes or batards) or small round loaves (boules only)
- 5 – 6 equal pieces for long thin loaves (ficelles)
- 10 – 12 equal pieces for small oval rolls (petits pains, tire-bouchons) or small round rolls (petits pains, champignons)
- 2 equal pieces for medium round loaves (pain de menage or miche only)
- If you making one large round loaf (pain de menage, miche, or pain boulot), you will not cut the dough at all and just need to follow the directions below.
After you have cut each piece, lift one end and flip it over onto the opposite end to fold the dough into two; place dough at far side of kneading surface. Cover loosely with a sheet of plastic and let rest for 5 minutes before forming. This relaxes the gluten enough for shaping but not long enough for dough to begin rising again.
While the dough is resting, prepare the rising surface; smooth the canvas or linen towelling on a large tray or baking sheet, and rub flour thoroughly into the entire surface of the cloth to prevent the dough from sticking
Step 6: Forming the loaves – la tourne; la mise en forme des patons
Because French bread stands free in the oven and is not baked in a pan, it has to be formed in such a way that the tension of the coagulated gluten cloak on the surface will hold the dough in shape.
For Long Loaves - The Batard: (Baguettes are typically much too long for home ovens but the shaping method is the same)
After the 3 pieces of dough have rested 5 minutes, form one piece at a time, keeping the remaining ones covered.
Working rapidly, turn the dough upside down on a lightly floured kneading surface and pat it firmly but not too roughly into an 8 to 10 inch oval with the lightly floured palms of your hands. Deflate any gas bubbles in the dough by pinching them.
Fold the dough in half lengthwise by bringing the far edge down over the near edge.
Being sure that the working surface is always lightly floured so the dough will not stick and tear, which would break the lightly coagulated gluten cloak that is being formed, seal the edges of the dough together, your hands extended, thumbs out at right angles and touching.
Roll the dough a quarter turn forward so the seal is on top.
Flatten the dough again into an oval with the palms of your hands.
Press a trench along the central length of the oval with the side of one hand.
Fold in half again lengthwise.
This time seal the edges together with the heel of one hand, and roll the dough a quarter of a turn toward you so the seal is on the bottom.
Now, by rolling the dough back and forth with the palms of your hands, you will lengthen it into a sausage shape. Start in the middle, placing your right palm on the dough, and your left palm on top of your right hand.
Roll the dough forward and backward rapidly, gradually sliding your hands towards the two ends as the dough lengthens.
Deflate any gas blisters on the surface by pinching them. Repeat the rolling movement rapidly several times until the dough is 16 inches long, or whatever length will fit on your baking sheet. During the extension rolls, keep circumference of dough as even as possible and try to start each roll with the sealed side of the dough down, twisting the rope of dough to straighten the line of seal as necessary. If seal disappears, as it sometimes does with all purpose flour, do not worry.
Place the shaped piece of dough, sealed side up, at one end of the flour rubbed canvas, leaving a free end of canvas 3 to 4 inches wide.
The top will crust slightly as the dough rises; it is turned over for baking so the soft, smooth underside will be uppermost.
Pinch a ridge 2 1/2 to 3 inches high in the canvas to make a trough, and a place for the next piece. Cover dough with plastic while you are forming the rest of the loaves.
After all the pieces of dough are in place, brace the two sides of the canvas with long rolling pins, baking sheets or books, if the dough seems very soft and wants to spread out. Cover the dough loosely with flour rubbed dish towel or canvas, and a sheet of plastic. Proceed immediately to the final rising, next step.
For Long Thin Loaves – Fincelles: Follow the steps above but making thinner sausage shapes about 1/2 inch in diameter. When they have risen, slash as with the Batard.
For Oval Rolls – Petits Pains, Tire-Bouchons: Form like batards, but you will probably not have to lengthen them at all after the two foldings and sealings. Place rolls on a floured canvas about 2 – 4” apart and cover with plastic to rise. When they have risen, make either 2 parallel slashes or a single slash going from one end to the other.
For Small, Medium, or Large Round Loaves – Pain de Menage, Miches, Boules: The object here is to force the cloak of coagulated gluten to hold the ball of dough in shape: the first movement will make cushion; the second will seal and round the ball, establishing surface tension.
Place the dough on a lightly floured surface.
Lift the left side of the dough with the side of your left hand and bring it down almost to the right side.
Scoop up the right side and push it back almost to the left side. Turn the dough a quarter turn clockwise and repeat the movement 8 – 10 times. The movement gradually smooths the bottom of the dough and establishes the necessary surface tension; think of the surface of the dough as if it were a fine sheet of rubber you were stretching in every direction.
Turn the dough smooth side up and begin rotating it between the palms of your hands, tucking a bit of the dough under the ball as you rotate it. In a dozen turns you should have a neatly shaped ball with a little pucker of dough, le cle, underneath where all the edges have joined together.
Place the dough pucker side up in a flour-rubbed canvas; seal the pucker by pinching with your fingers. Flour lightly, cover loosely and let rise to almost triple its size. After unmolding upside down on the baking sheet, slash with either a long central slash, two long central slashes that cross at right angles, or a semi-circular slash around half the circumference.
For Small Round Rolls – Petits Pains, Champignons: The principles are the same here as for the preceding round loaves, but make the cushion shape with your fingers rather than the palms of your hands.
For the second stage, during which the ball of dough is rotated smooth side up, roll it under the palm of one hand, using your thumb and little finger to push the edges of the dough underneath and to form the pucker, where the edges join together
Place the formed ball of dough pucker side up on the flour rubbed canvas and cover loosely while forming the rest. Space the balls 2 inches apart. When risen to almost triple its size, lift gently with lightly floured fingers and place pucker side down on baking sheet. Rolls are usually too small for a cross so make either one central slash or the semi-circular cut.
For Large Oval Loaf – Pain Boulot: Follow the directions for the round loaves except instead of rotating between the balms of your hands and tucking to form a round loaf, continue to turn the dough from the right to the left, tucking a bit of each end under the oblong loaf. In a dozen turns you should have a neatly shaped oval with tow little puckers of dough, le cles, underneath where all the edges of have joined together.
Place the dough pucker sides up in a flour-rubbed canvas; seal the puckers by pinching with your fingers. Flour lightly, cover loosely and let rise to almost triple its size. After unmolding upside down on the baking sheet, slash with parallel slashes going diagonally across the top starting from the upper left and going to the lower right.
Step 7: Final Rise – l’appret - 1 1/2 to 2 1/2 hours at around 70 degrees
The covered dough is now to rise until almost triple in volume; look carefully at its pre-risen size so that you will be able to judge correctly. It will be light and swollen when risen, but will still feel a little springy when pressed.
It is important that the final rise take place where it is dry; if your kitchen is damp, hot, and steamy, let the bread rise in another room or dough will stick to the canvas and you will have difficulty getting it off and onto another baking sheet. It will turn into bread in the oven whatever happens, but you will have an easier time and a better loaf if you aim for ideal conditions.
Preheat oven to 450 degrees about 30 minutes before estimated baking time.
Step 8: Unmolding risen dough onto baking sheet – le demoulage.
The 3 pieces of risen dough are now to be unmolded from the canvas and arranged upside down on the baking sheet. The reason for this reversal is that the present top of the dough has crusted over during its rise; the smooth, soft underside should be uppermost in the oven so that the dough can expand and allow the loaf its final puff of volume. For the unmolding you will need a non-sticking intermediate surface such as a stiff piece of cardboard or plywood sprinkled with cornmeal or pulverized pasta.
Remove rolling pins or braces. Place the long side of the board at one side of the dough; pull the edge of the canvas to flatten it; then raise and flip the dough softly upside down onto the board.
Dough is now lying along one edge of the unmolding board: rest this edge on the right side of a lightly buttered baking sheet. Gently dislodge dough onto baking sheet, keeping same side of the dough uppermost: this is the soft smooth side, which was underneath while dough rose on canvas. If necessary run sides of hands lightly down the length of the dough to straighten it. Unmold the next piece of dough the same way, placing it to the left of the first, leaving a 3 inch space. Unmold the final piece near the left side of the sheet.
Step 9: Slashing top of the dough – la coupe.
The top of each piece of dough is now to be slashed in several places. This opens the covering cloak of gluten and allows a bulge of dough underneath to swell up through the cuts during the first 10 minutes of baking, making decorative patterns in the crust. These are done with a blade that cuts almost horizontally into the dough to a depth of less than half an inch. Start the cut at the middle of the blade, drawing toward you in a swift clean sweep. This is not quite as easy as it sounds, and you will probably make ragged cuts at first; never mind, you will improve with practice. Use an ordinary razor blade and slide one side of it into a cork for safety; or buy a barbers straight razor at a cutlery store.
For a 16 to 18 inch loaf make 3 slashes. Note that those at the two ends go straight down the loaf but are slightly off centre, while the middle slash is at a slight angle between the two. Make the first cut at the far end, then the middle cut, and finally the third. Remember that the blade should lie almost parallel to the surface of the dough.
Step 10: Baking – about 25 minutes; oven preheated to 450 degrees (230 degrees C).
As soon as the dough has been slashed, moisten the surface either by painting with a soft brush dipped in cold water, or with a fine spray atomizer, and slide the baking sheet onto rack in upper third of preheated oven. Rapidly paint or spray dough with cold water after 3 minutes, again in 3 minutes, and a final time 3 minutes later. Moistening the dough at this point helps the crust to brown and allows the yeast action to continue in the dough a little longer. The bread should be done in about 25 minutes; the crust will be crisp, and the bread will make a hollow sound when thumped.
If you want the crust to shine, paint lightly with a brush dipped in cold water as soon as you slide the baking sheet out of oven.
Step 11: Cooling – 2 to 3 hours.
Cool the bread on a rack or set it upright in a basket or large bowl so that air can circulate freely around each piece. Although bread is always exciting to eat fresh from the oven, it will have a much better taste when the inside is thoroughly cool and has composed itself.
Step 12: Storing French bread
Because it contains no fats or preservatives of any kind, French bread is at its best when eaten the day it is baked. It will keep for a day or two longer, wrapped airtight and refrigerated, but it will keep best if you freeze it – let the loaves cool first, then wrap airtight. To thaw, unwrap and place on a baking sheet in a cold oven; heat the oven to 400 degrees. In about 20 minutes the crust will be hot and crisp, and the bread thawed. The French, of course, never heat French bread except possibly on Monday, the baker’s holiday, when the bread is a day old.
Step 13: Canvas housekeeping
After each bread session, if you have used canvas, brush it thoroughly to remove all traces of flour and hang it out to dry before putting away. Otherwise the canvas could become mouldy and ruin your next batch of dough.
The Simulated Bakers’ Oven
Baking in the ordinary way, as described in the preceding recipe, produces an acceptable loaf of bread but does not nearly approach the glory you can achieve when you turn your home oven into a baker’s oven. Merely providing yourself with the proper amount of steam, if you can do nothing else, will vastly improve the crust, the color, the slash patterns, and the volume of your bread; steam is only a matter of plopping a heated brick or stone into a pan of water in the bottom of the oven. The second provision is a hot surface upon which the naked dough can bake; this gives that added push of volume that improves both the appearance and the slash patterns. When you have the hot baking surface, you will then also need a paddle or board upon which you can transfer dough from canvas to hot baking surface. For the complete set up here is you should have, and any building-supply store stocks these items.
For the hot baking surface: Metal will not do as a hot baking surface because it burns the bottom of the dough. The most practical and easily obtainable substance is ordinary red floor tiles 1/4” thick. They come in various sizes such as 6 x 6, 6 x 3, and you only need enough to line the surface of an oven rack. Look them up under Tiles in your Directory, and ask for “quarry tiles” their official name.
For unmolding the risen dough from its canvas: A piece of 3/16 inch plywood about 20 inches wide.
For sliding the dough onto the hot tiles: When you are doing 3 long loaves, you must slide them together onto the hot tiles; to do so you unmold them one at a time with one board and arrange them side by side on the second board, which takes place on the baker’s paddle, la pelle. Buy a piece of plywood slightly longer but 2 inches narrower than your oven rack.
To prevent dough from sticking to unmolding and sliding boards: White cornmeal or small dried pasta pulverized in the electric blender until it is the consistency of table salt. This is called fleurage.
The steam contraption: Something that you can heat to sizzling hot on top of the stove and then slide into a pan of water in the oven to make a great burst of steam: a brick, a solid 10lb rock, piece of cast iron or other metal. A 9 x 12 inch roasting pan 2 inches deep to hold an inch of water and the hot brick.
+++++++++++++++++++++++++
Okay. Did you get all that?!?
Julia did make this sound a bit more complex that it actually is. On the other hand, I've made a few (thousand) loaves of bread in my time and am not intimidated by long sets of instructions. It's only bread. The ingredients are still relatively inexpensive. The very worst thing that could happen is it wouldn't be as good as Julia's. Oh well.
But... not to worry. The bread was every bit as good as Julia would have baked, and I know she would have enjoyed a slice or two.
Now... getting back to that cheese...

I did mention I went a little crazy with the cheeses... We had:
- Triple Cream Brie
- Saint Andre
- 3 kinds of chevere (plain, 4 pepper, and garlic and herb)
- 3-year-aged Cheddar
- Cotswold (A double Glouster with onions and chives)
- Blue Castello
And I grilled a flank steak and served thin slices of steak with the cheeses and bread. Tres fabu!
Oh. And while I was waiting for dough to rise this morning, I made the first Pumpkin Pies of the season!

Perfect Pumpkin Pie
- 3/4 cup granulated sugar
- 1/2 teaspoon salt
- 2 teaspoon ground cinnamon
- 1/2 teaspoon ground ginger
- 1/4 teaspoon ground cloves
- 1/4 teaspoon freshly ground nutmeg
- 2 large eggs
- 1 can (15 oz.) pumpkin
- 1 can (12 fl. oz.) evaporated milk
- 1 unbaked 10" pie shell
- Whipped cream
Preheat oven to 425°. Beat eggs, sugar, and spices in large bowl. Add pumpkin amd mix well. Gradually stir in evaporated milk.
Pour into pie shell. Bake at 425° for 15 minutes. Reduce temperature to 350° and bake for 40 to 50 minutes or until knife inserted near center comes out clean. Top with whipped cream before serving.
I topped mine with a ginger whipped cream.
I shall not be eating anything more today.
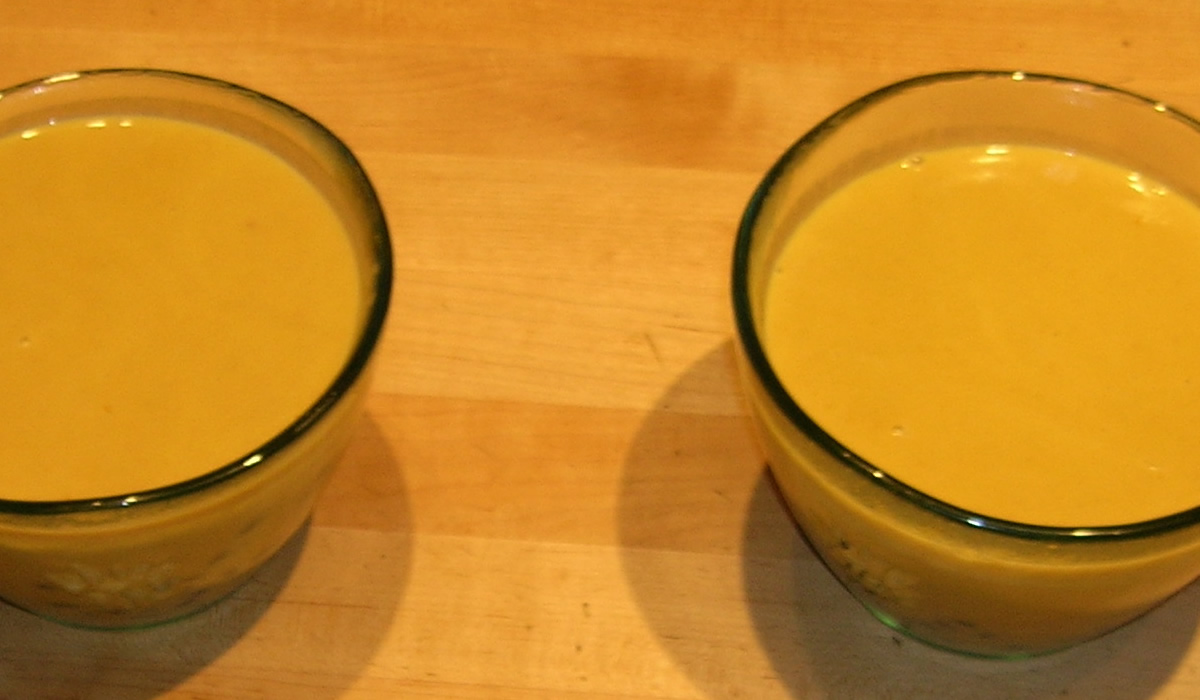
Pumpkin Soup
I love Pumpkin Soup. It's rich and creamy and you can put just about anything in it. My Uncle Dick made a great Pumpkin Soup. He was Half Mexican and half Irish and loved his jalapenos.
And I made a pretty good one last year for our Pumpkin Cookoff at work.
But I was looking fir something a bit different tonight - chicken and black beans were on my mind, so I came up with a really simple one tonight.
I suppose I could have put it on an underliner and made the picture a bit nicer. And if I had any sour cream, I definitely would have topped it with a dollup. But I didn't in either case - and it was still really good!
Pumpkin Soup
- 2 chicken breasts, cut into bite-sized pieces
- 2 qts chicken stock
- 2 cans pumpkin
- 2 cans black beans, rinsed
- 1 teaspoon ground cumin
- 1 teaspoon chili powder
- 1/2 teaspoon ground coriander
- 1/4 teaspoon ground nutmeg
- 2 cups heavy cream
In large pot, brown chicken in small amount of oil. Add spices and cook about 2 minutes. Add pumpkin and broth. Bring to boil.
Add drained beans and heat through.
Add heavy cream. Check for seasoning, and add salt and pepper, if desired.
It was a really simple soup and I served it with Victor's favorite walnut raisin bread.
Yum.
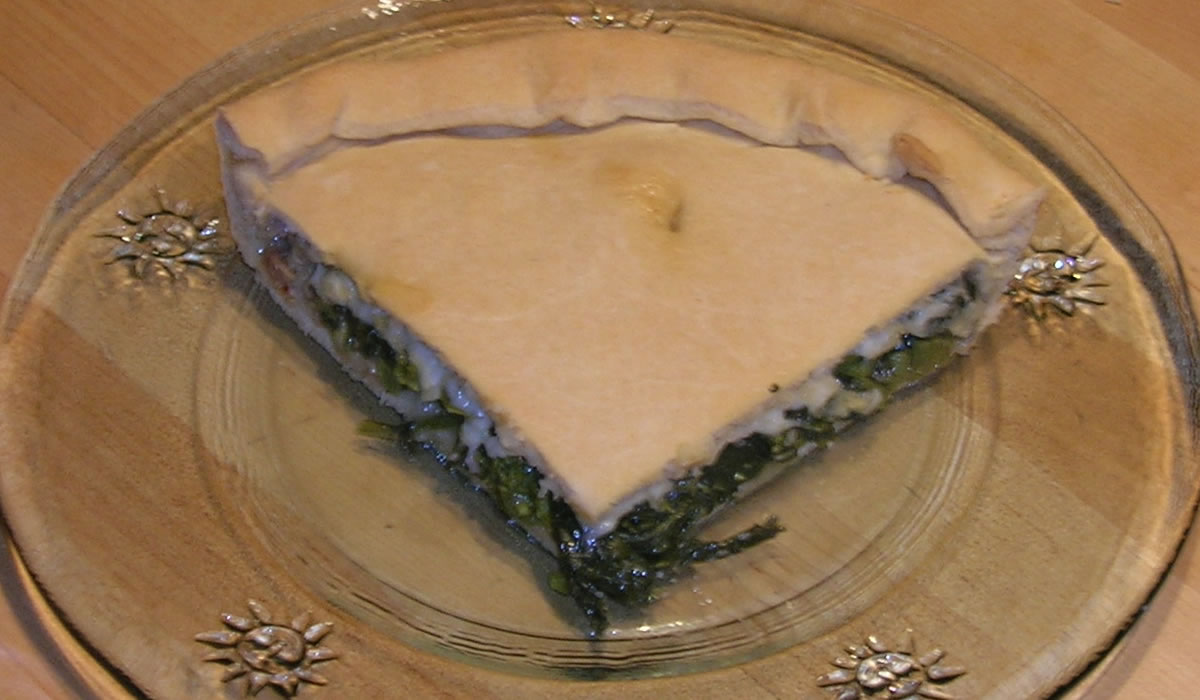
Tiella

We were watching Lidia on TV on Saturday, and she was making a Tiella. It's a thin-crusted deep-dish pizza stuffed with any combination of seafood and/or vegetables and/or meats. The most famous (and the ones her son-in-law's grandmother makes) come from Gaeta, but they can be found throughout Italy.
The dough is a combination of semolina and all-purpose flours, with a bit of salt, sugar, yeast, and olive oil. Simple.
It's baked in a cast iron skillet and can be served in the pan or out. I really should have started this earlier. It takes 45 minutes to bake and another full hour to cool in the pan before serving.
And I'm hungry now...

So I didn't wait the hour. It was out of the pan and on my plate in less than 15 minutes. It just smelled too damn good to let sit any longer.

I can't even begin to describe this one! WOW! I can just imagine a bazillion and one different fillings! The crust is light, yet hearty and the fiulling was superb!

Tim's Tiella
The crust was made using Lidia's recipe:
- 1 pkg yeast
- 1/4 cup warm water
- 1 1/2 cups all-purpose flour
- 1 1/2 cups semolina flour
- 1 tsp coarse salt
- 1 1/2 tsp sugar
- 3/4 cup water
- 5 tbsp olive oil
Dissolve the yeast in the warm water.
Add dry ingredients to food processor or heavy-duty mixer. Mix or pulse to mix ingredients. Mix water and 3 tbsp olive oil with yeast mixture and pour into feed tube of processor and mix about 30 seconds. You should have a soft dough that cleans the side of the bowl. Add more flour or water if necessary.
Knead briefly to form a smooth ball and place in lightly oiled bowl to rise and double. Punch down, reform ball and let rise, again.
After second rise, pinch off 1/3 of the dough for the top crust. Roll out to fit 12" cast iron skillet or baking dish. (I used a Le Cruset pan and it worked perfectly!)
Roll out top crust to fit top.
Add filling and press down slightly to compact.
Place top crust and fold and pinch seams together to seal. Brush top with olive oil.
Bake in preheated 375° oven for about 45 minutes. If you have a baking stone, preheat it in the oven and place the pan on top to bake.
The Filling:
Lidia's book has a couploe of great-sounding fillings, but on the show she pretty much said to do what you want. I always have a lot of that in the house, so I did:
- 1 bunch broccoli rabe, chopped
- 1 onion, chopped
- 4 Italian sausage links, casings removed
- 3 cloves garlic
- salt and pepper
- quattro formaggio cheese
I sauteed the onions with the crumbled sausage. When they looked good, I added the garlic, then the broccoli rab and S&P. I cooked it all down until it was quite dry and then cooled it completely.
Placed it in the pan, pressed it down, covered with cheese, added the top crust, and then baked for about 45 minutes.
The recipe calls for allowing it to cool for an hour in the pan before turning out. I let it maybe cool for 15 minutes.
It was damn good!
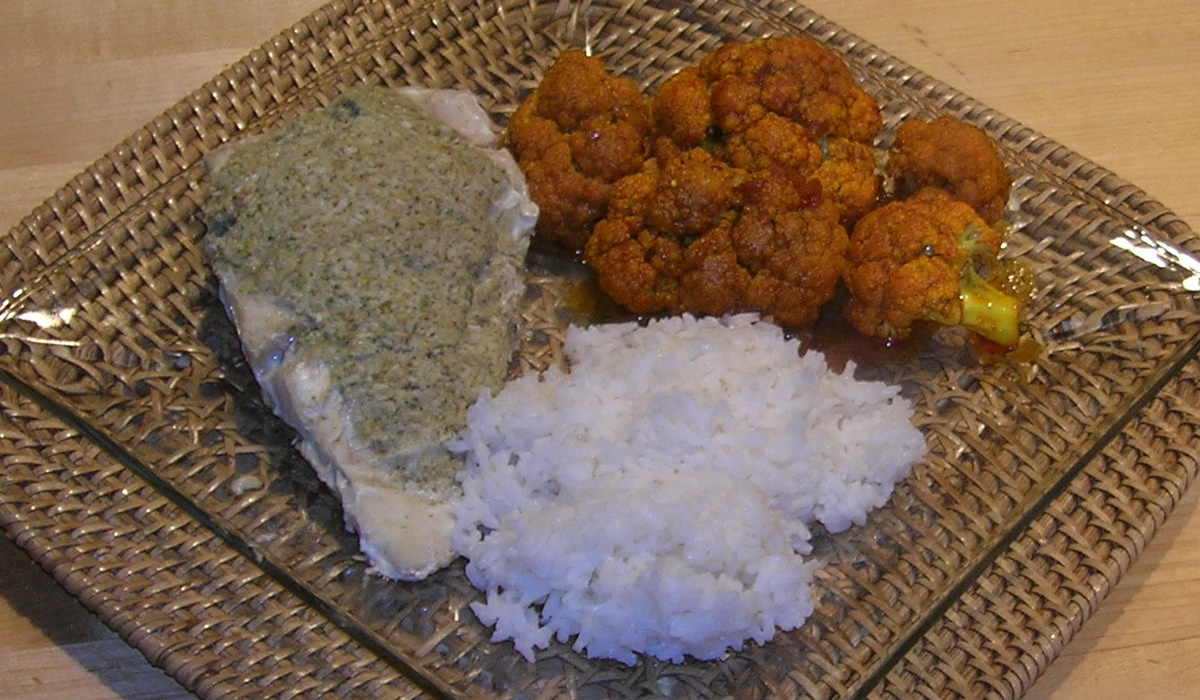
Ikan Kelapa from Singapore
It's Olympics, Day Three... On to Singapore!
Singapore is one of the mosty memorable places I've ever had the pleasure to visit. It's almost frightening to think that it's been 36 years since I was there as a 20 year old sailor. And I still have fantastic memories. I had some of the best food from sidewalk carts.
The old city that I enjoyed so much doesn't even exist anymore - urban renewal - but I'll never forget the omelette I had from a guy with a wok on a cart. The eggs were perfectly cooked with spices I had never had and with vegetables I couldn't pronounce. Damn it was good.
I had a curry dish that was so spicy, it seared the back of my eyeballs! The old guy who cooked it broke into a huge grin when he saw me devour it without missing a beat. His English was difficult for me to understand, but his food spoke in terms I understood very well!
As an adventurous (and Navy-poor) kid, I ate most of my meals from sidewalk carts and small hole-in-the-wall places. I was totally fearless - and never did get sick!
Some fun memories came back to me in looking for something Singaporean to cook tonight. I remember lots of coconut, and thought this fish dish might fill the bill.
It was good, but it wasn't really, really good. I think part of it was just the texture of the topping. It was gritty where my tongue was wanting creamy. If I were eating it in Singapore, I probably would have loved every morsel. But... I wasn't in Singapore tonight.
The cauliflower, on the other hand, was freakin' awesome! That recipe follows...
Ikan Kelapa - Spiced Coconut Fish
- Fish fillets
- 1/2 cup Desiccated coconut
- 3/4 cup Hot water
- 1 clove Garlic
- 12 mm Fresh ginger
- 1/4 tsp Ground kencur (aromatic ginger)
- 1 tsp Ground cumin
- 1 tsp Ground coriander
- 1 tsp Garam masala
- 1 tsp Salt
- 1 1/2 tbsp Lemon juice
- 1 tbsp Chopped fresh coriander leaves
Banana leaves
Aluminum foil
Method :
Wash, clean and scale fillets and cut into approximately 10 cm lengths.
Blend together, at high speed, the coconut, hot water, garlic, ginger, kencur, cumin, coriander, garam masala and salt until coconut is very finely ground.
Mix in lemon juice and coriander leaves.
Put equivalent of 1 fillet of fish on each piece of banana leaf placed on square of foil.
Spoon 2-3 teaspoons of coconut mixture on fish.
Wrap leaf over, make a parcel of foil, steam for 15 minutes.
Serve hot.
I was fresh out of Banana leaves, so I used parchment paper. It worked quite well.
The cauliflower I made was out of this world! And SPICY!!! This was really reminiscent of the foods I ate when I was there. I actually used less chili paste than the recipe called for and it was still firey hot.
Singapore Vegetable Sauté
- 1/4 cup oil
- 2 bay leaves
- 1/2 tsp cinnamon
- 1/4 cup shallot, chopped
- 1 tbsp ginger, chopped
- 1/4 cup chili paste
- 1 tbsp turmeric
- 1 tsp chili powder
Saute together and then add:
- 1 cup water
- 3 tbsp sugar
- 1/4 cup coconut milk
It was kickapoo awesome! I saved the excess sauce and plan on using it as a BBQ sauce/marinade.
12 more Olympian recipes to go.....
Oh... And Victor made a Good 'ol USA Lemon Poundcake for dessert. It's Gold Medal Good!!
