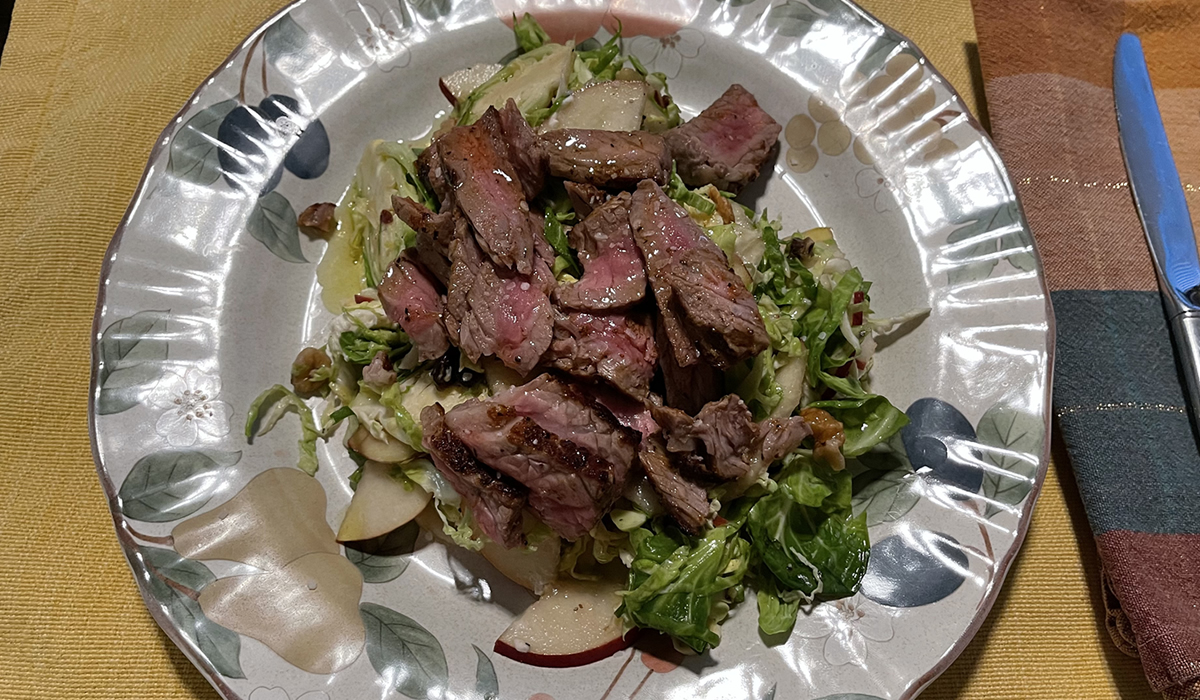
Brussels Sprouts, Pears, Cherries, and Cheese
Another fun recipe from Milk Street.
I've liked Chris Kimball since his early days at Cooks Illustrated. A bit of an oddball, but I can appreciate his approach to food. Besides, you have to be a bit of an oddball to be in the food business. I speak from personal experience.
The fun thing about recipes is knowing the ingredients are not chiseled in stone. His recipe called for dried cranberries - fitting for this time of year. Alas, I had no cranberries, but I did have dried cherries. (There are also dried apricots, raisins, golden raisins, and a half-dozen different nuts I could have used. Walnuts were open. I also added the steak, because I was making it as an entree, not a side dish. Us aging people need our protein.
Brussels Sprouts, Pears, Cherries, and Cheese
adapted from 177 Milk Street
- 1/4 cup dried cherries, roughly chopped
- 1/4 cup cider vinegar
- 2 ripe but firm pears unpeeled, quartered and cored
- 1 pound Brussels sprouts, trimmed
- 1/2 cup walnuts, toasted and chopped
- 2 ounces fresh chèvre, crumbled
- S&P, to taste
- Extra-virgin olive oil to serve
- 8 oz sirloin steak, sliced thin
In a small microwave-safe bowl, combine the cherries and vinegar. Microwave uncovered until heated through, about 1 minute.
Thinly slice the pears and sprouts and mix into a large bowl. Add the cranberry-vinegar mixture, 1½ teaspoons salt and ½ teaspoon pepper; toss well. Let stand for 15 minutes, tossing occasionally.
Toss in the nuts and cheese, then season with salt and pepper.
Plate, top with sliced steak, and drizzle with additional olive oil.
All-in-all, it was pretty good. The recipe is supposed to be a saladish side dish, but I think it would be better if the brussels sprouts were sauteed, first. It could still be served room temperature. They were just a bit too crunchy. The flavors were excellent, though.
With a couple of modifications, I can see this happening, again...
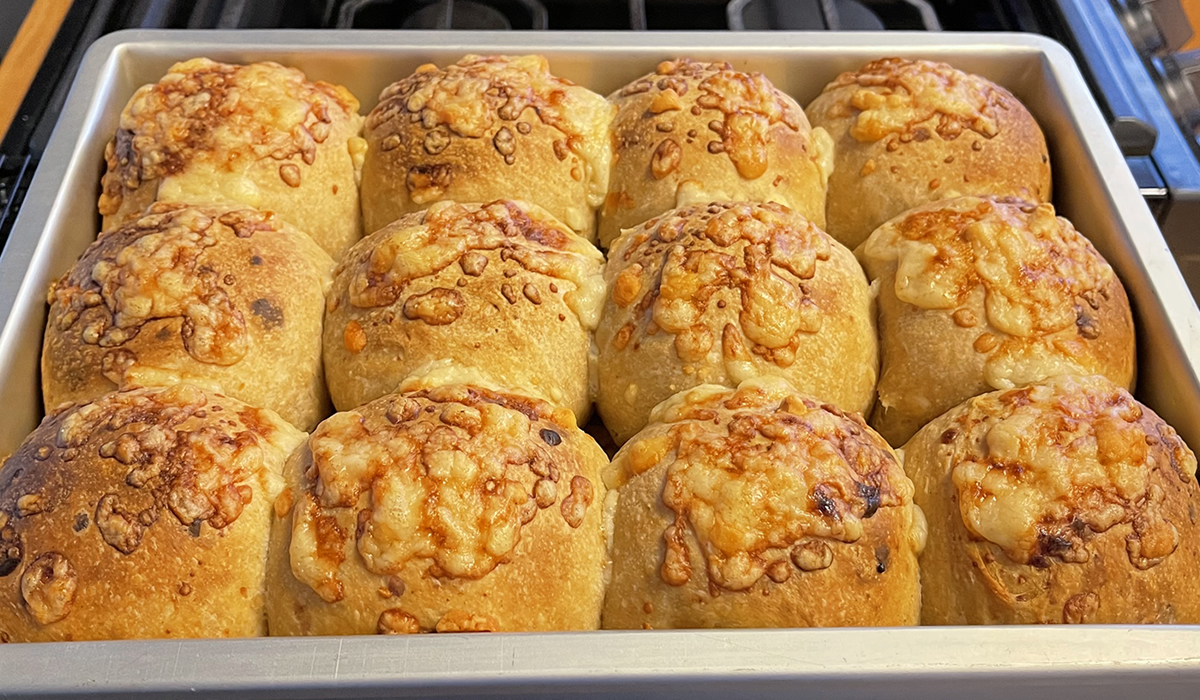
Cheddar Beer Bread Rolls
I really do think my most favorite thing to do is bake bread.
Cooking is fun, desserts are awesome, but bread?!? There's just something about it that truly is satisfying. And they run the gamut from basic 4-ingredient flour, water, salt, and yeast loaves to really complex recipes with tons of ingredients and steps. They're all fun. Well... mostly... The perfect loaf of sourdough still eludes me and at this stage of the game, I've pretty much settled for a pretty good loaf. But that's not stopping me from trying again, one of these days.
In the meantime, there are a lot of other loaves to be made.
We decided on Ravioli for dinner the other night and Ravioli at our house requires bread. Our local Safeway - .6 mile from our front door - has pretty lousy bread from their in-store bakery, so I wasn't going to bother with them. On a side note, I'm really hoping that if Kroger is allowed to buy Albertsons/Safeway, the anti-trust rules will make them sell that store and a real grocer will move into the space.
But I digress...
I had seen a recipe at NY Times a while back for a yeasted beer bread with cheese, so I thought I'd give it a try. Even though my Pre-Diabetes Program doesn't start until next week, rolls are good portion control for me - and it was a recipe I had never tried before. There are no bad foods in this program. It's more about moderation and making better choices.
I had all the ingredients, so off I went. Well... until I got to the bread flour. I needed 815 grams and I only had 400. I did have several other flours, so I blended some all-purpose with an organic white whole wheat my brother gave me to make up the difference. The rest, as they say, is history!
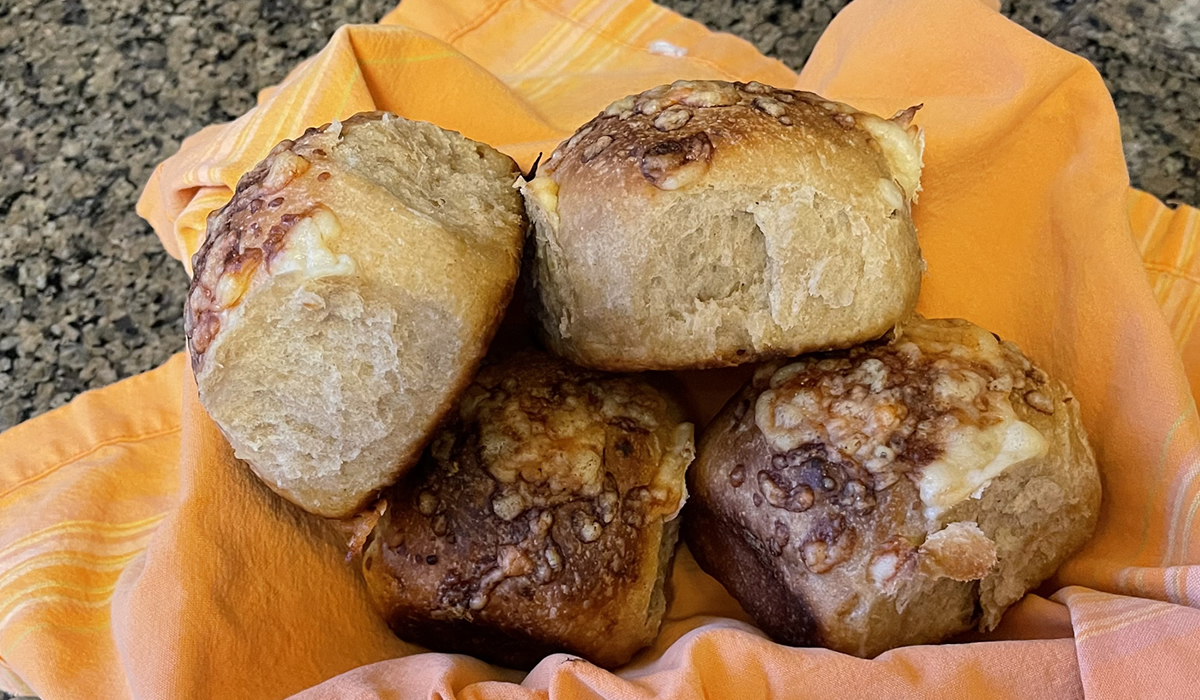
They were incredibly light for having so much cheese in them. Great texture. And the three flours and the cheese really gave them a fantastic flavor.
My biggest mistake was using beer from the refrigerator. (I used a Fortside Brewing Orange Whip Hazy IPA from across the river in Vancouver, WA.) Silly me. The bread took a really long time to rise... Our oven does have a proofing feature which helped, immensely, but it still took twice as long as it should have.
The end result was worth it!
Cheddar Beer Bread Rolls
adapted from the NY Times
- 6 cups/815 grams bread flour, plus more for work surface
- 1 tablespoon instant yeast
- 2 teaspoons coarse kosher salt
- 4 tablespoons/55 grams unsalted butter (2 tablespoons softened, 2 tablespoons melted), plus more for the bowl and pan
- 1/4 cup/60 milliliters honey
- 2 cups/480 milliliters beer, such as pale ale
- 1 3/4 cup/200 grams shredded sharp Cheddar cheese, preferably white
In the bowl of a stand mixer fitted with the dough hook attachment, combine bread flour, yeast, salt, 2 tablespoons softened butter, honey and beer. Mix on low speed for 4 minutes. The dough should come together around the dough hook. Increase speed to medium and continue to mix for 2 minutes more, occasionally stopping to scrape the dough from the hook. Add 1 cup/115 grams of the Cheddar cheese and mix until incorporated, 30 seconds to 1 minute.
Transfer the dough to a lightly greased bowl and cover with plastic wrap. Let rise until nearly double in size, about 1 hour.
Lightly grease a 9-by-13-inch pan. Tip the dough out onto a lightly floured surface and divide into 12 even pieces. Gently round each piece of dough into a ball, and place into the prepared pan. (The rolls may not touch now, but they will fill in the gaps when they rise and bake.)
Cover the pan with plastic wrap and let the rolls rise for 35 to 45 minutes, until they look visibly puffy. Toward the end of rise time, heat the oven to 400 degrees. Brush the rolls with 2 tablespoons melted butter, and top each roll with 1 tablespoon of the remaining white Cheddar, being careful to keep the cheese away from the edges of the pan.
Bake the rolls until golden brown, and the cheese on top is melted and browned 22 to 28 minutes. Let cool at least 10 minutes before serving.
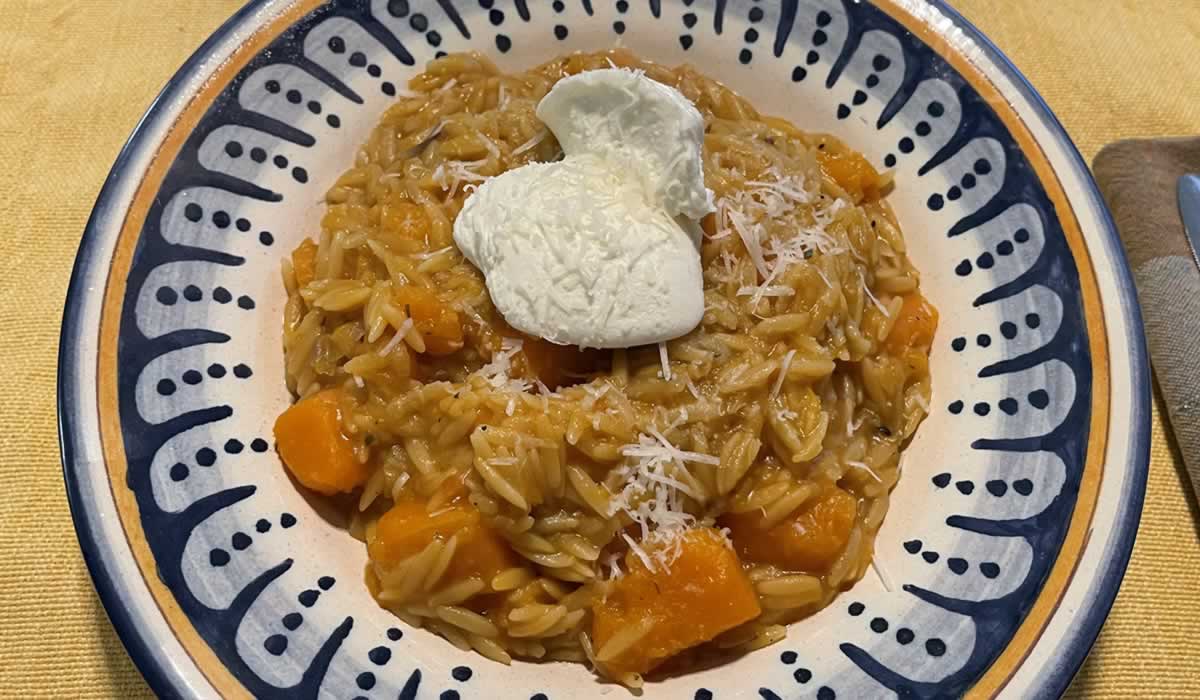
Brown-Butter Orzo with Butternut Squash
And the winner is...
Brown-Butter Orzo with Butternut Squash! And yes, boys and girls, it definitely is a winner!
It's another recipe from the New York Times cooking section. A source I highly recommend for some pretty good recipes.
Yes, they have their fair share of Really?!? recipes - you know... the kind with ingredients you can only find in a mountain village outside of Machu Picchu on a Thursday afternoon after the first full moon - but the vast majority are recipes actual people can source and prepare.
This particular recipe hit all the right buttons - rich, flavorful, easy to prepare, and made with ingredients one can easily find in their pantry. Naturally, even though we both knew we had orzo in the house - we didn't - and Victor ran down to the store while I started.
It's a quick meal from start to finish.
Brown-Butter Orzo with Butternut Squash
adapted from the NY Times
- 4 tablespoons unsalted butter
- 3/4 cup thinly sliced shallots
- 2-pounds butternut squash, peeled, seeded and cut into 3/4-inch cubes (3 cups)
- 1 tablespoon finely chopped fresh chopped rosemary
- 1/4 teaspoon red-pepper flakes, plus more for serving
- 3 cups vegetable stock or chicken stock
- 1 1/2 cup uncooked orzo
- 1 lemon, zested
- salt & pepper, to taste
- 2 tablespoons grated Parmesan, plus more for serving
- 1/2 cup whole-milk ricotta
In a medium Dutch oven, melt butter over medium heat. Cook, swirling occasionally, until the foam subsides, the milk solids turn golden brown and it smells nutty and toasty, 3 to 4 minutes.
Stir in shallots and cook, stirring occasionally, until slightly softened, about 2 minutes. Add squash, rosemary, a large pinch of salt, the 1/4 teaspoon black pepper and the 1/4 teaspoon red-pepper flakes, and cook until squash is golden at the edges and begins to soften, 12 to 17 minutes.
Add stock and bring to a simmer. Stir in orzo and lemon zest. Cover the pan and simmer over medium-low heat until orzo is just tender and most of the liquid is absorbed, 14 to 18 minutes, stirring once or twice. If the pan dries out before the orzo and squash are tender, add a splash or two of water.
Remove pan from heat and stir in Parmesan. Taste and add more salt if needed. Dollop with ricotta and sprinkle with more grated Parmesan and black pepper just before serving.
Simple and totally delicious! A perfect fall meal.
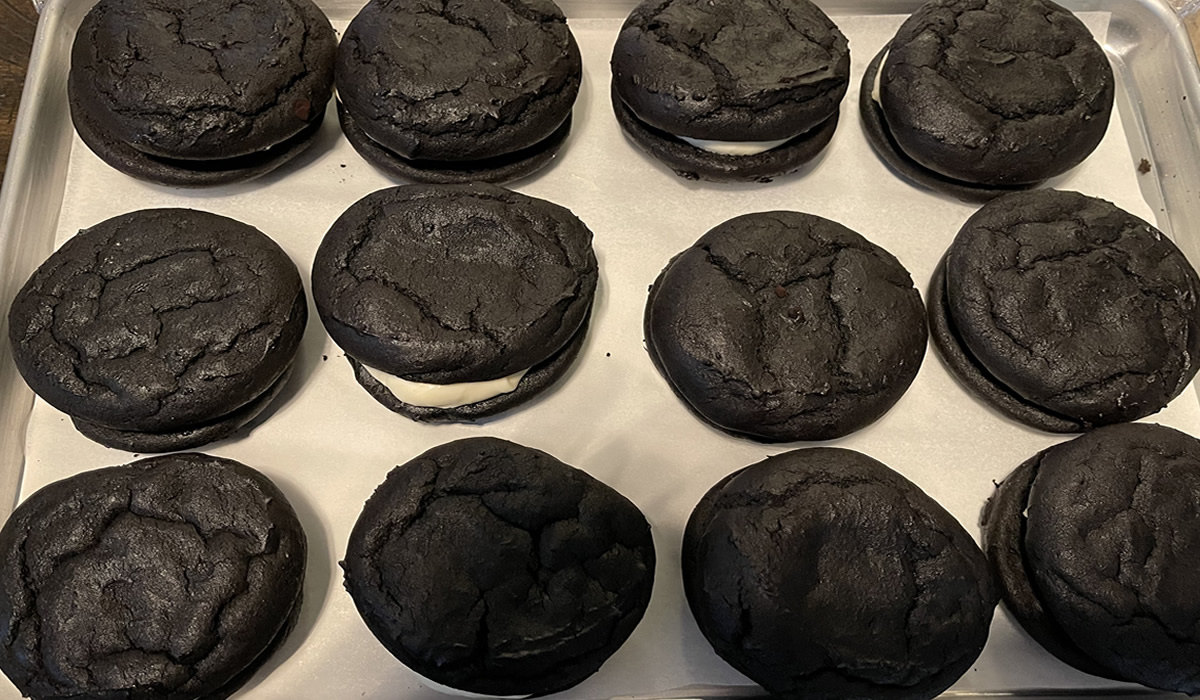
Whoopie Pies
We're having a bit of a local family get-together tonight at my sister's house. Even though we all live within a few miles of one another, we really don't all get together that often.
I asked what we could bring - no one person should have to feed this motley crew - and my niece said a desert - "your desserts are the best."
Flattery will get you everywhere!
So... what to make for 15 pseudo-adults and two toddlers?!? Why, Whoopie Pies, of course! Fun, hand-held, the kids can make a mess of them... Perfect!
These are a combination of recipes I've made in the past. The classic filling is a shortening and marshmallow fluff concoction I don't really care for, so I devised more of a cream cheese frosting with marshmallow fluff that's more to my liking. I'm the one cooking, so it's all about me.
Whoopie Pies
Cakes:
- 3 cups sugar
- 1 cup butter
- 4 eggs
- 1/2 cup vegetable oil
- 1 tablespoon vanilla extract
- 6 cups all-purpose flour
- 2 cups unsweetened cocoa powder
- 1 teaspoon baking powder
- 1 1/2 tablespoons baking soda
- 1 teaspoon salt
- 3 cups milk
Filling:
- 8 ounce pkg cream cheese, softened
- 6 tbsp unsalted butter, softened
- Pinch of salt
- 3 cups powdered sugar
- 12 oz jar Marshmallow Fluff
Preheat oven to 350°F.
In a large bowl of an electric mixer, beat the sugar, butter, and eggs together until well combined. Add the oil and vanilla and beat again.
In a separate bowl, combine all of the dry ingredients. Add half of the dry mixture to the egg mixture and beat or stir to blend. Add 1 1/2 cups milk and beat again. Add the remaining dry mixture and beat until incorporated. Add the remaining 1 1/2 cups milk and beat until blended.
With a 4oz scoop, scoop out 32 or more circles of batter onto a baking sheet. Bake for 12-13 minutes. Let cool.
Meanwhile, cream butter and cream cheese. Add fluff and mix well. Add vanilla and slowly add powdered sugar. Mix to a stiff, creamy texture.
Fill half of the cakes with filling and top with second half.
Enjoy.
I had to finish the batter by hand - it was too much for my KitchenAid mixer - but it worked out okay. I got 42 cakes - 21 Whoopie Pies.
Your results may vary - just make sure you have an even amount.
And... if you're in a Fall Mood, here's a link to the Pumpkin Version!

Pizza and Postponement
I was supposed to start my Pre-Diabetes Program tomorrow. Alas, it has been postponed until October 26th. The good news is I've been pretty much following the program for the past two weeks. I'm going to the gym - mostly pool exercises and stretching with some treadmill and bike - and actually logging what I eat and how much I move. I weigh myself every morning and can really tell when I cheat. It's actually good to see all of this before I actually start - there's not going to be a lot of room for cheating unless I start moving a lot more!
Besides, tomorrow is my brother Mike's anniversary and my SIL, Debbie's birthday. we're all heading out to dinner to a great seafood restaurant - Jake's Famous Crawfish - and it would be nigh-on impossible to keep to my calorie allotment. I have lost a couple of pounds and don't want to gain them all back before I start.
So... we had pizza for dinner! On the grill!
Now... before you say badbadbad... I did the nutritionals... 350kcal per slice - I had 2. I also had a bit of Orzo Salad that Victor made and it filled me up. I came right in at my calorie allotment!
Tomorrow, it will be a bit more of a workout so I can really enjoy that dinner!
This is my most-favorite pizza dough. It's at least a 2-day rise, so plan accordingly.
Pizza Dough
- 1 1/2 cups warm water (100º to 105º)
- 1/4 teaspoon active dry yeast
- 4 cups “00” flour or unbleached all-purpose flour plus more for dusting
- 2 teaspoons fine sea salt
- Extra-virgin olive oil for bowl
Sprinkle yeast over warm water in bowl of mixer fitted with dough hook. Let proof about 5 minutes.
Mix together flour and salt. Add to yeast mixture. Mix on low speed about 4 minutes or until dough forms a coarse ball. Stop mixer and cover bowl with a towel. Let dough rest about 5 minutes, then remove towel and continue mixing another 2 minutes or so.
Lightly oil a large bowl. Form dough into a ball, transfer to bowl and turn to lightly coat with oil. Cover bowl tightly with plastic wrap and let stand at room temperature 30 minutes, then refrigerate overnight.
Punch down dough, re-roll, and return to bowl. Tightly cover bowl with plastic wrap and refrigerate at least 4 hours or up to 24 hours.
Divide dough into 2 pieces; shape pieces into balls and place on a lightly floured work surface. Loosely cover with a damp kitchen towel and let rise at warm room temperature until doubled, about 2 hours.
Victor made the sauce from our garden tomatoes - it was almost like a paste - and delicious.
Then there were thick slices of tomato atop the pepperoni.
Excellent!
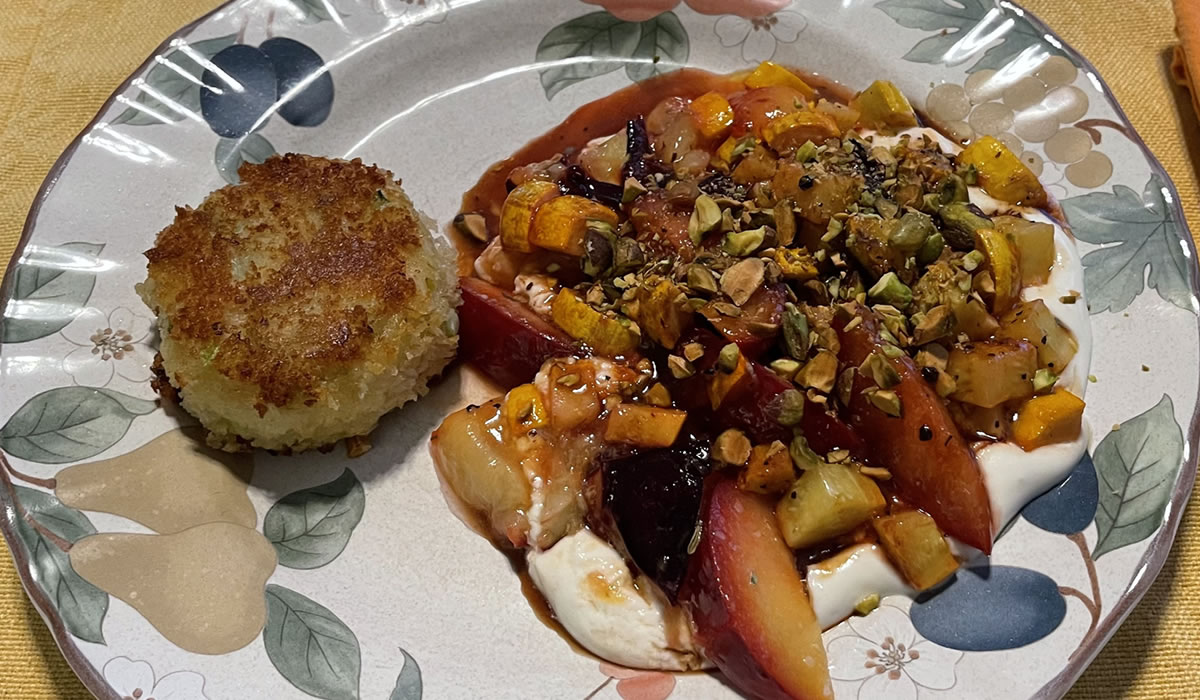
Squash and Plums with Ricotta
Victor was reading the Washington Post the other day when he came across a recipe he just knew we had to try. It's not all that unusual for one of us to latch onto a random recipe we find - it's more unusual to ignore them.
This one was not to be ignored...
Squash and Plums with Ricotta
adapted from The Washington Post
- 1 pound ricotta or cultured cottage cheese
- 2 tablespoons olive oil
- 2 small yellow squash (12 ounces total), chopped
- 4 plums, preferably black or purple (12 ounces total) pitted and sliced
- Leaves from 2 sprigs fresh thyme
- 2 tablespoons aged balsamic vinegar
- Flaky salt
- Freshly ground black pepper
- 3 tablespoons chopped pistachios, cashews or pumpkin seeds, for serving (optional)
In a food processor, whip the ricotta or cottage cheese until creamy and light, about 30 seconds.
In a medium skillet over medium-high heat, heat the olive oil until it shimmers. Add the yellow squash and sauté until browned on all sides, about 5 minutes. Add the plums and sauté until they begin to caramelize, about 5 minutes. Add the thyme leaves, and then place atop the ricotta.
Drizzle the balsamic vinegar over. Sprinkle with chopped nuts or seeds.
It's ridiculously easy outrageously good. It's savory but sweet, almost dessert-like, but better as a side dish. It would make a great appetizer with a crusty slice of bread or a really good cracker.
It also went great with a Dungeness Crab Cake from The Beaverton Farmer's Market.
It took minutes to make.
Make some.

Pre-Diabetes and Getting Old
I turned 70 back in July. To be honest, I didn't think much of it.
Mentally, I'm a Jr High School kid laughing at fart jokes. Physically, I've slowed down, but... I'm 70, not 20. I'm supposed to slow down.
But slowing down shouldn't mean stopping.
I was doing pretty good after retiring and losing a bunch of weight. Victor and I were gym-rats and spending an inordinate amount of time there. But then Covid hit, we went into lockdown/isolation mode, moved 'cross country, the weight came back, and I turned into a slug. Classic Catch-22 - move less, gain weight, gain weight, move less.
The joints and muscles had tightened up so much that at my last "Wellness Meeting" - old people don't have annual physicals, anymore... we now have Wellness Meetings where things like falling and elder abuse are discussed - my Primary Care Physician set me up with a Physical Therapist to learn how to stretch, again. She also recommended a Pre-Diabetes Program to get me refocused on eating and exercise.
In March of this year I made it up to 260 pounds. 18.6 stone. 118 kilograms. A lot. As of this writing, I'm at 238. Cutting back some, moving a bit more, but I need structure to make this work.
I've always been a Live to Eat person as opposed to an Eat to Live person. I love food. I love new flavors, different cultures, trying new things. Unfortunately, I love it all a bit too much.
I spent 13 years working in Nutrition and Dietetics with some of the best Dietitians in the country. I created recipes for different dietary needs and restrictions. I should know what I need to do. And, in theory, I do. But I also spent years baking and cooking professionally. There are 60+ herbs and spices on the spice shelf, A pantry full of flavorings and ingredients that my impulse-shopping hands grab while my brain is conjuring up what I can do with guava paste, ube, or gooseberry jam. But, obviously, knowing what I should do and actually doing it are two entirely different things.
As I noted above, I need structure - and accountability - to make this work.
September 28th is the fist day of a year-long program of paying attention to what I eat and committing to 150 minutes a week of exercise. The end goal of the program is to lose 7% of my weight - a number that in their studies, has been shown to reduce the likelihood of type 2 diabetes.
Personally, I'd like to lose 15%, but, at this point, I'm just going to go with it.

I'll be heading back to the gym on Monday. I need that structure, as well. I can find a million and one reasons not to do something at home - or even step outside and walk down the street. I need that structure.
I've already started with a daily food diary, logging everything I eat and all of my movement. After we officially start, there will be a weigh-in/check-in every week for the first 14 weeks. It then becomes every other week for the duration.
What's great about the program is it's not focused on "Good" foods vs "Bad" foods, but about paying attention and being aware of what we're putting in our bodies. Looking at triggers that contribute to over-eating or binging. It's about being realistic. There's nothing wrong with having a piece of cake for dessert. It's probably not a good idea to eat a slice every night.
It also stresses that we're human. It's not about beating ourselves up about food or food choices. It's about learning, making better choices - and getting back up after eating that quart of ice cream after having a miserable day.
I don't plan on having any miserable days, but I am glad that I'm starting this in the fall. We're heading right into Holiday Over-Eating Season, and this year, I hope to pay a bit more attention to how many cookies I eat and how many cups of Egg Nog I consume.
I'll be doing weekly updates on Wednesdays because I need the accountability. Anyone who knows me, knows I hate to be wrong and I really hate public humiliation. I really hope my blogging will keep me focused.
Wish me luck.
From The Garden
Finally! Tomatoes and peppers are coming in! Black Krims, Brandywine, and an Oregon tomato are doing some serious producing. We pulled up the San Marzanos we planted - five plants - because of rot. Plum tomatoes just don't seem to do well, here.
Oh, well.
The peppers - bell, anaheim, and jalapeño - are finally doing well, also. It's taken all summer for them! The Thai peppers have lots of flowers, but I haven't seen a lot of peppers, yet. there's still time.
It's great to sit out front on our new patio and look up at the garden... We have a whole new outdoor room to enjoy, and it's great to look up and see where dinner came from!

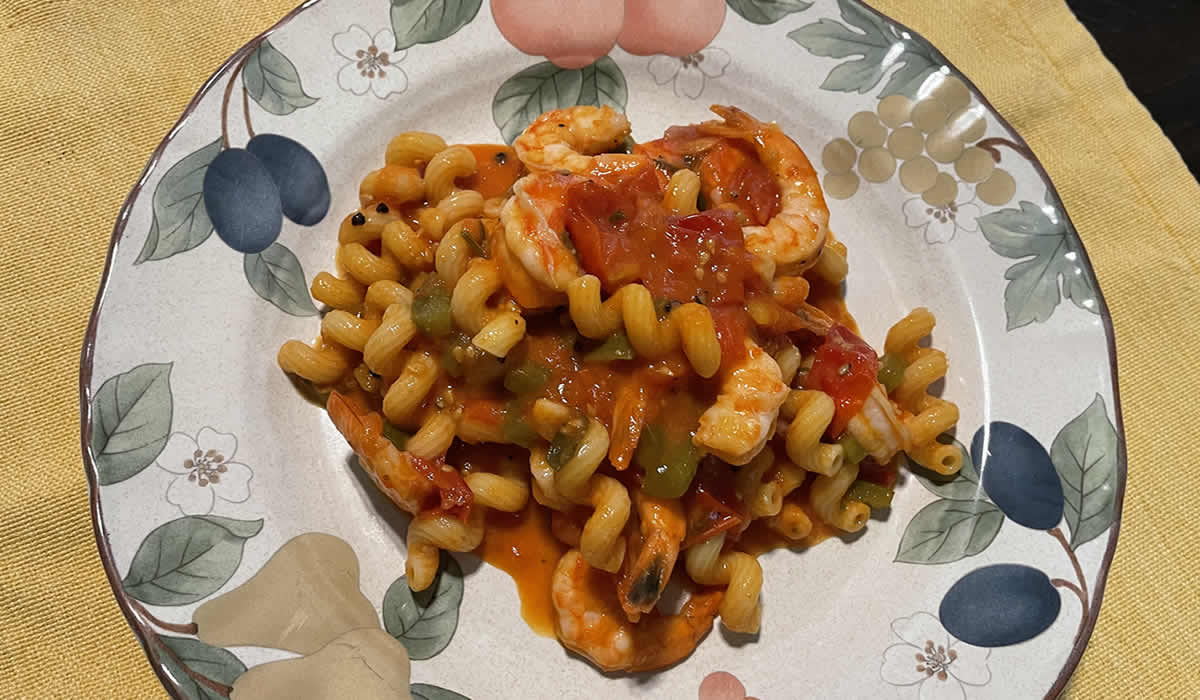
Dinner, tonight, was a quick pasta dish with peppers, garlic, and tomatoes from the garden - along with fresh rosemary and oregano - white wine, shrimp, red onion, and salt and pepper. As basic as can be.
The tomatoes really shone through - they are just really flavorful - as only a homegrown tomato can be.
We're hoping for a bunch more to ripen at the same time so we can make a bit more Tomato Paste - the true nectar of the gods.
Cross those fingers.
In the meantime, there's still carrots and eggplant to go through! Lovin' it!
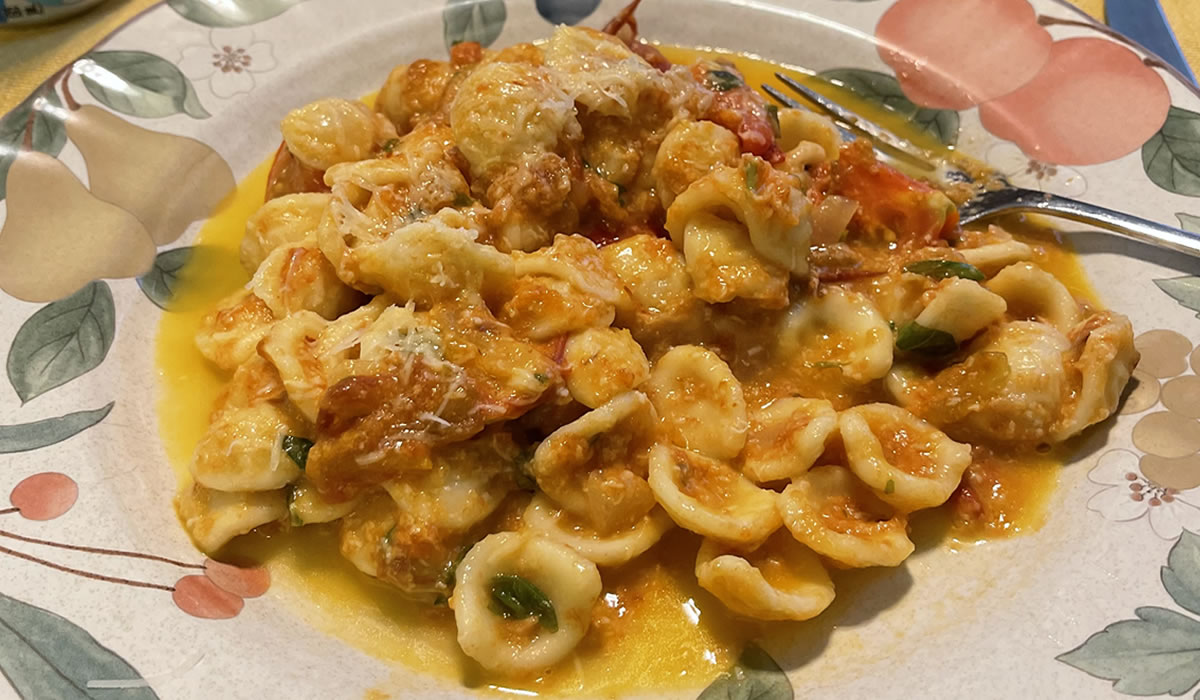
Orecchiette with Buttery Tomato Sauce
The latest edition of Bon Appetit arrived, yesterday, and I immediately found a recipe to cook for dinner.
We had just picked a bunch of lovely ripe heirloom tomatoes from the garden, we had an unopened bottle of Colatura - an Italian anchovy sauce (think of it as an Italian version of Asian fish sauce) - fresh basil... a nice, big wedge of Parmigiano Reggiano... We were ready!
It is really one of the quickest and most basic recipes you can throw together - and throw together really is what you do with this one. It's dinner in the time it takes to cook the pasta.
Any pasta will work with this. The original recipe called for making your own - and Alon Shaya's recipe would be perfect, here. It's our go-to fresh pasta recipe. It's perfect every time. We did, however, opt for bagged pasta because we have lots and I was looking for that quick meal.
Pasta Dough
adapted from Alon Shaya
- 1 1/4 cup 00 flour
- 1/2 cup semolina
- 2 eggs
- 2 egg yolks
- 2 tsp olive oil
Mix flours. Make a well and add the eggs, egg yolks, and oil. Slowly mix in the flour and knead until smooth. Let rest 30 minutes before rolling to desired shape.
The Bon Appetit recipe calls for Sun Gold or cherry tomatoes. Having learned our lesson years ago, we only grow full-sized. The amount of sauce should work for up to 8 ounces of pasta. And since there are only a few ingredients, use the best you can.
Buttered Tomato Sauce
adapted from Bon Appetit Magazine
- 4 cloves garlic, minced
- 1/2 cup onion, minced
- 1/2 tsp crushed red pepper - more, to taste
- 3 lbs ripe, heirloom tomatoes, chopped
- 4 tbsp butter
- 1 tsp Colatura (or fish sauce)
- 2 oz shredded parmigiano reggiano
- 4 tbsp torn basil
Heat oil in large skillet. Quickly sauté onion, and then add garlic and red pepper. Stir in about 3/4 of the tomatoes, a big pinch of salt, a pinch of pepper, and about a half-cup of water. Cover, reduce heat, and let simmer about 5-6 minutes.
Stir in butter, colatura, and cheese. Add pasta and stir to completely coat. Add reserved tomatoes and mix well - adding a bit of pasta water, if necessary. Stir in basil, and serve!
It was rich and filing without being a belly-bomb! A bit of crusty bread would have been nice, but even that wasn't necessary.
With the tomatoes finally coming in, i can see more of this in our future!

Cold Noodles With Tomato-Peanut Sauce, Pork & Peppers
I was reading the Sunday San Francisco Chronicle - one of four newspapers we subscribe to - and came across a recipe for a cold noodle dish that sounded pretty good. As luck would have it, we had all the ingredients in the house, so I decided to give it a try.
Final result?!? Meh.
It wasn't bad... it just wasn't really good. It was a little too bland. It lacked a punch. Probably the most flavorful part of the dish was one of the chicken meatballs I made the other day.
I used heirloom tomatoes and ground pork. Perhaps a sausage would have helped, but the blandness was in the sauce. I think it needs a bit of help. Some chilis... some ginger... even some nice, salty soy sauce would help.
I really liked the concept, so methinks I'll be trying this one again.
Oh... and a POUND of noodles for 4 people?!? Waaaaaaaaaaaay too much. A standard serving is supposed to be 2 ounces. Even an overly-generous 3 ounces per person would be really filling!
Cold Noodles With Tomato-Peanut Sauce, Pork & Peppers
adapted from the San Francisco Chronicle
Serves 4
- 1 pound fresh lo mein, udon or dried spaghetti noodles
- 5 tablespoons olive oil, plus more for tossing with noodles
- Diamond Crystal Kosher salt
- 1 pound ground pork or sausage
- Freshly ground black pepper
- ½ pound Jimmy Nardello, red bell or other sweet peppers, stemmed and chopped
- 1¼ cups unsweetened roasted peanuts
- ¾ pound Early Girl or Roma tomatoes, chopped (about 3 or 4 large)
- 5 tablespoons unseasoned rice wine vinegar or lemon juice (or mix of both)
- 3 garlic cloves, chopped
- 1 tablespoon fish sauce
- ½ cup chopped cilantro and/or mint, plus more if desired
Instructions: Cook noodles in a large pot of boiling water according to package directions then drain and rinse under cold water, then shake off as much water as possible. Transfer the cool noodles to a large bowl and toss with enough olive oil to coat them. Season with salt and set aside.
Heat 1 tablespoon of olive oil in a large skillet over medium-high heat. Once the oil is hot and shimmery, add the ground pork, using the back of a spoon or blunt wooden spoon to break the meat into bite-size pieces and crumbles. Cook, tossing and turning every few minutes, until cooked through and you have a mix of crispy browned and tender bits. Season with salt and pepper, then fold in the peppers and cook, tossing and turning until the peppers are softened and tender but still have a fresh pepper taste (taste a piece or two), about 5 minutes. Transfer to a small serving bowl and let cool before serving.
Place ¾ cup of the peanuts, tomatoes, vinegar or lemon juice, garlic, fish sauce and remaining 4 tablespoons olive oil in a blender and blend until smooth. Taste, season with salt, pulse, taste again and season again if needed.
Pour the tomato-peanut sauce into the bowl with the noodles and toss very well to combine. The noodles should look fully coated and there should be some sauce pooling at the bottom of the bowl. If there isn’t, or if the sauce looks too thick, add a few splashes of water at a time, tossing in-between. Season with salt again and taste until it’s sufficiently saucy and delicious.
Chop the remaining ½ cup peanuts. Serve the noodles in bowls with the cooled pork and pepper mix spooned over the top with the chopped herbs and peanuts.
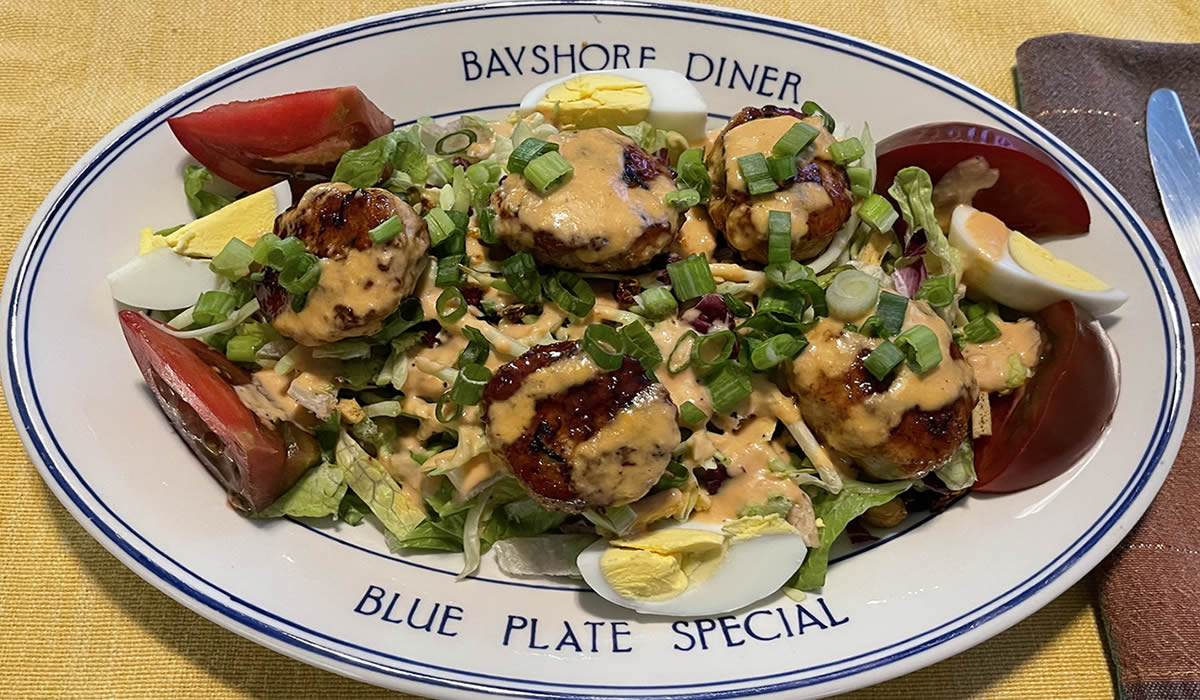
Japanese-Style Chicken Meatballs
It has definitely been a while since I put fingers to keyboard and wrote about something I made. It's not like we've stopped eating - a look at my waistline will prove that not to be the case. It's more that we really haven't been cooking significantly different foods from the 2, 576 posts and 1,259 other recipes already on the site. I mean, how many times can I cook and wax poetically about the same ol' things?!?
And then, the other day, my latest copy of Milk Street arrived. It's a fun magazine. I really do like Chris Kimball. He has an Alton Brown approach to cooking - the science and chemistry behind food - along with stories about where the food came from. Granted, sometimes the ingredient lists can get a bit kludge, but all-in-all, they're pretty good.
The latest issue had a recipe for a Japanese-Style Chicken Meatball that really sounded interesting. And, as luck would have it, I had the ingredients!
To make it even better, we just started watching a show on Prime called "James May - Our Man in Japan". It's a pretty fun travel show with May - an Englishman - travelling from north to south in Japan, doing things your basic traveler would never think - or be able - to do. It's fun and interesting.
So... Milk Street recipe, Japan travel show... Time to make some meatballs!
Naturally, I couldn't just serve them over rice. It's summer time. That means salads. About as un-traditional as one can get - but it really worked!
I also found a recipe for a "Japanese Restaurant-Style Salad Dressing", so off we went...
Japanese-Style Chicken Meatballs
adapted from Milk Street Magazine
- 1/2 cup sake
- 1/2 cup mirin
- 1/4 cup soy sauce
- 2 medium garlic cloves, 1 smashed and peeled, 1 finely grated
- 2 inch piece fresh ginger, 2 teaspoons finely grated, the remainder thinly sliced and bruised
- 1 pound ground chicken
- 4 scallions, minced, divided
- 1/3 cup panko breadcrumbs
- 1 large egg white
- 1 tablespoon toasted sesame oil
- Ground black or white pepper
- 2 tablespoons grapeseed or other neutral oil, plus more for oiling your hands
Line a rimmed baking sheet with kitchen parchment and mist with cooking spray; set aside. In a 12-inch nonstick skillet over medium-high, combine the sake, mirin, soy sauce, smashed garlic and bruised ginger. Bring to a boil and cook, stirring often, until reduced to ⅓ cup, 6 to 8 minutes. Remove and discard the garlic and ginger; transfer the mixture to a small bowl. Rinse out and dry the skillet.
In a large bowl, combine the chicken, the grated garlic, the grated ginger, ¼ cup scallions, the panko, egg white, sesame oil and ¼ teaspoon pepper. Using your hands or a silicone spatula, vigorously stir and knead the mixture until well combined and sticky. Using lightly oiled hands, divide the mixture into 16 portions (about 2 tablespoons each), form each into a ball and place on the prepared baking sheet. Lightly press each ball to slightly flatten it into a 1- to 1¼-inch round.
In the same skillet over medium-high, heat the neutral oil until shimmering. Place the meatballs in the skillet, reduce to medium and cook until lightly browned on the bottoms, about 4 minutes. Flip each meatball and add the sake-soy mixture; continue to cook, occasionally turning the meatballs and basting them with the sauce, until the centers reach 160°F and the exteriors are glazed, 5 to 7 minutes; reduce the heat to medium if the soy mixture is reducing too quickly.
And then the salad dressing... I really like making my own dressings. This one is going into the rotation.
Japanese Restaurant-Style Salad Dressing
- ½ cup minced onion
- ½ cup peanut oil
- ⅓ cup rice wine vinegar
- 2 tablespoons water
- 2 tablespoons minced fresh ginger root
- 2 tablespoons minced celery
- 2 tablespoons ketchup
- 4 teaspoons soy sauce
- 2 teaspoons white sugar
- 2 teaspoons lemon juice
- ½ teaspoon minced garlic
- ½ teaspoon salt
- ¼ teaspoon ground black pepper
Combine minced onion, peanut oil, rice vinegar, water, ginger, celery, ketchup, soy sauce, sugar, lemon juice, garlic, salt, and pepper in a blender. Blend until all ingredients are well-pureed, about 30 seconds.
We went out and bought a Ninja blender, and the smoothie cup it came with is the perfect size for making a batch of dressing - and it really makes for a smooth finished product.
Hopefully, this will get me out of my rut and start cooking a few more new, fun things...
It could happen.....
Paper Plane
While we were back east last week, we were fortunate to have dinner with our nephew and his family. Time flies... one day they're toddlers and the next day they have toddlers of their own and are hosting fantastic dinners.
Lucky us.
One thing their generation has perfected is the reemergence of the cocktail.
Victor and I were both bartenders at some point in our lives. My experience was mainly at a neighborhood restaurant in San Francisco where I was also a cook. In my hotel days, I would occasionally work a banquet bar or service bar to help out. Victor worked in some of the finest restaurants in Philadelphia, owned his own restaurant, and made the rounds at some of the better Atlantic City Hotels and Casinos.
But neither of us are big cocktail drinkers. My go-to at a nice restaurant will be a Gin martini. bone dry, straight up, with an olive. Victor is the same - except he's a top shelf Vodka martini guy. Since we tend to frequent brew pubs and local joints over fine dining establishments, more often than not, we'll have a whiskey or reposado tequila neat, with a local craft beer.
That was then This is now. Nick made us a cocktail called a Paper Plane that has us completely rethinking the cocktail genre!

The drink itself is quite simple.
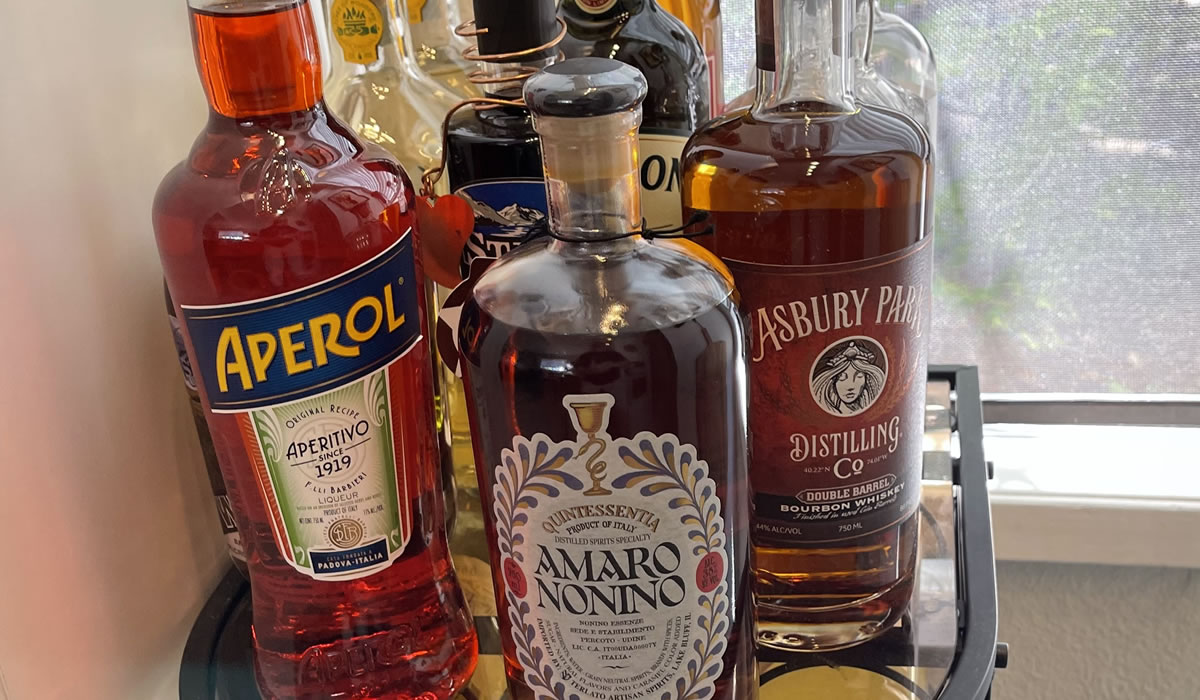
Paper Plane
Equal parts:
- Whiskey or Bourbon of choice
- Aperol
- Amaro Nonino
- Fresh Lemon juice.
Add ingredients to cocktail shaker with a bit of ice. Do a quick stir and strain into cocktail glasses.
You don't want the alcohol to dilute too much, so mix quickly.
It is the perfect summertime drink!
It's a fairly recent (2007) upgrade of a prohibition-era cocktail called The Last Word. That drink consists of equal parts of Gin, Green Chartreuse, Maraschino Liqueur and freshly squeezed Lime Juice, I may have to try one of those, one of these days!

Retirement is treating us well.