A '60s Dinner Party

Ah… those thrilling days of yesteryear… or were they?!? Answer in a minute…

Since I had updated the TJ Recipe site, I thought I’d do a bit of an update on Flour Power and Mom’s Cookbooks, as well to give the sites a bit of a more uniform look. The only issue was Mom’s Cookbooks used a different theme than the other two.

In order for Mom’s site to have the same general look, I needed to install a new theme and redo most of the 1038 pages individually – a lot of repetitive work. These sites have all been around in various configurations, on different urls, and different formats since at least 2005. It was time to get them all together and more easily updatable.

The fun thing about it was actually revisiting all of those recipes!

I collect recipes the way my mom did – not necessarily to make the dish, but to get an idea of what to do. It was unusual for her – or me, for that matter – to actually make a recipe completely as written. They’re concepts, not absolutes.

Some of the recipes brought back memories. Some of the recipes sounded completely gawd-awful. Some were intriguing…

I thought it would be fun to actually make a complete dinner using only recipes from the book.

Enter Phoebe, Nancy, and Victor as my trusting dinner guests…

I chose five recipes – an appetizer, a protein, a potato, a vegetable, and a dessert – very ’60s meal planning. Of the five, I had only had one of them, before – and only a very vague recollection of it. The others just sounded interesting. Not wanting to throw a modem spin on anything, I actually made them pretty much as written. I did use actual sherry in place of the Holland House Sherry Cooking Wine. I have my standards, low as they may be.

First was a Party Cheese Ball.

Party Cheese Ball

  • 2 8 oz pkg cream cheese
  • 8 oz shredded cheddar
  • 1 tbsp pimento
  • 1 tbsp chopped green pepper
  • 1 tbsp finely chopped onion
  • 2 tsp Worcestershire sauce
  • 1 tsp lemon juice
  • pinch cayenne
  • pinch salt
  • finely chopped pecans

Mix all ingredients until well blended. Chill.
Shape into ball and roll in nuts.

Unfortunately, I didn’t get a picture of my creation, but it pretty much looked like the picture – and it really tasted great. It was no-brainer simple to make and I could see it becoming a regular family-gathering treat. We served it with Ritz Crackers, Saltines, Chicken in a Biskit crackers, and Triscuits.

We also had Lipton’s Onion Dip, and Mixed Nuts, because those were always constants at our house growing up.

**NOTE: Chicken in a Biskit crackers suck.

Next up was Chicken Parisienne.

Chicken Parisienne

  • 4 chicken breasts
  • 3 tbsp butter
  • 1 small onion, sliced
  • 1 cup sour cream
  • 1 cup mushrooms, sliced
  • 1 can cream of chicken soup
  • 3/4 cup sherry

Season breasts with salt & pepper.

Melt butter in skillet and brown chicken on both sides.

Arrange chicken, onions, and mushrooms in baking dish.

Mix sour cream, soup, and sherry in a bowl.

Pour over chicken.

Bake at 400°F for 40 minutes.

This one sounded intriguing, but I do have to admit it was about as French as I am – and definitely didn’t live up to it’s supposed Parisienne roots. I’m guessing that the only reason it was called Parisienne was because it had a sauce.

The concept wasn’t bad, but the execution was wrong. It would have made a better dish if the chicken breasts and sauce were cooked separately with the sauce poured over the chicken at serving. Being baked in the oven, the sauce consistency was uneven and the chicken stringy.

Flavor-wise it was okay. Not great, but okay.  The concept has promise, but I probably won’t be making it, again, any time soon.

Next we had Vaughan’s Potatoes.

Vaughan’s Potatoes

  • 3 potatoes, peeled and quartered (about 1 lb)
  • 1/4 cup grated parmesan cheese
  • 2 oz cream cheese
  • 1 tbsp butter
  • 1 tbsp chopped green onion
  • 1/2 pcket onion soup mix
  • pinch pepper
  • dash Tabasco
  • milk
  • egg
  • 1 1/2 cups crushed cornflakes

Cook potatoes until tender. Drain and mash.

Stir in parmesan cheese, cream cheese, butter, green onion, onion soup mix, and Tabasco. Add 1-2 tbsp milk if it appears dry. Shape into 8 balls.

Dip in beaten egg and then roll in cornflakes. Place on baking sheet and bake at 400° about 15 minutes, or until hot and crisp.

I have no idea who Vaughan is or was – but I loved their potatoes! They are definitely something I could see making, again.

I made them pretty much as described, but used a bit more than a pound of potatoes – my two russets weighed more than their three 1960s counterparts.

I riced the potatoes to make them completely smooth and then mixed everything in by hand. Very easy.

The potatoes were a bit loose – definitely not add more milk if dry – so I formed then into balls using an ice cream scoop and then refrigerated them to firm up. It was really easy to roll the refrigerated balls, dip into the egg, and roll in the crumbs.

They were fun – a nice, crispy exterior and a smooth, flavorful interior. Lipton’s Onion Soup Mix, potatoes, and corn flakes… Who woulda thunk?!? Thanks, Vaughan!

And then we had Guess-Again Carrots.

Guess-Again Carrots

  • 2 pounds Carrots
  • 1/2 cup melted butter
  • 3/4 cup milk
  • 1 medium onion, grated
  • 8 oz shredded Cheddar
  • 2 eggs
  • sm chopped pepper
  • Tabasco
  • pinch nutmeg
  • Parsley
  • Bread crumbs

Peel, slice, and boil carrots until tender. Mash well.

Add butter, onion, eggs, cheese, milk, hot sauce, and nutmeg,

Place in a buttered quart casserole. Top with chopped peppers and buttered bread crumbs.

Bake at 350° for 40 minutes. Garnish with parsley.

This was the only dish I had a vague recollection of – and the recipe made enough for several armies – not a dinner for 4. I could have halved it and still had leftovers.

They were not bad. My Mom completely changed the recipe around – how unusual – so I have no idea what the original would have been, but, overall, they were not bad.

They were silky-smooth and the crumbs added a nice contrasting texture.

The concept would also work with butternut squash, pumpkin…

Naturally, we had to have dessert – and also naturally – my first thought was to something really ooey and gooey. Mom was a dessert queen. Her original dessert binder was twice as thick as the binder holding all the other recipes. Gee… I wonder where I get my sweet tooth from?!?

But.. after the above meal, I knew my 71 year old over-weight metabolism would not be happy. My taste-buds would, but I’d pay for it.

Instead, we went with Peanut Cookies.

Peanut Cookies

  • 8 oz butter, softened
  • 1 cup chunky peanut butter
  • 1 cup granulated sugar
  • 1 cup – packed – brown sugar
  • 2 eggs
  • 2 cups ap flour
  • 1 tsp baking soda
  • 1/2 tsp salt
  • 5 oz peanuts
  • chopped peanuts for garnish

Preheat oven to 325°. Cream butter and peanut butter. Gradually add sugars.

Add eggs one at a time, and beat until light and fluffy.

Combine flour, baking soda, and salt. Gradually add to creamed mixture and beat until well-blended. Mix in peanuts.

Drop by teaspoons onto ungreased cookie sheets and top with crushed peanuts. Bake 12-15 minutes or until brown.

I do not actually remember these particular cookies from my childhood, but that really doesn’t mean I never had them. My mother made so many different cookies, cakes, pies, and other desserts – we actually had some sort of dessert every night – that they all just blend and fade into sweet memories.

That being said – these cookies are dangerous! The perfect two-bite treat!

They were soft but not cake-like. Fully-baked – not under-done like designer cookies of today. A good but not overpowering peanut flavor, good crunch, and not too sweet. The perfect cookie, in my not so humble opinion.

A perfect end to a fun meal with excellent company.

The recipe states 6 dozen cookies dropped by rounded teaspoons. I got 8 dozen cookies using a #60 scoop.

So… gastronomically speaking, were those thrilling days of yesteryear really thrilling?

A resounding yes, no, and maybe.

Let’s face it… tastes change. When my Mom was making these things – or at least collecting the recipes – avocados were exotic, fresh strawberries were only available in summer, chicken was expensive and bone-in, beef was cheap, pork had fat, and watermelons had seeds.

Every one of those things is different, today. We didn’t have access to the ethnic foods and exotic spices we see in supermarkets, today. Fresh produce was local – canned and frozen reigned supreme.

We have access to so many different ingredients, today, that using a can of condensed soup as the base for a sauce seems rather low-brow. But adding sour cream and sherry – even if it was Holland House Sherry Cooking Wine – elevated it to a company meal.

I grew up with a mother who loved to experiment in the kitchen. I think it was part of her escape mechanism from dealing with six kids. She could let her mind wander and creative juices flow in-between changing diapers and stopping brawls in the living room.

Some of her meals were home runs, most definitely got on base, and, once in a while, there were strike-outs, but her batting average made Ty Cobb look like a loser.

And I was definitely a benefactor of it. It paved my way into the kitchen.

For lunch, today, I made a sliced ham and cheese ball sandwich.

Mom would be proud.


And Another Re-Do

Here we go again, boys and girls!

I thought it time to clean up the recipe site a bit, and - like most simple projects - it took much longer than I thought.

It was a typical scenario - change this, and that could use a facelift, Then tweak this, then that, and next thing ya know, there's a thousand-and-one other things that need updating. Since leaving well enough alone is not in my DNA... well... you get the picture.

The site started out 20 years ago in 2003. It was set up as a site to share the recipes that Ruth and I were creating at Trader Joe's in Wayne, Pennsylvania - store #632 for those who care.

It was a fun site, and for the next two years started including the rest of the stores in the area. I had helped open many of them in the Demo area, so I always took lots of pictures and wrote about how great the new stores were. I knew people in every store, so it was a way to keep track of who was where, who was promoted... office gossip.

Here's a partial screenshot of that old site.

Alas, in 2005, I got a call from the corporate offices to take the site down. They were not pleased that one of their employees was running a rogue website. In 2005, the company had not really embraced technology. Case in point - the store opened in late 2000 using manual cash registers. The products didn't have barcodes - you know... those things that came out in the 1970s - everything was priced by hand. Scanners came about in July 2002. MY website was a hellava lot more informative than theirs.

But I digress...

I had just started a food blog on the Tim and Victor site, so... being the stubborn and pigheaded person that I am, I removed the Trader Joe logos and direct references from the site and rebranded it as Tim and Victor's Totally Joyous Recipes.

I kept the Demo recipes on the site and added cookbook collections I had - my Mom's Cookbooks, Family Reunion, Christmas Cookies... No direct reference to TJ's, but they were still there - the demo recipe pages were really popular in the store, and a of of other stores in the country had found out about it and were using the recipes and sharing their own.

I was keeping it a bit under the radar.

I did an update in 2006...

And another quite quickly...


And another in late 2006.

Fun and colorful. I was writing quite a few blog posts by this time and they were pretty much front and center to keep the corporate folks at bay. I was changing the look quite often, but it had to stay up for a few months to be included, here!

All was going well until 2008. I had done yet, another revamp and, during election season, put an Obama/Biden picture on the site.

Another call from The Corporate Office. It seems a customer had called them and complained about having the Obama/Biden sticker on the site. My store Captain - we had started at the store 1 day apart and knew each other extremely well - took me out to lunch. Midway, he told me about the call and that I had to take the site down.

Naturally, I told him it was a personal, private site and had nothing to do with Trader Joe's, and the site was staying up. My concession was to promise him to completely scrub the site of all reference to TJ's - and I did.

And I did another redo. Demo became Quick and Easy Meals In Minutes.

I was doing all of these sites  in html. First, with Microsoft FrontPage. It was far easier than the hand-coding I had originally learned but it definitely had its limitations. My brother became Chief Engineer of Macromedia in San Francisco, and sent me a copy of their Designer Suite - DreamWeaver, Flash, Fireworks... I was in Web Design Heaven! There was quite the learning curve, but it was something I really wanted to learn - and I kinda almost did.

I was blogging up a storm! I felt like Anthony Bourdain with a side of Alton Brown.

Sadly, I didn't have their talent - for cooking or writing. Reading back on some of my earlier posts are enough to make me cringe - how pompous and pretentious can one person get? Evidently, a lot.

It didn't help matters that someone decided it would be a good idea to have a sandwich board out front letting passersby know the Daily Demo - with MY picture on it.

Yeah... let's feed that ego just a little bit more...

In fact... let's use it for the next iteration of the site! And call them Demo Recipes, again, and have a recipe contest with people submitting recipes on the website! Why not?!? Can you say insufferable, boys and girls?!?


Fortunately, I had a Regional Director who really liked - and understood - me. He encouraged me to keep being creative. He enjoyed seeing the rules bent.

The next big change was moving the entire site to WordPress - and pulling myself back, a bit. Age has a way of mellowing some people out - and I started mellowing out. My pomposity was starting to be more tongue-in-cheek. I was - am - still opinionated. Hopefully, a bit more tolerable, now...

I had been using an html site for recipes and cookbooks and a blogging platform for the blog. Design-wise, there weren't as many options - easy options - and I wanted everything in one easily-searchable and similar-looking place. I decided to go with more of a magazine-style format, highlighting the blog and different categories.

I had a lot of fun with this one, changing background colors, headers, you name it!

It served me well for a couple of years, but, the itch to change is strong... The next site came about right after I retired in 2018.

No longer constrained by being an employee of Trader Joe's, I even posted a couple of our old Demo Calendars. The snapshot below is from April, 2019 - prime pandemic time! We were home 99.999% of the time. I had lots of time to play.

We moved west in 2020 and by our first Christmas out here, I needed a holiday update!

The WordPress theme I started using in 2018 allows for so many designs that I'm like a kid in a candy store. This next one was pretty short-lived. It loaded slow - which led to the next iteration...

One of the reasons the site was slow is because I have over 7000 images on it.

There are 2627 blog posts, 1260 recipe pages on the TJ database, 1038 recipe pages on Mom's database, and 340 on Flour Power. Most of the graphics were either ,jpg or .png - and both take up a lot of bandwidth. I found a plugin that will convert the images to Google's .webp or - if your browser supports it - the newer .avif - really fast downloads!

That became the impetus for the re-do. I needed to attach a featured image to every blog post. Most of the posts after 2009 had one attached - very few prior to 2009 did. Fortunately. I'm a bit of a computer packrat so I was able to find a lot of the original files, but they were also very small pictures. back in the dark ages, screens were smaller, there was less bandwidth, and pictures and graphics didn't easily resize.

That, and switching blogging platforms was anything but easy. The two systems were totally different and, while they did allow me to import one to the other, the formatting was all screwed up.

It was tedious, but last night, I finished!

There's more continuity in cookbook page style and layout, and everything flows a bit better. At least I think it does.

I'm sure there will be more tweaks and updates in the years to come, but, for now... this is it.

And tomorrow, back to our regularly scheduled blog posts about what we had for dinner, our newest culinary find, or a rant on the latest diet craze.

Stay tuned.


Ricotta Gnocchi with Pesto and Chicken

I took a chicken breast out of the freezer with no real idea of what I was going to make for dinner.

That's not entirely unusual - ofttimes I will have a plan when I hit the 'fridge. Other times, it's a gamble.

I never plan meals in advance because I really don't know on Sunday what I'll be in the mood for on Thursday. I know many people who do that - I'm just not one of them.

By the same token, I'm not always sure at 10am what I'm going to want at 6pm - more often than not, it depends on what's in the 'fridge and needs using up. Not wasting things is a great motivator - and when there are lots of spices and other things in the pantry, there can be endless possibilities.

All of that came to a screeching halt when Victor asks what I had planned for the chicken. My answer was nothing, and his reply was gnocchi.

I was no longer cooking! That means, no matter what, I'm going to enjoy dinner!

And enjoy, I did!

Light as a feather gnocchi with chunks of chicken in the last of last years pesto was perfection on a plate!

Ricotta Gnocchi

  • 1 to 1 1/4 cups flour
  • 1 cup ricotta - drained
  • 1 cup freshly grated Parmigiano Reggiano
  • 1 egg
  • Pinch garlic powder
  • Pinch S&P

Mix everything together with a light hand and refrigerate about an hour. Start with one cup of flour and add more, depending on how wet the dough is.

Remove from 'fridge and roll pieces of dough into a rope about a half-inch thick. Cut into pieces about an inch long.

Place into simmering salted water and lightly stir. When they rise to the surface, cook another 2 or so minutes.

Serve with your favorite sauce.

Victor sauteed the chicken and then added the pesto. When it was all cooked, he added the gnocchi and mixed it all together.

Dinner was served!

Tons of flavor and contrasting textures made for the perfect dish.


Pesto Pantesco with Shrimp

I love it when Victor heads into the kitchen! I know I'm in for a treat!

Our tomatoes are finally coming in at a pretty good rate - Not enough, yet, for a batch of sauce, but enough to have tomatoes at pretty much every meal. I made a tomato and bean salad Saturday night to serve with a flank steak, we  had a tomato an hot pepper salsa over a grilled pork loin on Thursday. Both really good but they were both just throw-togethers - no recipes.

Victor had seen a recipe in The Washington Post for a pesto that used fresh Roma tomatoes, but... we've found out Roma's really don't do well in our area.  That, of course, has never stopped us from creating something! The reality is, in just about any recipe, any good tomato will work - and if you are able to pick them from your own garden - even better!

Pesto Pantesco

adapted from The Washington Post

  • 1 pound fresh tomatoes, peeled, if desired, and roughly chopped
  • 1 cup (3 ounces) almonds, roughly chopped
  • 3 tablespoons capers, rinsed and drained
  • 1 cup (1 ounce) packed fresh basil leaves
  • 1 cup (1 ounce) packed fresh mint leaves
  • 2 cloves garlic
  • 1/4 cup extra-virgin olive oil
  • S&P, as desired
  • 1 pound cooked pasta or a dozen crostini, for serving (optional)

Step 1 In a food processor or blender, pulse together the tomatoes, almonds, capers, basil, mint and garlic until chunky. With the machine running, slowly add the olive oil and process until smooth. Taste, and season with S&P, if desired.

Step 2 Toss with pasta, use as a topping for bruschetta, crostini, or serve as you’d like.

He did peel the tomatoes this time around. We have a bad-boy Ninja blender/food processor, so it can blend things a bit better than your basic budget Hamilton Beach, but it's still a personal preference. If you have the time, go for it. If not, don't worry about it.

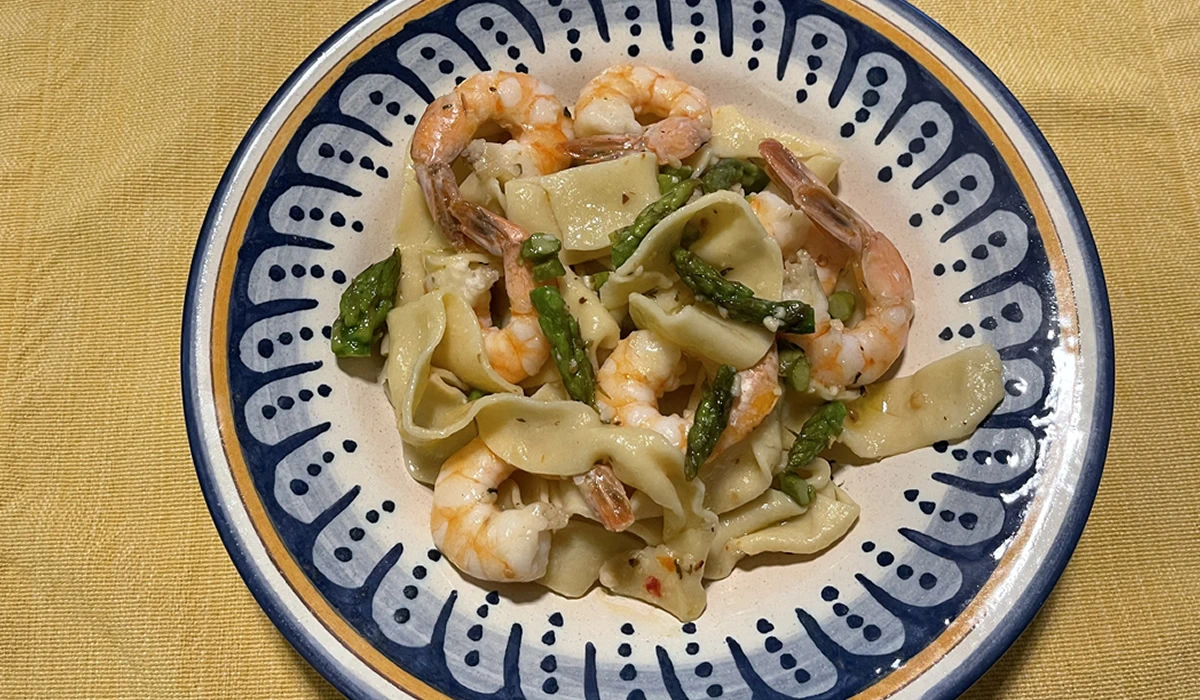
Victor knew it was going to go over pasta and thought he might make some - he does make some awesome pasta. We had a box of squid ink and pepper pappardelle, however, and he decided to add shrimp to the pesto and serve it with the pappardelle. I have absolutely no idea where we picked up the pasta, but it's been around for a while - just waiting for the right sauce. And this was definitely it!


The pesto screamed fresh tomatoes - it definitely was the prominent flavor - and, I think the peeled tomatoes may have helped enhance that fresh-from-the-garden flavor - totally contradicting my earlier claim, above.. And then, everything else came into play - the basil and mint, the garlic, the almonds in the background... Bold and subtle at the same time.


The pasta was the perfect foil, and the perfectly-cooked shrimp added another layer of flavor and texture.

The pesto recipe made about 2-2 1/2 cups - enough for dinner and enough to go into the freezer for another great meal or two - a little goes a long way.

And just for grins and giggles, here is the comic Pickles by Brian Crane.

It just described our refrigerator, perfectly. As I do the majority of the grocery shopping...

... Guilty, as charged.


Buena Mulata Pepper Sauce

I made some hot pepper sauce, yesterday - emphasis on the word hot!

It's pretty spectacular, if you like that sort of thing - and we both do!

Our niece, Christine, started a slew of plants from seed and handed them out to the family. We got numerous peppers, tomatoes, and eggplants to add to our garden this year.

One pepper that just exploded is the Buena Mulata. It's a purple heirloom cayenne pepper with a Scoville of 30,000 to 50,000. These seeem on the higher end!

They start out with a really pretty purple flower, and as they grow, they start off a pale greenish yellow color, but then turn bright purple. Once they begin to ripen, the peppers turn orange, then brown, and finally to a deep crimson red. The colors are striking!

I gathered about 4 ounces of peppers and started to make a vinegar-based hot sauce. It's a really quick recipe and only takes about 30 minutes from start to bottling.

You can use this for just about any hot pepper.

Hot Pepper Sauce

  • 4 oz chopped hot peppers
  • 1 medium, carrot, chopped
  • 2 cloves garlic, chopped
  • 1 shallot, chopped
  • 1 cup distilled white vinegar
  • 1/2 tsp sweet paprika
  • 1/2 tsp oregano
  • S&P to taste
  • water, as necessary, to thin

Add all of the ingredients to a small pot and bring to a boil.

Reduce heat and simmer, covered, for about 15 minutes, or until all of the ingredients have softened.

Transfer to a blender and blend until smooth.

Add water a bit at a time and process to desired thickness.

Strain, if desired.

Bottle and enjoy.

The carrot acts as the sugar. You can omit and add a quarter-cup, or so. It's also a pepper-forward recipe. It's hot. It's also the first sauce we've made from a single source pepper. Usually, we make pepper sauce from a collection of different peppers. I like this one!

I got exactly 3 5 oz bottles from the recipe. A perfect amount.

Now to start thinking about tomatoes...

That's just one of 10 plants we have going!


The 50th Anniversary of My 21st Birthday

I would imagine most people can recall where they were on their 21st birthday. Not necessarily the details, as alcohol in excessive amounts may have been in play, but, at least, a general idea.

I definitely remember mine - I was floating off the coast of California. I was still in Uncle Sam's Yacht Club in July of 1973 - A Commissaryman on the USS Ranger (CVA-61).

We had returned from Viet Nam in June, and were back at our homeport of Alameda. I was working 8-hour shifts on the boat, and living with 4 other sailors in a house at 17th and Lincoln in the city, commuting over the Bay Bridge maybe 4 times a week. It was rough, but someone had to do it.

Knowing my 21st birthday was rapidly approaching, I put in for 3 days leave, as the Ranger was going to be out at sea for three days over my birthday. Nothing special, the Navy just had to get us out to sea every once in a while to make sure our lives were properly disrupted.

Military Chain-of-Command is an interesting thing. One starts at the lowest level and things either move up the chain or are stopped at any given level. My leave request was stopped at the first. Our Leading Chief - Chief Tanzio - did not like me. In fact, he really disliked me. He didn't like my attitude, he didn't like that I knew how to get around rules, he didn't like that I was good at any task I was given, and he really didn't like that our Division Head a Warrant Officer named Mr. Dame - did like me - for most of the aforementioned traits.

Chief Tanzio, knowing it was my 21st Birthday, refused my leave. I had no recourse. I was out at sea.

Fifty Years Ago.

Upon separation from the ship and active duty, this same Chief made me get a strict military haircut before he would sign my separation papers - but that's a story for another time.

Fast-forward 50 years and we're camping - at Devil's Lake State Park in Oregon.

The local family up here does at least one family camping trip a season. Last year, it was over my brother's birthday in August. We missed that one because of Covid. Victor caught it and then I did.  We weren't quite past the CDC rules for engagement, so, we stayed home. This year, since my birthday fell on a Friday, it was the perfect date to go. Covid-free.

Camping. The Great Outdoors.

I did a lot of camping and hiking in my youth. When I lived at Tahoe, we went hiking and camping in the Desolation Wilderness, Fallen Leaf Lake, and all over Tahoe National Forest. I even camped atop Half Dome in Yosemite back when it was still allowed. The only time I was atop Half Dome.

But that was then and this is now. Osteoarthritis in knees and hips makes lots of walking less than really enjoyable. [I'm seeing the Orthopedist on August 2nd to work out a treatment plan.]

Victor, the East Coast Boy, had never been camping. He doesn't quite grasp the logic of emptying out half of your house to go somewhere and sit and sleep outside. That's what hotels are for. You need bring nothing but your credit card and a change of clothes and venture in-and-out of nature and luxury as you see fit.  Someone brings you food, you leave them a gratuity. Very civilized.

Instead, we have tents and cots - this old body ain't sleeping on the ground, thankyouverymuch - sleeping bags and pillows, lanterns, coolers with beverages and food, bags with more groceries and snacks, And camp stoves and pots and pans and a sharp knife, a cutting board, plates and flatware, cups and glasses - for 17 adults and 2 toddlers and 4 dogs - not to mention the additional supplies, food, toys and sundry equipment toddlers and dogs require.

Granted, this is drive-up camping where you actually drive up to your site, pitch your tents, and there are flush toilets. But still, the amount of stuff you need to bring with you is mind-boggling!

And then there is the setup.

It's amazing how much work one must do to relax. But relax, we did. And eat. And eat...

This is some gourmet camping, boys and girls! Our first night, our niece, Katie, made a 4-bean chili with kielbasa - just outstanding! There were pasta salads, green salads. I baked cookies for snacking and desserts - and then it was time to sing Happy Birthday!


My sister, Phoebe, baked the cake. Obviously, she knows me well! And it was delicious! I had more than two pieces!

It's finally dark, fire is burning low, and time for the old people to get to bed. The 20-somethings and thirty-somethings stayed up, because that's what 20-somethings and thirty-somethings do.

Into the tent, crawl into the sleeping bag atop out brand-new cots and...

Have you ever heard the story of The Princess and the Pea?!?

Well... let me tell you the story of the Queen and the Boulder.

The cot was extremely hard - properly rigid as a cot should be - but my light and soft sleeping bag just didn't offer any cushioning. Lying on my side was hitting pressure points on my hips, radiating pain all the way down my legs. Lying on my back doesn't work because of sleep apnea. I tossed, I turned, I cursed under my breath - the campground has a 'Quiet Time' after 10pm and I didn't want to scare any wild animals - and stared at the ceiling for hours on end. Three Tylenol PM did no good, at all.

I dozed, fitfully, and finally got up when I heard movement outside. Coffee was perking. I had survived. Barely, but I survived. I was determined not to be cranky - even though I was feeling cranky. The gang started getting up and plans were being laid for cooking breakfast. Food can usually get me out of a cranky mood.

We had bacon and eggs and sausages and pancakes and melons and bagels and English muffins and mini donuts - I got a free dozen for my birthday and bought another three from a great little donut shop close to the house - Pip's, if you're in the neighborhood - and orange juice and... and... and...

We ate well. I was no longer feeling cranky.

Refreshed, Victor and I headed into town to buy air mattresses for the cots. No way could I do two nights in that pain.

First stop, Ace Hardware. They had ONE mattress for $54. Steep, but I would have taken out a second mortgage or sold one of the kids, if necessary. The store employee told us that there was a Bi-Mart down the road that would probably have a bigger selection and better prices. Bi-Mart is a membership discount department store in Oregon. Naturally, I have a membership, so off we went. We walked by the guns and ammo, camo clothing, fishing gear, groceries, beer, and pots and pans, and found the cots.

They had a great selection and we bought two mattresses for $12.99 each - and picked up a queen mattress for my nephew, Bill, whose mattress had sprung a leak. It was $20. Three for less than the price of one.

Armed with a battery-operated pump - of course, no one blows these things up manually -  we filled the mattresses. It was like sleeping on Grandma's Feather Bed - not that my grandmother actually had a feather bed, but you get the idea. It was heavenly.

The rest of the day was total fun - sitting around, laughing and joking, chasing toddlers and dogs, and playing Remember When... There's a 12-year gap between older brother and youngest sister, so it's often fun to hear how different people remember different events - someone who was 5 definitely had a different experience than someone who was 17.

Chili dogs for lunch and burgers with all the fixin's, potato salad, orzo salad, chips and dips, for dinner.

And then S'mores.

Nephew Bill was teaching his daughter how to make them and not fall into the fire pit. I had my obligatory one, but... they really don't do much for me. And they're a sticky mess - when made correctly.

Back to the tent and a blissful nights sleep.

Back up around 6:30am - early to bed, early to rise - and another huge breakfast. These folks really are professional campers.

And then the taking apart of all of those things we spent all of that time putting together. We have a 9'x10'x78" pop-up tent. It takes one person about 90 seconds to put up. Really. It's amazing.

And it takes about 5 minutes to take down because you have to fold it in such a way so it will fit back into its bag. But before doing the tent, we had to empty it out. Deflate the air mattresses and fold them up. Roll the sleeping bags and get them into their bags. Disassemble the cots - which really takes a lot of effort. Collapse the camping nightstand/table my brother gave me for my birthday. Pack the clothes, the lanterns... leftover food and beverages...

And then get it all into the car along with overflow from my sister. We learned tricks to make it all easier, more creature comforts, streamlining techniques...

Easy peasy.

And the final verdict?!?

We'll do it again and again and again - even when it means showing up in our motorized wheelchairs and paying our aides to put everything up.

It was that much fun. And more.


Sicilian Melon Pudding

Yes, you read that right - Melon Pudding...

Made with local melons from Walchli Farms in Hermiston, Oregon. They're the largest melon grower in the Pacific Northwest - and I have to say, the absolute best melon I have ever tasted.

We heard about them from our friends, Bonnie and Nancy up in Washington. Their local farmer's market up there carries them for a short time each season, and they were raving about how good they are. I found them at our local New Seasons Market and headed over there, yesterday morning. New Seasons is an upscale grocer and can be a bit expensive, for things - but not nearly as expensive as Whole Foods and with a much better and friendly staff - so I just picked up a few things before heading up the road to the local WinCo - much more pocketbook friendly.

The melons were on special in their weekly flyer and I get a 10% veteran discount on Tuesdays - so it was about $11.50 for 2 large melons - about 9 1/2 pounds, total. I put the melons in the car and headed up the road. 20 minutes later, I came out of WinCo and opened the door. I was immediately hit with the strongest melon scent, ever.

Back in my produce-buying days,, a good melon was instantly noticeable by the rich melon scent and a bit of give at the stem end. One doesn't often find those characteristics in supermarket melons, anymore. For several years now, melons have been pretty hit-or-miss. Even when you've gotten a bit of a whiff of melon scent, they've often been mealy or just flat - lacking in that fruity summertime flavor.  I knew these were not going to disappoint.

I added the rest of the groceries - mostly junk food since we're doing a family camping trip this weekend over my Birthday - and drooled all the way home.

Into the house and the kitchen immediately lit up. These are some potent melons - and well worth the price.

The pudding recipe comes from a website called Jul's Kitchen - Stories and Recipes from Tuscany. There are some fun recipes there - and I like her style.

Gelo di Melone - Sicilian Melon Pudding

adapted from Juls Kitchen

  • 2 melons
  • 80 g sugar
  • 70 g corn starch
  • 4 tablespoons elderflower syrup

Instructions

Cut the melon into wedges, remove the seeds, and then purée it in a blender. Pass it through a sieve placed over a bowl to eliminate the pulp. If you have a juicer, cut the melon into chunks and juice it, then pass the juice through a sieve into a bowl. You should get about 4 cups/1 lr of melon juice. Should you have any leftovers, save the juice for another use, or drink it cold with a squeeze of lime.

Add the sugar and the cornstarch to a saucepan.

Dilute them with 1 cup of melon juice. Add the rest of the melon juice and the elderflower syrup.

Bring it to a simmer on medium-low flame, stirring continuously. When you spot the first bubbles, cook for one more minute, then remove from the heat.

Pour the thickened melon juice into 4 1-cup pudding molds, or glasses, smooth the surface, and refrigerate until set.

I used a Ninja blender and did not have much pulp to strain - those suckers know how to blend!

And the final verdict is - it's eating the melon in pudding form! Smooth, creamy, soft, rich, flavorful... I'm running out of superlatives! It was that good!

It's a very easy recipe. You can use your favorite melon - and I highly recommend the Walchli if you can find it - or go for your favorite summer fruit. Just strain it to make it as pulp-free as possible. Obviously, the more fresh and ripe the fruit is, the better the flavor.

I see this as an annual summer treat.

Thanks, Bonnie and Nancy for the tip!

**edited to add: If you don't have Elderflower Syrup, just omit it. Or, add 4 tablespoons of a light cordial or something that will compliment the fruit. Don't not make it because of one simple ingredient.


Pomegranate Molasses

A million and one years ago when I was The Demo Dude at Trader Joe's #632 - and years before Pomegranate Molasses was readily available outside of Middle Eastern stores - I came up with a recipe to make it with their rather excellent 100% Pomegranate Juice. The juice is pretty tart and most people didn't know what to do with it back in those dark ages. It was before POM and all those other juices and products came into vogue. As was typical with our Demo Process back then, we took products and gave people several different ways to use them - the more reasons we gave people to use something, the more often they would buy it. We figured it was job security - and since I lasted 17 years before finally retiring, I guess it was.

Pomegranate Molasses was one of our definite hits - we sold a pallet of the juice in just a couple of days because it was new, it was unique, and it tasted fantastic. And because we were extremely fun and creative - drizzling it over ice cream, making BBQ Sauce, salad dressing... We were definitely creative!

Pomegranate Molasses

  • 1 qt pomegranate juice
  • 3/4 cup Sugar
  • 3/4 cup Lemon juice

Place pomegranate juice, sugar, and lemon juice in a saucepan and slowly reduce by boiling to about 1 1/2 cups.
Cool, bottle, and keep refrigerated.
We really did have a lot of fun back in those days.

Fast-Forward 15 or so years and I now buy it - it's available just about everywhere - and I still use it whenever I'm looking to add a bit of sweet/tart flavor - like tonight...

I had seen a recipe for Charred Eggplant with Burrata and Walnut and Pomegranate Relish quite a few years ago in Food and Wine magazine and filed it away as I do with hundreds of recipes a year.

Today, I was thinking of different ways to cook zucchini - since it has taken over one of the garden beds - and thought it might be worth revisiting... My mind definitely works in mysterious ways when it comes to cooking. I guess it's one of the reasons we had so much fun creating all of those Demo recipes back in the day...


Pomegranate and Pistachio Relish

adapted from Food and Wine magazine

  • 1 cup pistachios - roasted & salted
  • 1/2 cup pomegranate arils
  • 1/2 cup chopped parsley
  • 2 tablespoons pomegranate molasses
  • 1/4 cup extra-virgin olive oil
  • 1/4 teaspoon kosher salt
  • 1 garlic clove, finely minced
  • Ground black pepper

Coarsely chop pistachios. Combine them with the pomegranate arils, parsley, pomegranate molasses, olive oil, garlic, and salt. Season with black pepper to taste, and stir to combine.

It really is that easy!


I switched out pistachios for walnuts and parsley for cilantro, doubled the pomegranate molasses and served it over grilled zucchini instead of eggplant. I left out the cheese. And grilled lamb loin chops for the win.


Tons of flavor and totally minimal effort - important when it's really hot outside...


Stuffed Zucchini

Zucchini are stealth-growers.

Their goal is to grow as large as vegetably-possible. They hide. They manipulate leaves to cover themselves. They suck nutrients from the soil as they quickly gain size and shape. Then - without any warning, they show themselves in all of their weighted glory.

Or, at least, that's what it seems like.

I'm in the garden checking things every day, but I didn't see this monster until yesterday morning. It was hiding... mocking me...


But I had the last laugh on this one... What does one do with a 1 3/4 pound zucchini?!? Why... one stuffs it - - with sausage and peppers and onions and a chunk of our homemade bread and lots and lots of cheese!


It was a clean-out-the-'fridge recipe, tonight...

  • Zucchini
  • Buccellato di Lucca
  • Spring onions
  • Bell peppers
  • Roasted red peppers
  • Tomatoes
  • Basil
  • Garlic
  • Mint
  • Oregano
  • Calabrian Chili Paste
  • Salt
  • Pepper
  • Mozzarella

I made a quick blender sauce of onion, pepper, tomato, basil, garlic, mint, oregano, S&P. Poured half into a 9x13 bking dish.

I cooked up the sausage, Calabrian chili paste, onion, peppers, basil, ad garlic. Into a bowl with the crumbled bread.

I added the rest of the quick sauce and mixed it all together.

Hollowed out the zucchini, stuffed it, and then covered and baked for 30 minutes. Uncovered, added the mozzarella, and placed back into the oven until all melty and gooey.


It was huge - and waaaaaaay too much for one meal - so we're having it for lunch, today.

I'm on the lookout for more of these monsters!


Fresh-Baked Bread and a Bowl of Soup - Italian Style

Ah, Lucca... one of the famed walled cities of Italy.

We spent an afternoon in the old city - not nearly enough time - but it gave us a glimpse of it... The food, the drink, the sites... all of it memorable.

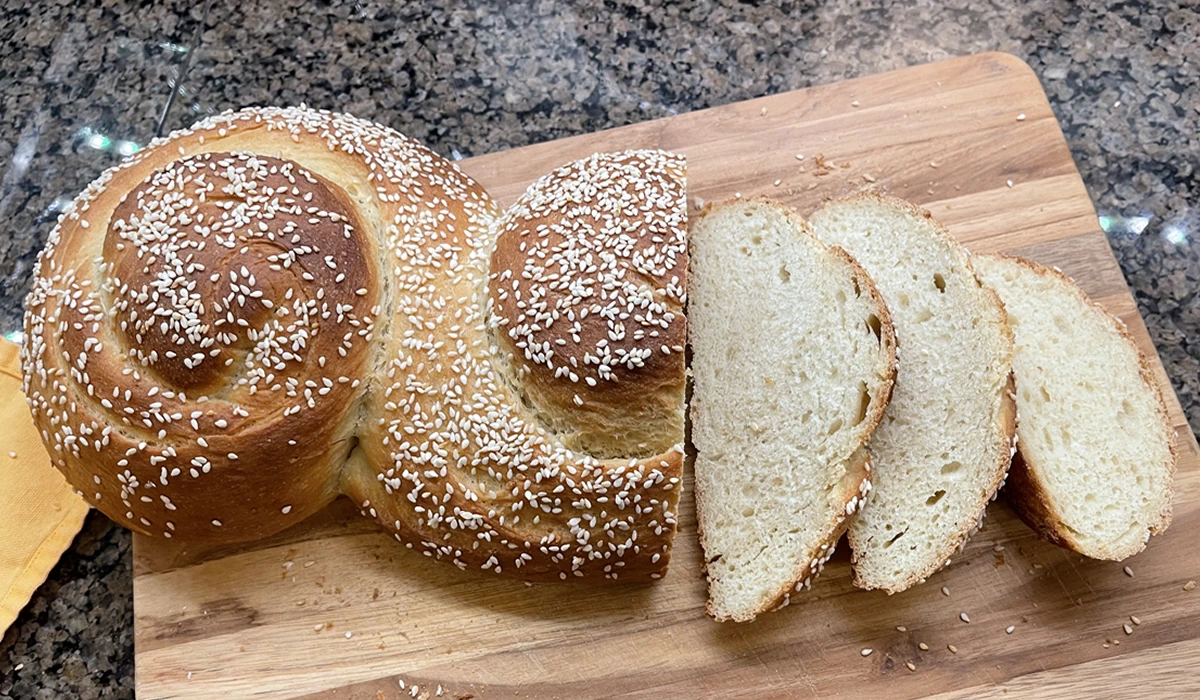
One thing we didn't have, was Buccellato di Lucca - a raisin and aniseed sweet bread. Not to be confused with Sicilian Buccellato - a Christmas bread usually made with figs and nuts. The Italians can be very territorial with their recipes.

Victor came across the recipe, and - since we just happened to have all of the ingredients - he decided to make a loaf! Traditionally, this is considered a breakfast or dessert bread but we decided it was going to be a dinner bread - and a soup was the perfect accompaniment! Fortunately, the weather gods cooperated and gave us an overcast day in the low-70s.

We have some extremely fresh aniseed from San Francisco Herb Company and 10 minutes after going into the oven, the whole house smelled of anise and baking bread. Total gastronomic heaven! I was drooling before I saw it come out of the oven!

Buccellato di Lucca

adapted from Juls Kitchen

  • 550 g of all purpose flour
  • 150 g of sugar
  • 3 1/2 g active dry yeast
  • 220 ml of warm water
  • 1 egg yolk
  • 50 g of butter, at room temperature
  • 50 g of raisins
  • 20 g of aniseed
  • 1/4 teaspoon of salt
  • Extra virgin olive oil

The Glaze

  • 1 egg white
  • 2 tablespoons of water
  • 2 tablespoons of sugar

Soak raisins in warm water.

Pour the flour and sugar in the bowl of a stand mixer. Dissolve the yeast in a cup with half the water, then pour it in the bowl and knead on low speed with the dough hook, adding gradually the remaining water.

When the dough has completely absorbed the water, add the egg yolk and the butter cut into small pieces. Knead on low speed until the dough becomes smooth, but still slightly sticky.

Add the aniseed, the squeezed raisins and salt and knead just enough to get them incorporated in the dough.

Form into a ball and place in a lightly oiled bowl.

Cover the dough with a damp cloth and let it proof for about three hours in a warm place.

After it has risen, place on board and roll into a long rope.

Line a baking sheet with parchment paper, form the dough into a circle and pinch the ends to form a donut.

Cut the dough all the way around, so that it will rise better, and let rest for at least an hour.

Preheat the oven to 350°F. Melt the sugar into the hot water to make a syrup, then pour it over the egg white and beat with a fork until frothy.

Brush the syrup and bake for about 45 minutes, until golden brown.

Let it cool completely before slicing.

It should be noted that it takes a couple of really long rises, so, plan accordingly.

And then there was soup...

This is based on something I saw a while back - a 3-imgredient soup that looked rather boring - but had potential.

Cannellini and Cauliflower Soup

  • 1 leek, sliced
  • 1 head cauliflower - cut into florets
  • 2 cans cannellini beans, drained
  • 2 oz thick-sliced prosciutto
  • 1 zucchini, cut into 1/4 inch cubes
  • 1 qt chicken broth
  • 2 cloves garlic
  • 1 habanero chili - or chili pepper of choice
  • thyme - fresh if you have it
  • salt & pepper, to taste

Lightly brown leek and prosciutto in pot with olive oil. Add crushed garlic and give a quick stir. Add minced habanero.

Add cauliflower and broth. Add thyme. Cook until cauliflower is completely cooked through and falling apart-tender.

Puree cauliflower with immersion blender or regular blender. Return to pot.

Add beans and cubed zucchini and cook until zucchini is tender.

Check for seasoning and add salt and pepper, as desired.

It's quite a simple recipe and can be pulled together in no time. The chicken broth can be switched out and prosciutto omitted to make it vegan, and the hot pepper can be omitted, completely - although we both really like our spice and the added flavor of the broth and prosciutto.

It was great for dinner and even better for lunch, today!

My stomach is smiling...


Drag Queens and Guinness World Records

It’s pretty much once in a lifetime that one gets to participate in a Guinness Book World Record, but when we learned of Darcelle XV Showplace trying to set the record for the longest continuous Drag Performance, we knew we had to go!

The criterion is quite strict. There had to be a minimum of 25 people in the audience at all times. The show had strict time limits for emcees and announcements. Performers had set times. And all was regulated by Guinness Inspectors who were there for the entire 48 hours. there was no problem with the audience numbers – it was sold out for the entire 48 hours!

Tickets were sold for 2-hour sets. Ours were for 1pm-3pm on the last day – with 3pm to 4pm as the Grand Finale. We tried, but those tickets were sold out immediately.

The Official Record is now 48 hours, 11 minutes, and 30 seconds!

Darcelle XV – aka Walter Cole – holds the Guinness Record for Worlds Oldest Performing Drag Queen. The record was set in 2016 when she was just shy of 86 and and she performed continually until she passed in March. 2023

We have visited Darcelle’s many times and have always had a great time. It’s an experience everyone should have. A sight to behold was Darcelle performing Rhinestone Cowboy in Rhinestone Chaps – a 92 year old bare ass is definitely something you don’t forget!

The talent and energy of the performers is astounding, and many of the performers seem like old family friends, Poison Waters, Cassie Nova, Mr Mitchell… Great fun, indeed.

And the energy of the performers 45 hours into the record was phenomenal.

The pictures don’t even begin to do justice to the costumes, the make-up, the hair, the shoes – and how ANYONE can dance non-stop across a stage in stilettos is a miracle in and of itself. It was enough to exhaust Tina Turner!

Another great benefit of the Drag-A-Thon was raising over $290,000.00 for The Trevor Project! They provide information & support to LGBTQ 
young people 24/7, all year round. If you would like to donate, please mention Darcelle XV Drag-A-Thon for them to get credit!

While there probably won’t be a repeat of the Drag-A-Thon any time soon, I do encourage all of you to go and visit a drag club near you.

With draconian legislation being passed by Republicans across the country, Drag performers need our support right now, more than ever.

Do your part and have fun doing it!


Zucchini

We harvested our first zucchini yesterday!

They came out of nowhere - as zucchini are wont to do. Wednesday, we had nothing but flowers. Friday, there were 2 huge zukes - with many more coming.

Being the gluttons for punishment that we are, we planted not one, but TWO zucchini plants.

As with our 2 eggplants from our Pennsylvania days, we shall be getting very creative.

Our first zucchini went into Zucchini Bread, because - cake. A simple, very basic recipe from the New York Times that never fails to please.


Zucchini Bread

adapted from NY Times recipes

  • 1/4 cup / 57 grams unsalted butter, plus more for greasing the pan
  • 1 3/4 cups / 225 grams all-purpose flour
  • 1 teaspoon cinnamon
  • 1 teaspoon kosher salt
  • heaping 1/2 teaspoon baking powder
  • heaping 1/2 teaspoon baking soda
  • 1/4  teaspoon nutmeg
  • 2 large eggs
  • 3/8 cup/ 83 grams brown sugar
  • 3/8 cup / 76 grams sugar
  • 3/8 cup / 90 milliliters neutral oil
  • 3/4 pound zucchini, unpeeled and grated on a box grater

Heat oven to 350°F. Lightly grease an 8-x4-inch loaf pan with softened butter and line with parchment paper.

Melt butter in a small pot over medium heat. Cook, swirling occasionally, until the butter starts to brown and smell like hazelnuts, 5 to 7 minutes. Use a whisk to scrape up any browned bits on the bottom of the pot; set aside.

Whisk together flour, cinnamon, salt, baking powder, baking soda and nutmeg in a large bowl.

Whisk together eggs, light brown sugar, sugar and canola oil in a medium bowl until no lumps remain and eggs are well blended.

Using your hands, squeeze out as much water as possible from the zucchini. Add zucchini and browned butter to the egg mixture, whisking to blend.

Make a well in the center of the dry ingredients and add the wet ingredients. Use a spatula to slowly incorporate until no dry spots remain.

Divide batter among prepared pans, smoothing the top. Sprinkle both with demerara sugar, if using, and place in oven. Bake, rotating once, until bread is golden brown on top, pulls away from the sides and springs back lightly when pressed at the top, 50 to 60 minutes.

Let cool completely on a wire rack before removing from the loaf pan.

I didn't brown the butter because I didn't feel like it. I've done it in the past but I don't think it makes that big of a difference.

Personal taste. Your results may vary.

The other zucchini became our dinner side.


It's a really quick sauté we did as a standard vegetable dish when I worked at the Hyatt Lake Tahoe back in the '70s and have been making ever since.

Zucchini and Tomatoes

  • Zucchini
  • Tomatoes
  • Onion
  • Garlic
  • Basil
  • Olive Oil
  • S&P

Chop zucchini and tomatoes into chunks. Slice onions into either strips or 1-inch pieces. Mince garlic, and chiffonade basil.

Heat olive oil in skillet over medium-high heat. Add onion and sauté briefly. Add zucchini and cook until it just begins to soften. Add minced garlic and tomatoes.

Continue cooking until tomatoes begin to break down and zucchini is al dente.

Stir in basil and salt & pepper, to taste.

It really is one of the easiest - and tastiest - ways to cook a zuke!

We have plenty of recipes for zucchini, eggplant, and tomatoes. The tomatoes are veeeeeery slowly starting to come in and the eggplant is growing, but mocking us in their lack of flowers.

We shall be getting zucchini-creative very soon!