The Last of the Beets
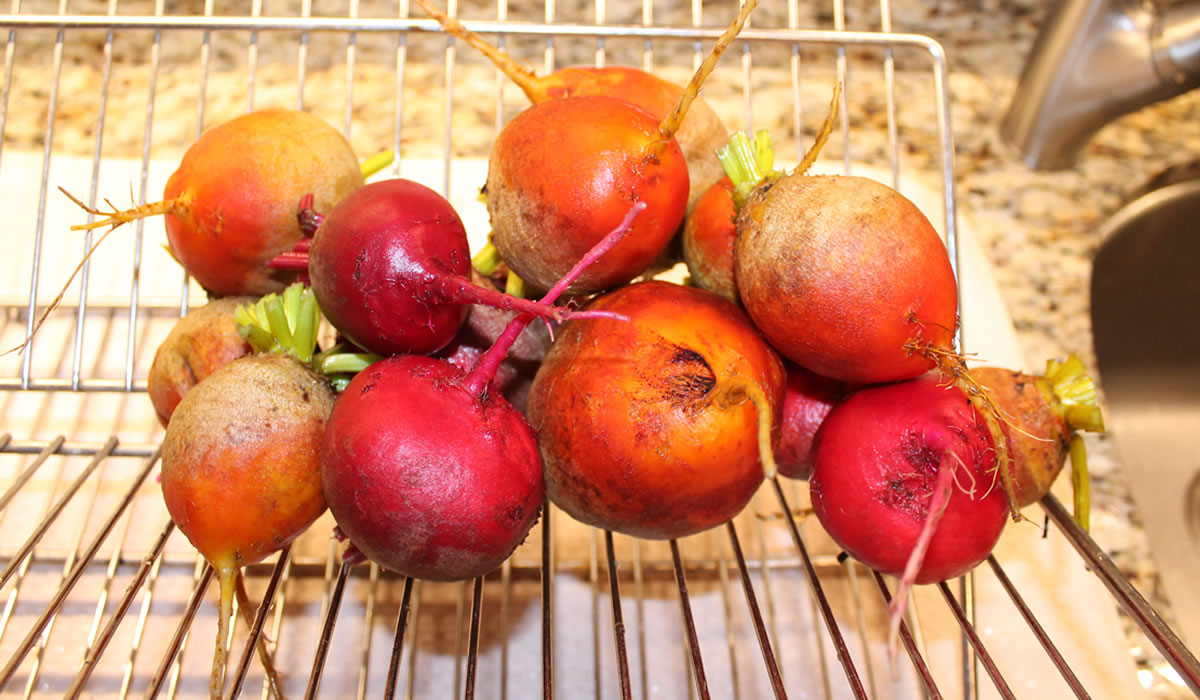
I suppose all good things must come to an end. Today, that good thing was the beets from the garden. Victor wasn't a huge fan of them until he found out that they all didn't taste like those red things coming out of a can. Once he tasted a fresh golden beet roasted in the oven, he was a believer! We had a few last year - and even more this time around!
We planted golden beets and zebra striped beets and I even learned something about growing beets, as well. We had our beet section cordoned off and I went in to sow the seeds. Well... let us just say that I got lazy and didn't plant them in any sort of row or order. I just kinda threw the seeds out and called it a day. Beets prefer to have a bit of room on their own to grow. They don't necessarily like having six beets competing for the same real estate. Next year, I shall give them their proper space. Learning experience.
Tonight I took those beets and oiled them up a bit and put them - covered - into a 425°F oven for a bit under an hour. When they were cool enough to handle, I peeled them and cut them into chunks.

The chunks got liberally doused with balsamic vinegar and they went back into the oven to caramelize a bit.
And then dinner was served. Because we still have tomatoes coming out of our e pluribus unum, I sauted chicken breasts, topped them with a really thick slice of tomato, and baked them off for about 20 minutes. I then topped it all with cheese and let it all get gooey.
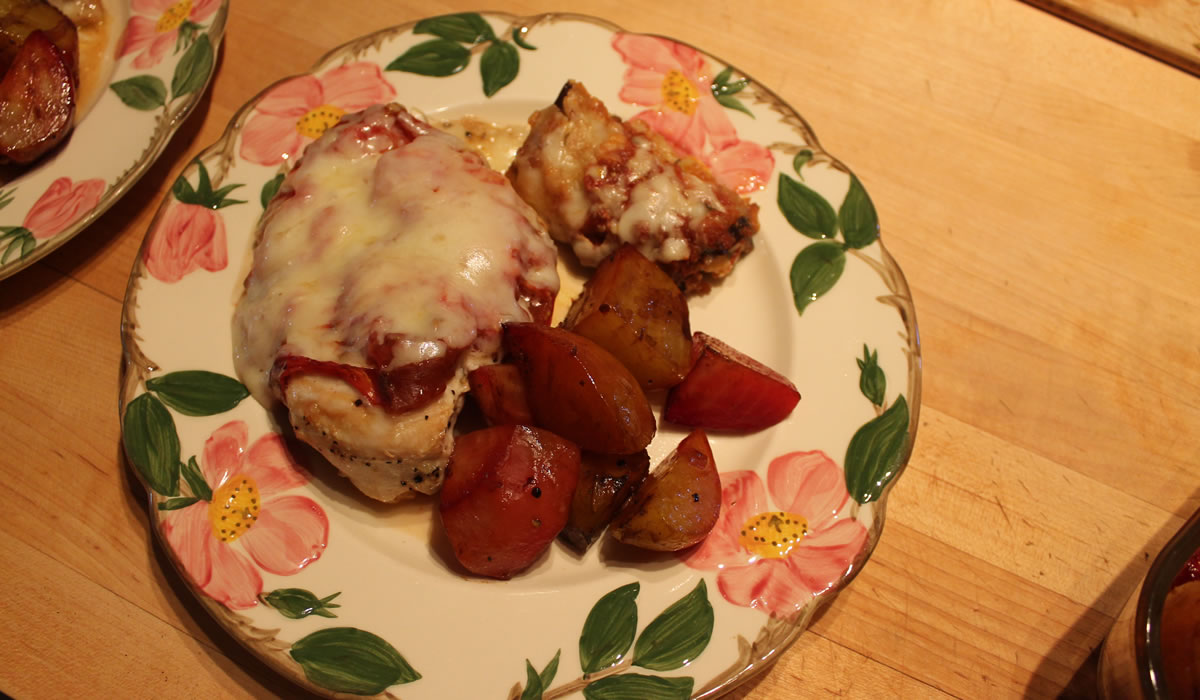
To complete the plate, we had a bit of last night's eggplant rolatini.
I can't believe how much fun this garden has been. We are really eating well. Really well. The fun has been trying to come up with different recipes using the same few items. We have canned pasta sauce, canned plain tomato sauce, salsa, peppers, eggplant... I have about 5 pounds of green beans blanched and in the freezer... And more tomatoes coming in.
I think this weekend I'm going to make some BBQ sauce.
And tomato salad. Lots and lots of tomato salad.
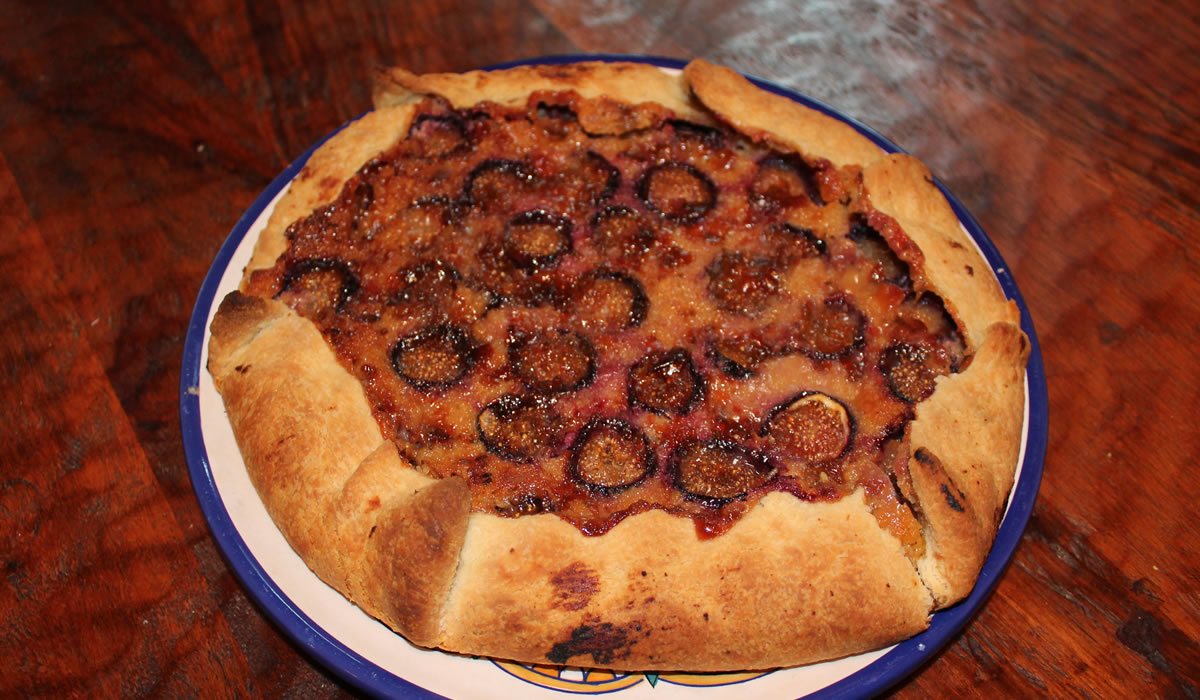
Fig Tart
I just realized the danger of winging a recipe. Victor declared this tart to be one of the five best things I have ever made - and while I have a pretty good idea of what I did, I didn't measure or write anything down.
Curses, says I.
It was a bit of a clean-out-the-refrigerator idea. I had a pie crust made from Sunday, figs that needed using, some ricotta cheese that needed using, and a can of almond paste in the cabinet from Dubya's first term. Time to make a dessert, eh?!?
Making a tart was my first idea because I had that single pie crust, so I started rooting around for what to do. I didn't feel like making a pastry cream, I didn't want to blind-bake a tart shell. I wanted something really good and I was feeling really lazy. I grabbed the step stool and found the can of almond paste on the top shelf of the baking cabinet - back in the corner behind some Wilton Meringue Powder I think we brought from San Leandro.
The can was in good shape, no rust, no bulges, and when I opened it, it actually smelled like almond paste. Score one for the lazy guy.
I thought mixing it with cream cheese would be good for the base but we didn't have any - but we did have some ricotta left from when Victor made the eggplant rolatini. I thought some corn syrup might help pull it together, but I espied a jar of Lyle's Golden Syrup with a few drops remaining, and went for it, instead. I almost added an egg yolk, and then decided against it. Some vanilla went in. Then it almost got pistachios on top - because figs and pistachios go really well together - but pistachios and almonds?!? I forewent the nuts.
The end result was nothing short of miraculous.

Victor's first remark was that it reminded him of the holidays. We've done a lot of cookies and desserts with almond paste over the years so that makes sense. And it was light in texture and heavy on flavor. Not a bad combination.
So here are the measurements I think I used - and the ones I will use the next time I make this.
Fig Tart
- pastry for single crust pie
- 3/4 pound fresh figs
- 1 8oz can almond paste
- 3/4 cup whole milk ricotta
- 3 tbsp Lyle's Golden Syrup
- 1 tsp vanilla
Roll out pastry to about a 13"-14" circle. Place on sheet pan - on parchment paper, if you have it.
Break up almond paste and slowly mix in the ricotta - making sure the almond paste is breaking up and mixing in. Add the vanilla and Golden syrup.
Spread the almond cream evenly over the crust leaving a 3" border all around.
Thickly slice the figs and place then atop the almond cream.
Fold the pastry up over the filling, crimping as you go along.
Bake in a preheated 400°F oven for about 45 minutes.
Cool and serve!
Give it a try. It may be one of the best five things you've ever made!
Brisket
I didn't have a Jewish Bubbe to teach me how to cook a brisket and the briskets of my Irish youth were usually corned and served on various days of the year, but most notably on my Grandfather's birthday - March 17th.
I'm sure we had a non-corned brisket now and again, but I don't remember anything unusual or spectacular about them. Just another meal for the six kids...
Leon's BBQ down the street from us as kids had an amazing brisket sandwich. He did the whole mop and sauce thing over wood fire. Real BBQ in San Francisco. The place was known for miles around.
My first real memory of cooking brisket comes courtesy of Uncle Sam's Yacht Club. Uncle Sam provided us with whole briskets in the 20 pound range. Untrimmed. A cursory trimming would ensue - in Navy jargon that means it came out of the box and into the pan untouched - and then into low ovens for hours on end with water, beef bouillon, onions, garlic, and whatever other spices could be found. They made a damned good brisket. Really. It's not just looking at the past through rose colored glasses. Uncle Sam did have some pretty good food. They had some pretty bad food, as well. Brisket was not one of them.
Back into civilian life with my tastebuds expanded after traveling around the world and working in restaurants that served more than American versions of Italian food, I got to learn a bit more about the hows and whys of braising large cuts of meat - and why you really shouldn't be trimming all that fat off if you want it tender and to taste good. The Navy had it right.
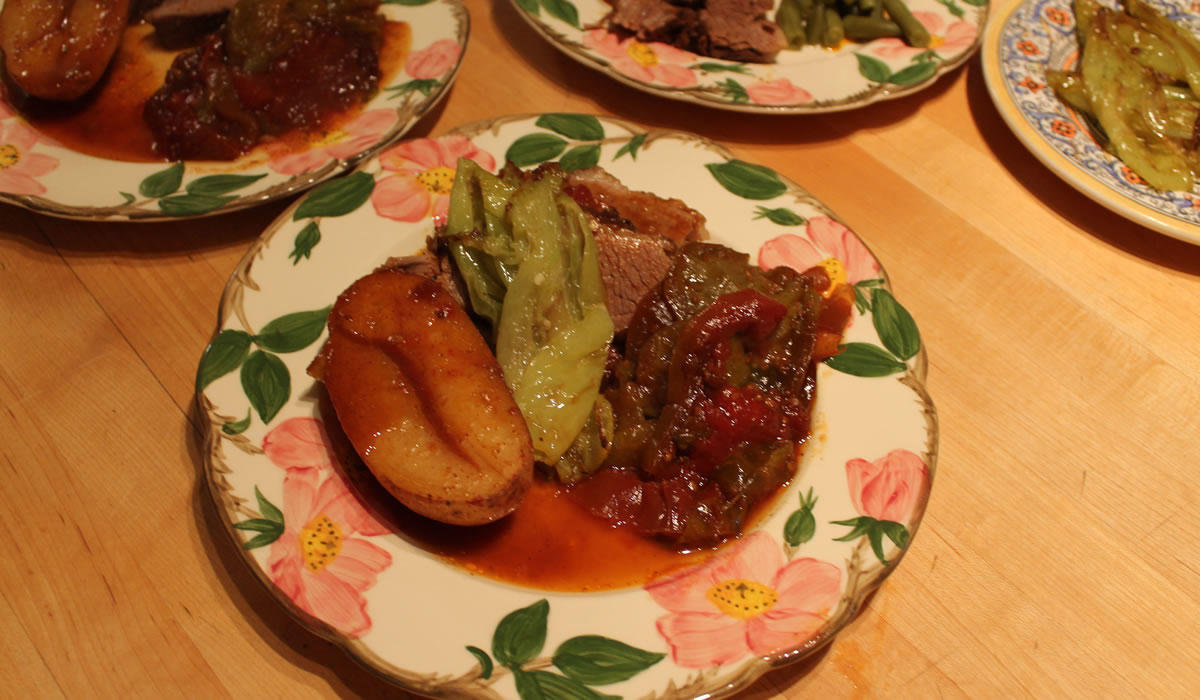
And here we are, today, all these years later, with a 2 pound brisket I picked up at Reading Terminal Market, yesterday, with the proper amount of fat cap.
I started off early this morning by making a spice rub and letting the meat sit out for an hour or so and then it went into the braising pan and into the oven at 225°F for about 5 hours or so.
Rather good.
Oven-Braised Brisket
Spice Rub:
- Brown Sugar
- Chile Powder
- Cumin
- Cayenne Pepper
- Garlic Powder
- Salt & Pepper
Braising Ingredients:
- Beef Broth
- Ketchup
- Apple Cider Vinegar
- Worcestershire Sauce
- Thick-Sliced Tomatoes
Mix spices together and coat brisket liberally. Let sit out about an hour for flavors to penetrate.
In a bowl, mix together equal parts beef broth & catsup, half as much vinegar and a few good shots of worcestershire sauce. Pour over meat and top with thick slices of tomato. Cover and place in oven about 5 hours at 225°F. Add potatoes at the 4 hour mark.
Remove meat, raise temperature to 400°F, and let the potatoes and tomatoes continue cooking another 30 minutes while the meat rests.
While the meat was resting, I started frying off some hot Italian peppers. I got them cleaned and into the skillet, and Victor took over cooking them.
I sliced up some slabs of crusty bread and we ate well. Really well.
Crusty bread with fork-tender beef, a bit of stewed tomato, and fried hot pepper is something everyone should experience.
Really.
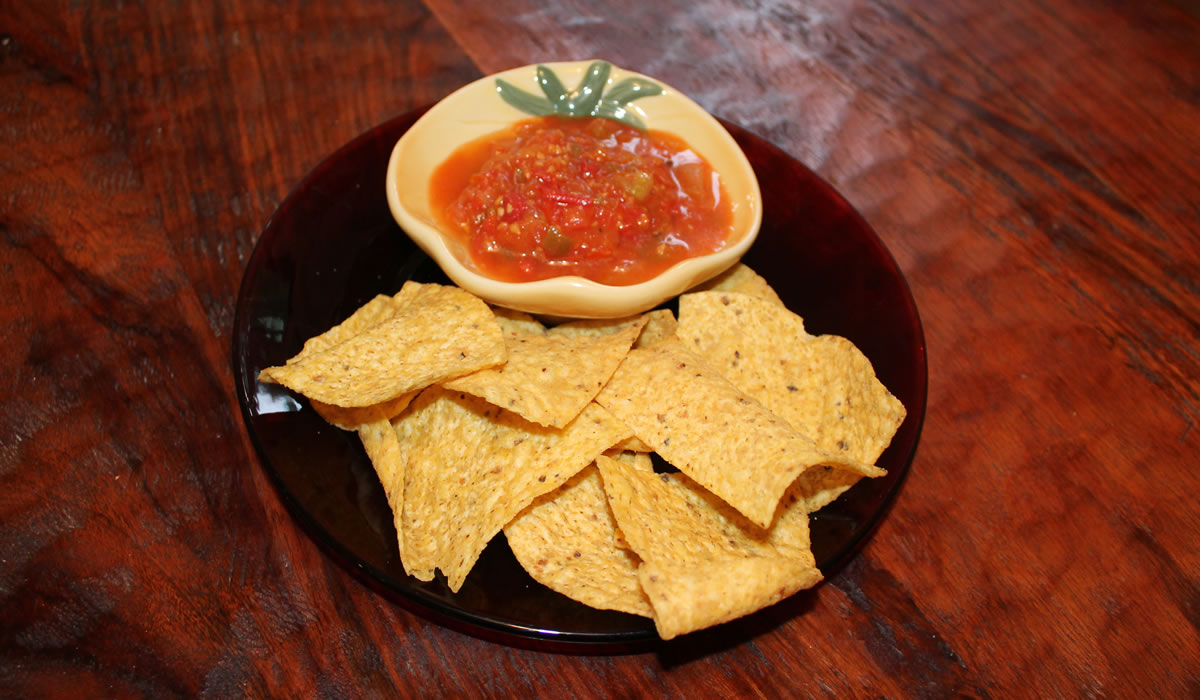
Salsa
When the garden gives tomatoes and peppers, it's time to make salsa!
I make a lot of fresh salsa - just chop stuff up and eat it - but this is my first foray into canning it. It shan't be my last!
The premise is the same as making fresh salsa - except this gets cooked.
Fresh salsa is one of the nectars of the gods... I can eat it with anything. I top chicken, pork, fish with salsa. I eat it with tortilla chips or crackers. With tortillas. As a spin on a bruschetta. Versatility, thy name is salsa!
Time to put it in a jar! Or... several jars...

The tomatoes, hot peppers, bell peppers, and cilantro all came from the garden!
There are no right or wrong ingredient measurements. Obviously, the more of one and the less of another you put in will change the flavor - but that's kinda the point. Use what you have and adjust to your own taste.
I didn't peel the tomatoes. I usually don't unless I'm looking for a specific outcome like the tomato tart. This was all done in the food processor.
Salsa
- Tomatoes
- Onions
- Bell Peppers
- Hot Peppers
- Garlic
- Cilantro
- Cider Vinegar
- Salt
- Pepper
Core tomatoes and coarsely chop in food processor. Do the same with onion and bell pepper.
Mince the garlic and hot peppers.
In a large pot, lightly saute the onion. Add garlic and peppers, and briefly cook. Add tomatoes and vinegar and bring to a boil.
Boil about 10 minutes. Stir in cilantro and salt & pepper, to taste.
Ladle into hot jars and process in a boiling water bath about 15 minutes.
I seeded the peppers and came out with a fairly mild salsa. It makes it a bit more versatile and I can always add a bit of heat if I want it.
Make it your own... Use a variety of red, yellow, orange, and green peppers... Mix up the hot peppers. Add other herbs.
It's a great way to use up the garden bounty!
Have fun with it!
Oven-Dried Cherry Tomatoes in Olive Oil
There are days when I am just not the brightest color in the crayon box...
We have a bit of an overabundance of cherry tomatoes, so I thought I'd give oven-drying a try. I searched Chef Google and found a pretty simple recipe for oven-drying and then preserving in olive oil. About as simple and basic as simple and basic can be.
What I liked about the recipe was there wasn't any canning, per se - just covering with the olive oil. My grandmother canned everything with paraffin, so I get the concept of keeping air out to prevent spoilage.
Back when I lived at Tahoe, my roommate, Steve, made a dehydrator from screens. The air is so dry at 7000 feet that we would slice up just about anything - strawberries, peaches, tomatoes - and lay them out on the screens and hang it outside. In a few days we had dried everything. Alas, things are just a tad different in the humid east.
To work I went.
I washed and dried tomatoes...
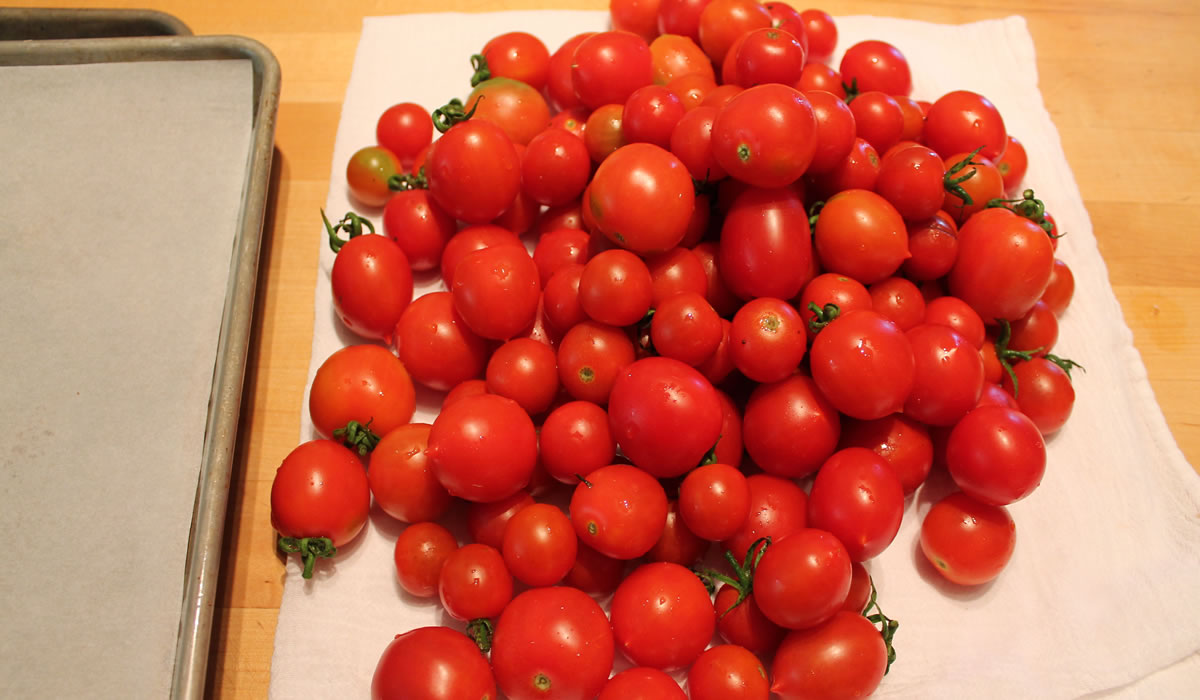
And then I sliced them and laid them out on sheet pans...
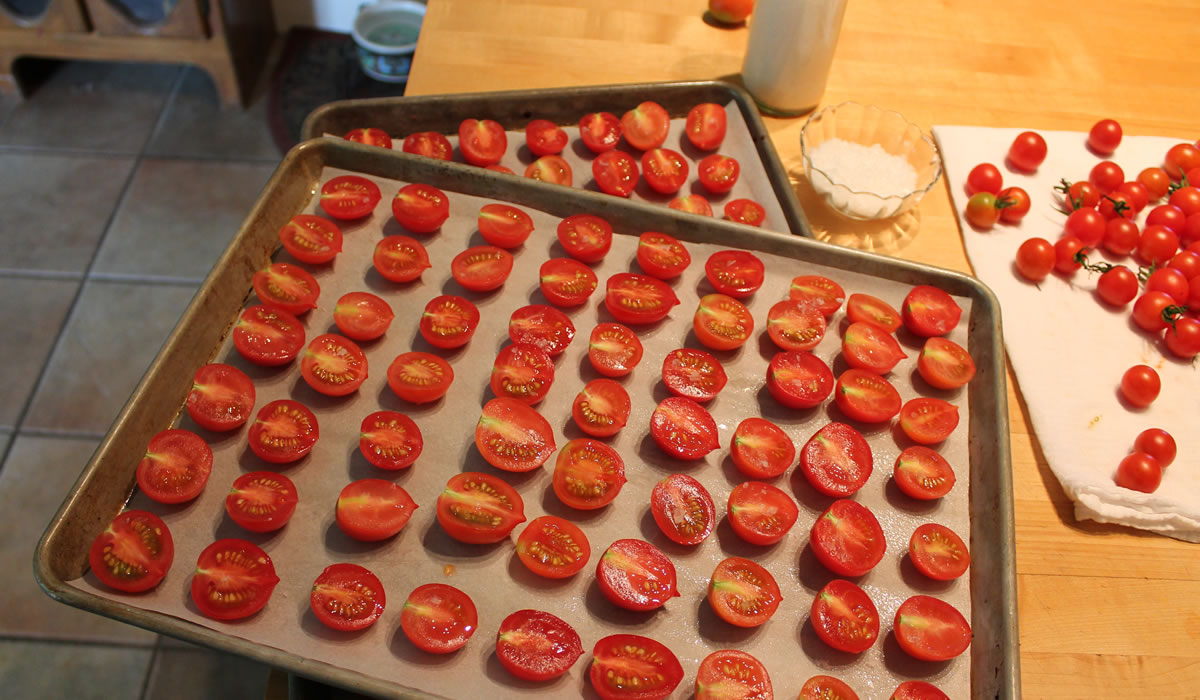
I sprinkled them with Maldon salt - because I have a lot of Maldon salt along with the 14 other salts I have from when I was going through my salt craze.
Into a 210°F oven for almost 6 hours, turning and rotating every hour.
I brought up 8 pint jars to hold the multitude, and brought up the big blue pot to boil them all in - they wouldn't all fit in anything already upstairs and they needed to boil for 10 minutes before filling with the dried tomatoes.
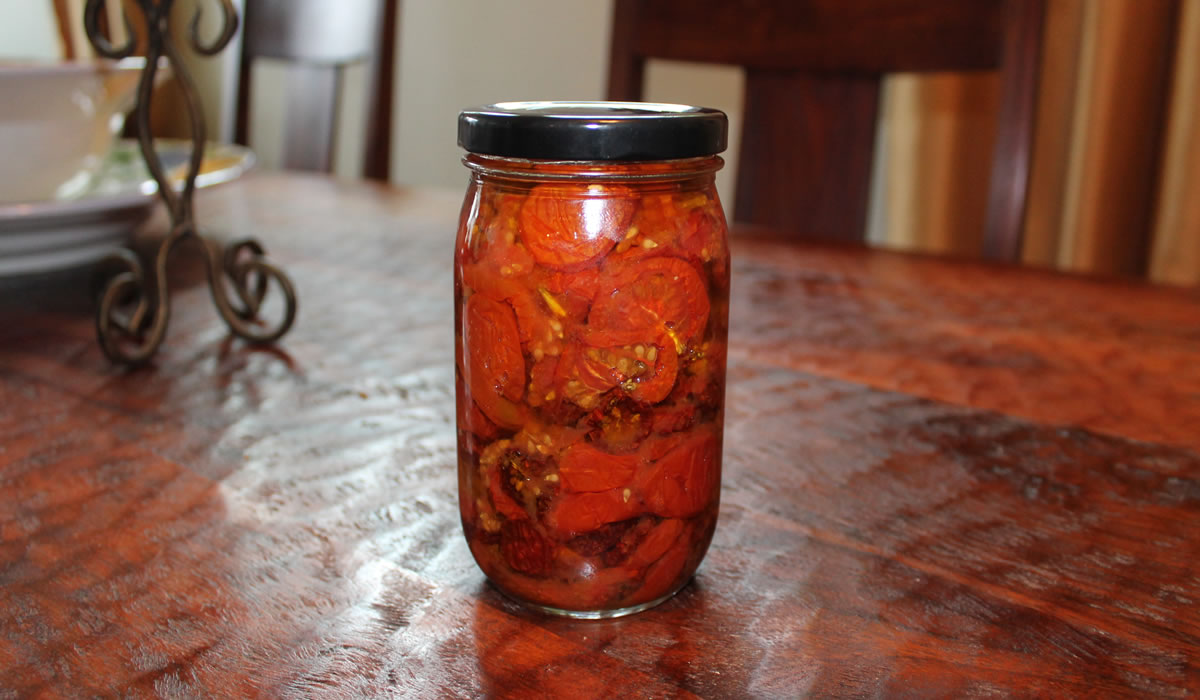
Finally all ready. I started this at 8:30am and it's now 3pm. Time to fill those jars.
I grab the first one out of the boiling water and filled it - with every one of the tomatoes. 7 hours and I got one jar of dried tomatoes in oil.
Not a great return on investment.
Pot went back downstairs, 7 jars and lids went back downstairs, and the lone jar of tomatoes went into the 'fridge.
Here's a link to the recipe in case you have nothing to do for six or so hours...
Tomato Sauce
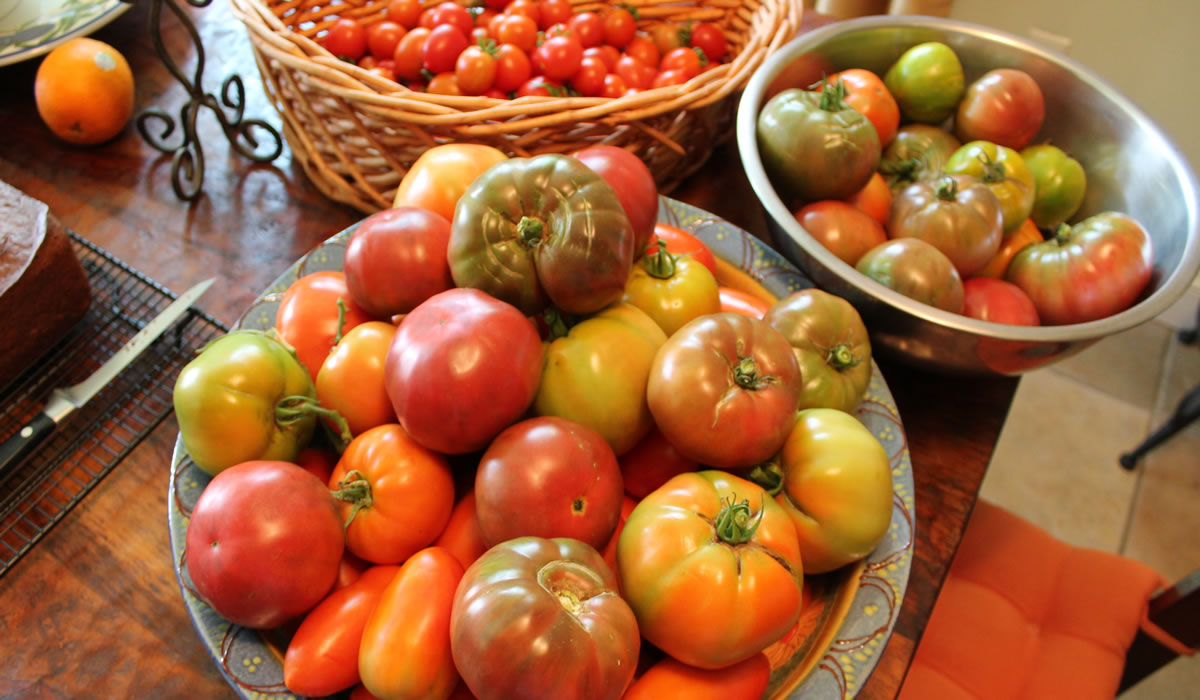
It seems like just yesterday that I was lamenting the lack of tomatoes. I am officially lamenting no more.
Houston - we have tomatoes.
And I mean tomatoes! What a crop coming in. Different colors, shapes, and sizes. Different flavors and textures. Absolutely perfect for blending them all together and making a quick tomato sauce.
This is new territory for me, but I went brazenly into it almost like I knew what I was doing.
I washed them...
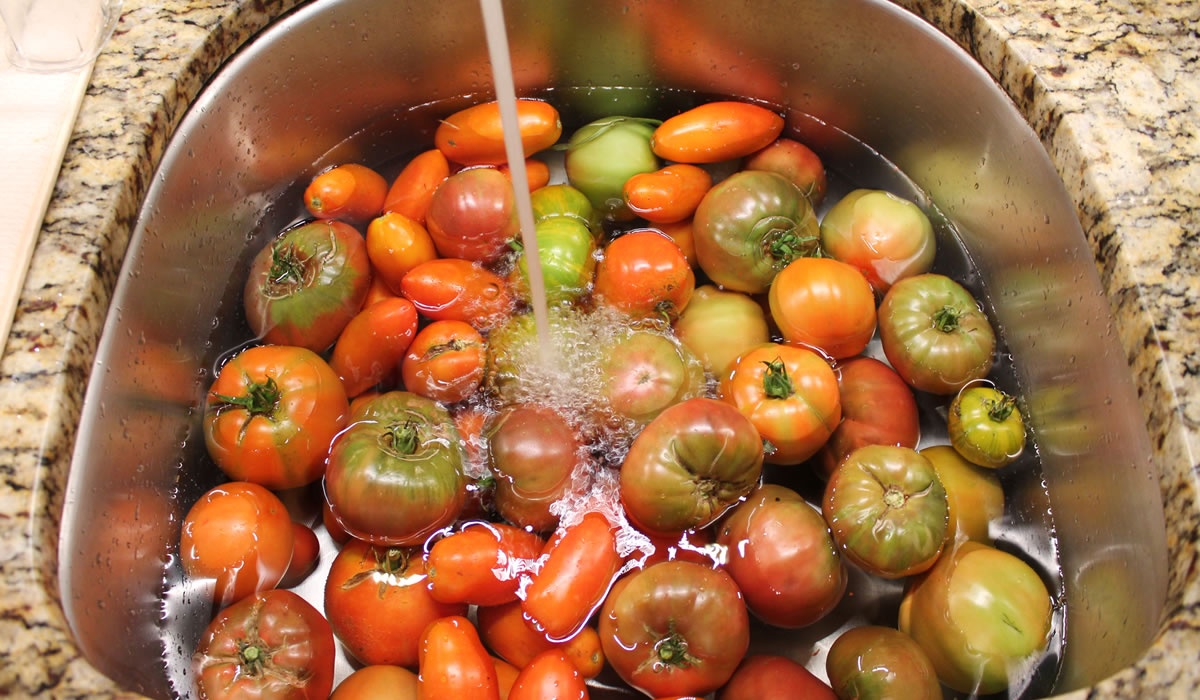
And then chopped them, pureed them in the blender, added a bit of salt and citric acid, and into clean jars and the pressure canner.
The end result is 5 quarts and 16 pints of sauce.
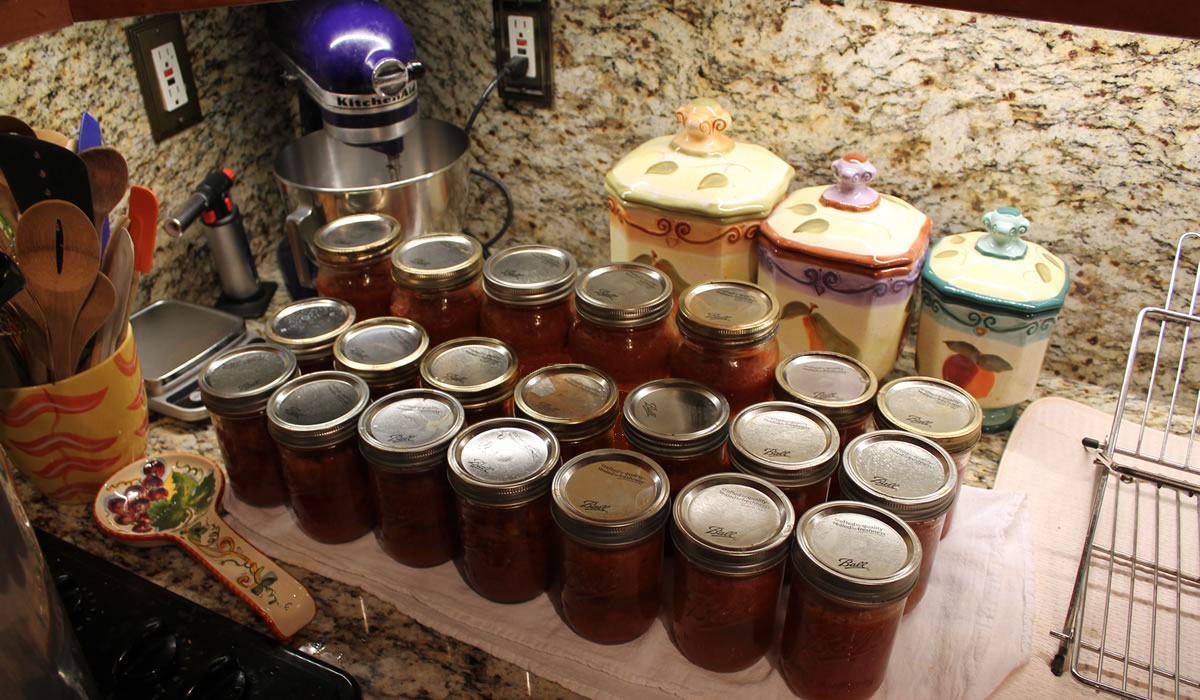
The tomatoes were uncooked before going into the canner and the pulp and liquid separates. This is a very thin sauce.
It will be great for soups and stews or as the start of a quick pasta sauce. I saved a few of the best tomatoes for slicing and dicing, but there are a lot more almost ready to come in.
Tomorrow, I'm going to oven-dry the cherry tomatoes and preserve them in olive oil. It's about a six hour process - although it's unattended most of the time.
I think that next week we'll be doing another batch of Victor's Sauce.
I'm loving this!
Eggplant Timbale
Victor spent the day in the kitchen whilst I was at work, today...
We harvested another seven eggplants, so he set to work creating spectacular foods utilizing the garden bounty. It's rough being us...
First off was a vat of Little Gram's Eggplant Appetizer. It's our go-to for fabulous caponata.

Naturally, it came out perfect. It's great as a bruschetta, a pasta sauce, hot, cold, room temperature... It's eggplant perfection.
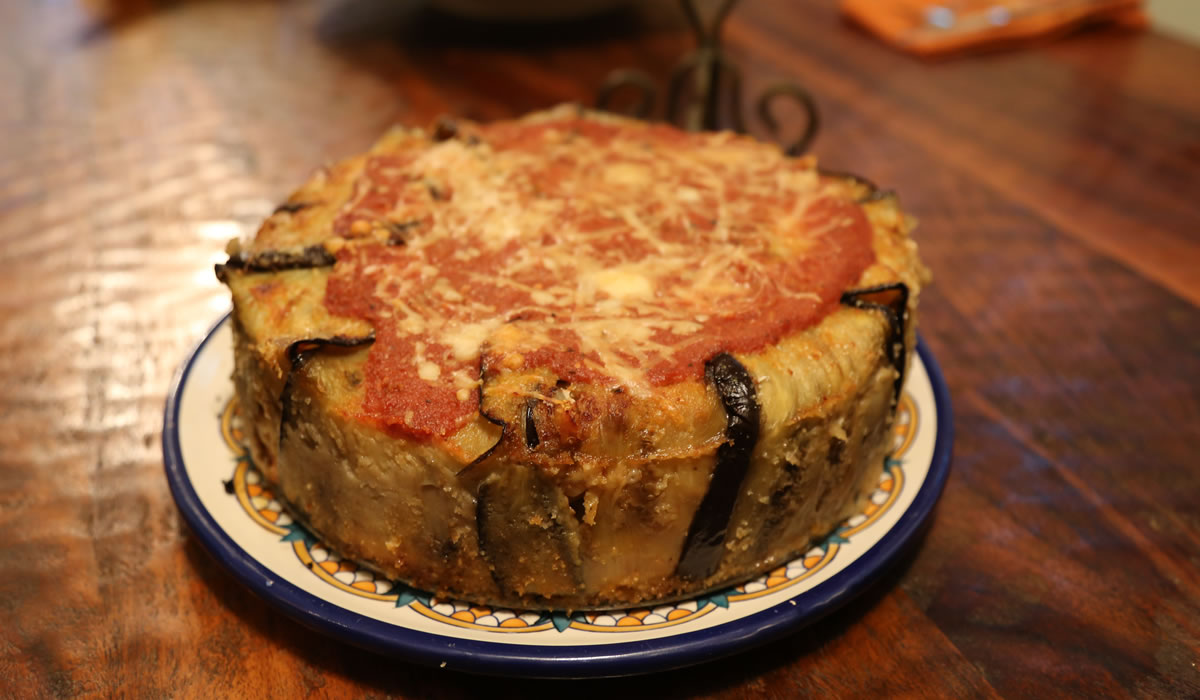
And then we had even more eggplant perfection in the form of a timbale. Victor really did spend the day in the kitchen!
A timbale is not difficult to make, but it does take a bit of time. There are lots of steps involved, starting with cutting and cooking - in this case - the eggplant.
Here's a basic recipe. Amounts will vary depending upon how big you make it. Victor baked off a 10" timbale. Your results may vary.
Eggplant Timbale
- eggplant
- pancetta
- peppers
- ground beef
- peas
- pasta sauce
- penne pasta
- shredded cheese
- olive oil
- bread crumbs
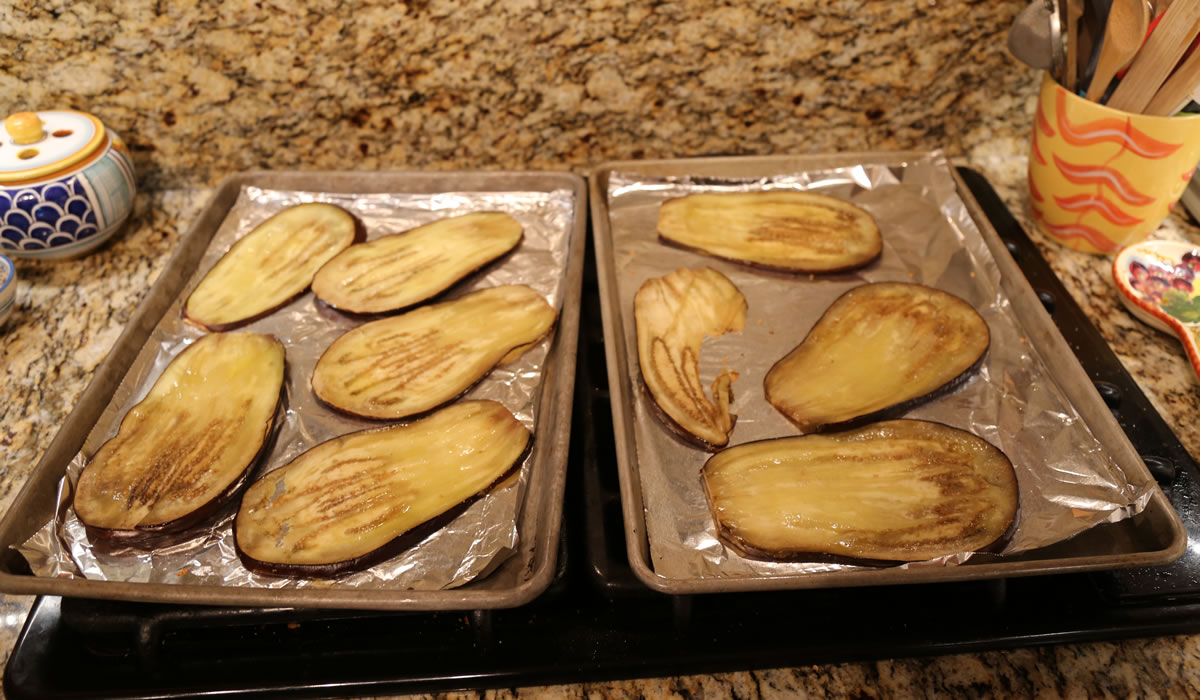
First step is to slice the eggplant and cook it. You can oven-bake, grill, or fry. Victor oven-baked it, today by brushing it with olive oil and cooking it in a 350°F oven for about 25 minutes.
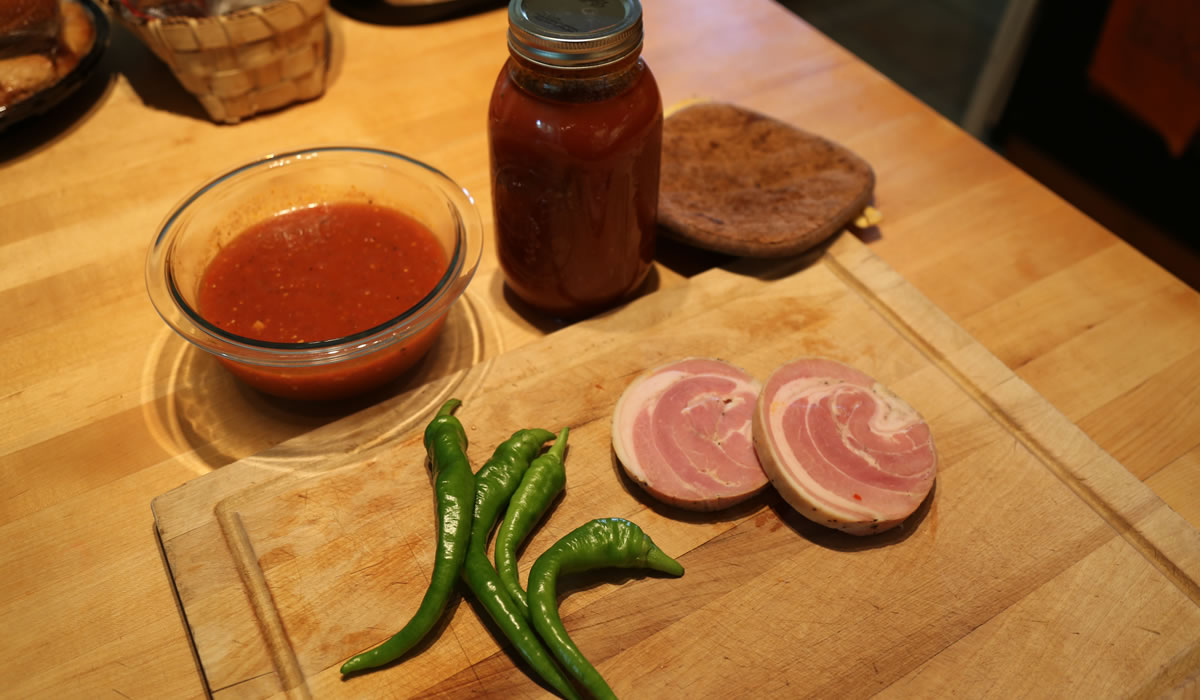
Next, chop pancetta and peppers.
The peppers came out of the garden. they're not really hot but have good flavor.
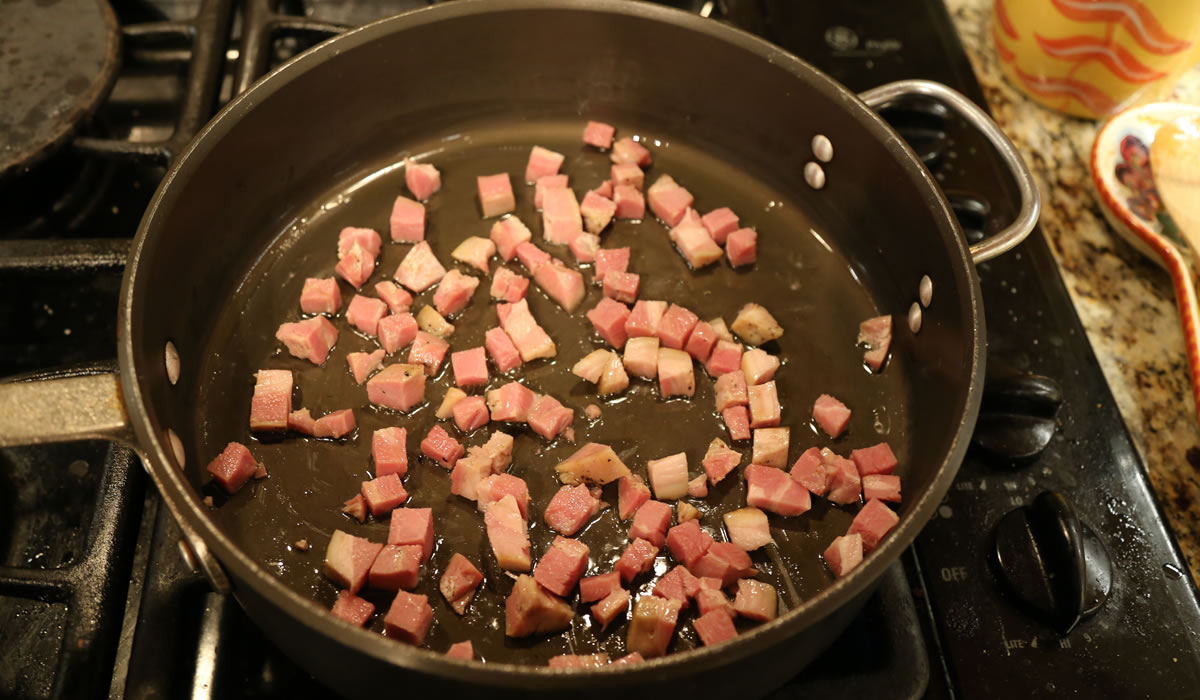
Saute the pancetta...
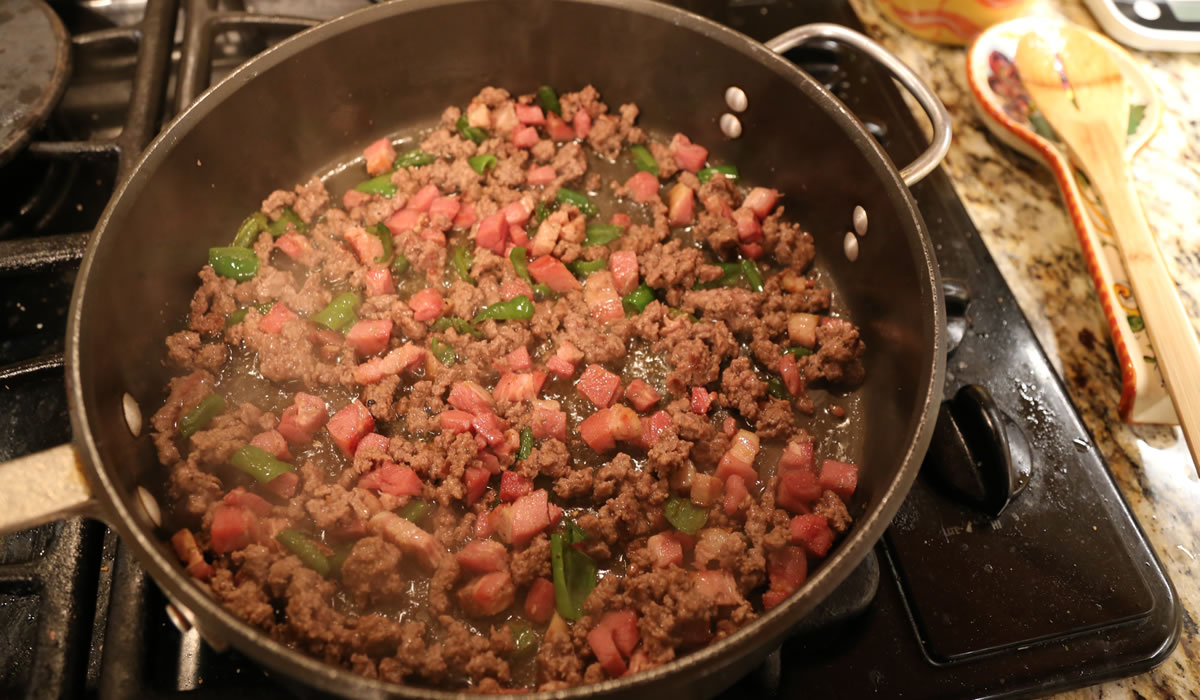
Add the peppers...
And the ground beef...
And then the sauce and peas... Cook the penne and mix it all well...
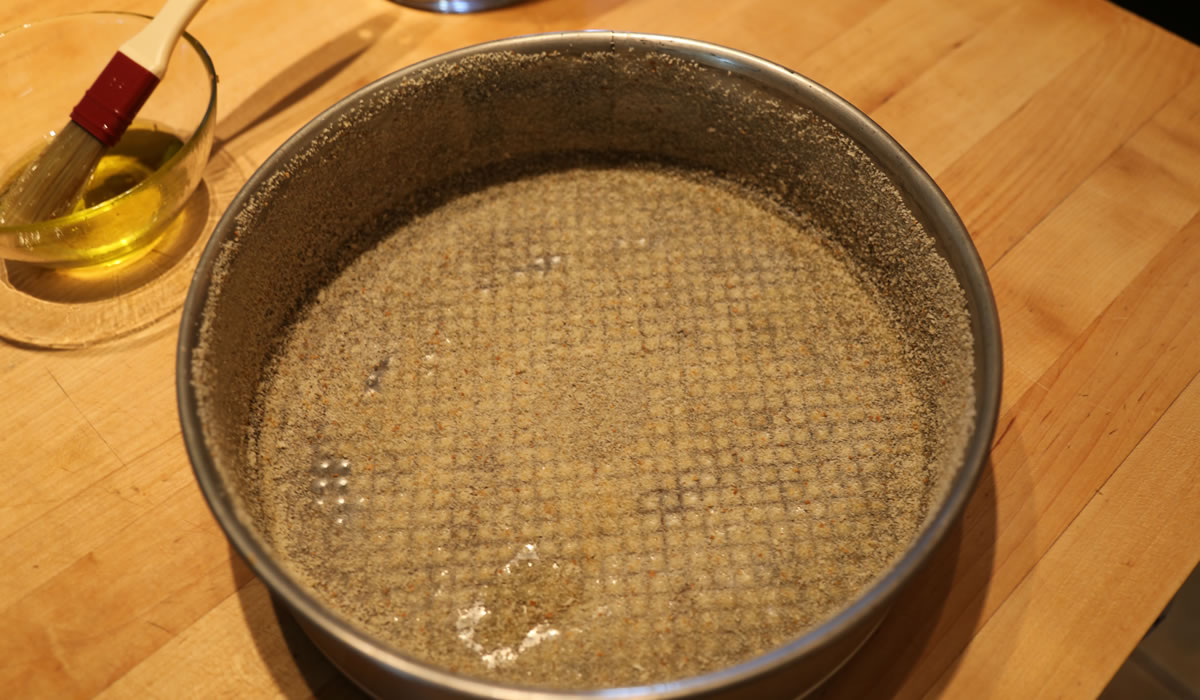
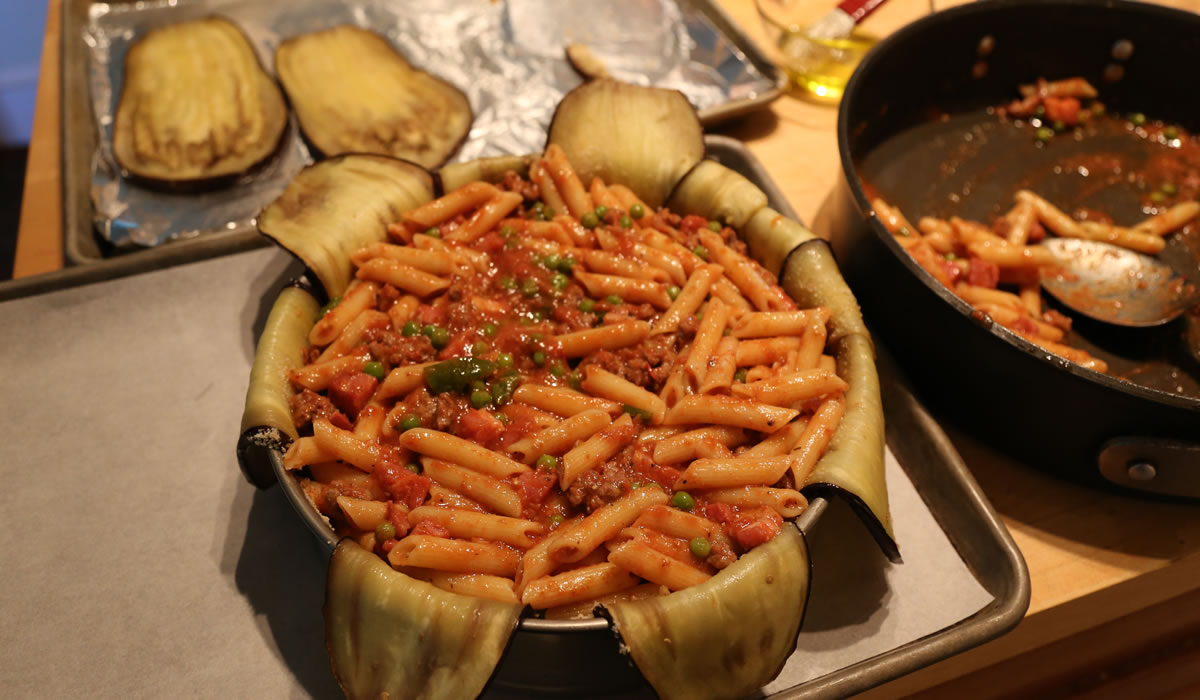
Oil and liberally coat a springform pan with bread crumbs. The breadcrumbs help to release the timbale when it's cooked.
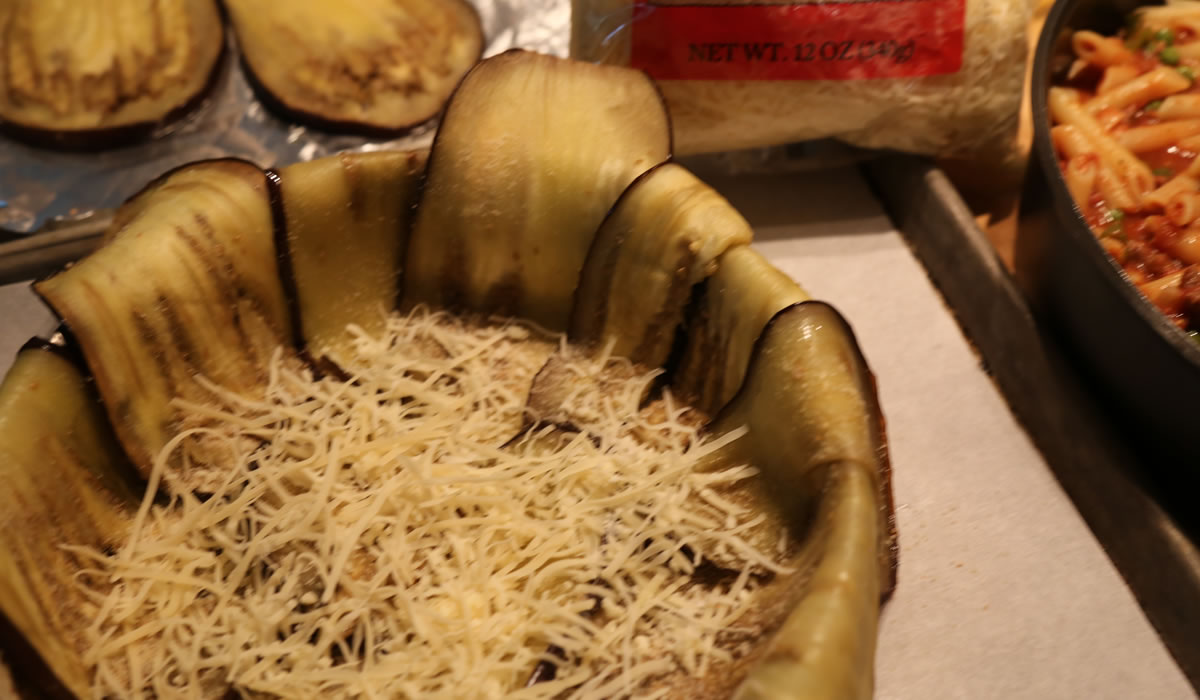
Line the pan with the cooked eggplant...
Add a layer of shredded cheese...
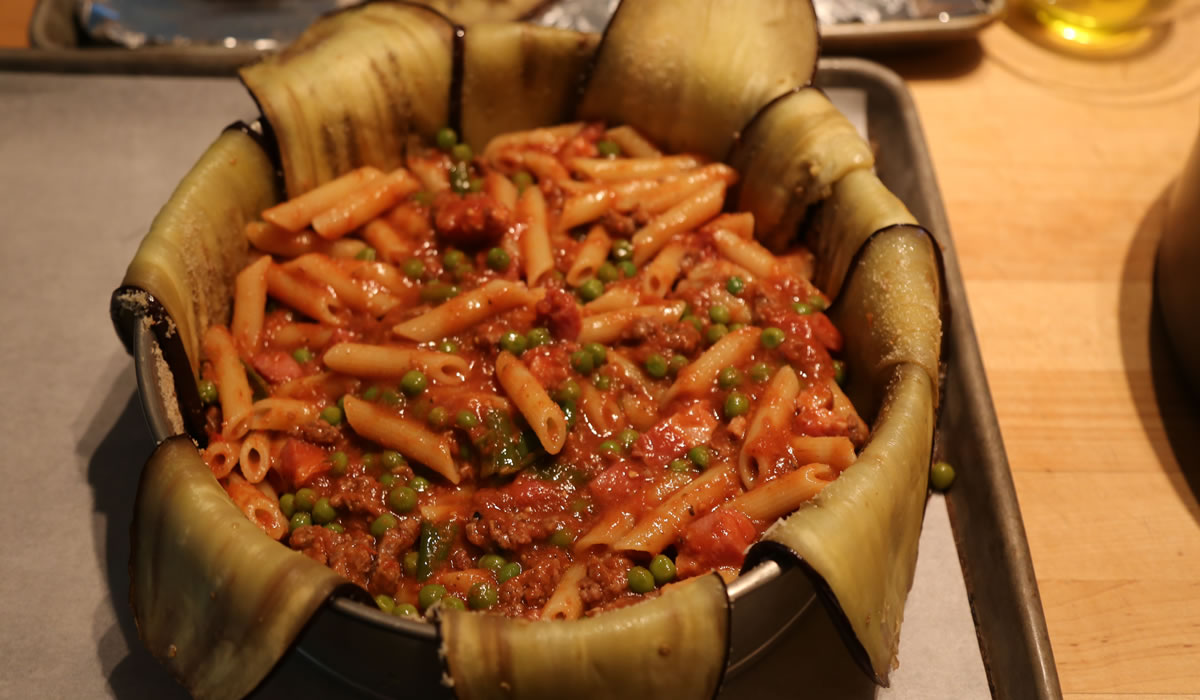
Next, a layer of the penne pasta mixture...
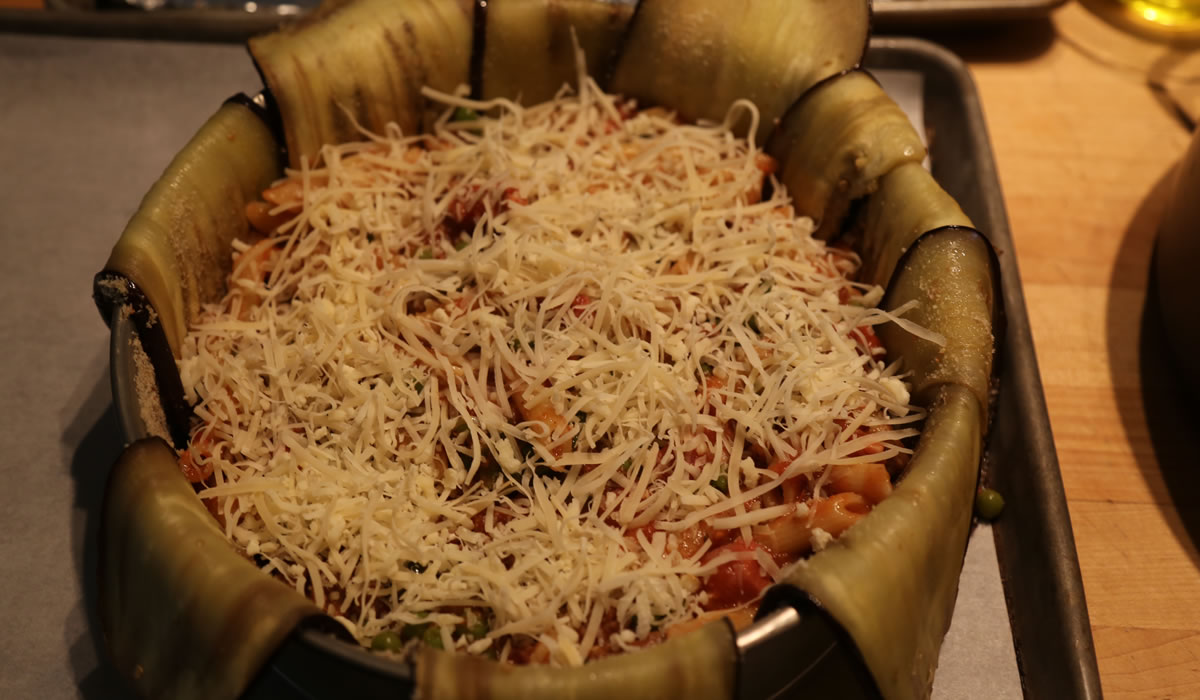
More cheese...
More pasta mixture...
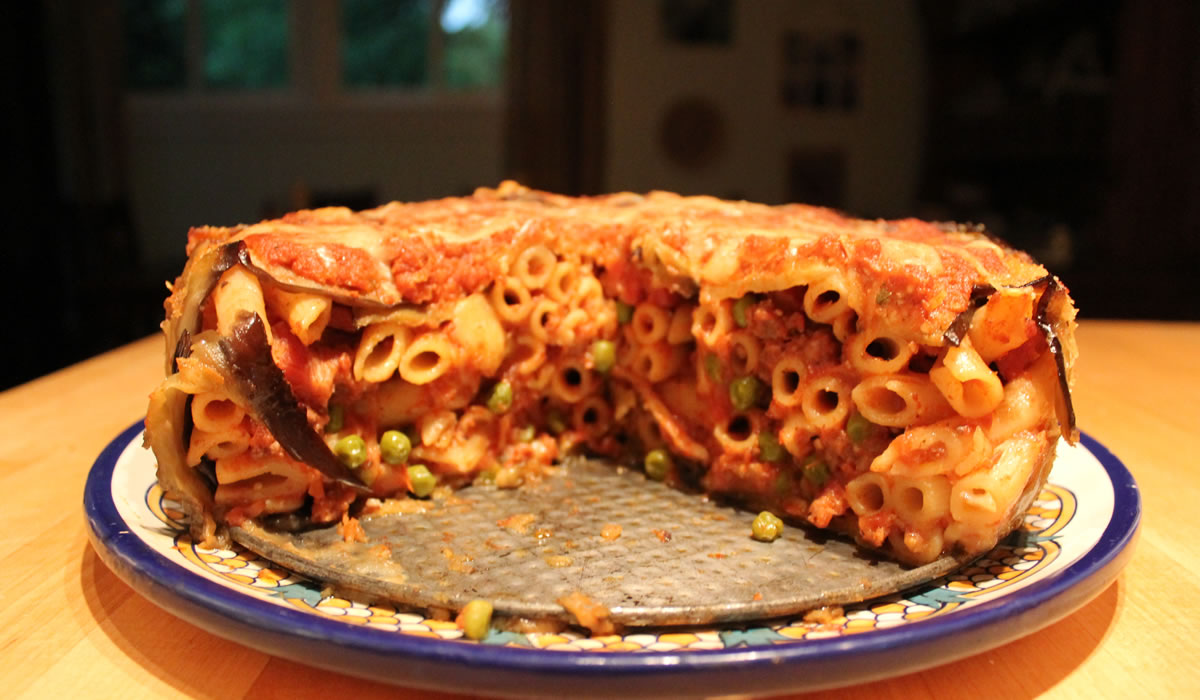
More cheese and then fold the eggplant over the top, pressing down to compact and encasing everything.
A few crumbs on top...
And into a preheated 350°F oven for about an hour and 15 minutes. If you plan on inverting the timbale onto a serving platter, bake as-is. If you are not going to invert, add sauce and cheese to the top midway through.
Remove from the oven and let sit at least 20 minutes before serving or inverting onto a platter.
Cut into wedges, and enjoy!


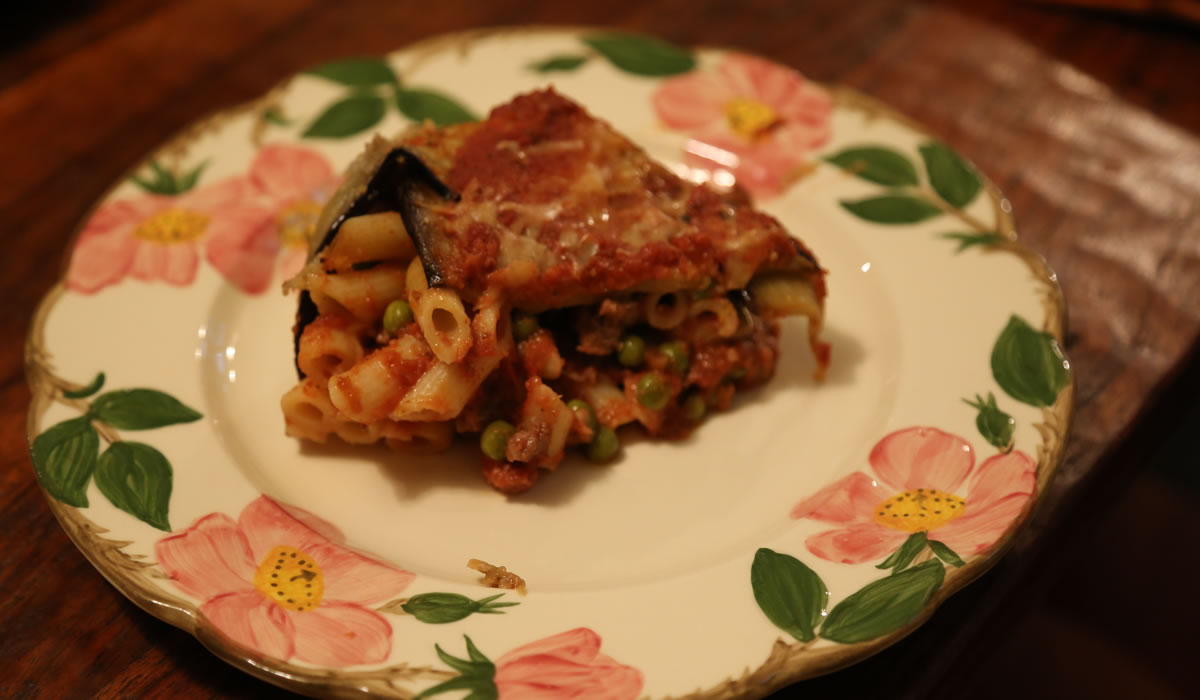
This really is an awesome dish and one that anyone can make. Victor used just one eggplant for the entire dish, a half-pound of ground beef, maybe 2 oz of pancetta, a half bag of frozen peas, maybe 6oz of shredded cheese, 4 small peppers, a quart of sauce, and a pound of pasta.
It definitely needs to set for at least 20 minutes if not a bit longer, so plan accordingly.
If we were making it for company, we would have inverted it onto the platter and topped it with additional heated pasta sauce dripping down the sides for that dramatic effect. For the two of us, the springform pan liner was sufficient.
So get yourself an eggplant and get cooking!

Malloreddus and Sauce from the Garden
When the going gets tough, the tough get cooking.
Yeah... it's been tough the past few days. The bile coming out of the mouth of our Commander-in-Chief is enough to gag a maggot, as my father was wont to say. Pop was a WWII vet and would not be taking this well. Hell - I'm a Viet Nam vet and I'm not taking it well.
It's hard to stomach such blatant racism and disregard for human life in the year 2017. But I do take heart in the number of people who are seriously standing up and shouting "ENOUGH!"
Good will prevail. I really do believe that. But it's going to be a fight - and fight is something I am more than willing to do. Because trust me - I ain't going quietly.
Cooking and being in the kitchen has always had a calming effect on me. Funny, because I know a lot of people who start stressing at the mere thought of having to figure out a meal. I just find it easy. What can I say?!?
Monday afternoon, I pureed three gallons of tomatoes from the garden - they're starting to come in fast and furious - and today, Victor made his sauce. I came home and canned it. I got 10 quarts. A nice start.
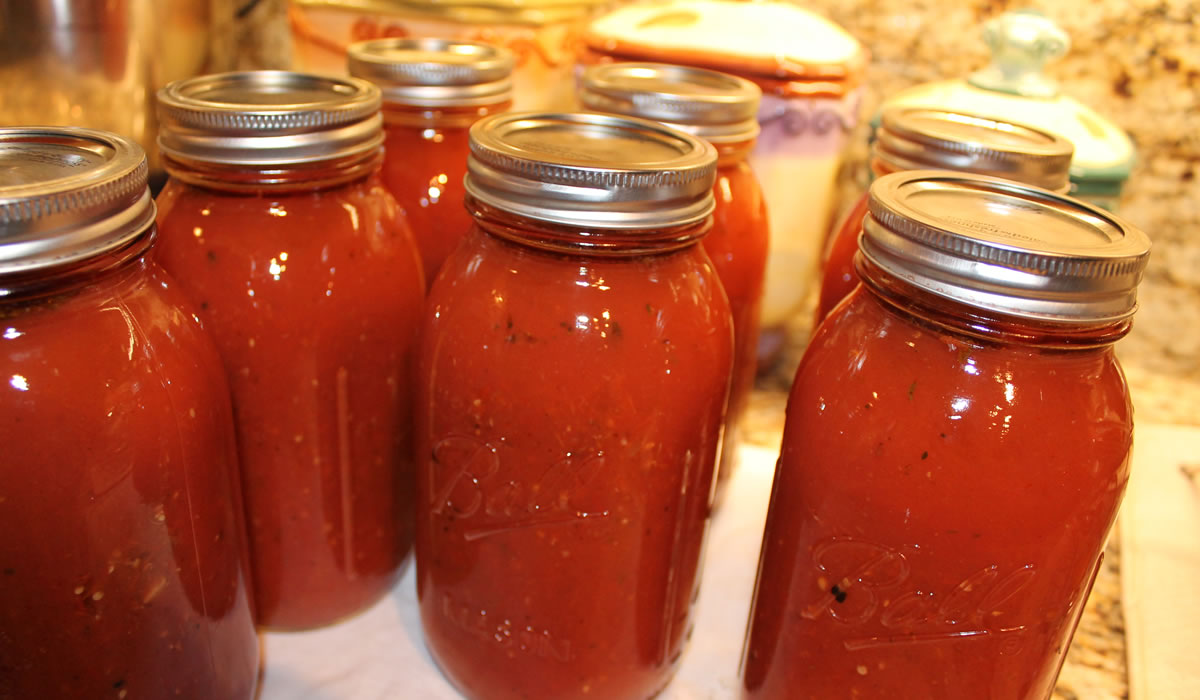
This is the basic recipe. Obviously, three gallons of fresh tomato sauce is going to alter it a bit and in Summer the herbs are fresh from the garden, but the basics are here...
Victor's Sauce
- 2 – 28oz cans of crushed tomatoes
- 1 – Sm can tomato paste
- 1-2 cloves of garlic (or to taste if you like more) chopped fine
- Olive oil
- Dried Italian seasonings
- Hot red pepper flakes (a tsp or more or less to taste)
- Salt and Pepper to taste
- Red wine (always cook with a decent wine, never “cooking” wine) about a cup or cup and a half
- Meat – such as Italian sausage or some nice beef or pork ribs or pork chops
Ok…I ALWAYS make my sauce with meat, so start with a deep, heavy pot and add about 3-4 TBS of olive oil. On high heat, once the oil is hot, start frying the sausage or pork, Let the meat get good and caramelized although you don’t have to cook it all the way through because you’ll add it back to the sauce to finish. Once the meat is browned take it out of the pot, put it on a plate and set aside.
Lower the heat to medium and sauté the tomato paste for a couple of minutes until it begins to “melt”. Add the chopped garlic and sauté with the tomato paste for just a minute (no longer or it will burn). Then add about a cup of the red wine and deglaze the pan with it, scrapping up all the good bits that stuck to the bottom when cooking the meat.
When the wine reduces by about ½ start adding the canned tomatoes. Add one can of hot water for every can of tomatoes you use.
Now start adding the dried Italian seasonings. I eyeball it but I would guess a good 2 TBS is fine. Add about another ½ cup of red wine, with red pepper flakes, salt and pepper. Stir everything into the sauce. It will be very thin at this point.
Add back the cooked meat. Now this is important….at the bottom of the plate you let the meat rest on will be some of the oil and juices that seeped out. Pour that back into the pot. It has a lot of flavor in it.
Bring the sauce back to a boil then turn the heat down low and let it simmer for at least 1 and a half hours, stirring every 15 to 20 minutes to keep it from burning. It should reduce by about a third or a little less and get thicker. The meat will absorb the sauce and get very tender.
When I make meatballs, I don’t fry them, I bake them on a sheet pan. When I do, I add them to the simmering sauce when they’re done so they also absorb the flavor.
I usually make the sauce early in the day and after it’s done, just let it sit on the stove until dinner then I re-heat it. This should make enough sauce for a couple of dinners or good sized lasagna.
And the sauce went onto homemade malloreddus - a Sardinian pasta.

It's great being married to a man who can cook...
Malloreddus
- Sea Salt
- 1 ¼ cups semolina flour
- ¾ cup tipa “00” flour or all-purpose flour
- Extra virgin olive oil
Gnocchi board or a table fork
Dissolve 1 tsp salt in ¾ cup warm water. In a large bowl whisk together semolina and all purpose flour; mound and form a well in the center.
Add water mixture and 2 tsp olive oil to the well. Using your hand or a fork, slowly incorporate flour from inside the rim of the well. Continue until liquid is absorbed, then knead in bowl until dough forms a complete mass (dough will be slightly sticky).
Transfer dough to a well floured work surface and knead, dusting with a bit more flour as needed just to keep dough from sticking to your hands, for 5 minutes. Wrap dough tightly in plastic wrap and let rest for 30 minutes.
Break off about 1/8 of the dough; tightly rewrap remaining dough. Roll dough into ½ inch cylinder, and cut into ¼ inch thick pieces. Pressing with your thumb, roll each piece on a gnocchi board (or down the back of a fork) to give it the characteristic ridges, and put on a floured baking sheet. Repeat with the remaining dough.
To cook fresh Malloreddus, bring a large pot of salted water to a bill. Add pasta and cook until tender, about 6 minutes after water returns to a boil. Drain, transfer to a large serving bowl and immediately toss with sauce and serve.
A fresh loaf of bread - store bought, alas, rounded out the meal.
And just as an aside...
I have always felt that food is the great equalizer - that sitting down and enjoying different foods from different countries and cultures can open our minds and our hearts to others different from us.
Go to Chef Google and type in the name of a country and type "recipes" after it. Cook something different. Learn what other people have for breakfast or dinner.
Learn.

Stuffed Tomatoes
The tomatoes are finally coming in - fast and furious! That means time to figure out yet another way to eat them up.
Today, I blended up three gallons of tomato sauce so Victor can make sauce on Wednesday. I'll probably have at least another gallon by then so I'll be doing a lot of canning Wednesday night. I just core and chop and put into the blender - skin and all - and into gallon jugs and into the 'fridge.
I took a couple of the absolute best ones and stuffed them with a wheat berry filling. It was a bit of a clean-out-the-refrigerator salad. My favorite kind.
It had 2 cups of cooked wheat berries - I just put a cup of them in a pot, cover with water, and boil for 20 minutes - along with:
- a diced yellow zucchini
- 1 roasted red pepper
- 2 ears of corn
- scallions
- a small jar of artichoke hearts
- fresh basil, thyme, oregano, and parsely
- S&P
- olive oil
- fig balsamic vinegar
I just hollowed out the tomato and filled it with the salad.
These tomatoes are just so damned good that I am really looking forward to eating them in all of their various guises! There is just no comparison to supermarket tomatoes. None.
I work late tomorrow so I'm thinking of something simple for Wednesday... maybe grilled?!?
We shall see...
Sweet and Savory Tarts
The Queen of Hearts she made some tarts
All on a summer’s day.
The Knave of Hearts he stole the tarts
And took them clean away.
The King of Hearts called for the tarts
And beat the Knave full sore.
The Knave of Hearts brought back the tarts
And vowed he’d steal no more.
The things that pop into one's mind while one is cooking...
It is reasonably fitting, I guess... I've been called a queen, I did make tarts, and it is a summer's day. Fortunately, no one stole anything or had to be beaten. Score one for the good guys.
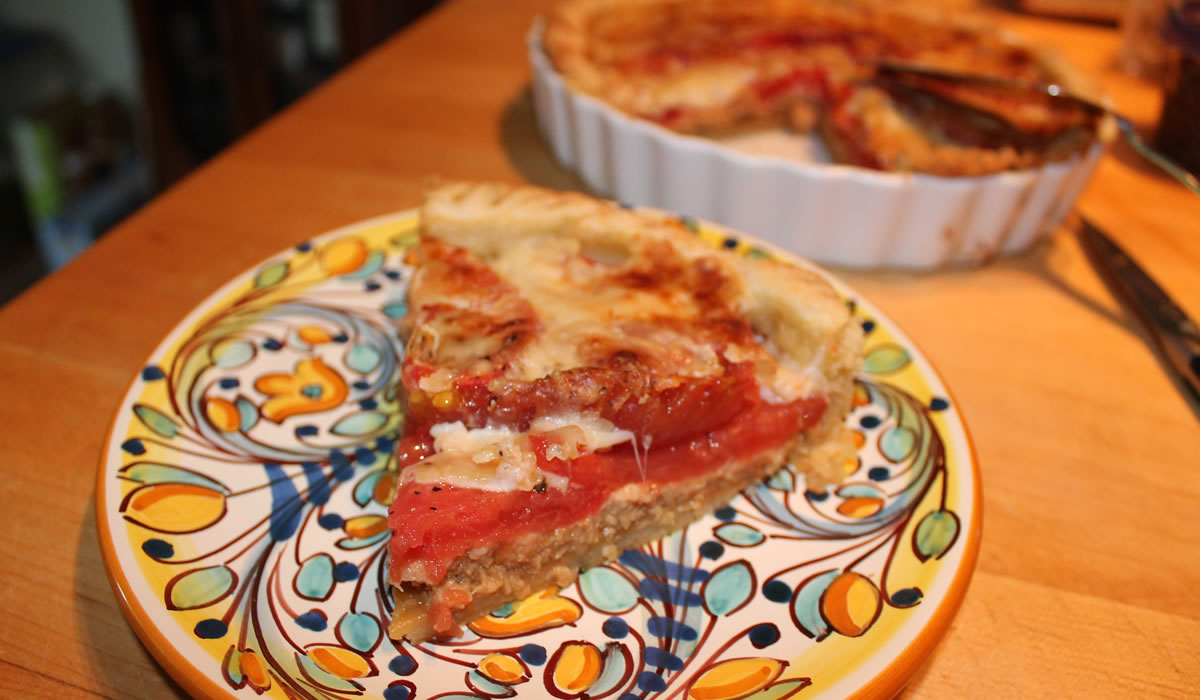
The tomatoes are finally coming in at a pretty fast pace - we'll be making a vat of sauce this week - and I'm always looking for different ways to use them. As much as I like it, one does not live by tomato salad, alone.
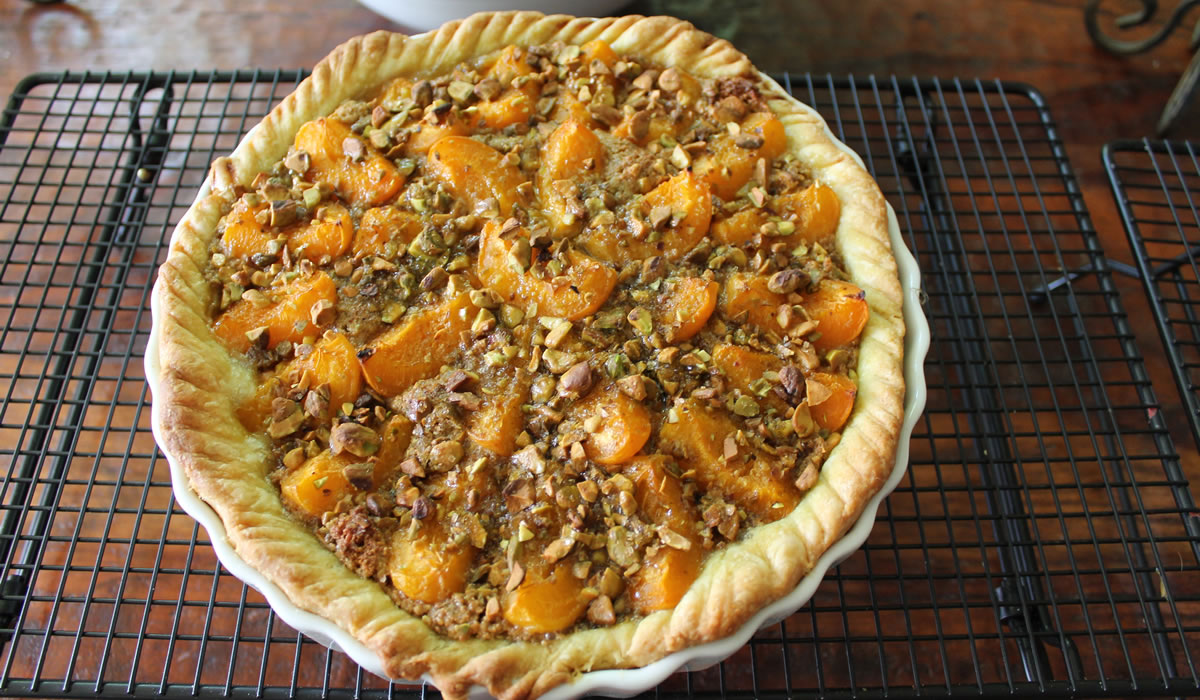
I also had apricots I wanted to use up in a dessert of sorts...
I headed over to my go-to recipe sites but didn't see anything overly wonderful. I headed over to the Martha Stewart website and found a Tomato Tart recipe that sounded promising. There was also a recipe for an Apricot Tart with Pistachios on Puff Pastry...
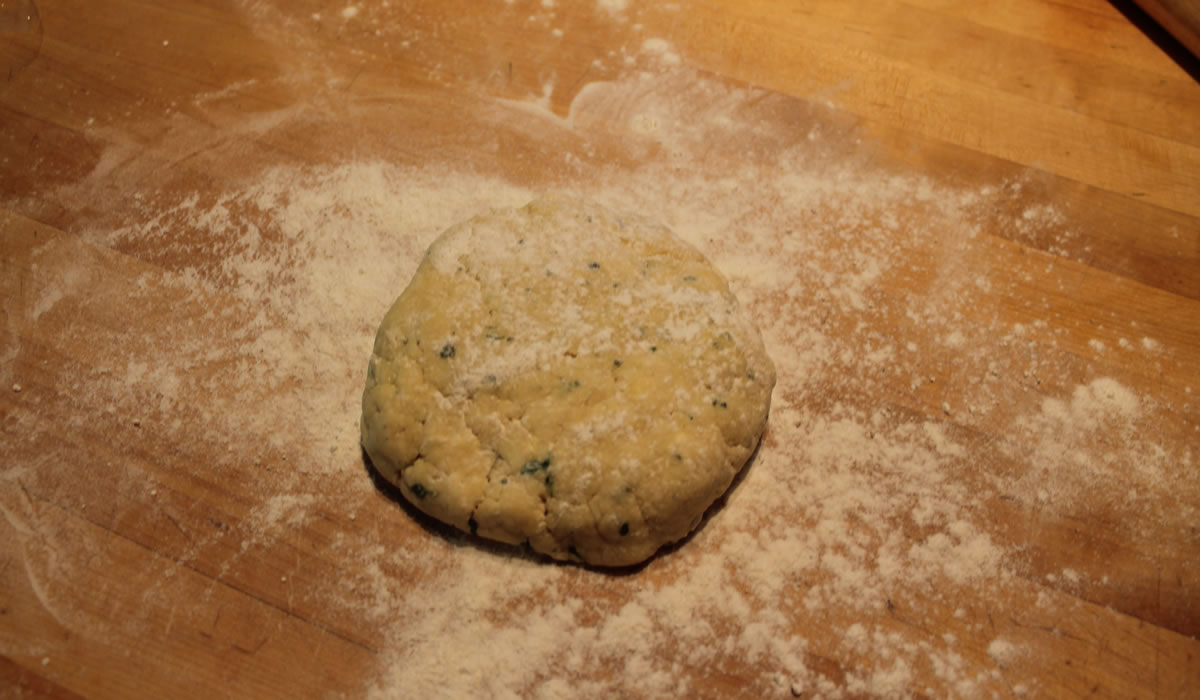
My thought process was I could make one batch of dough and use it for both tarts. Heck with the puff pastry. An idea was born... I didn't end up doing either of her recipes, although the apricot tart filling is pretty close. I also added thyme to the pastry for the tomato tart. Both tarts are similar in their making - a filling on the bottom with something on top and something on top of that. Really basic stuff.
I made them one after the other and baked them together.
Pastry Dough for Two Tarts
- 2 1/2 cups flour
- 1 tsp salt
- 8 oz butter, cut into small pieces
- 1/2 cup ice water
- 2 tsp chopped fresh thyme - hold back and use only for savory tart
In a food processor, add flour, salt, and butter. Process until butter is mixed in well.
With machine running, add most of the water and process with on and off turns until a good dough forms. Divide dough in half. Wrap one half in plastic and refrigerate about 30 minutes. Return the second half to the food processor, add the fresh thyme, and quickly incorporate it into the dough.
Wrap the dough in plastic and place in 'fridge for 30 minutes.
Tomato Tart
- 8 oz porcini mushrooms
- 2 large tomatoes
- 1 1/2 cups shredded cheeses
- Salt & Pepper
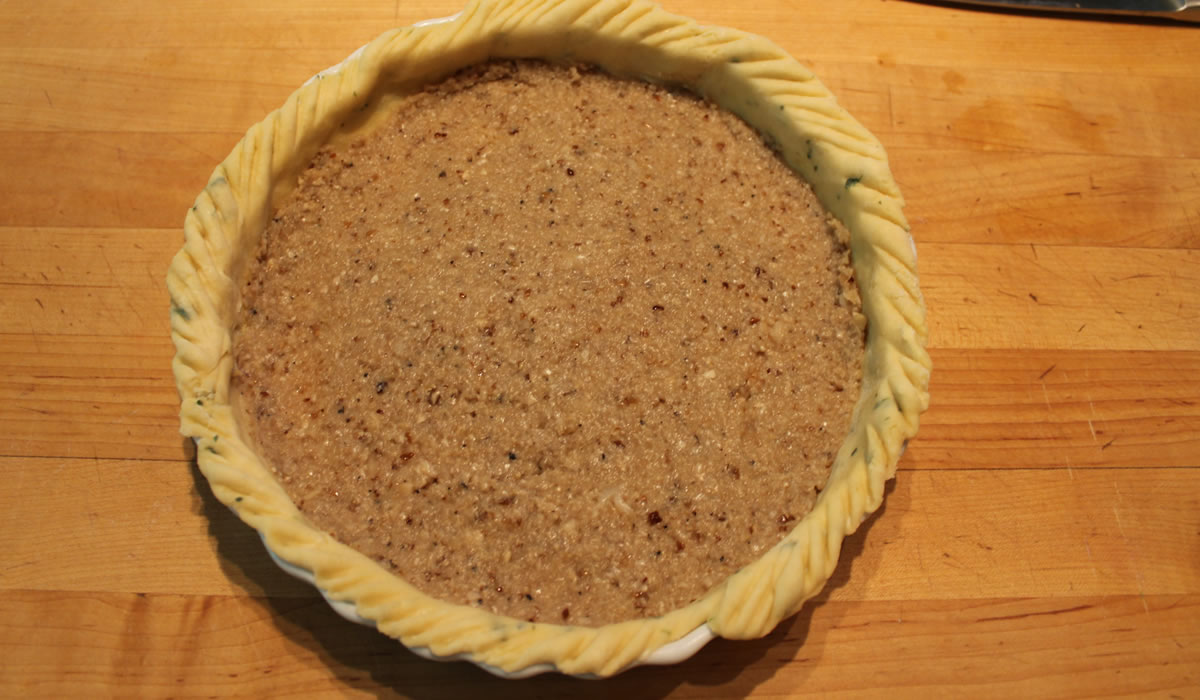
Puree mushrooms and set aside.
Blanche tomatoes to remove skin. Set aside.
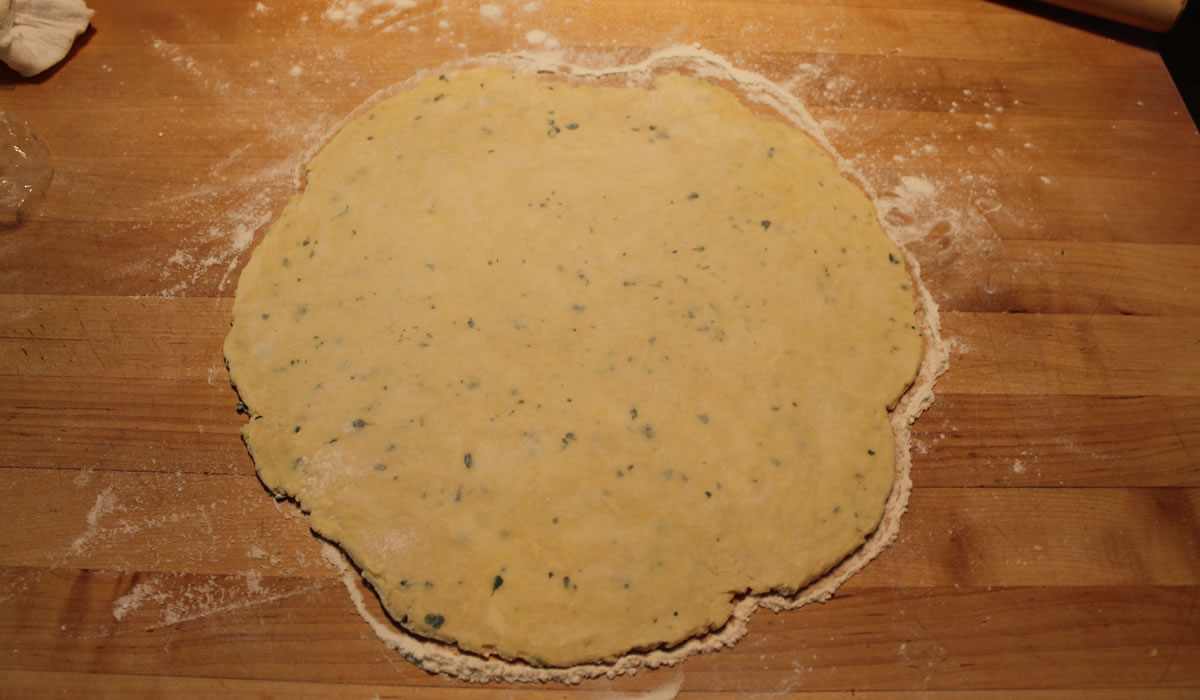
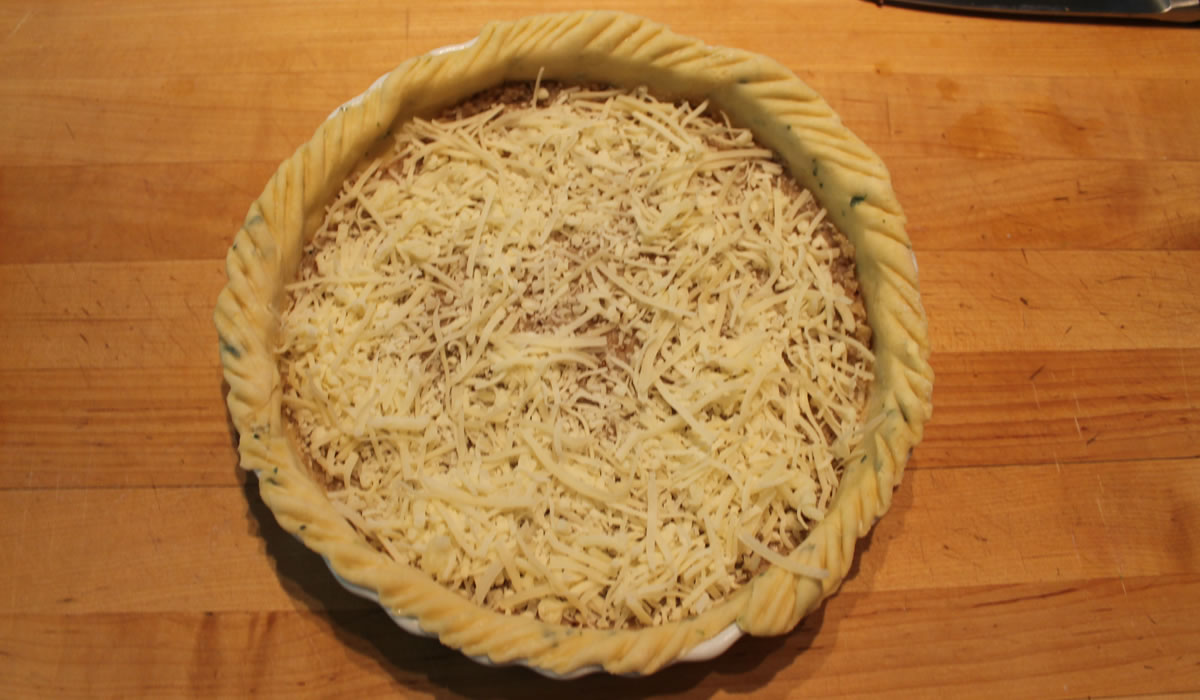
Roll out dough and line tart pan. Refrigerate for 30 minutes.
Spread mushroom puree over crust.
Top with half of the cheese.
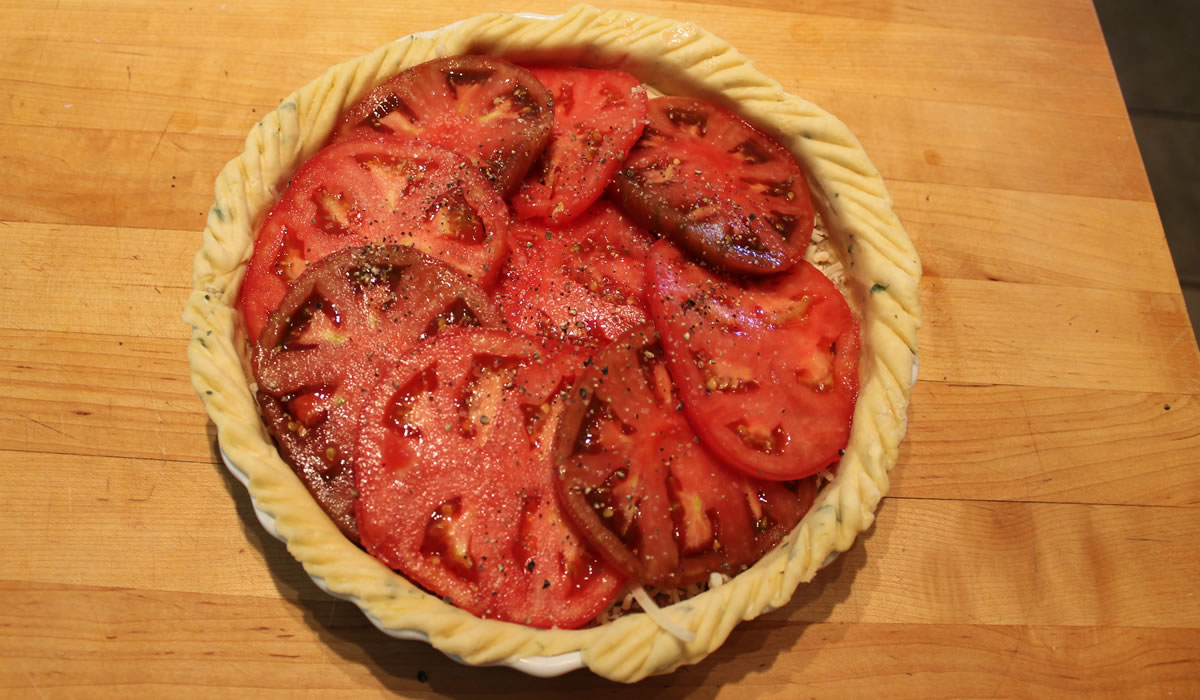
Slice the peeled tomatoes and cover cheese, overlapping them as you go. Generously salt and pepper the tomatoes.
Cover with the remaining cheese and refrigerate for 30 minutes.
Preheat oven to 400°F.
Place in oven and bake 35 minutes. Remove and cool to room temperature.
Slice and enjoy!

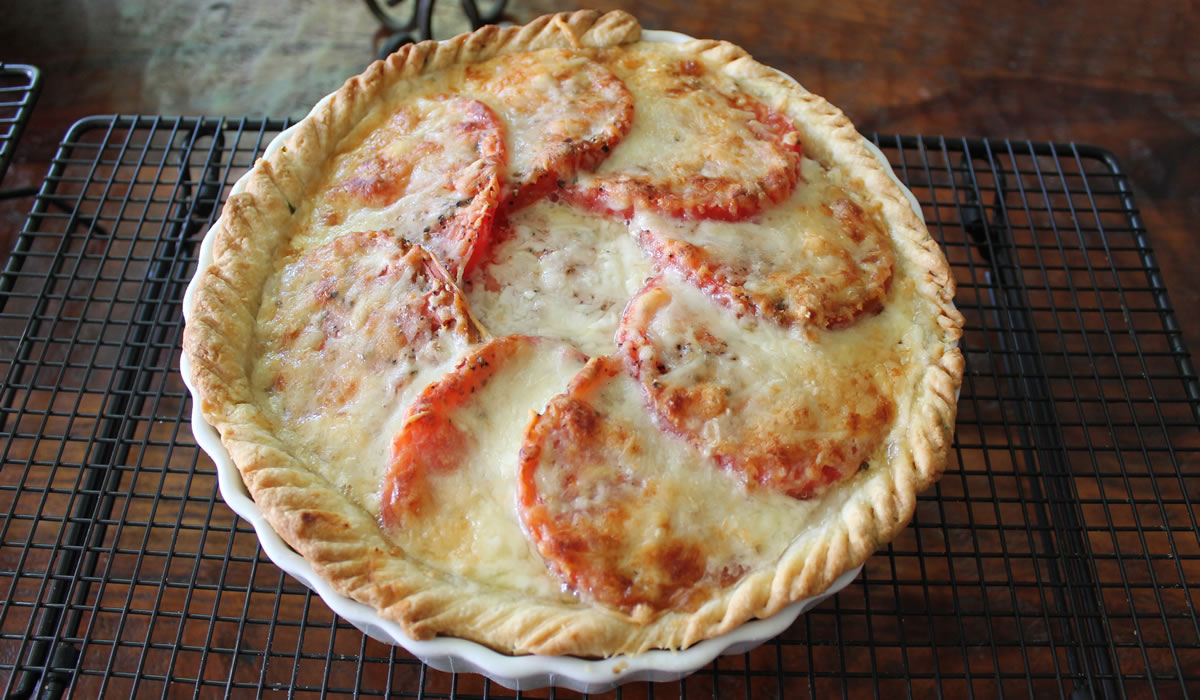
This was really good - really good! The mushrooms added an unexpected flavor and the tomatoes were cooked but still held together. And the cheesy goodness just topped it off. Perfectly crumbly crust...
Yeah... this one worked.
And on to dessert...
Apricot and Pistachio Tart
adapted from Martha Stewart
- 1 1/4 cups unsalted pistachios, chopped, divided
- 1/2 cup sugar
- 1 cube (stick) butter
- 1 egg
- 1 tsp vanilla
- Pinch of salt
- 1 1/4 pounds apricots (about 6), cut into 1/4-inch-thick wedges
- 2 tbsp turbinado sugar
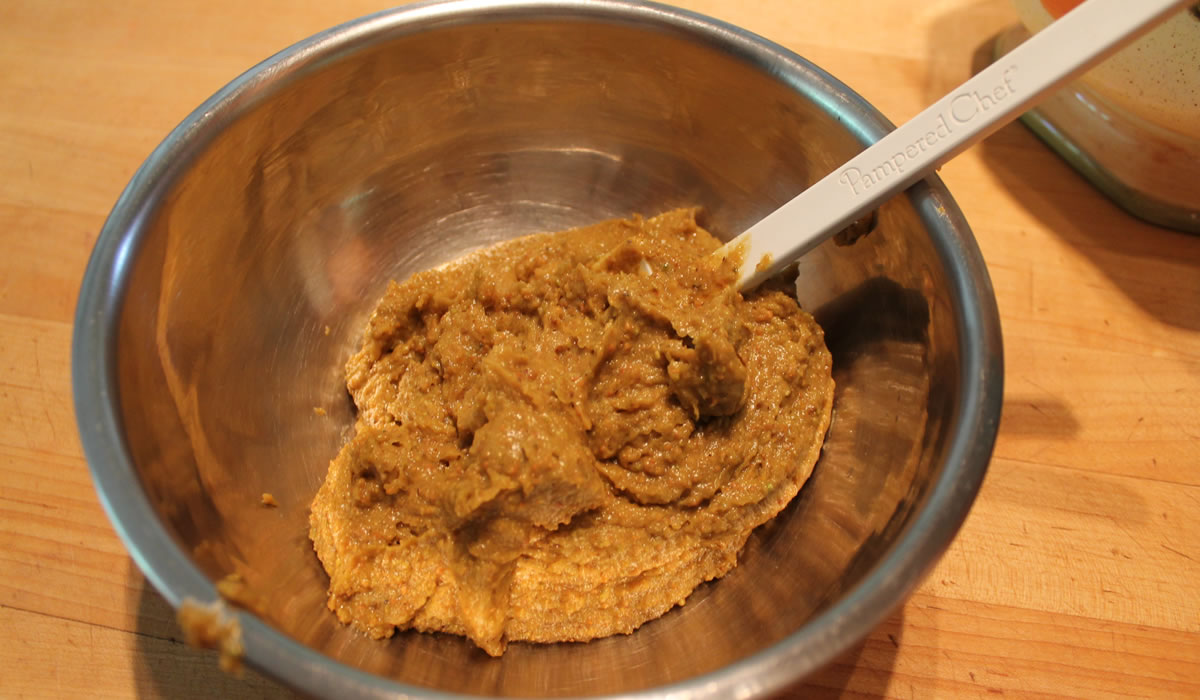
Place 1 cup pistachios and 1/2 cup sugar in food processor. process until pistachios are fairly well chopped. Add butter, egg, and vanilla, and process to a paste.
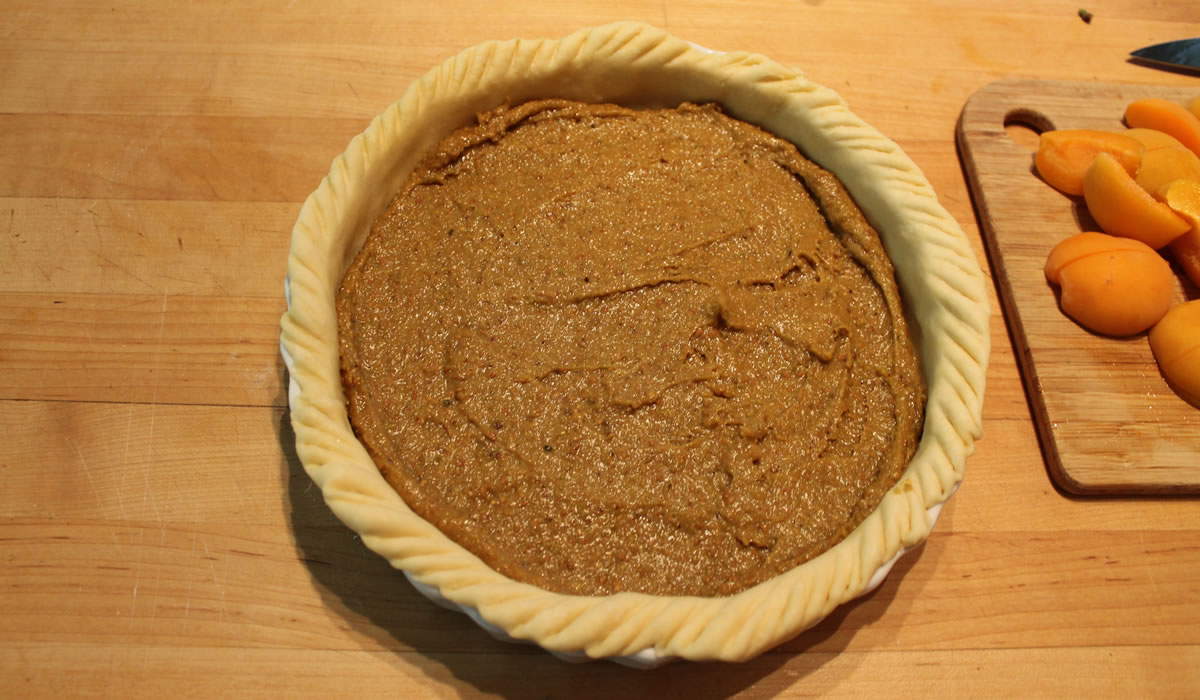
Roll out dough and line tart pan.
Spread pistachio filling over pastry.
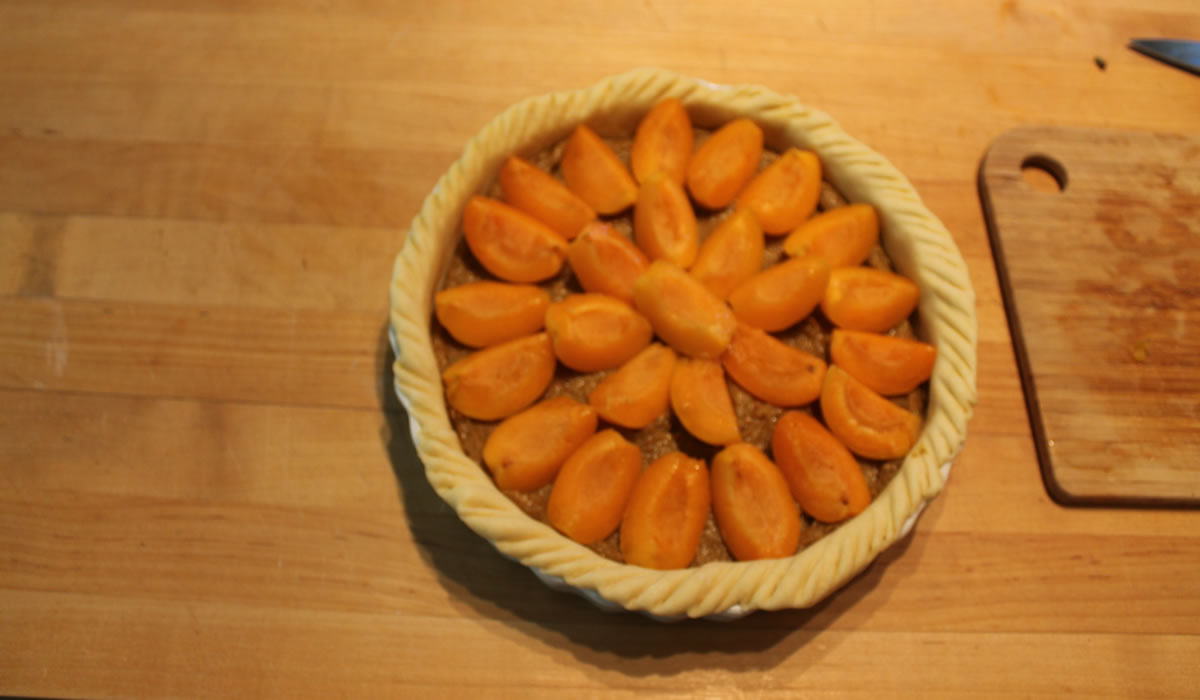
Top with quartered apricots.
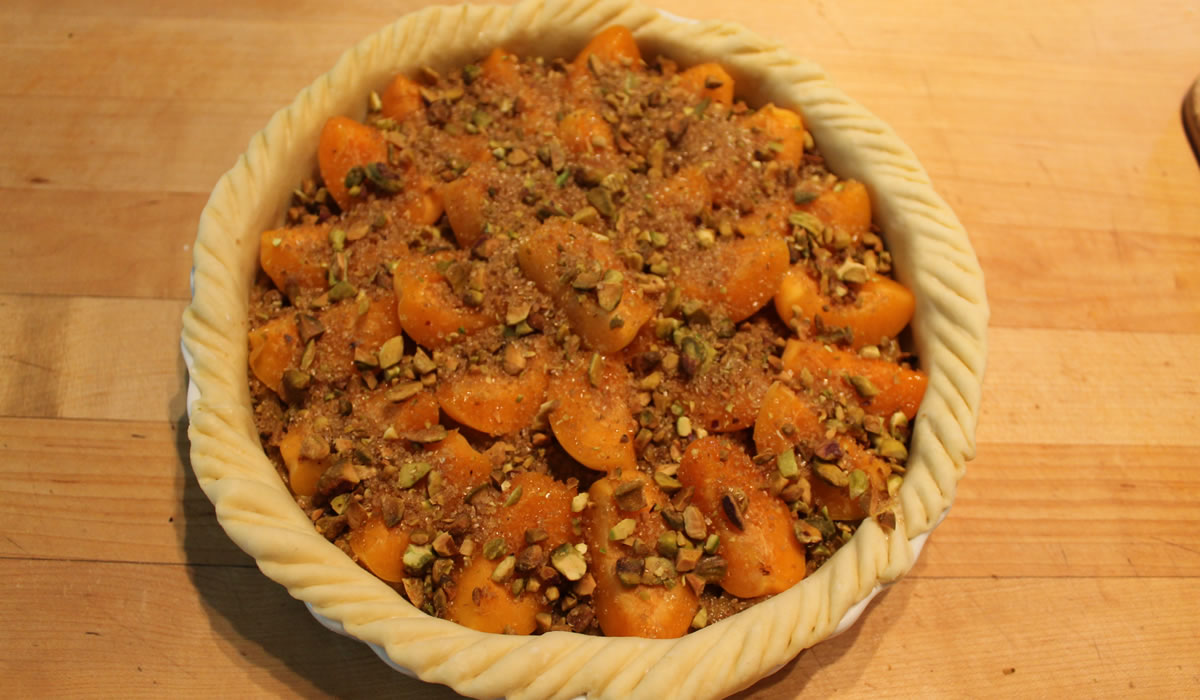
Mix remaining 1/4 cup of chopped pistachios with the 2 tbsp turbinado sugar and sprinkle on top.
Refrigerate for 30 minutes.
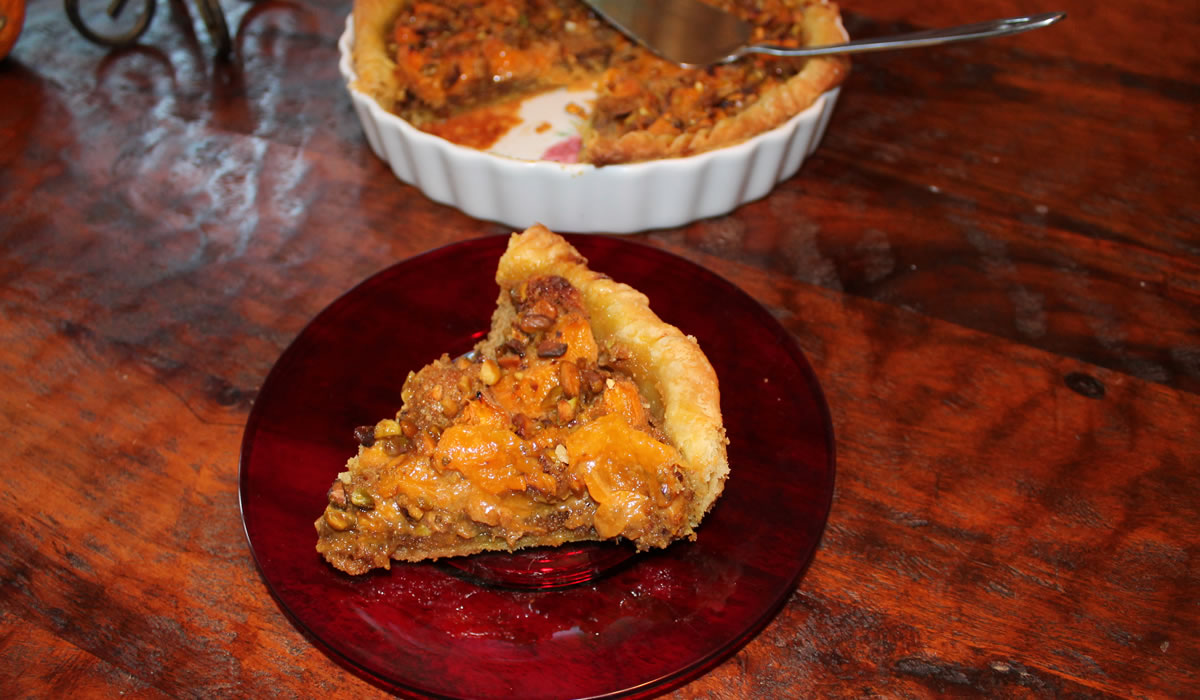
Bake in a preheated 400°F oven for 35 minutes.
Cool and enjoy!

Both of these were really easy to do. The hardest part was cleaning the food processor several times.
The crust is really easy to make and is pretty no-fail. It will also make any double-crusted pie you want to do.
I see more of these in our future...

Eggplant and Pepper Lasagne
Last night we were discussing tonight's dinner - Victor had said he wanted to make an eggplant lasagne - when he asked what I thought of adding some of the hot peppers from the garden. My eyes lit up, I started drooling, and said "YES!!!" Eggplant from the garden. Tomatoes from the garden. Peppers from the garden. Basil and oregano from the garden. It just doesn't get any better.
This is how easy cooking at our house is... A comment was made and a recipe was born... And it's a recipe that will be made again and again.
This really is the secret to cooking - take something you know you like and play with it. It's just not difficult. And for all those folks out there who say they're just not creative... Yes, you are. Just go for it - to quote a famous footwear and apparel company. Seriously, the worst thing - the absolutely worst thing that can happen is you throw it all out and call for pizza.
I have to admit that I've made a few things that I'll never make again, but I haven't had to call for pizza, yet.
Tonight, Victor made his basic Eggplant Lasagne and added peppers in the layers. He seeded and fried the peppers in olive oil and then added the oil to the homemade, fresh from the garden tomato sauce. It was outrageously good.
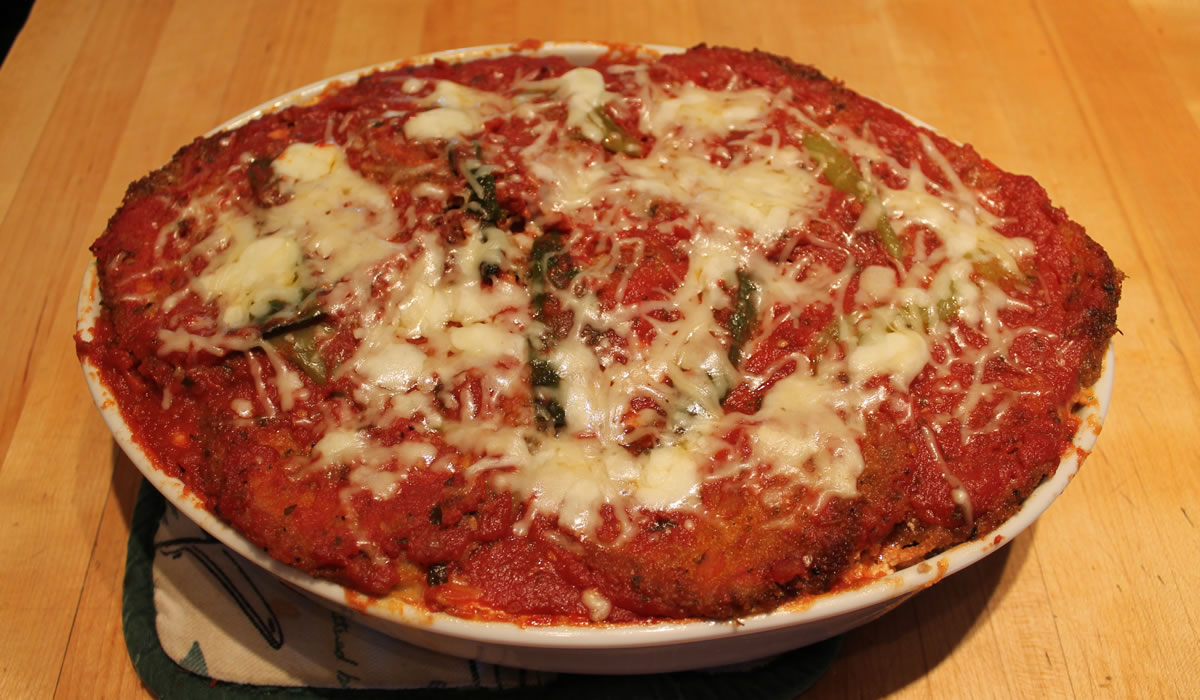
It's amazing what you can do with a single eggplant. And there's a lot more where this one came from.
I think tomorrow night I'm doing something with short ribs. And more goodies from the garden...
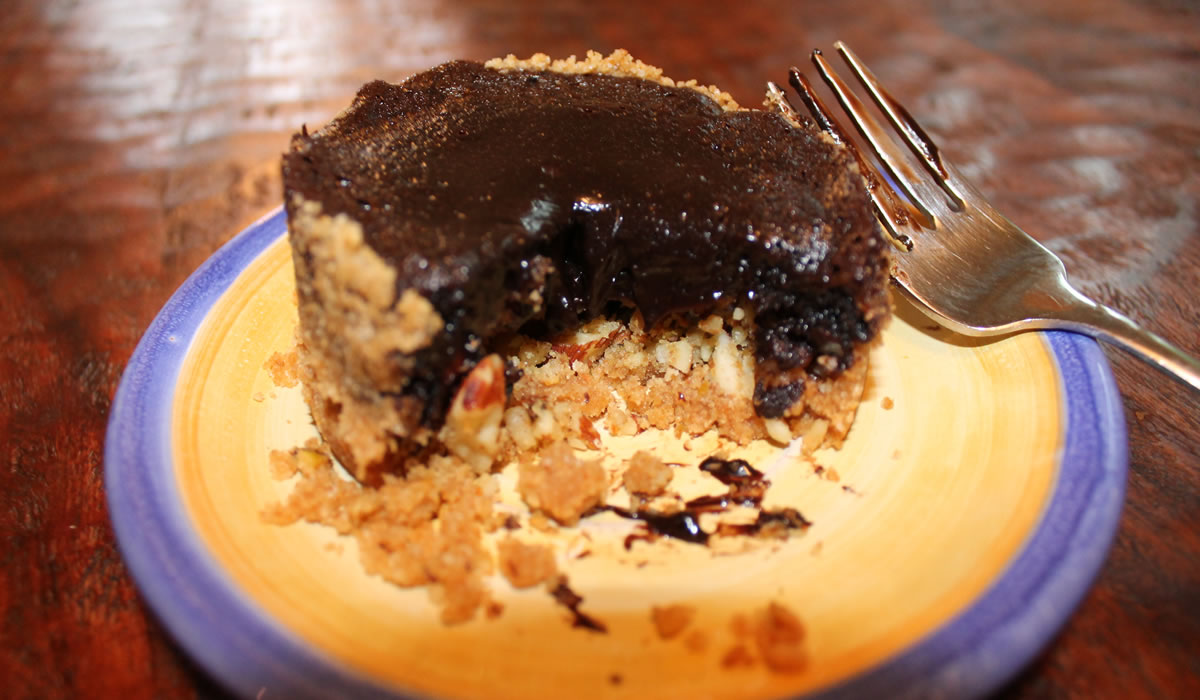
Jacques Pepin's Individual Chocolate Nut Pies
The newest cook book to come into the house is Essential Pepin. To say that I am enamoured of Jacques Pepin would be an understatement. I love his cooking, his take on food - and his take on life. The book is something like 6 years old, now, but it's new to me - and something that's never going to go out of style.
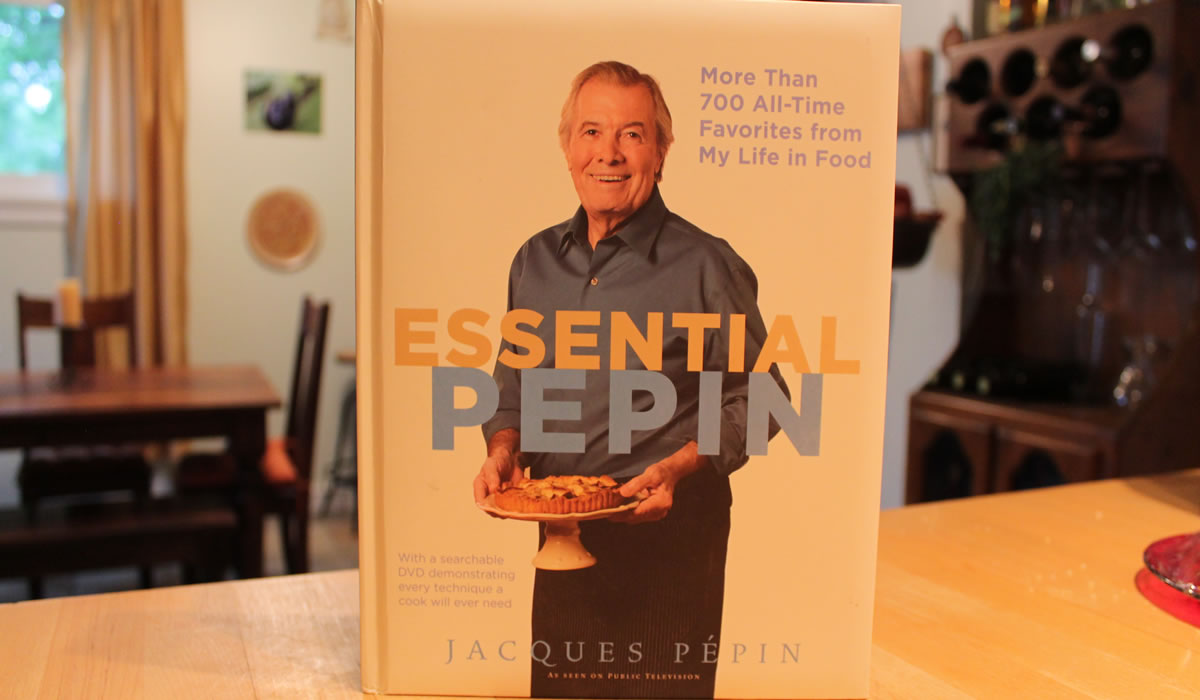
I especially like how he has evolved and how all of his various cooking positions have had an impact on what he does, today. We catch his show on PBS and after seeing a few of the things he was making, I knew I needed to get the book.
Recipes run from basic and simple to more complex -but with a bit of practice, there's nothing that can't be made by anyone who really wants to make it. As in all things, you get out of it what you put in.
Today, I decided to put in chocolate.
Victor is making dinner, tonight, so I needed something to do to dirty up the kitchen while he was trying to get dinner together - using up counter space, equipment, the oven, sink... We work well in the kitchen together...
Since it's raining outside, Blanche was in there, as well - laying right in the middle of the floor - moving only to get in the way somewhere else. Meanwhile, Nonna was in looking for a fresh water bottle and half-dozen coconut cookies.
The kitchen is the heart of the home, right?!? There are times when I think ours is having a coronary.
But here we go. I'm copying the recipe here because I found it on numerous sites on the web. I made the recipe as written, but I used walnuts in place of pecans and pistachios in place of the pine nuts. It's what I had in the house and cooking is more about using what you have than buying more things.
Individual Chocolate Nut Pies
Jacques Pepin
Serves 4
CRUST
- 5 graham crackers (3 1/2 ounces)
- 1 1/2 tablespoons unsalted butter, softened
- 1 tablespoon canola oil
- 2 tablespoons sugar
FILLING
- 1/2 cup mixed nuts (pecans, almonds) - I used walnuts and almonds
- 1/4 cup pine nuts - I used pistachios
- 3 1/2 ounces bittersweet chocolate, broken into pieces
- 2 teaspoons unsalted butter
- 1 teaspoon cornstarch
- 1/3 cup light corn syrup
- 1 large egg, lightly beaten
- 1 teaspoon pure vanilla extract
FOR THE CRUST:
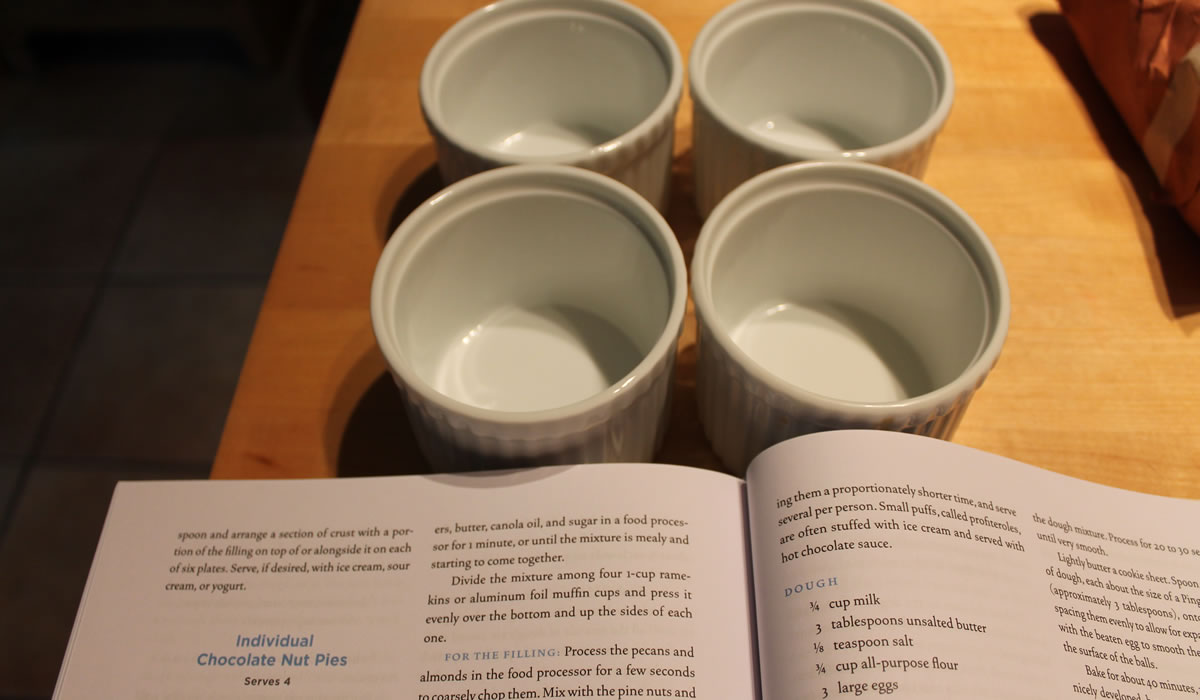
Process the graham crackers, butter, canola oil, and sugar in a food processor for 1 minute, until the mixture is finely chopped, mealy, and starting to come together.
Divide the mixture among four 1-cup ramekins or aluminum muffin cups and press it evenly over the bottom and up the sides of each ramekin.
Preheat the oven to 350 degrees.
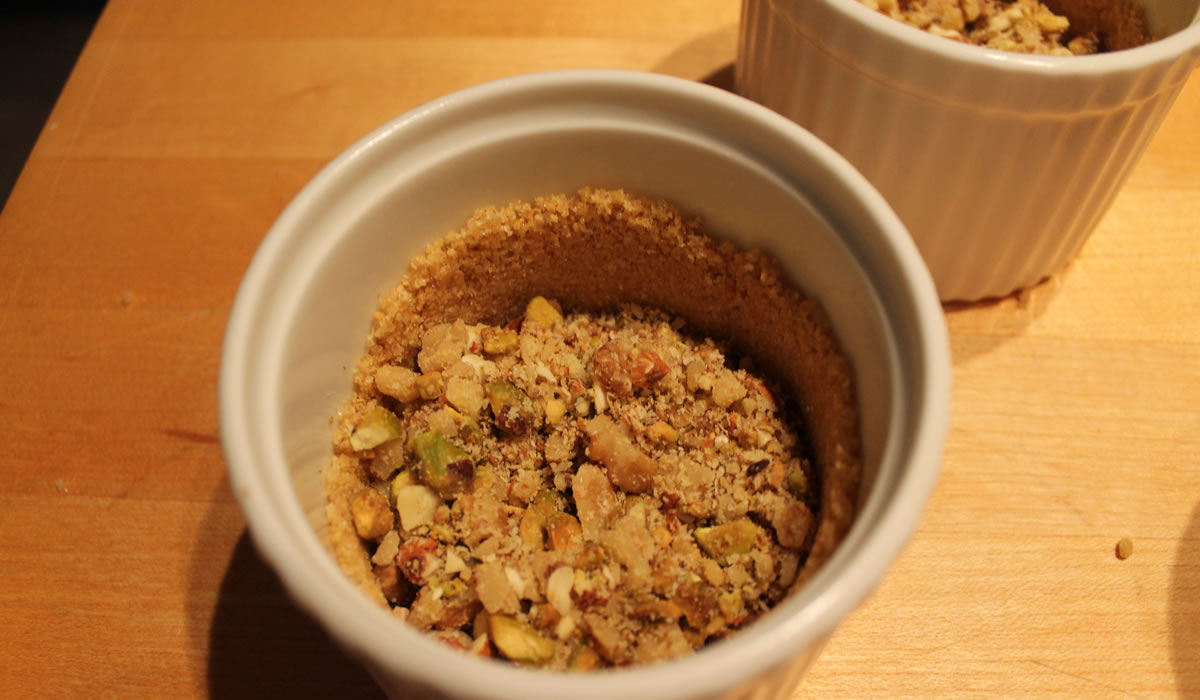
FOR THE FILLING:
Process the pecans and almonds in the food processor for a few seconds to coarsely chop them. Mix with the pine nuts and divide among the lined ramekins.
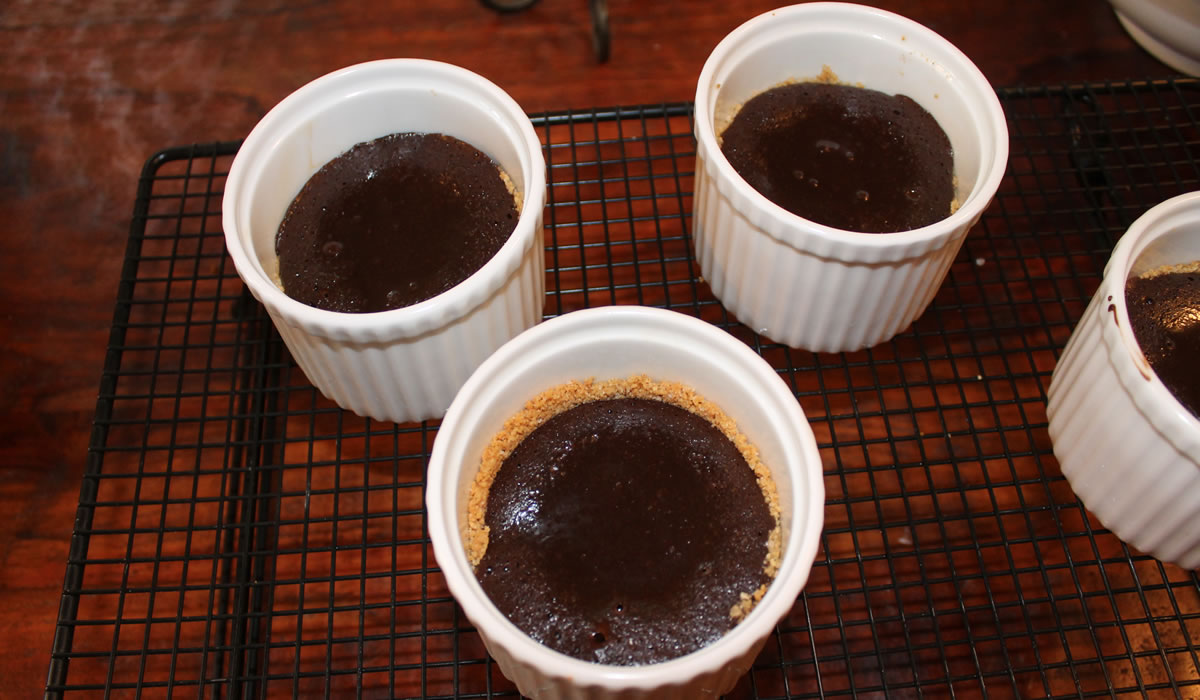
Melt the chocolate with the butter in a bowl in a microwave oven or in a double boiler. Add the cornstarch and mix well, then add the corn syrup and mix well. Add the egg and vanilla and mix well.
Divide the mixture among the ramekins.
Arrange the ramekins on a cookie sheet, and bake in the middle of the oven for about 20 minutes, until the filling is set but still somewhat soft in the middle. Let cool to lukewarm or room temperature on a rack.
At serving time, invert each of the pies onto a dessert plate. Carefully turn the pies right side up and serve.
Copyright © 2011 by Jacques Pépin.


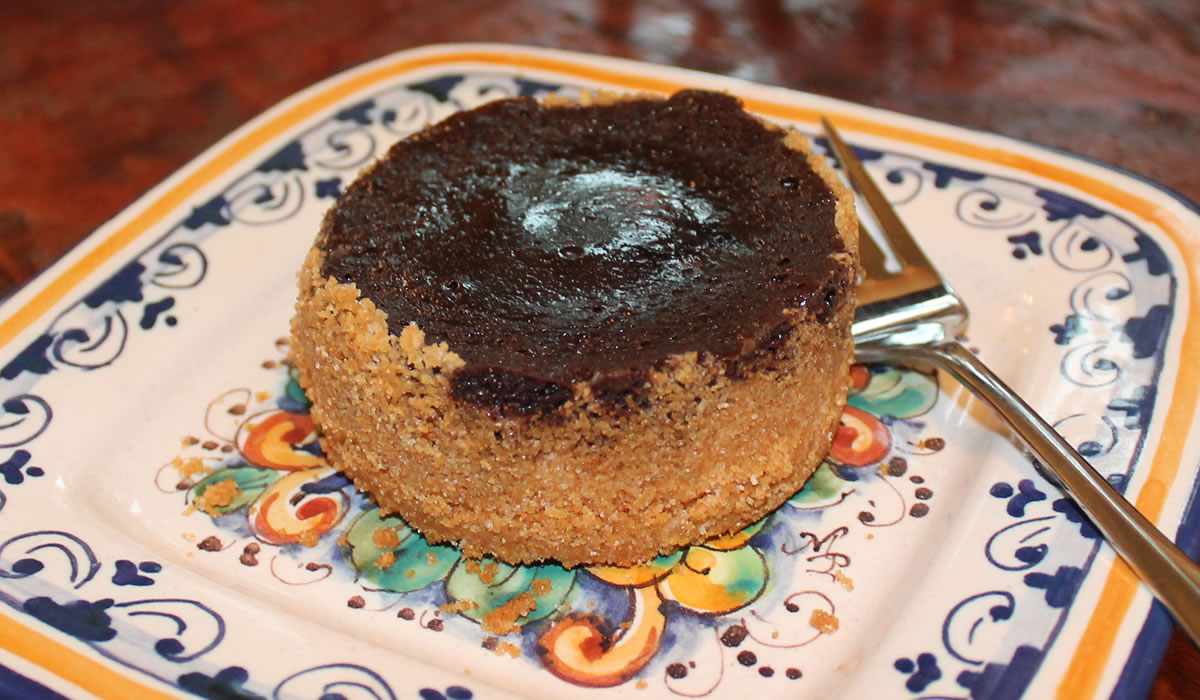
Okay... these are ridiculously good. As in ridiculously good. The combination of the rich, fudgy chocolate and the crunchy nuts, held together with the graham crackers is unbelievably good. And it was ridiculously easy to put together!
This could be made with ingredients already found in many kitchens. While I get the mixed nuts - and I want to use pine nuts next time because I really like their taste and texture - 3/4 cup of any nuts at all would work.
So... make this one soon. You'll be glad you did!