Crock Pot Phobia
I thought it time I got over my phobia about crock pots. I don't know what it is about them but... I get the concept, but I don't see a reason for actually doing it. I know, I know... put the stuff in before you go to work and dinner's ready when you get home. It's like sous vide cooking. Again, I get the concept. I don't get a reason for actually doing it.
So today I decided to break my phobia. I went to the official Crock Pot website and found their number one-rated recipe for chicken.
First off - the recipe as written would require a crock pot the size of a bathtub! 8 Chicken breasts, cubed, 4 Sweet potatoes, peeled and cubed, 4 Yellow potatoes, cubed, 4 Carrots, sliced, 56 Ounces whole tomatoes, canned... and 2 cups of chicken broth. Who has a crock pot that big?!?
But I did kinda like the idea. It also called for a bit of cinnamon, a pinch of nutmeg, paprika... The concept was sound even if the amounts were not. I started gathering up the ingredients and realized that it would actually taste better as a slow braise in the oven.
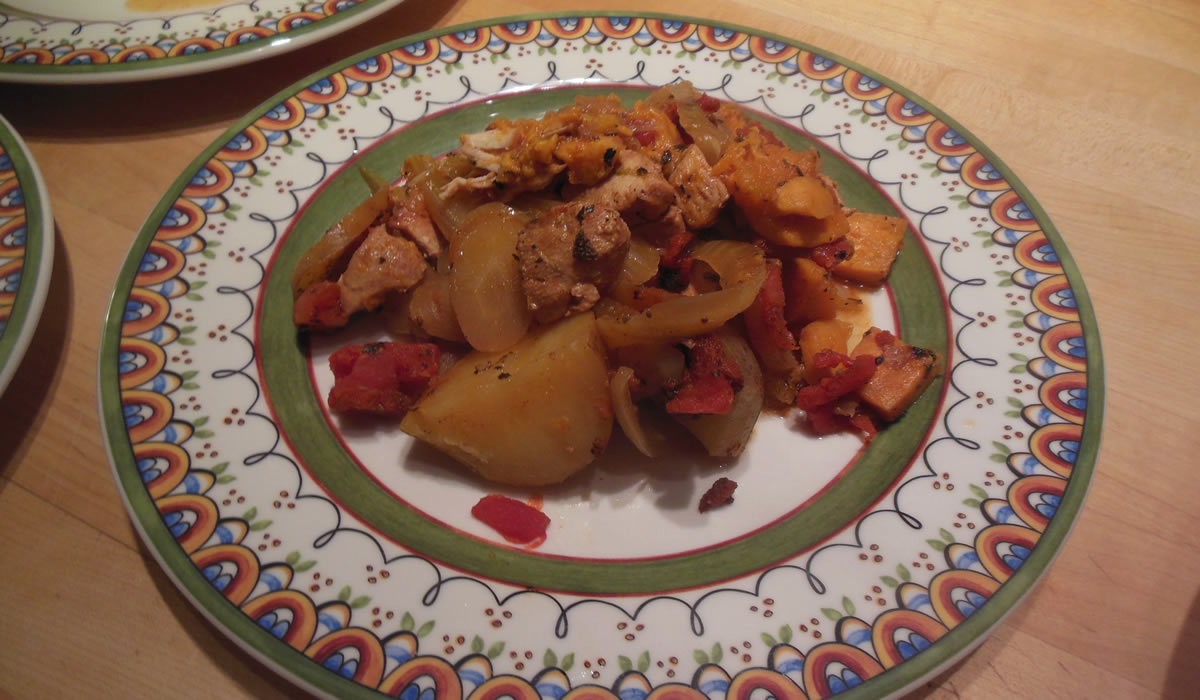
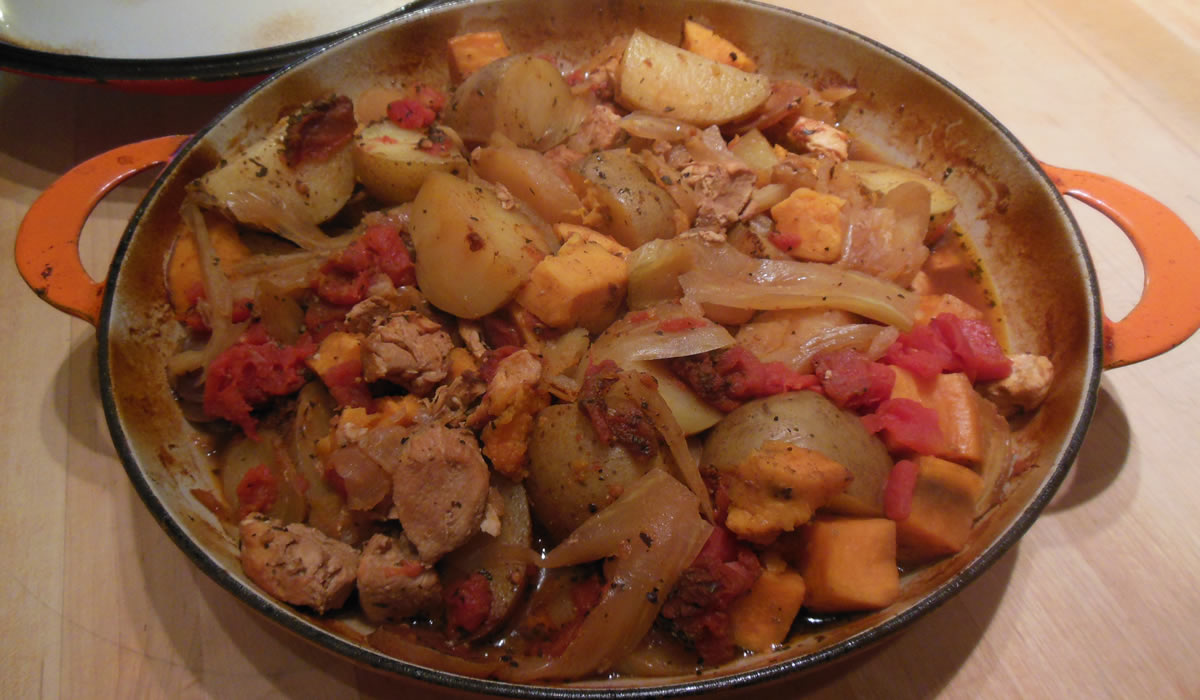
I chopped an onion and browned it a bit with the chicken. I splashed in some white wine and cooked it down a bit and then started adding the other ingredients - a bulb of sliced fennel, carrots, a single 14 oz can of diced tomatoes, sweet and gold potatoes, chicken broth, cinnamon, paprika, nutmeg, celery seed, dried basil, and salt and pepper. I brought it to a boil, put the lid on, and put it into a 300°F oven for about three hours.
It came out great!
And whilst that was cooking, I made rolls.
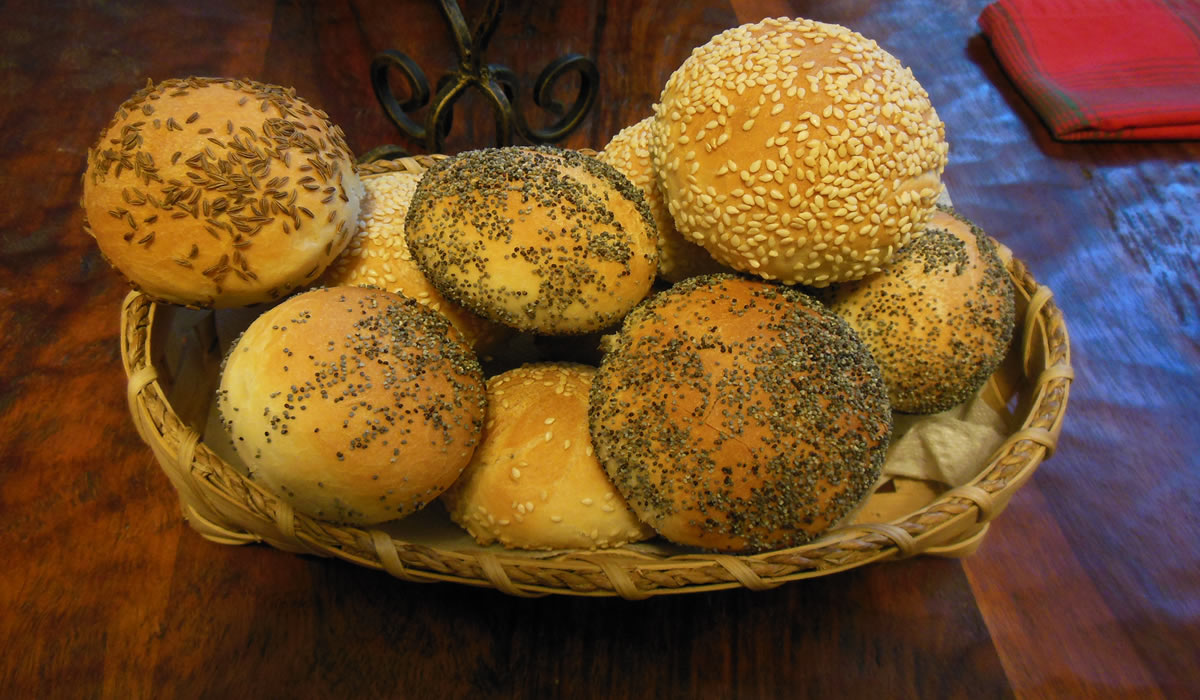
These were really easy. I followed the James Beard recipe for Cuban Bread and divided the half-batch into 12 rolls, rolled them in caraway seeds, poppy seeds, and sesame seeds.
James Beard Bread Rolls
Ingredients
- 1 package active dry yeast
- 2 tsp sugar
- 1 cup warm water (100° to 115°, approximately)
- 1 1/2 tsp salt
- 3 cups flour
- Seeds of your choice
Directions
Combine the yeast with sugar and warm water in a large bowl and allow to proof. Mix the salt with the flour and add to the yeast mixture, a cup at a time, until you have a stiff dough. Remove to a lightly floured board and knead until no longer sticky, about 10 minutes, adding flour as necessary. Place in a buttered bowl and turn to coat the surface with butter. Cover and let rise in a warm place until doubled in bulk, 1½ to 2 hours.
Punch down the dough. Turn out on a floured board and shape into a long rope. Cut into 12 pieces and roll each into a ball. Roll each ball into seeds of your choice - sesame, poppy, caraway, whatever. Place on a baking sheet that has been sprinkled with the cornmeal but not buttered. Place in a cold oven, set the temperature at 400° and place a pan of boiling water in the oven beneath the rolls. Bake about 35 minutes or until well browned.
So... I didn't get over my crock pot phobia. Hell - I probably made it worse. But it doesn't matter. We had a great dinner - that's all that counts!
Bachelor Dinner
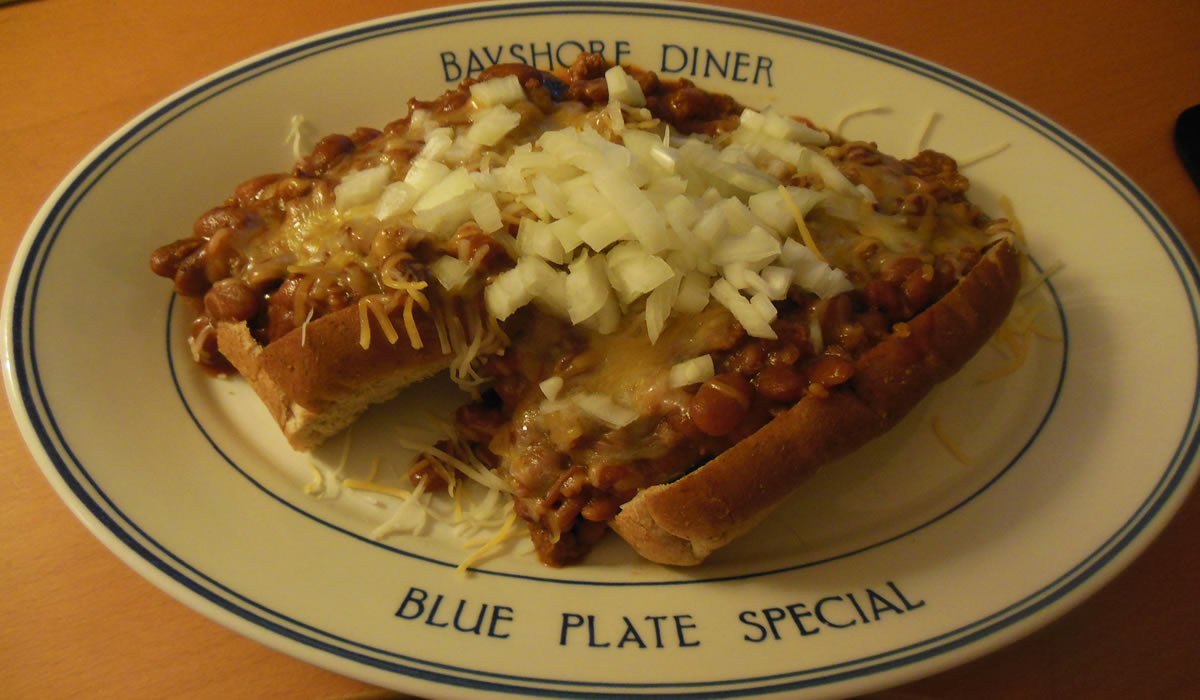
It's been a while since I was home alone for dinner. Victor and Nonna took off to North Jersey for Joanna's and Miles' birthdays while I worked, so I fell back onto my old standby from yesteryear - chili dogs!
Hot dogs really are one of my most favorite foods. I really really like old-fashioned skin-on hot dogs, but they are getting more and more difficult to find locally. Most of what is now out there is skinless - the kind that just sorta dissolve in your mouth with no chew and no texture. Bogus.
I do pick up the all-beef dogs at work. They, at least, have a bite to them - but I really do miss that snap and pop when you bite into a real one.
I usually grill them, but tonight I split them and fried them like we did when I worked at The Donut Center circa 1961. And then topped them with canned chili - hot, of course - and cheese and raw onions.
Gastronomic Heaven on Earth.
Dover Sole
Friday Fish. There's a concept I haven't thought about since childhood...
We didn't eat a lot of fish when I was a kid, other than canned tuna and the occasional fried shrimp. Mom wasn't crazy about fish and we ate what mom liked - she was the cook. Fridays would be things like tuna casserole or her really good tuna salad - canned tuna, iceberg lettuce, celery, and mayonnaise. I never ever saw a Mrs Paul's Fish Stick - ever. I still don't think I've ever actually eaten one in my almost 64 years. They're just not something that evokes childhood, ya know?!?
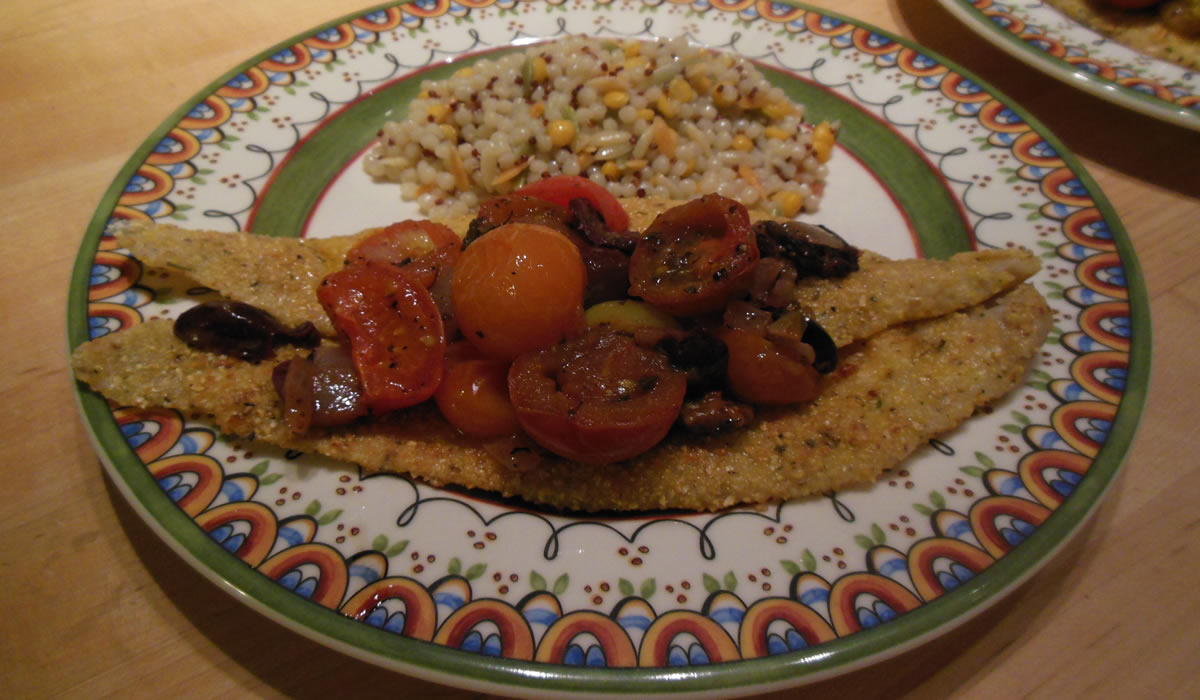
It took me a while to like fish and nowadays there's nothing I won't eat, but it's usually not the first thing I think of when contemplating dinner. I need something to catch my eye - like the package of Dover Sole that fell out of the freezer when I opened it last night. It was an omen. Dinner solved.
I had cherry tomatoes and I had kalamata olives, so I thought a faux-Mediterranean topping on a cornmeal-breaded fillet would work just fine.
I sauteed a bit of onion in olive oil, added the sliced tomatoes, the kalamata olives, garlic, and a splash of white wine, and cooked it all down.
Foe the fish, it was simply breaded with a mixture of flour and coarse cornmeal and fried in an olive oil and butter mixture.
Simplicity.
Methinks it's time to bring a bit of seafood back into the house a bit more often...

Cavatelli
Ya know how you're surfing the interwebs and ya click on something and then you follow something else and then you're someplace completely different from where you started out?!? Me, neither, but I understand it happens to folks from time-to-time...
One thing that did happen to me last week, though, was I was looking at an old copy of La Cucina Italiana and saw a recipe for cavatelli - and decided to buy a cavatelli maker. That, of course, led me to Google which led me to A Best Kitchen - an online restaurant supply house.
I have to tell ya... I'd rather spend all day in a restaurant supply house than a Williams-Sonoma or other retail outlet. Form follows function. I want something that is going to work and last a while - not something that is cute and will break the 2nd time it's used. My dream kitchen is actually stainless steel with a quarry tile floor - with a drain. Sadly, that's not going to happen any time soon.
But I digress...
The cavatelli maker arrived in a couple of days and once we knew the storm was coming, decided that today would be the perfect day to try it out. And, it was. Sunshine, blue skies, a chill in the air, and feet of snow awaiting the plow. We had spoken with our neighbor who has a snow service and she said she'd send him down when he did her place. He hasn't shown. I went down there a couple of hours ago and dug out her front door - she and her sister were actually trapped in the house because both doors were completely blocked in with snow. It's what neighbors are for. But we still didn't get our driveway done! It looks like I'll be hand-digging it out tomorrow. Oh well. I wanted feet of snow and I got feet of snow!
But back to the cavatelli...
We had several recipes to choose from, so Victor went with a ricotta and parmesan version.
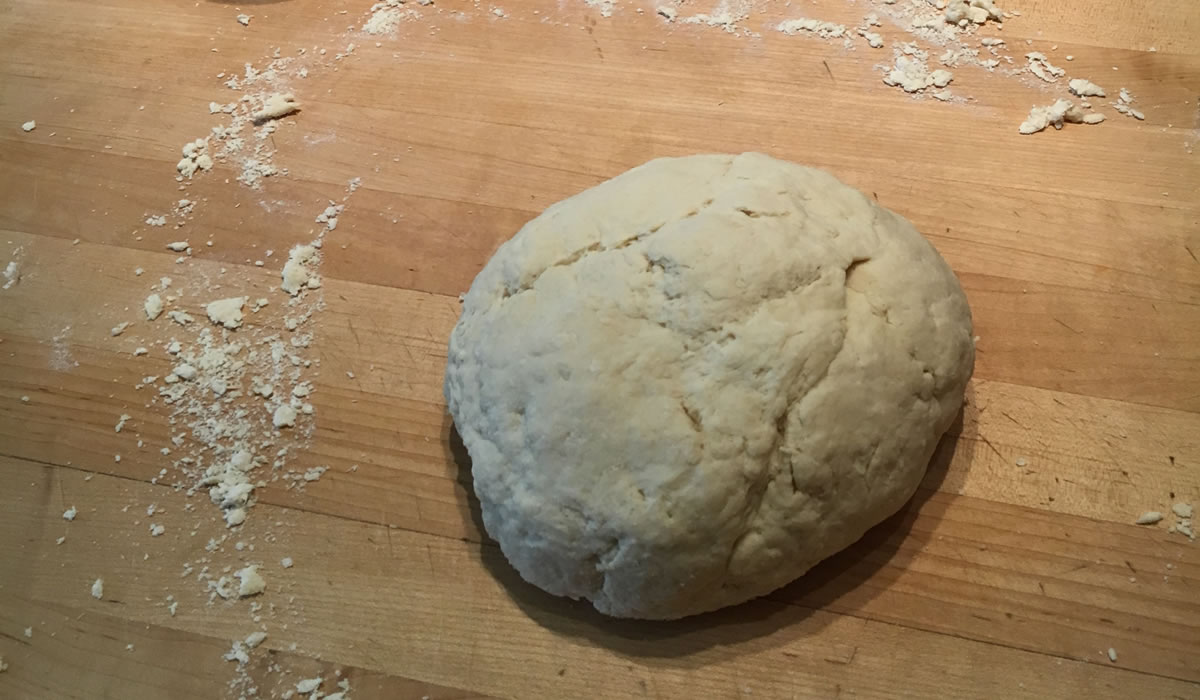
The dough is quite easy to make - actually, all fresh pasta dough is pretty easy to make. It's the rolling and/or forming that takes the talent. I leave it to Victor.
Ricotta and Parmesan Cavatelli
- 4 cups flour
- 1 egg
- 1 lb ricotta
- 1 cup finely grated Parmesan cheese
- 1 tsp salt
- 1/4 cup milk
Sift flour onto a counter or board. Make a well and add the remaining ingredients. Slowly incorporate the liquids with the flour. when everything is mixed in, knead for about 2 minutes. When done, cover and let dough rest for about 10 minutes.
When ready to make the cavaletti, roll the dough to about 3/8" thickness and cut into 3/4" strips. Feed into your cavatelli maker, or cut into small pieces and roll on your gnocchi board.
Yes, we have one of those, also. Victor makes an awesome gnocchi.
Cook in boiling, salted water for about 5 minutes. Drain, and serve with your favorite sauce.

Our favorite sauce is the sauce Victor just made - with Italian sausages and meatballs.
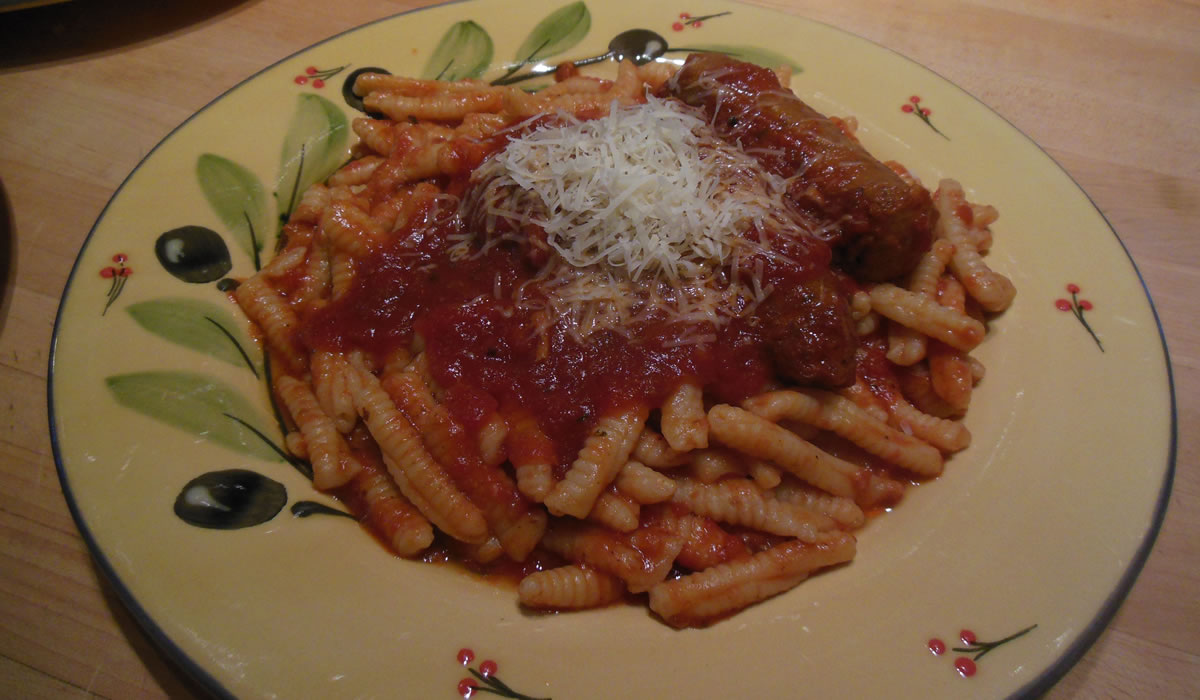
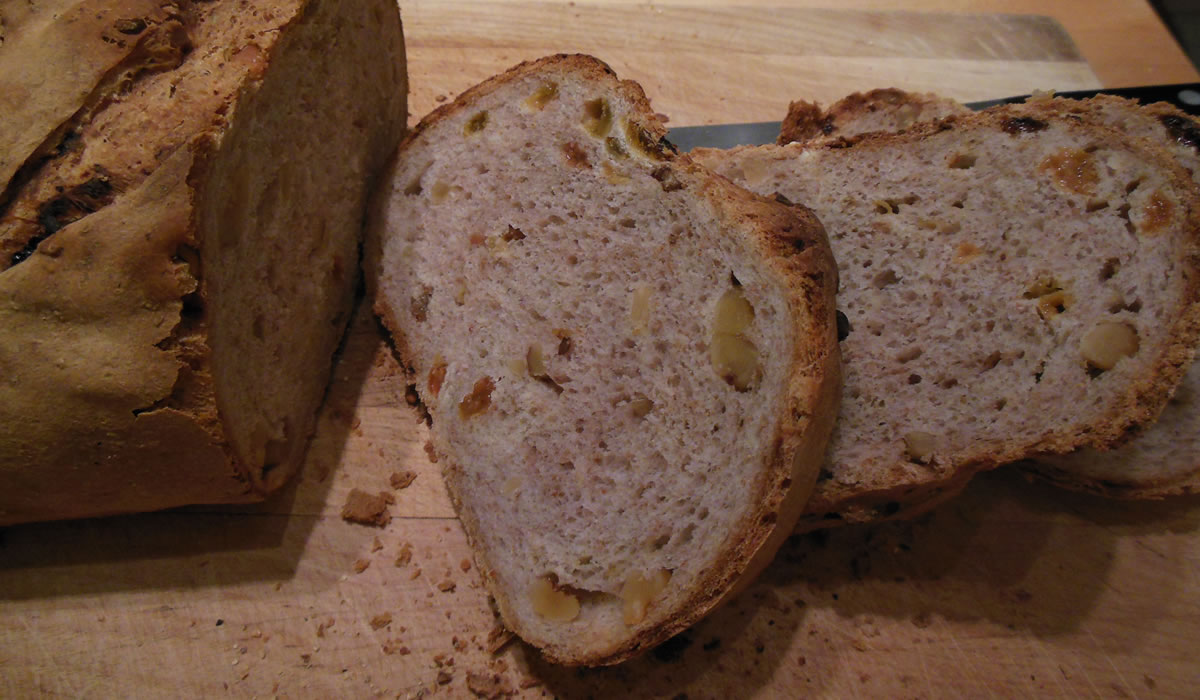
We had it with thick slices of the Walnut Raisin Bread from yesterday.
So we didn't get the driveway plowed, but we sure as hell ate well - and there's Pecan Pie for dessert.
I'll deal with the driveway tomorrow.
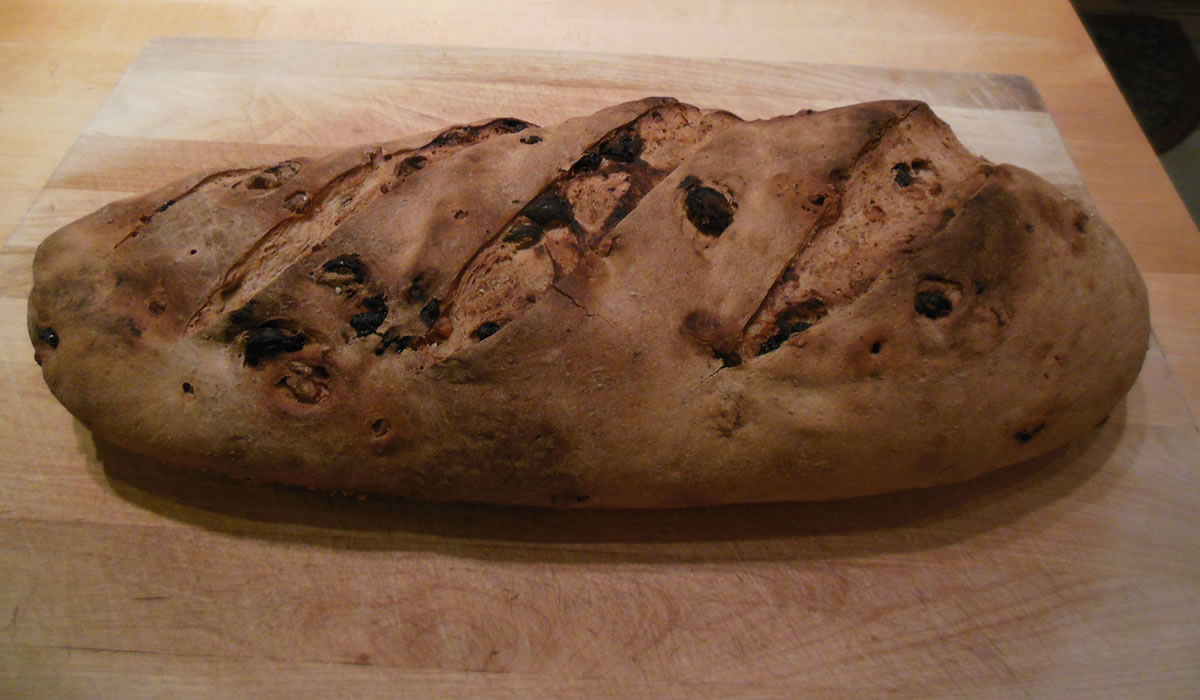
Walnut Raisin Bread
It's been snowing now for 24 continuous hours. One of the best snowfalls I've seen in years. Feet and feet of snow - with drifts over 5 feet. It's incredible.
I started shoveling the drive but said hell with it less than a third of the way out. I don't have to be anywhere until Tuesday afternoon. I'll take my time.
Food-wise, we're doing well. Scones for breakfast, meatball sandwiches for lunch, and pork chops for dinner - with a loaf of walnut raisin bread. The bread definitely took the blue ribbon - it's one of the better ones I've made. Really crunchy crust with a perfectly light crumb. Just enough walnuts and golden raisins for sweetness and a bit of extra crunch. I slathered three slices with butter during dinner.
And, because man does not live by bread alone - although there are times when I almost do - we had pork chops with a balsamic reduction for the actual dinner.
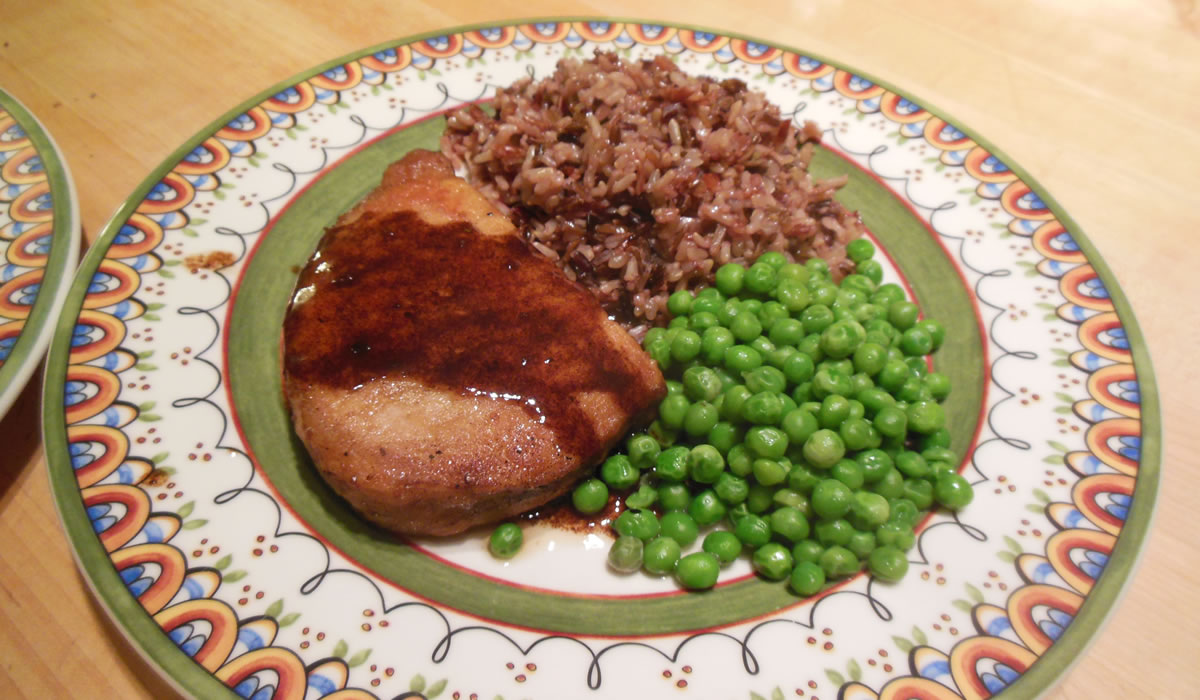
Just browned in a skillet, pulled out, added chicken broth and balsamic vinegar, boiled it down a bit, added the chops back in to finish cooking, and then reduced the juices a bit more. Really simple.
Dessert is going to be Pecan Pie, because... what the heck. It's still snowing!
One thing to note about the bread - it needs a starter, so make sure you make the starter the day before you want to make the bread!
Walnut Raisin Bread
starter
- 2 tsp active dry yeast
- 3/4 cup water 110°
- 1 3/4 cups flour
Sprinkle yeast into the warm water. Stir to dissolve. Stir in flour. Cover bowl with clean towel and leave at room temperature for 2-3 days.
dough
- 1 tsp active dry yeast
- 3/4 cup water 110°
- 1 cup starter
- 2 cups all-purpose flour
- 1/3 cup rye flour
- 1/4 cup whole wheat flour
- 1 1/2 tsp salt
- 1 cup raisins
- 1 cup chopped walnuts
Sprinkle yeast into water in mixing bowl. Stir to dissolve. Add starter, flours, and salt.
Mix on low speed with dough hook for about 5 minutes or until dough is smooth and elastic. Add raisins and walnuts and continue mixing another 5 or so minutes.Knead by hand for a minute or two on a lightly-floured surface to make sure the nuts and raisins are evenly distributed.. Place the dough into a clean bowl and cover with a kitchen towel.
Let rise until doubled – up to 2 hours. Punch dough down and let rest for about 10 minutes before forming the loaf.
Shape the dough into a cylindrical loaf and place on a bread peel generously coated with coarse cornmeal. Cover with a kitchen towel and let rise again until doubled – about an hour.
Preheat oven with baking stone to 425°.
Dust loaf with flour and then make three parallel slashes across the top. Slide dough onto stone and bake for about 1 hour.
Replenish starter with about 3/4 cup flour and 1/2 cup water.
Oh... AND... I won the snow pool at work. I said 19".
Snow and Scones
Ah... what a glorious morning! Snow falling, wind blowing... It's almost a perfect day!
The weather service is calling for 18"-24" and we're under a blizzard watch until 6am tomorrow. In the work snow pool, I chose 19" as my guess. It could happen!!
I LOVE IT! Provided, of course, that we don't lose electricity. I've pretty much ensured that we won't, though. I've ground a pound of coffee and brought in wood. Nothing ever happens when you're prepared.
24" of snow... it's almost like those thrilling days of yesteryear when I lived at Lake Tahoe. I loved those feet-of-snow storms. I moved up there in 1976 and stayed until 1980 - with a brief stint back in San Francisco round '78.
I started off at The Old Post Office in Carnelian Bay on the North Shore.
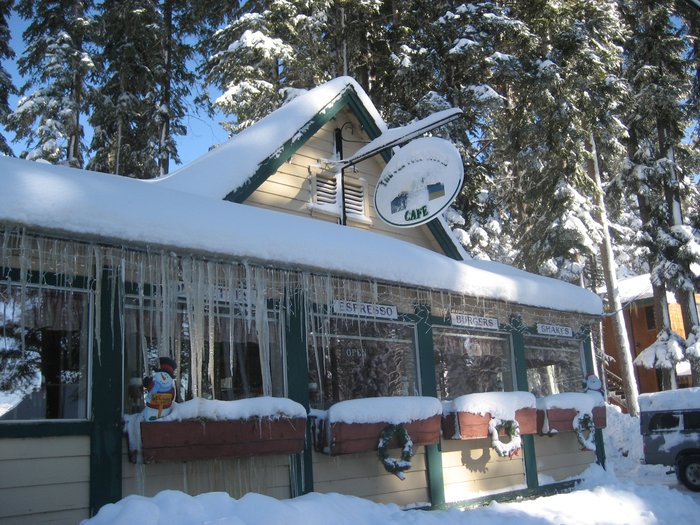
They had the dinkiest kitchen on the planet. It's amazing the amount of food that could be produced back there.
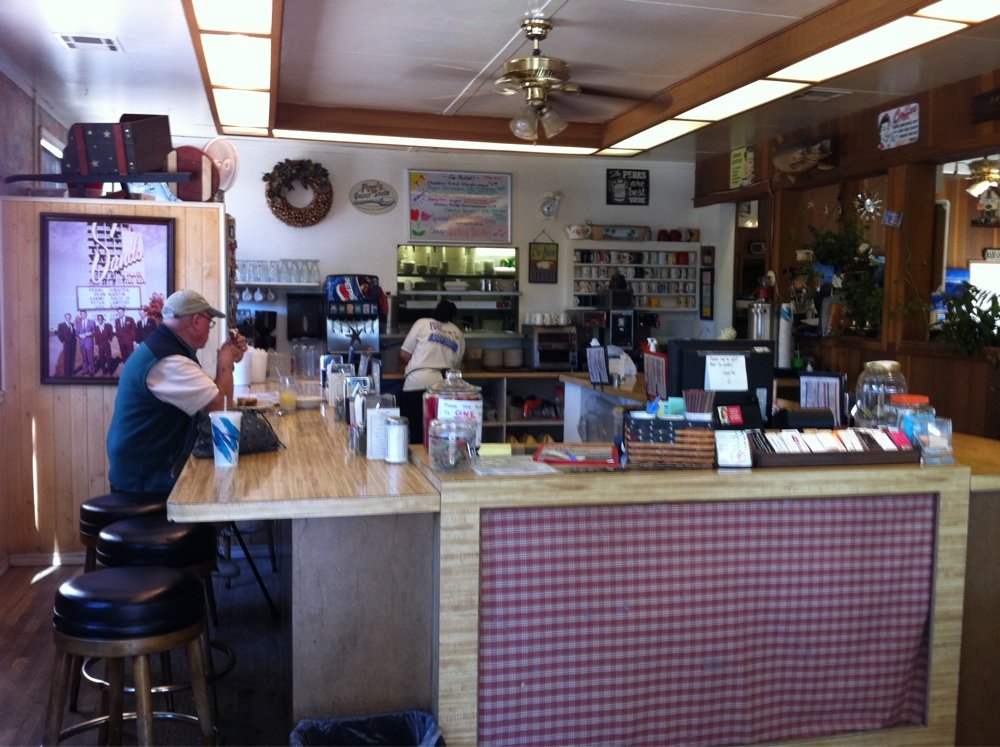
I quit on Mother's Day - after my shift - and a couple weeks later moved on to the Hyatt Lake Tahoe as a cook at Hugo's - then the gourmet lakeside restaurant. All of it has changed since those days. The hotel, casino, and all the restaurants have been seriously renovated since my days there.

This is my one souvenir - a casino rocks glass close to 40 years old. Even the Hyatt logo has changed.
We were rarely snow-bound in those days. Studded snow tires were the norm, and when ya had to, ya put on chains. We did always make sure we had a well-stocked larder, though. We always ate well. It's a recurring theme in my life.
But I digress...
It's close to white-out conditions outside, right now. The wind is howling and the snow is coming down like there's no tomorrow. Our one saving grace is it's really powdery so it's not sticking on the trees or power lines. If the snow gods stay with us, the electricity will stay on.
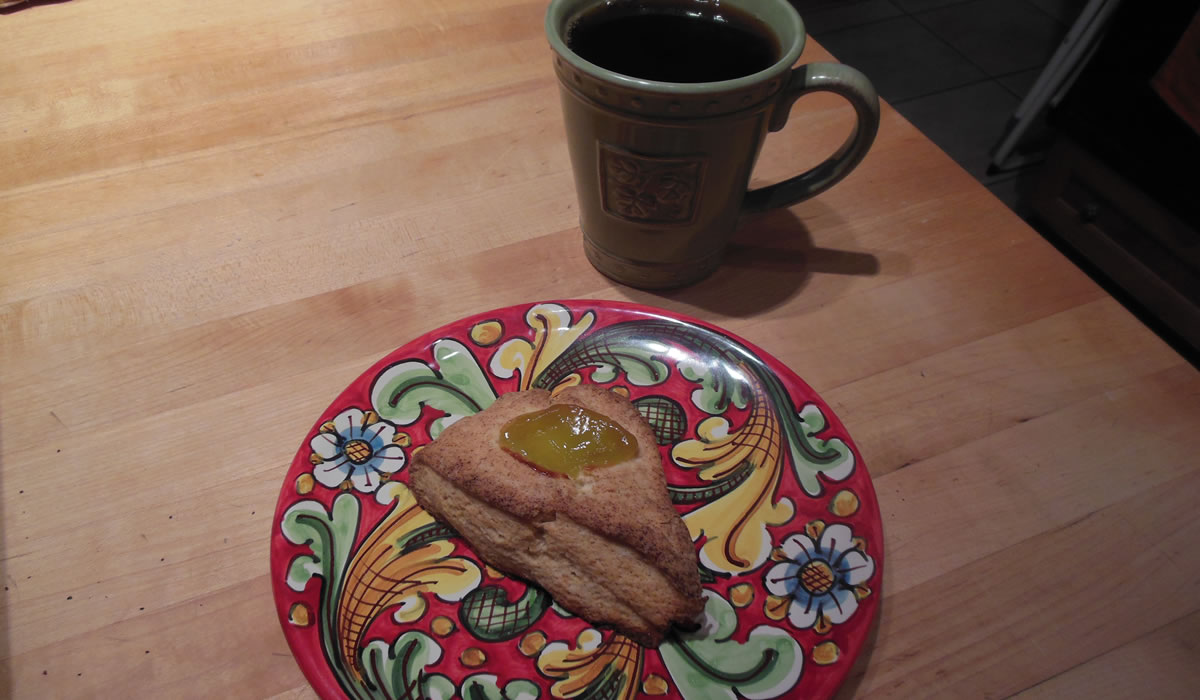
I've consumed several cups of coffee and a couple of scones and there's a walnut raisin bread proofing right now. Lots of fun food on the snow-covered horizon.
The scones are really simple and really good. perfect for a snowbound day - or any day. they come together in minutes and are edible right out of the oven!
Scones
- 2 cups all purpose flour
- 1/3 cup sugar
- 2 teaspoons baking powder
- 1/2 teaspoon salt
- 5 tablespoons chilled unsalted butter
- 1 cup whipping cream
- 1 tsp vanilla
- your favorite jam
Preheat oven to 400°F. Mix flour, sugar, baking powder, and 1/2 teaspoon salt in large bowl. Add butter; rub in with fingertips until mixture resembles fine meal. Gradually add 1 cup cream and the vanilla, mixing until dough comes together. Pat to 1/2-inch thickness. Cut scones into wedges. Make an indentation at the wide edge and fill with a dollop of jam. Transfer to baking sheet. Bake scones until brown, about 18 minutes. Serve warm.
I did half of them with boysenberry jam and half with key lime curd. Yum.
Bean Soup and Cornbread
I've had a hankerin' for some beans for a while. Growing up with six kids in the family meant beans were definitely part of the normal rotation. Mom knew how to stretch a dollar when it came to feeding us and nothing was ever wasted. Sunday's roast became Thursday's hash and bits of this and that went into a pot of soup.
She had her favorite menus... red beans with spinach or navy beans with a ham bone and a loaf of Larraburu french bread - it was all called french bread back then - to sop up the juices. Beans are a great and versatile high-protein product. And the ultimate in comfort food. Pop drove a Larraburu bread truck in 1954 before finally getting into the fire department - he even took a pay-cut joining the SFFD - which means the bread drivers were well-paid or the firemen weren't. There was a lot of pride working for those family-owned companies back in the day - before corporations bought them all up and dismantled and sold off the parts.
But I digress...
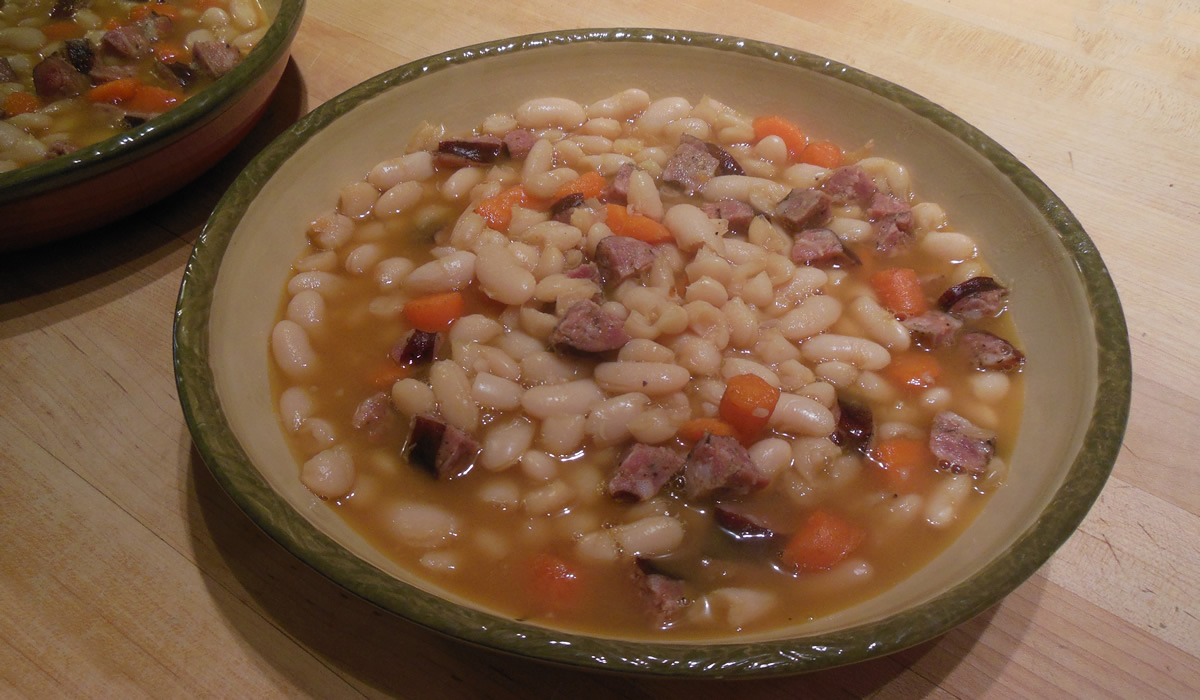
I soaked a bag of cannellini beans overnight and cooked them today in a partial carton of turkey broth and a partial carton of beef broth - I inherited Mom's gene for not wasting anything. When they were almost done, I added 12oz of andouille sausage and 3 chopped carrots and simmered it all away. It didn't need a lot of other herbs or spices - the andouille took over and made it nice and mildly spicy.
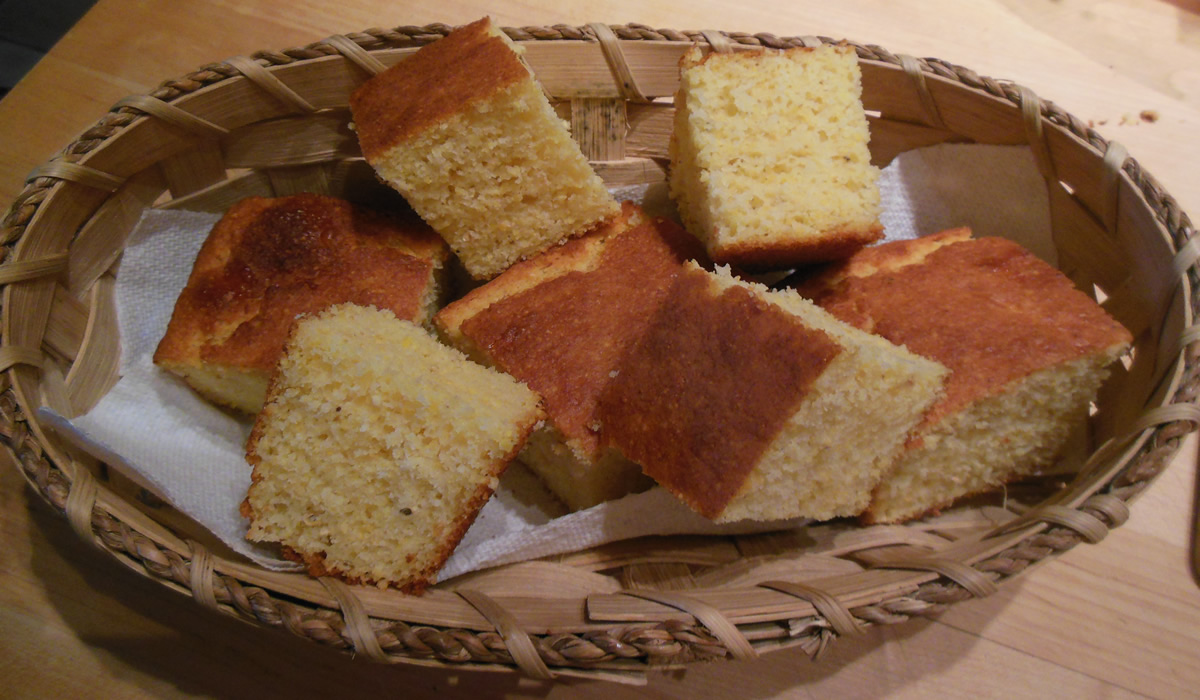
Beans call for bread but the Larraburu of my youth no longer exists - so I decided on cornbread - about as polar opposite of a San Francisco Sourdough as you can get. But what the hell, right?!?
I wanted a no-frills, plain ol' down-to-earth cornbread - nothing fancy or sweet. I grabbed my trusty Better Homes and Gardens New Cook Book and went to work. It's one of the easiest recipes on the planet.
Cornbread
- 1 cup all-purpose flour
- 1 cup corn meal
- 1/4 cup sugar
- 4 teaspoons baking powder
- 3/4 teaspoon salt
- 1/4 cup oil
- 2 eggs
- 1 cup milk
Preheat oven to 425°. Grease 8x8 baking pan.
Combine the flour, sugar, baking powder, salt and corn meal in a mixing bowl. Add eggs, oil, and milk, and stir until just combined. Do not over mix.
Spread batter into prepared pan. Bake for 20-25 minutes or until nicely browned.
Really simple. Really basic. Really good.
The perfect meal for a a cold winter's day.
Another Vat of Sauce
Victor has been making sauce and I've been jarring it for a long, long time, now. It's just something that takes a bit of time, but is so worth it in the long run. I even graduated from plain ol' mason jars to fancy jars that look like store-bought.
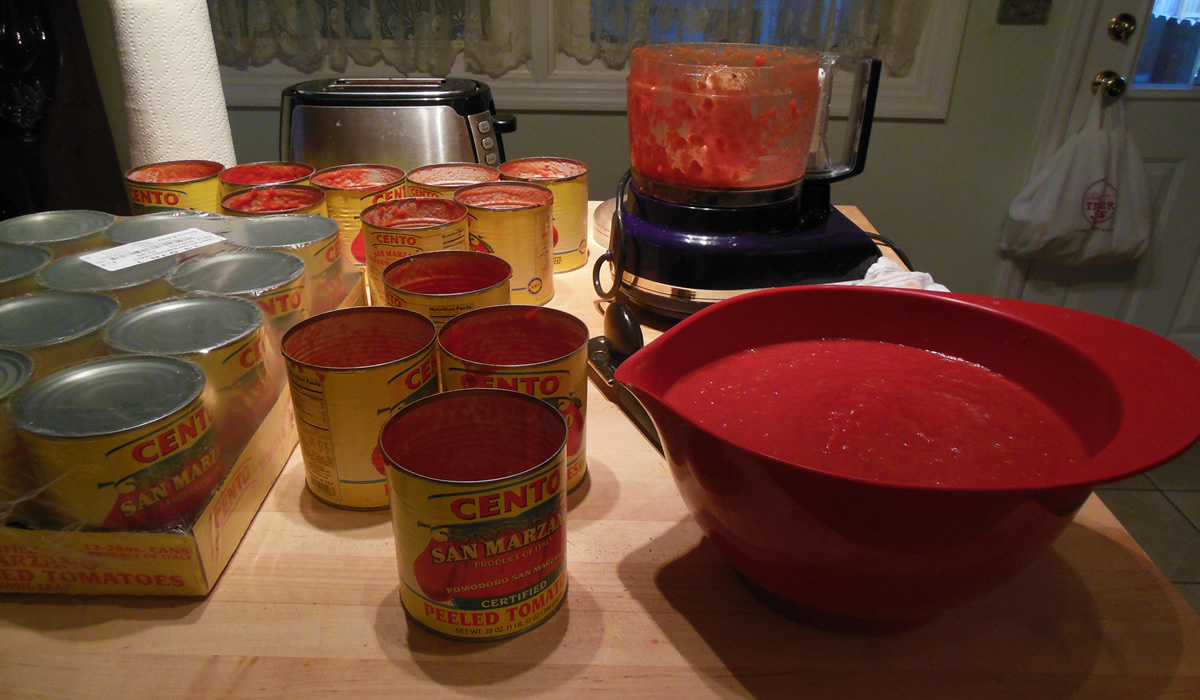
I do have to admit that it's not as inexpensive as buying sauce, but... Prego doesn't use San Marzano tomatoes like we do. If you're going to go to the trouble of making something, make it good with good ingredients. Make it worth your while.
We have the process down to a science... Victor makes the sauce and I do the canning. Teamwork.
We have a big ol' pot that we bought years ago and it gets filled up and then goes for a slow simmer for a few hours...
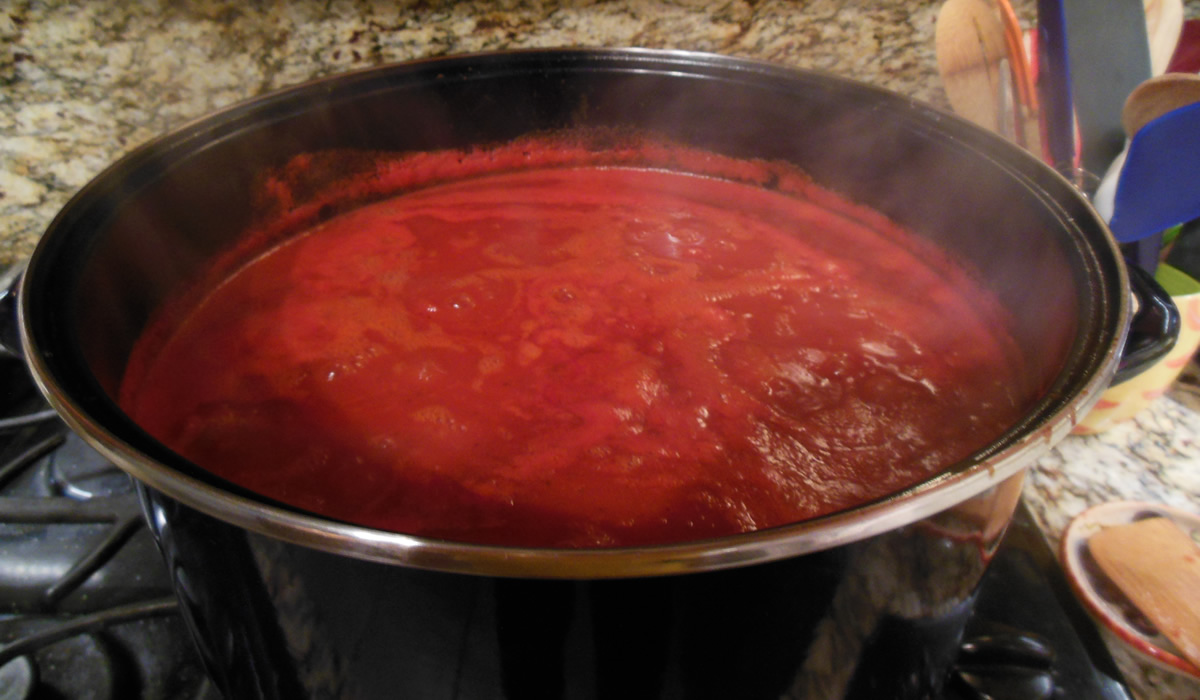
While the sauce is simmering, I get the jars ready...
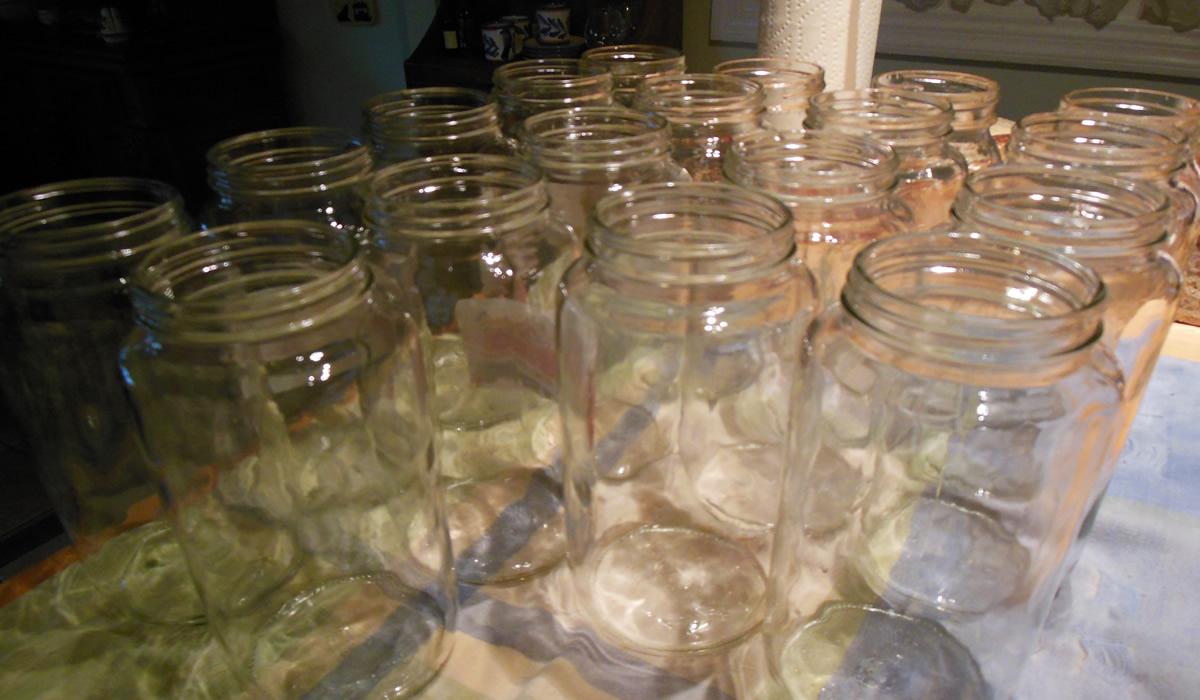
I like the one-piece lids on these but think I may be going back to mason jars at some point. I kinda like the old-school look and feel of a good ol' mason jar. Not to mention I have dozens of them in the basement - complete with lids and rings.
Of course, that would mean I would have to stay away from my favorite jar website - Fillmore Container - and stop getting their emails and all that. Yeah. Right. I probably won't be doing that any time soon. Going through the pages of bottles and jars is almost as bad as going through the Atlantic Spice website. Food porn. That's all there is to it.
But back to the sauce...
First I fill up the jars...
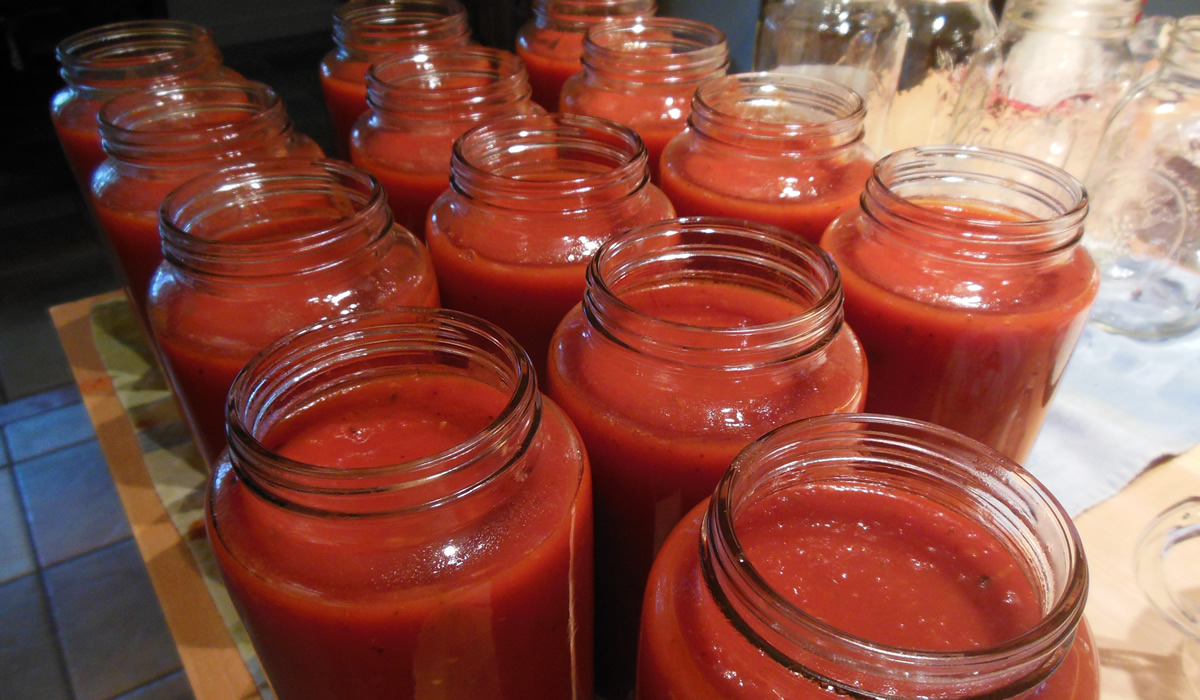
I got 14 quarts this time around. That's about the average. I canned 13 and kept one out for dinner, tonight. They then go into the canner - 7 quarts at a time.
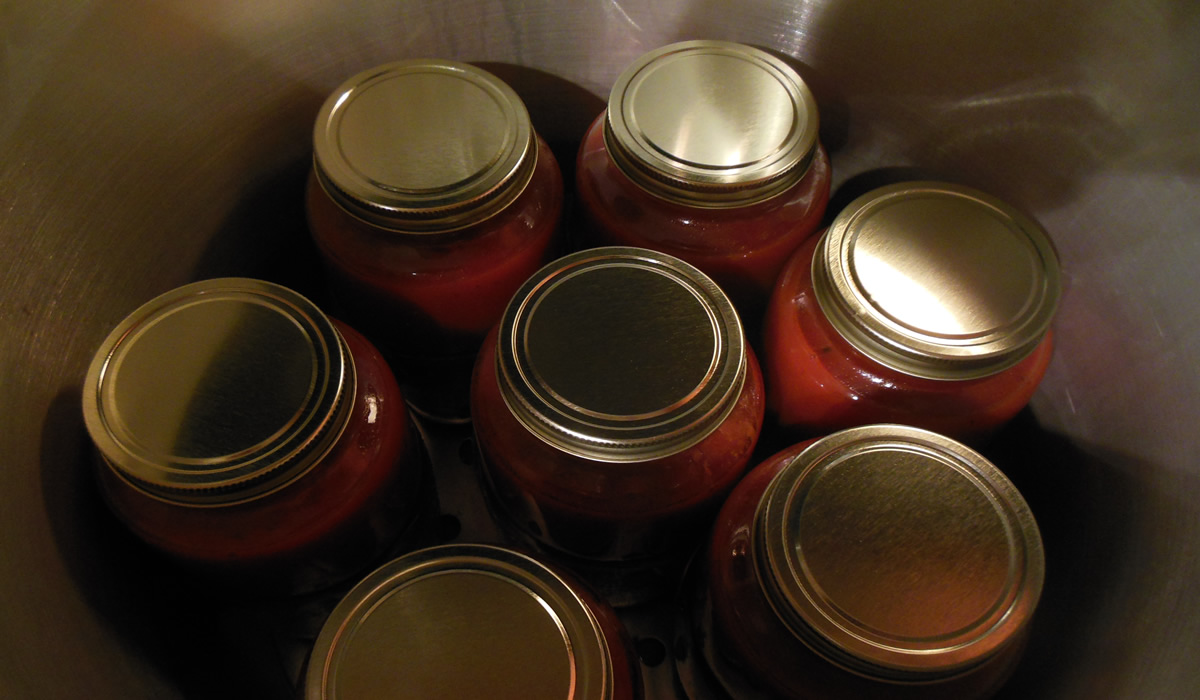
They can at 11 pounds of pressure for 45 minutes - and then i do it all over again. Fortunately, I don't have to stand in front of the stove while it's going on - just check once in a while to make sure the pressure remains constant.
And then they come out to cool.
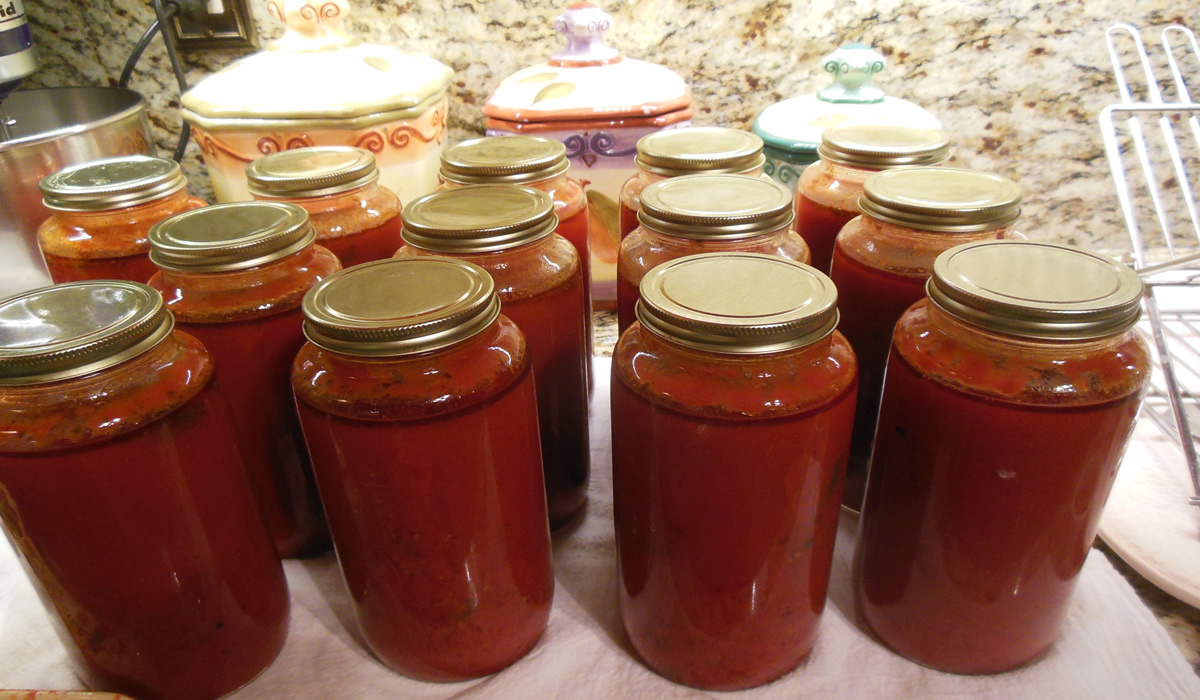
I had one that didn't seal properly this time around, so it went into the 'fridge and we'll use it up sometime in the next week or so. The rest of them went downstairs to the basement with the other goodies. I rarely have one that doesn't seal properly and it's pretty much the main reason I thought about going back to two-piece lids.
We had the sauce served over Cavatelli.
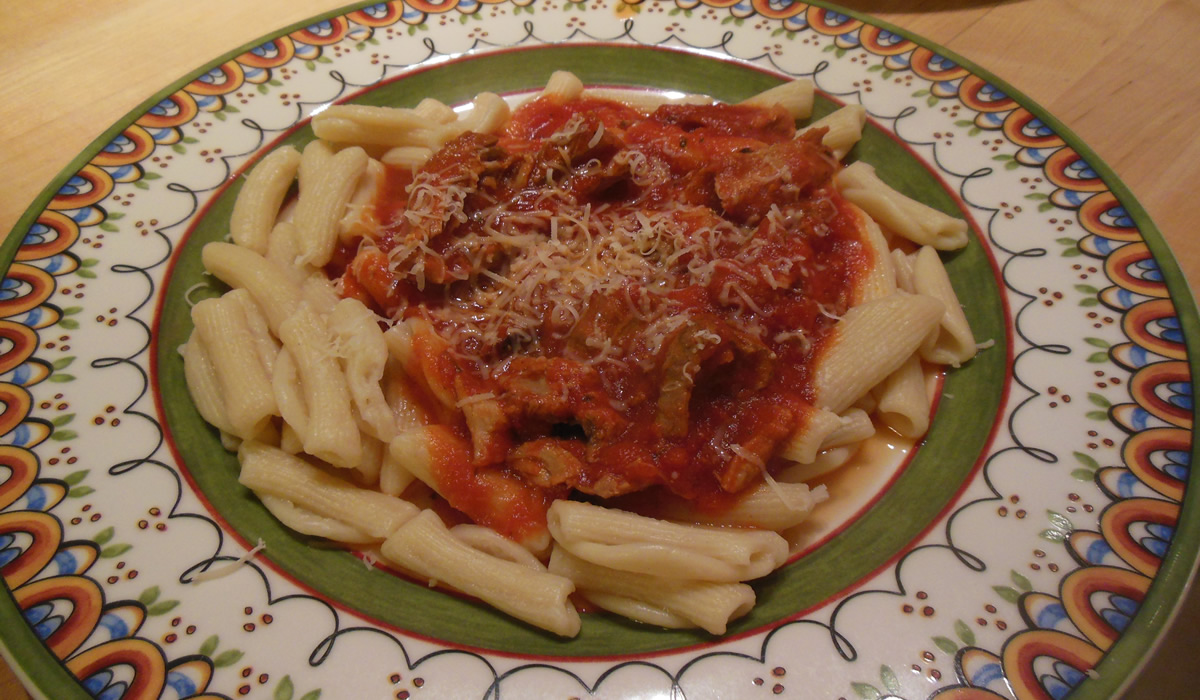
It was totally delish. And just now - while double-checking that I spelled cavatelli correctly, I bought a cavatelli maker. $34.95. What the hell. So much for purging and getting rid of stuff. It will be here in a few days. Fresh pasta and homemade sauce.
La vita è bella.
Oh... here's the recipe...
Victor’s Pasta Sauce
- 2 – 28oz cans of crushed tomatoes
- 1 – Sm can tomato paste
- 1-2 cloves of garlic (or to taste if you like more) chopped fine
- Olive oil
- Dried Italian seasonings
- Hot red pepper flakes (a tsp or more or less to taste)
- Salt and Pepper to taste
- Red wine (always cook with a decent wine, never “cooking” wine) about a cup or cup and a half
- Meat – such as Italian sausage or some nice beef or pork ribs or pork chops
Ok…I ALWAYS make my sauce with meat, so start with a deep, heavy pot and add about 3-4 TBS of olive oil. On high heat, once the oil is hot, start frying the sausage or pork, Let the meat get good and caramelized although you don’t have to cook it all the way through because you’ll add it back to the sauce to finish. Once the meat is browned take it out of the pot, put it on a plate and set aside.
Lower the heat to medium and sauté the tomato paste for a couple of minutes until it begins to “melt”. Add the chopped garlic and sauté with the tomato paste for just a minute (no longer or it will burn). Then add about a cup of the red wine and deglaze the pan with it, scrapping up all the good bits that stuck to the bottom when cooking the meat.
When the wine reduces by about ½ start adding the canned tomatoes. Add one can of hot water for every can of tomatoes you use.
Now start adding the dried Italian seasonings. I eyeball it but I would guess a good 2 TBS is fine. Add about another ½ cup of red wine, with red pepper flakes, salt and pepper. Stir everything into the sauce. It will be very thin at this point.
Add back the cooked meat. Now this is important….at the bottom of the plate you let the meat rest on will be some of the oil and juices that seeped out. Pour that back into the pot. It has a lot of flavor in it.
Bring the sauce back to a boil then turn the heat down low and let it simmer for at least 1 and a half hours, stirring every 15 to 20 minutes to keep it from burning. It should reduce by about a third or a little less and get thicker. The meat will absorb the sauce and get very tender.
When I make meatballs, I don’t fry them, I bake them on a sheet pan. When I do, I add them to the simmering sauce when they’re done so they also absorb the flavor.
I usually make the sauce early in the day and after it’s done, just let it sit on the stove until dinner then I re-heat it. This should make enough sauce for a couple of dinners or good sized lasagna.
Macaroni and Cheese
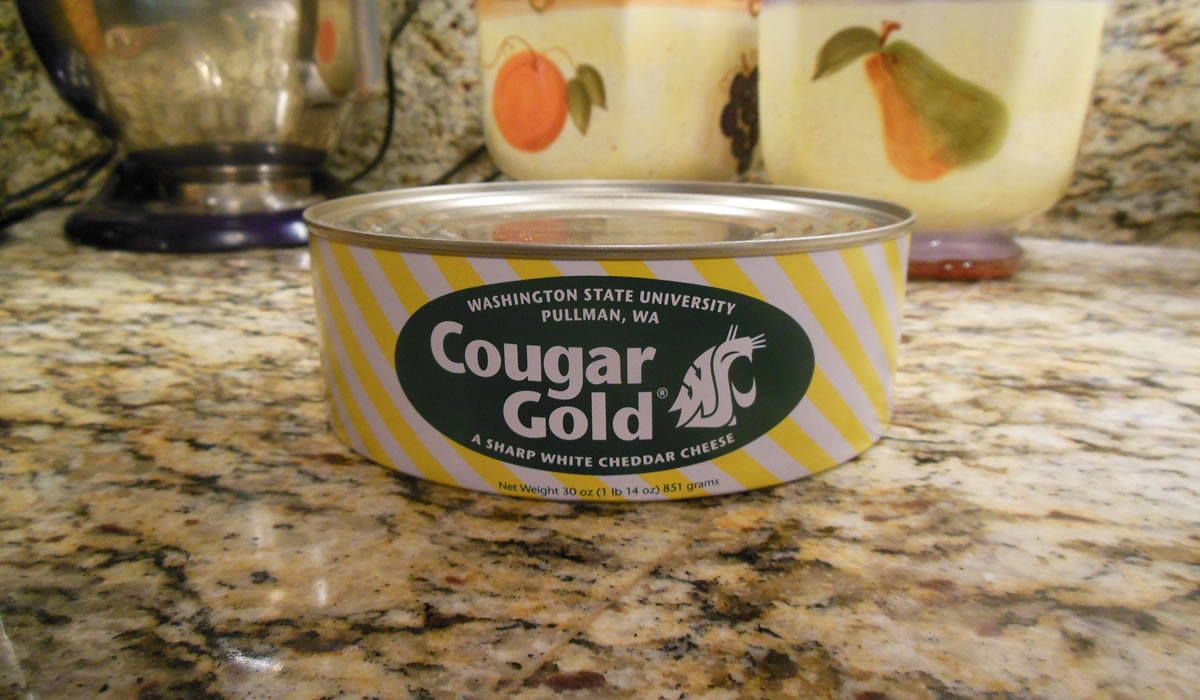
While delivering Christmas Cookies this year, our neighbors down the street gave us an unexpected and really unique gift in return - a can of cheese.
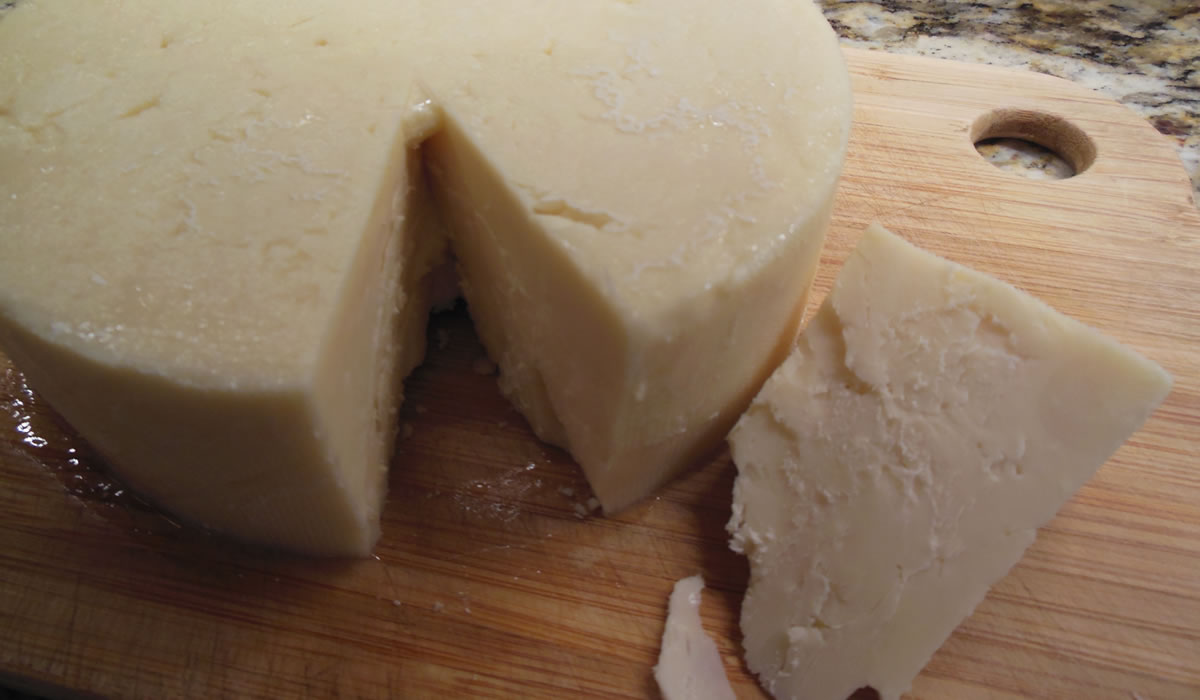
But not just any ol' can of cheese - a 30oz can of Cougar Gold Aged Cheddar Cheese from Washington State University! Can we say WOW! boys and girls?!?
Washington State is known for their cheese - they produce some 250,000 cans of the Cougar Gold every year - along with several other unique varieties.
The Washington State University website describes the cheese as: "Our most famous & popular cheese! Winner of several national and international awards. A rich, white cheddar with a smooth, firm texture. This unique cheddar has a depth and intensity that most people have never before experienced. Its creamy, lingering flavor will leave you wanting for more! Our current stock of Cougar Gold is just over one year in age. Buy 2 and store one for aging, as it becomes more sharp and crumbly with age, developing crystals throughout, which can give it kind of a crunch."
Our can is closer to 2 years old and made by Lorna in 2014 the day between my mom's and Victor's mom's birthdays!

I took that as a sign that I had to make at least one batch of Macaroni and Cheese. My mom was the ultimate Mac & Cheese maker back in the day. She loved cheese and would save up the odds and ends and bits and pieces and make her own unique Mac & Cheese on those Catholic Meatless Fridays when my dad was at the firehouse. Pop loathed cheese as much as mom loved it. Go figure.
I hadn't opened the can and didn't know quite what to expect, although I did figure it would be good. I didn't set my expectations high enough, though. The stuff is pretty awesome!
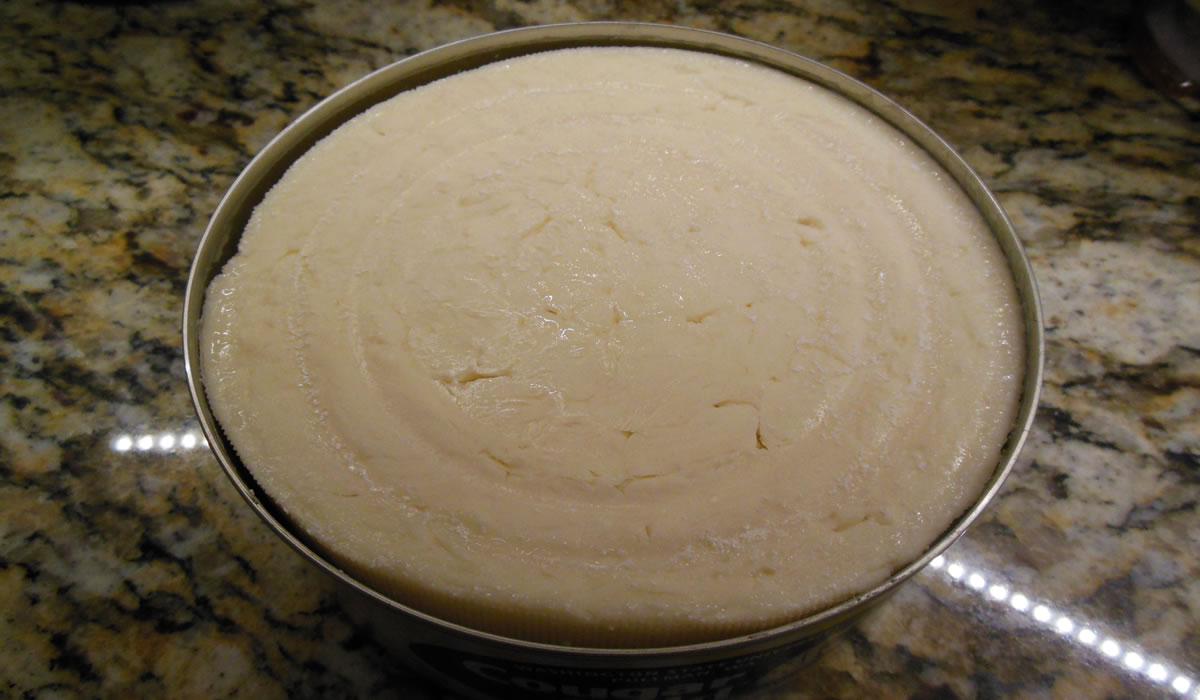
Almost 2 pounds of creamy sharp cheese with just the beginning of the crunchy crystals the blurb mentions. It's starting to take on that aged, crumbly texture, as well.
With a cheese like this, I knew I was going to have to up my Mac & Cheese game a bit. I didn't want to do lobster mac & cheese, again, and was tossing ideas around when I thought why not a carbonara?!? It's a classic - and befitting the richness of the cheese. Besides, I had bacon in the 'fridge...
The whole story of the Washington State University Creamery and how they began aging cheese in cans is pretty interesting. Did I mention that this cheese is really good? Lorna did one hellava good job on it! It's not often that you get to know the name of the person who made something you're eating. I may not know her personally, but it's nice to know there was a human being responsible for this - and it's nice to know that buying the cheese is supporting the University and the students. Methinks I shall be visiting the website, soon...
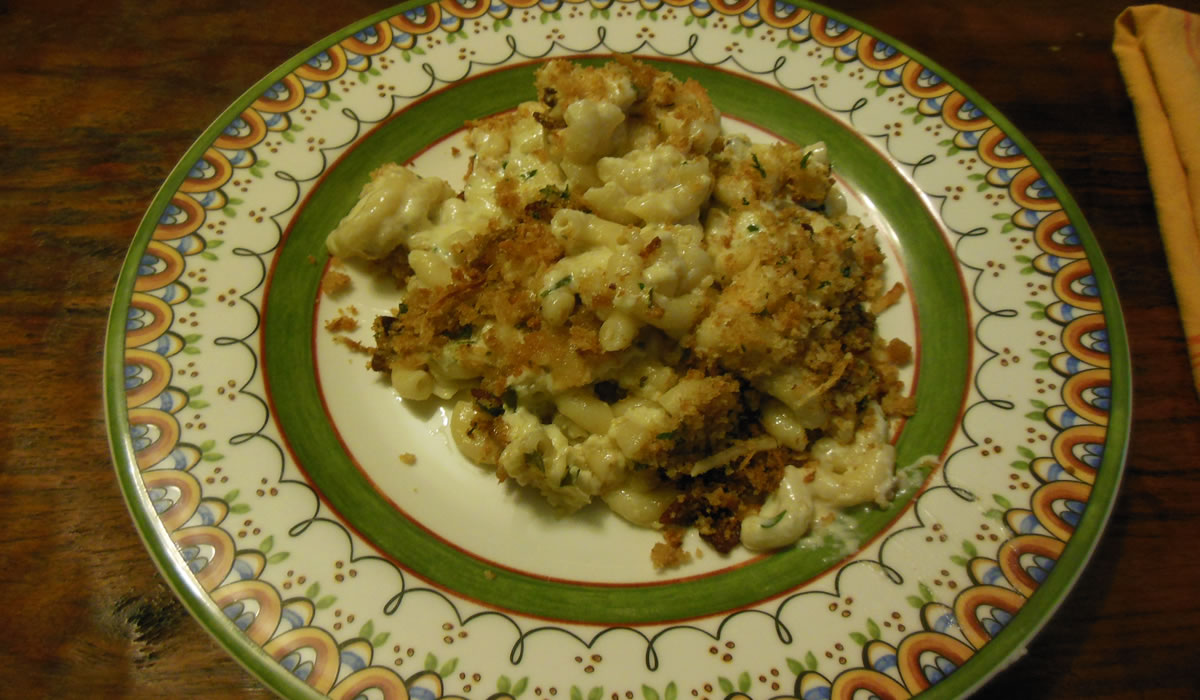
This is what Lorna's work turned out to be...

Yes. That is bacon mixed in with the breadcrumbs! There is a nice, thick bacony-breadcrumb-topping on this! The recipe itself is pretty straightforward with ingredients anyone would have easy access to - cheddar cheese notwithstanding (although it is available online...) I used regular elbow macaroni, although I did think about using mini shells and a couple other shapes. Tradition won out.
Mac & Cheese Carbonara
- 3/4 lb elbow macaroni
- 3/4 lb bacon, chopped
- 3 cups breadcrumbs
- 1/2 cup Italian parsley, chopped
- 2 cloves garlic, minced
- 3 tbsp flour
- 6 cups milk
- 6 large egg yolks
- 1 1/2 lbs good quality cheddar cheese, shredded
- Salt & Pepper, to taste
Cook macaroni according to package instructions. Drain and set aside.
While pasta is cooking, cook bacon in a large saucepan until crisp. Mix bacon, bacon grease, breadcrumbs, half the chopped parsley, and a handful of the shredded cheddar in a bowl and set aside.
In bacon pot, saute garlic in 2 tbsp olive oil until fragrant - 2-3 minutes. Stir in flour and cook a moment. Slowly add milk and then add egg yolks, whisking well.
Cook until sauce has thickened.
Stir in shredded cheese. Next add macaroni and the rest of the parsley.
Pour into a buttered 9x13 casserole dish and bake, uncovered, for 30 minutes at 350°. Top with breadcrumb mixture and return to the oven for another 30 minutes - or until crumbs are nicely browned and crisp.
Enjoy!
Rich, creamy, and cheddary - but not overly-so. It really did have a great balance of flavor. The milk and eggs toned down the sharpness and created a smooth and silky sauce.
This came out lighter than my normal go-to mac and cheese, so I may have to rethink my everyday recipe. It was that good!
Thank you, Marie and Kay!
Bone-In Pork Chops with Leeks
I got a great deal on a bone-in pork roast the other day. It was much too big to actually cook as a roast for us, but perfect for cutting into bone-in pork chops! I really do like bone-in steaks and chops - and chicken, too, for that matter. The flavor is so much more pronounced.
I usually go the quick-and-easy route with boneless whatever just to get it on the table quickly, but when I have the time... Besides, I needed to practice for my life of leisure after winning the $900 million+ Powerball tonight. Almost a billion dollars. That could build one hellava kitchen in our new house - and pay for someone to clean up after me. That would be such a luxury - and Victor would be so happy since he's the one who cleans up after me most days. I mean, it's not like I'm a total slob, but I can definitely dirty some pots and pans.
Armed with my trusty knife, I cut six huge chops. I have to admit it was not the neatest butchering job I have ever done, but, I had six edible portions and no waste when I was finished. That's pretty much all that matters, right?!?
I found a recipe in a 10 year old Bon Appetit that seemed perfect - being that I had all the ingredients in the house - and to work I went!
Pork Chops with Leeks and Mustard Sauce
- 4 1 1/2"-or thicker bone-in pork chops
- 2 tsp coarse salt
- 1 tsp thyme
- 1 tsp rosemary
- 1 tsp black pepper
- 2 bacon slices, coarsely chopped
- 4 cups thinly sliced leeks
- 3 garlic cloves, minced
- 1/4 cup brandy
- 1 cup chicken broth
- 1 tsp sage
- 2 tbsp Dijon mustard
- 1/3 cup sour cream
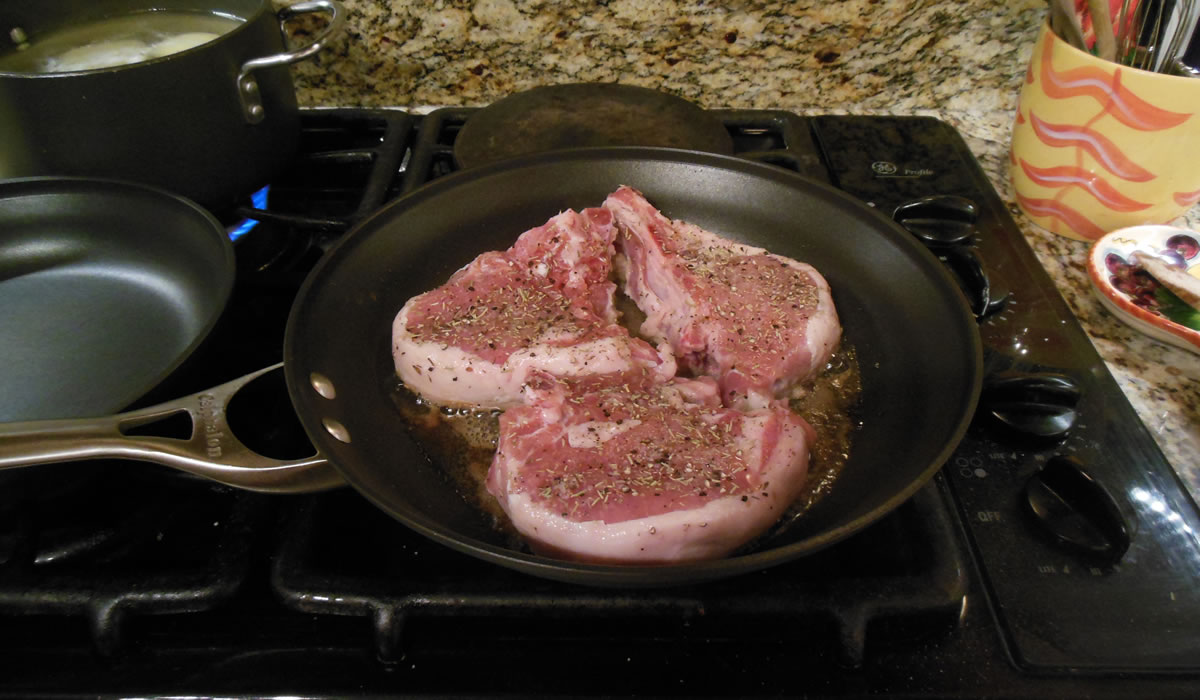
Mix the salt, thyme, rosemary, and pepper. Liberally cover the pork chops and let sit at room temperature about an hour.
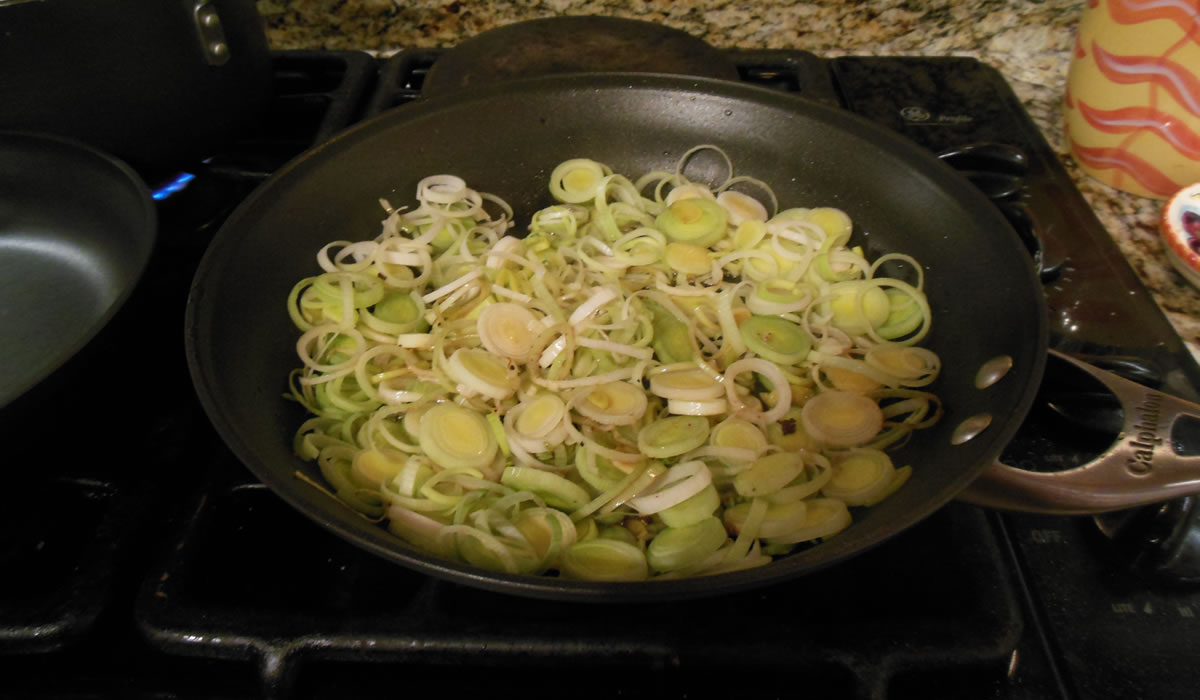
Saute chopped bacon in a large skillet until crispy. Remove bacon and set aside. Add pork chops to pan with bacon grease and cook about 5 minutes on each side.
Remove pork chops from pan and add leeks.
Cook about 7 minutes or so and then add the garlic. Cook another minute or two and then add the brandy and broth and bring to a boil. Add the cooked bacon and the sage and let simmer a moment.
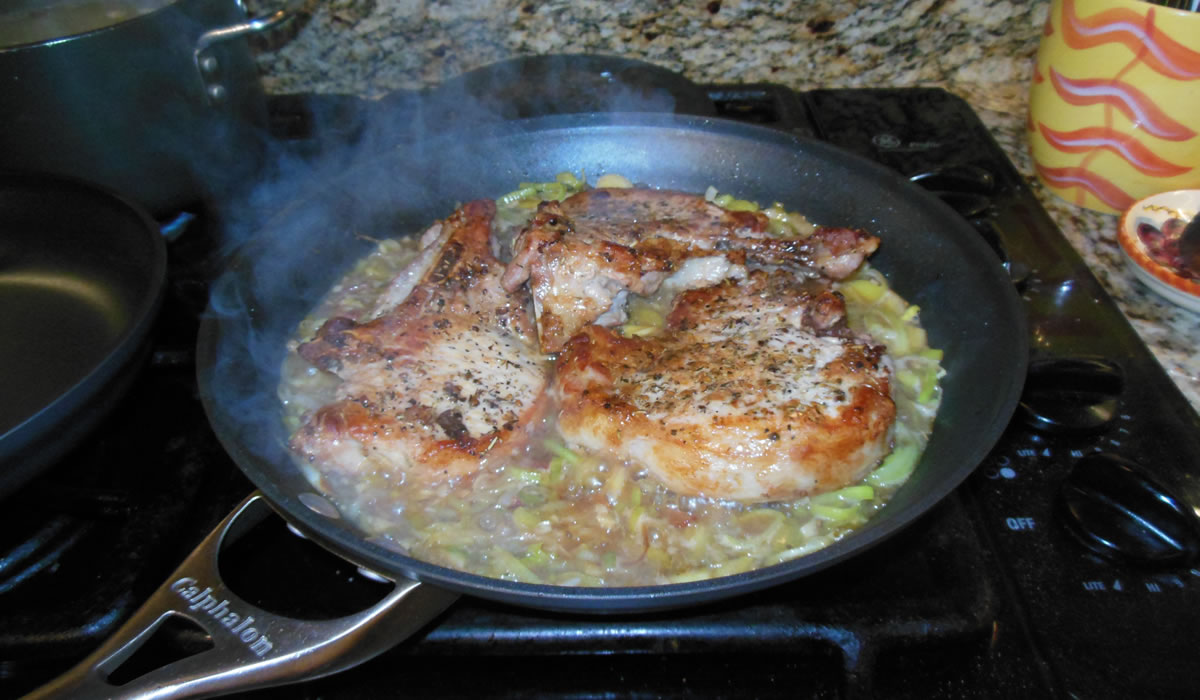
Nestle the chops into the leeks and simmer about 3 or 4 minutes. Flip the chops and cook another 3-4 minutes or until cooked through.
Remove the chops and set aside. Bring the leeks to a boil until most of the liquid evaporates. Stir in mustard and sour cream and just heat through.
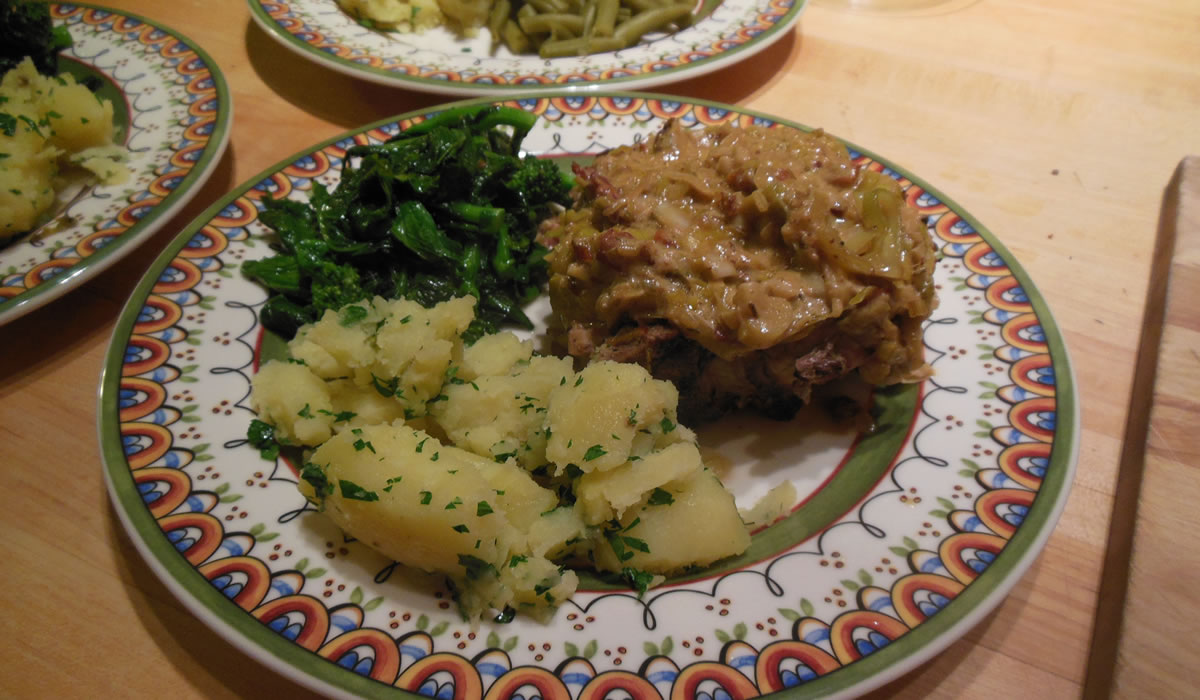
Spoon over pork chops and enjoy!

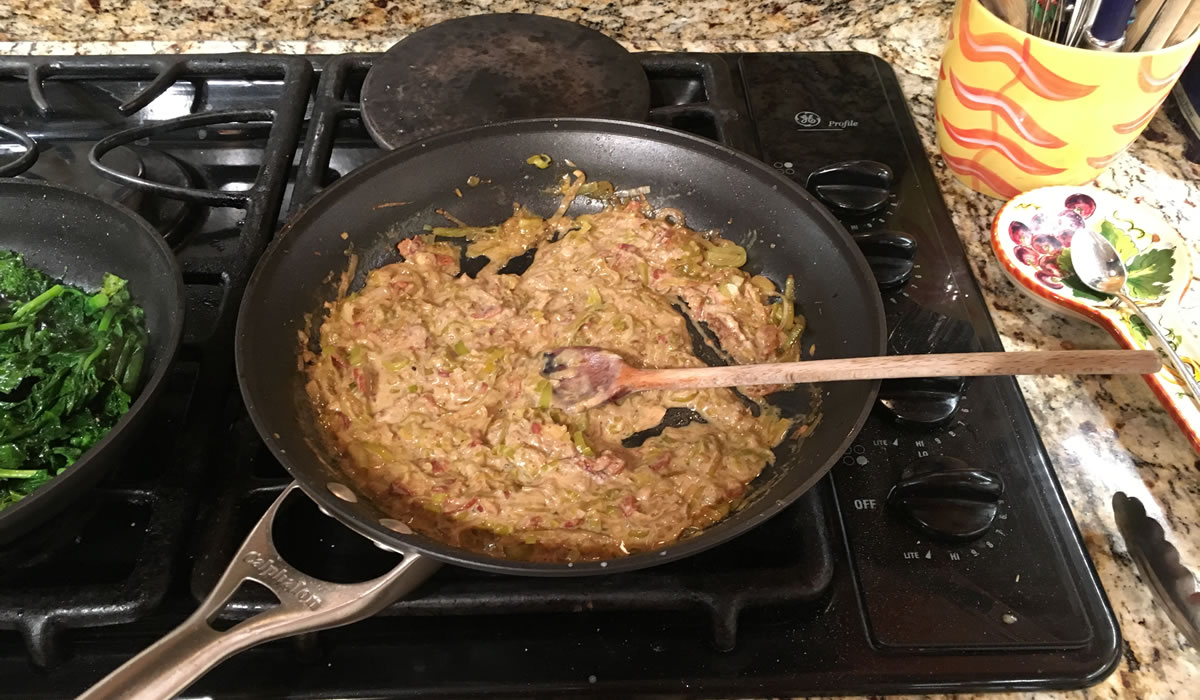
I served them with broccoli rabe and parslied potatoes.
The pork chops were extremely tender and the sauce really worked well. The flavors all played well together and in each bite there was a hint of bacon, a hint of mustard, a hint of brandy... As silly as it may sound, I could see this sauce atop a nice hamburger steak.
We shall see... In the meantime, there are still three more huge pork chops in the freezer...
Stay tuned...

Cottage Pie
There's nothing like a Cottage Pie on a cold winter's night. Well... maybe a lovely Boeuf Bourguignon in a small cafe in Paris would top it, but we didn't win the Powerball last night... We'll go for second-best.
The names Cottage Pie and Shepherd's Pie are often used interchangeably, but they are different dishes - Cottage Pie is made with beef, Shepherd's Pie is made with lamb. These things are important to know. Use the wrong term and someone will be judging you mercilessly. And we certainly can't have that, can we?!?
I had leftover mashed sweet potatoes from last night, so I boiled up some russets, mashed them, added two egg yolks and some sour cream, and mixed them into the leftovers. Fancy.
The filling was ground beef, onions, lots of assorted mushrooms, portobello mushroom soup, beef broth, and mixed vegetables. More easy than fancy.
Into the oven at 350°F - about 180°C for the rest of the world - for 45 minutes while I relaxed.
Dishes such as these don't make for pretty pictures once they're spooned into, but I wanted to take a picture with my new phone and see how it came out, so - here's a picture after we all had several spoonfuls.
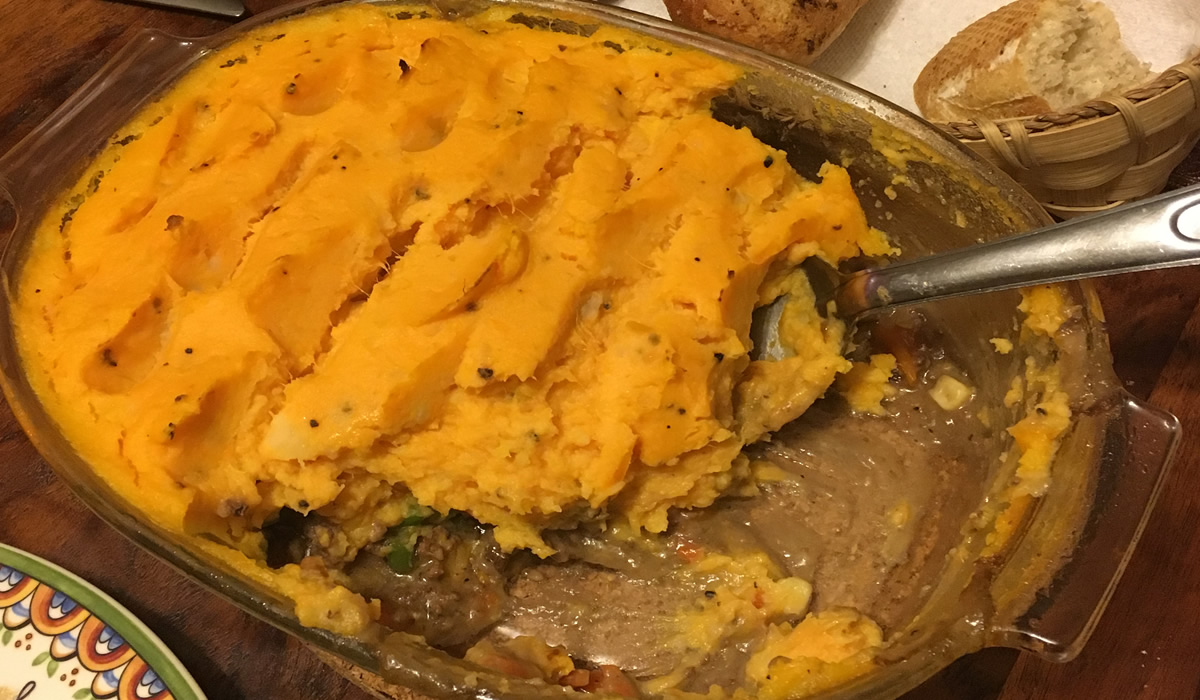
There's lots left over for lunches - and the phone takes some pretty good pictures!
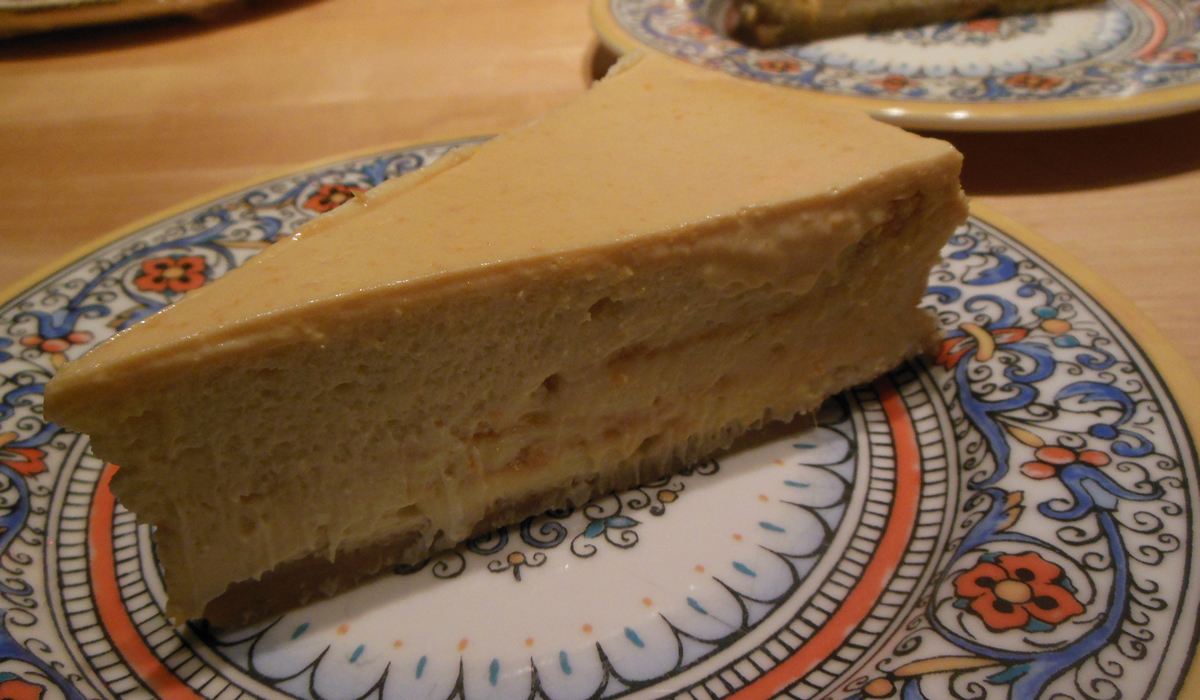
Apricot Cheese Cake
In baseball parlance, sometimes ya strike out, and sometimes you hit one out of the park. Tonight, I hit one out of the park.
While finishing up Mom's cook book this afternoon, I came across a recipe for Sicilian Apricot Cheese Cakes. The title caught me immediately, but when I read the recipe, I, uh... well... let's just say it didn't sound very Sicilian. It was fine as far as 1960-ish desserts go and I'm sure I would have loved it as a kid, but it just didn't hit the elder me.
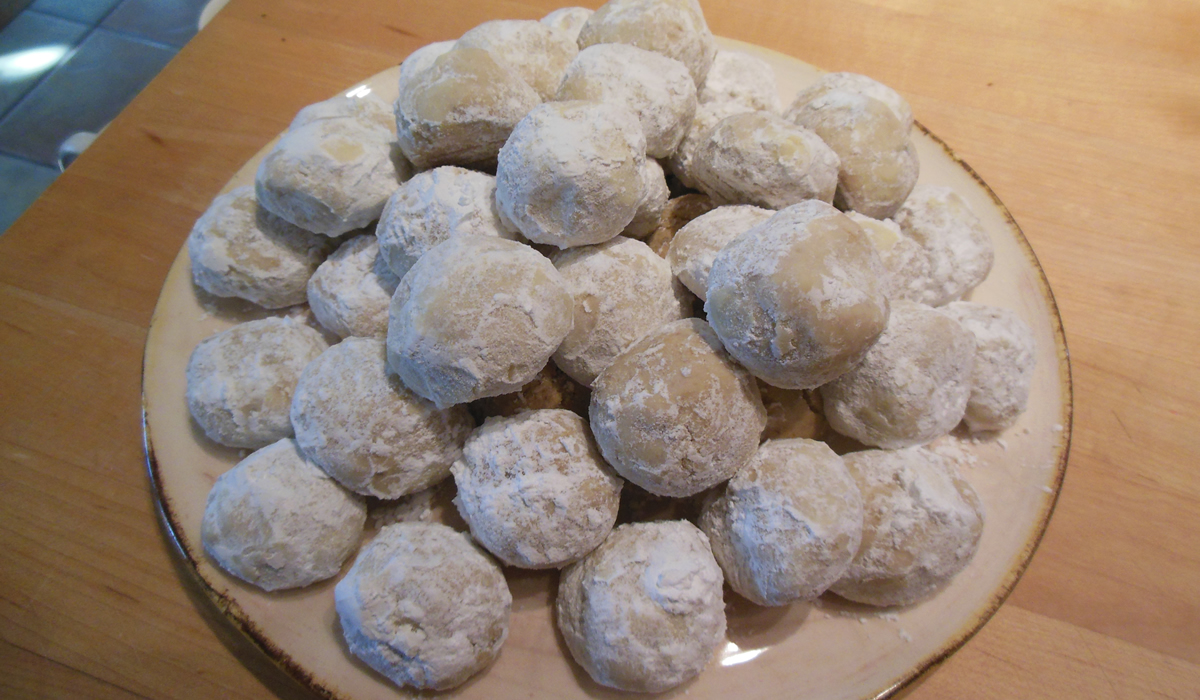
I read the recipe to Victor and he felt the same way - and then he said "Why don't you make your cheese cake with Aunt Emma's filling?" We always have leftover apricot filling when we make Aunt Emma's Apricot Cookies. The extra filling goes into other cookies as thumbprints or jelly strips, and it even gets used on toast. Nothing goes to waste around here...
His next question was "Do you have anything for the crust?" The usual crust is made from graham crackers and walnuts. We didn't have any graham crackers but we did have a big plate of Greek Walnut Cookies I baked off last night! They were the last of the Christmas cookies that just never got baked. The dough has been in the 'fridge for 2 weeks. Did I mention that nothing goes to waste around here?!?
So armed with cookies and an idea, I got to work.
I tweaked my normal cheese cake recipe, cut back on the sugar, added apricot brandy in place of the heavy cream, and layered apricot filling as I filled the pan. I swirled in three layers of apricots...
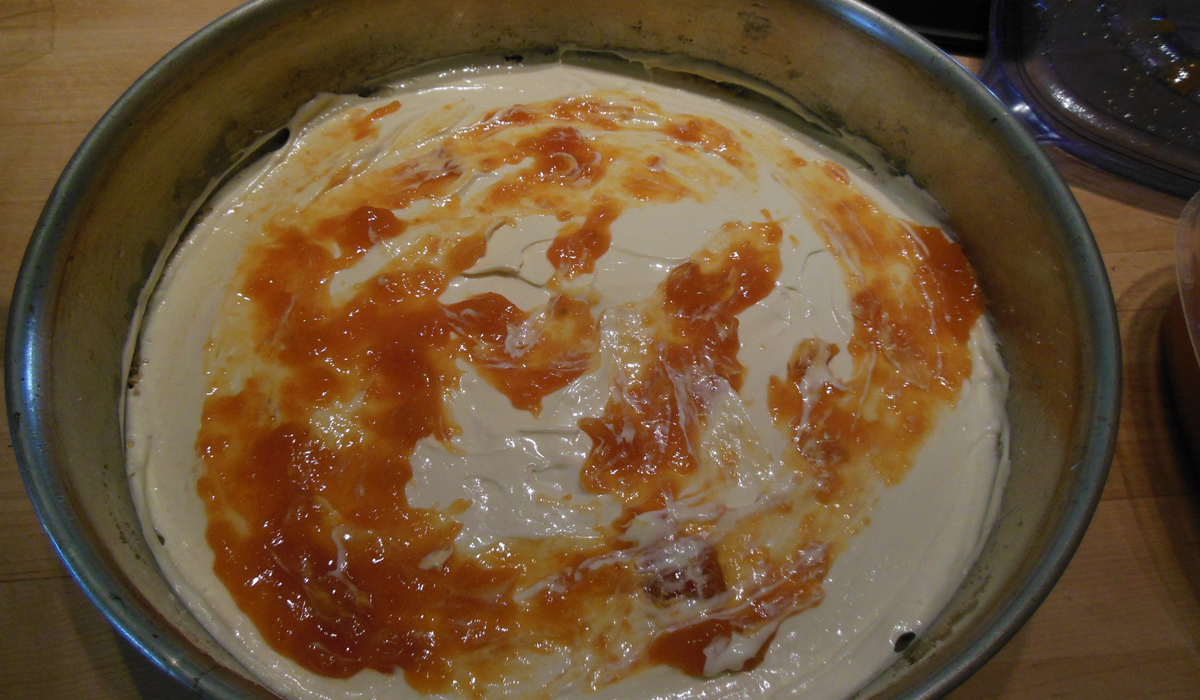
I also added apricots and apricot brandy to the sour cream topping. The end result was seriously stellar.
Apricot Cheese Cake
The Crust:
- 1 1/2 cups ground walnut cookies
- 3 tbsp butter, melted
The Filling:
- 4 pkgs cream cheese
- 4 eggs
- 3/4 cup sugar
- 1 tbsp vanilla extract
- 1/4 cup apricot brandy
- 1 cup apricot preserves
The Topping:
- 16 oz sour cream
- 1/4 cup apricot preserves
- 1 tbsp apricot brandy
Putting it together:
Preheat oven to 350º. Mix cookies and butter and press evenly into bottom of 10″ springform pan. Set aside.
Cream the cheese. Mix in eggs one at a time, mixing well after each addition. Add sugar, vanilla, and apricot brandy, mixing until smooth and light. Pour into pan and about bake 60 minutes. Remove from oven and cool about 15 minutes. Keep oven on.
Mix topping ingredients in a food processor until smooth. Spread onto top of cheesecake. Return to oven and bake about 7 more minutes. Cool completely, cover, and refrigerate.
In theory, a cheese cake should sit in the 'fridge for 24-72 hours before eating. It gives them a chance to settle and for the flavors to meld. We didn't do that, tonight. We cut that sucker 4 hours after it went into the 'fridge.
And it rocked.
A good-quality apricot jam or preserves would work in place of Aunt Emma's filling, and a traditional graham cracker crust would work, as well.
I'm fighting the urge to go get another slice...