

Okay… a LOT of assembly required. But I do think it’s going to be worth the effort.
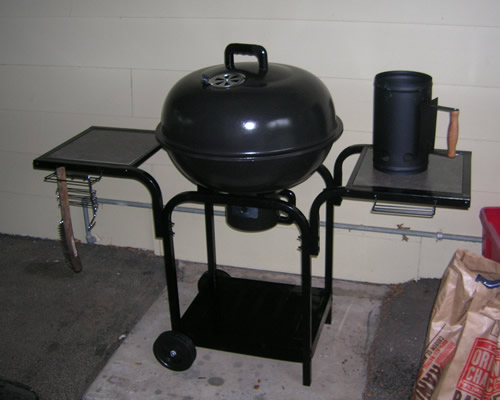
I didn’t buy THE cheapest grill, but I did come close. Nothing at all assembled in any way, shape, or form. Lots of itty-bitty little parts. It seemed reasonably sturdy in the store, and has an ash-catcher. Plus the two little side-wings mean I don’t have to find a table. Cheap and functional. If I get ONE year out of it, it will be less expensive per year than the damn gas grill we just dumped.
I decided to assemble it in the kitchen because 1) it was raining outside and 2) well… it is a cooking appliance, after all. Sort of.
So… I have all the parts out of the box and properly lined up just as the instructions state I should, and I begin. Step one, Lid assembled in a minute. Step two, Bottom base assembled and wheels attached. Step 3, Attach braces for bottom kettle. Uh… The illustration for Step three clearly shows that I have assembled Step two incorrectly. Step two, of course, does not show that bracket holes need to be on the INSIDE when assembling.
At this moment, Victor comes into the kitchen to cook us lunch.
Victor wisely gives me a wide berth, but in a few minutes I’m snickering and reassembling the damn thing, glad that the instructions actually said “Do not tighten at this point”. They knew the assembler would have to take it apart, I’m sure.
Luncheon consumed, grill assembled, life is good.
And I have a couple of ribeye steaks to grill tonight, with potatoes cooling for potato salad, and baked beans getting ready to go into the oven.
Life is REALLY good!
