Rustic Potato Bread
Okay, boys and girls... this is a strange recipe. It pretty much contradicts everything I've ever known about bread baking - and it came out perfect!
Rustic Potato Bread is made with potatoes that have been boiled in salted water - cut but unpeeled - allowed to dry on the counter, and then worked into a bread dough - all the while looking like it will never happen. The secret here is to trust the recipe. Really.
The recipe comes from Leslie Mackie when she was on Baking With Julia. The PBS show is on reruns on Create TV and, since I have the cookbook, it's fun to follow along on some of the shows - like when a young Martha Stewart makes a huge wedding cake!
It's no secret that I'm a huge fan of bread and I'm always up for a new recipe. However, it seems that I'm always making variations on my favorite Pane Pugliese from Carol Field. It's time to take some of those other recipes I have and start baking!
This was a great one to do. The caveat is to follow the recipe. It doesn't look like it's going to come together, but it really does.
It also rises fast. First rise is 20-30 minutes, second rise another 20 and they're ready to bake.
Rustic Potato Bread
adapted from Leslie Mackie in Baking with Julia
Makes 2 loaves
- 1 1/2 pounds russet potatoes (about 3)
- 4 teaspoons salt
- 1/2 cup tepid reserved potato water (80 to 90 degrees F)
- 1 tablespoon active dry yeast
- 2 tablespoons extra-virgin olive oil
- 4 3/4 cups unbleached all-purpose flour
Cooking the Potatoes.
Scrub the potatoes and cut them into quarters, peel and all. Toss them into a 2 quart pot, cover with water, add 2 teaspoons of the salt, and boil until the potatoes are soft enough to be pierced easily with the point of a knife. Dip a measuring cup into the pot and draw off 1/2 cup of the potato water; reserve. Drain the potatoes in a colander and then spread them out, either in the colander, or on a cooling rack over a jelly-roll pan, and let them cool and air-dry for 20 to 30 minutes. It's important that the potatoes be dry before they're mashed.
Mixing the dough.
When the potatoes are cool, stir the yeast into the reserved potato water (if the water is no longer warm, heat it for a few seconds in a microwave oven--it should feel warm to the touch) and allow it to rest for 5 minutes; it will turn creamy.
Meanwhile, turn the cooked potatoes into the bowl of a mixer fitted with the paddle attachment and mash them. With the mixer on low speed, add the dissolved yeast and the olive oil and mix until the liquids are incorporated into the potatoes.
Replace the paddle with the dough hook and, still mixing on low speed, add the flour and the remaining 2 teaspoons of salt. Mix on low speed for 2 to 3 minutes, then increase the speed to medium and mix for 11 minutes more. The dough will be firm at first and soft at the finish. At the start, it will look dry, so dry you'll think you're making a pie crust. But as the dough is worked, it will be transformed. It may even look like a brioche, cleaning the sides of the bowl but pooling at the bottom. Have faith and keep beating.
First rise.
Cover the mixing bowl with plastic wrap and allow the dough to rise at room temperature for 20 to 30 minutes, at which point the dough will have risen noticeably, although it may not have doubled.
While the bread is proofing, position a rack in the bottom of the oven and fit it with a baking stone or quarry tiles, leaving a border of at least 1 inch all around. Preheat the oven to 375 degrees F. Place a linen towel on a baking sheet, rub the towel with flour, and set aside; this will be the resting place for the bread's final rise. Rub a baker's peel or baking sheet with cornmeal or flour. Fill a spray bottle with water; set aside.
Shaping the dough.
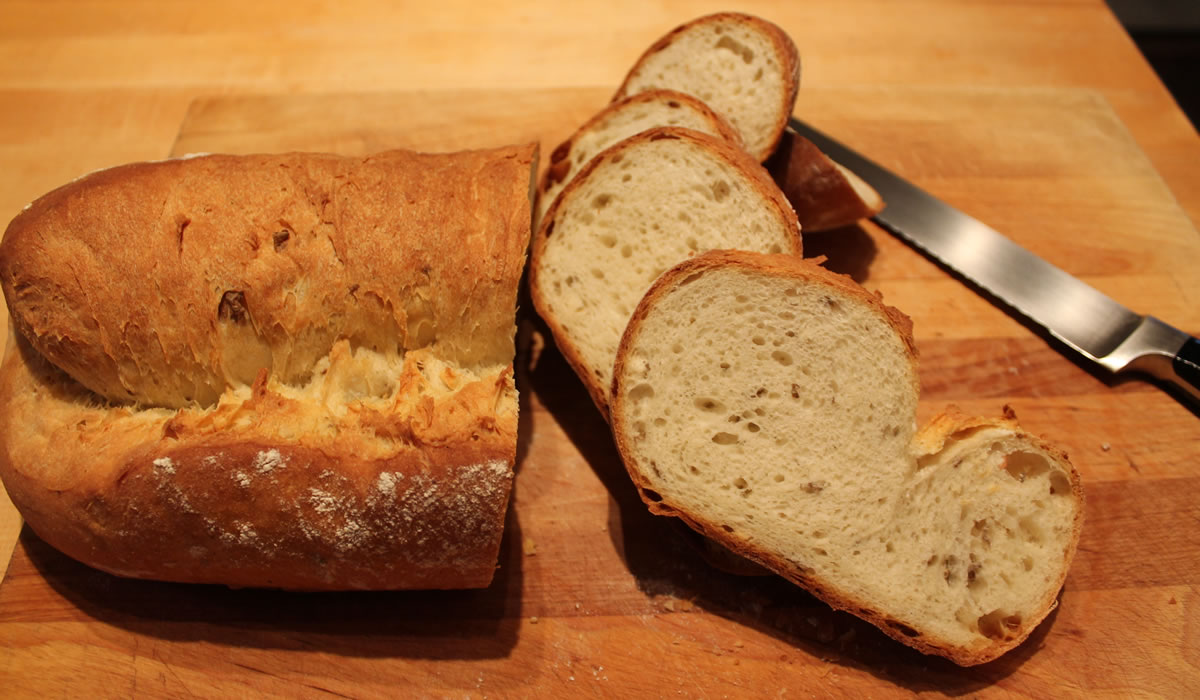
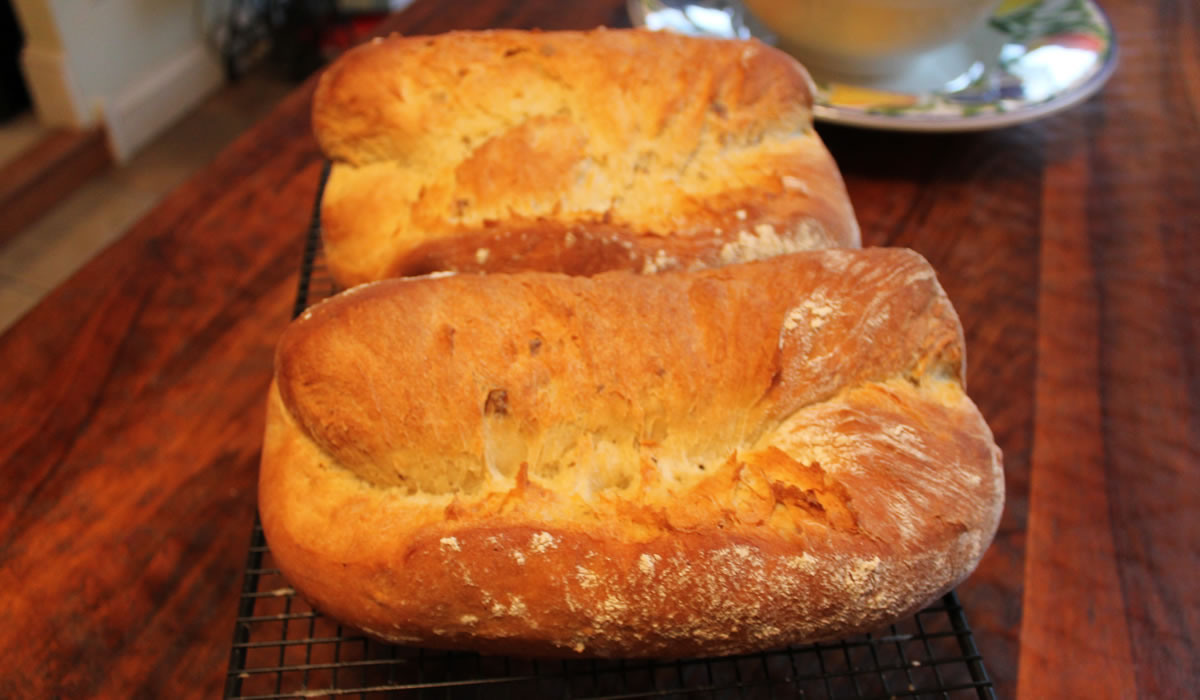
Turn the bread out into a lightly floured surface and, using a dough scraper, cut the dough in half. To shape each half into a torpedo shape, first shape it into a ball and then flatten it into a disk. Starting at the end farthest from you, roll up the dough toward you. When you're on your last roll, stop and pull the free end of the dough toward you, stretching it gently, and dust its edge with flour. Finish the roll and, if necessary, rock the loaf back and forth a little to taper the ends and form a torpedo, or football.
Second rise.
Place the loaves on the floured towel, seam side down, and cover them with the ends of a towel (or another towel). Let the breads rise at room temperature for 20 minutes.
Baking the bread.
When you're ready to bake, spray the oven walls with water and immediately close the oven door to trap the steam. Turn the breads out, seam side up, onto the peel or baking sheet and transfer them to the oven. Spray the oven with water again and bake the loaves for 45 to 50 minutes, or until the crust is very brown, the loaves sound hollow when thumped on the bottom, and, the most important test, the interior temperature measures 200 degrees F when an instant-read thermometer is plunged into the center of the loaves. Remove the loaves from the oven and cool on a rack at least 20 minutes before slicing. While you should wait for the bread to firm up in the cooling process, slather this bread with butter while it's still warm is a great treat.
The bread has almost a sourdough texture and flavor. It is seriously good. Light, great crumb and chewy crust. My perfect bread.
Now, to find more of her recipes!
Stay tuned.
Pogaca Rolls
I love it when a new cooking magazine arrives and I immediately see a recipe I immediately want to make. Fine Cooking did not disappoint.
Pogaca rolls - pronounced po-ah-cha - hail from Turkey. We know my penchant for international foods, so these fit right in. I truly believe we could really learn a lot from one another if we just sat down and started eating different foods from different cultures.
My first recollection of Turkey comes from the Four Lads tune Istanbul (not Constantinople) recorded in 1953. There was also Bonomo's Turkish Taffy which is neither Turkish nor taffy - but what did I know? And, of course, Agatha Christie and Murder on the Orient Express - a story that drew a vivid picture of the foreign and exotic city as seen through the eyes of the colonizing British.
It's really not surprising that our views of different cultures are so skewed...
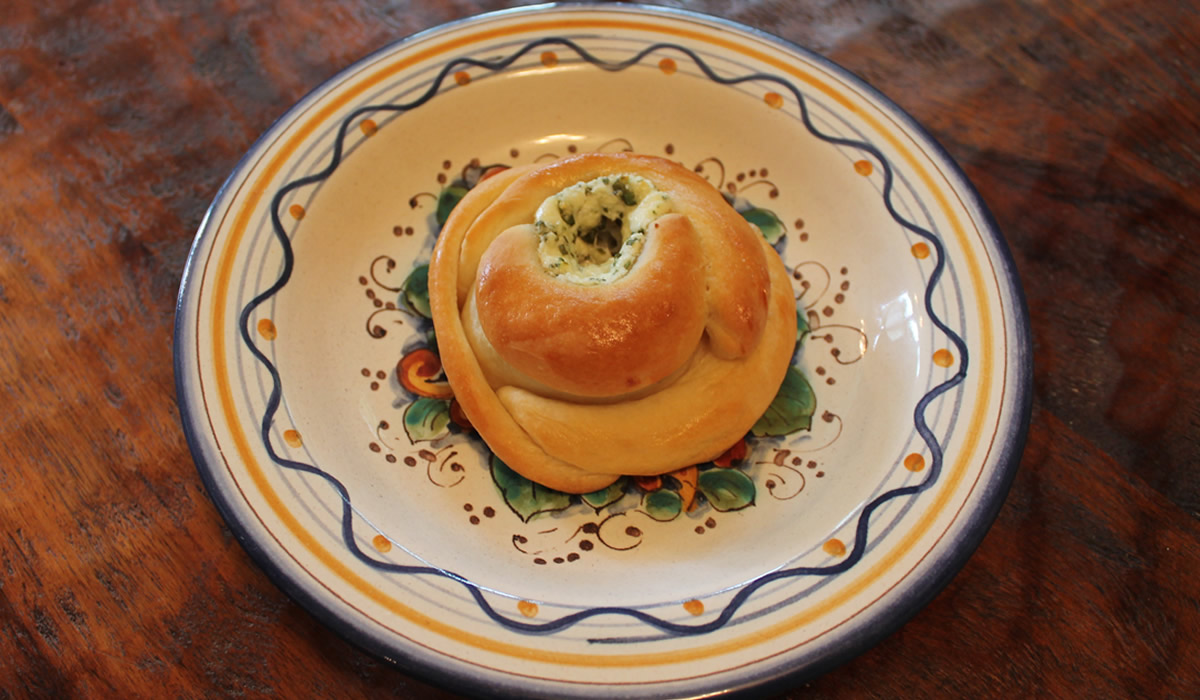
Pogaca rolls are extremely versatile and can be eaten with any meal. The fillings can be as varied and exotic - or simple and plain - as you wish. They can also be sweet or savory, depending upon your mood or time of day for eating them. I decided on a cheese filling based upon one of the offerings in the magazine. It called for simple feta and parsley. I went for chevre, queso fresco, chives, and parsley because that's what I had in the house.
Pogaca Rolls
adapted from Fine Cooking magazine
Dough:
- 1 cup whole milk, warmed to 105°F
- 1 tbsp active dry yeast
- 2 tsp sugar
- 1 large egg
- ½ cup neutral oil
- 3 cups all-purpose flour
- 1 tsp kosher salt
Filling:
- 4 oz chevre
- 4 oz queso fresco
- 1 tbsp chives
- 1 tbsp parsley
Combine warm milk with yeast and sugar in a mixer bowl. Proof about 5 minutes.
Add egg and oil and mix.
Add flour and mix on medium low speed about 10 minutes or until silky smooth.
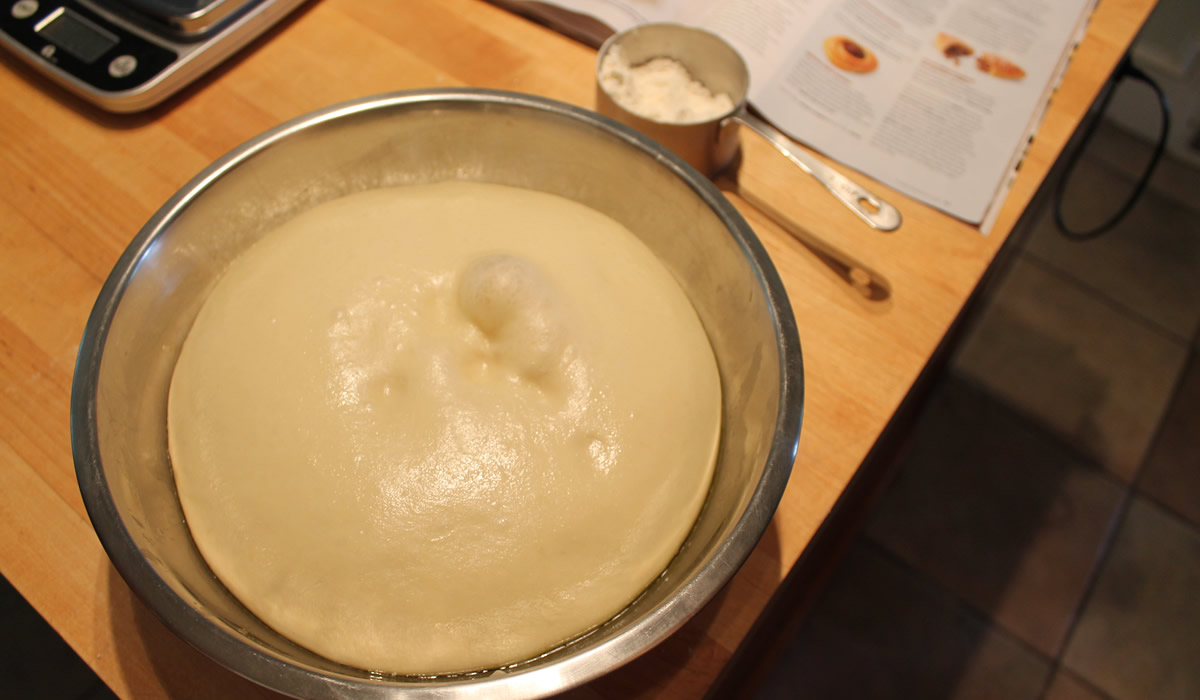
Turn dough out onto a lightly-floured board and shape into a ball. Place in a lightly-oiled bowl, cover, and allow to rise until doubled - about 1 to 1 1/2 hours.
Shaping and Forming:
Lightly flour a work surface, and turn the dough onto it. Deflate the dough, and divide into 13 - 15 pieces, about 2 oz. each.
Roll each piece into a ball, cover, and let rise again for about 30 minutes.
Line two rimmed baking sheets with parchment. Lightly flour a work surface.
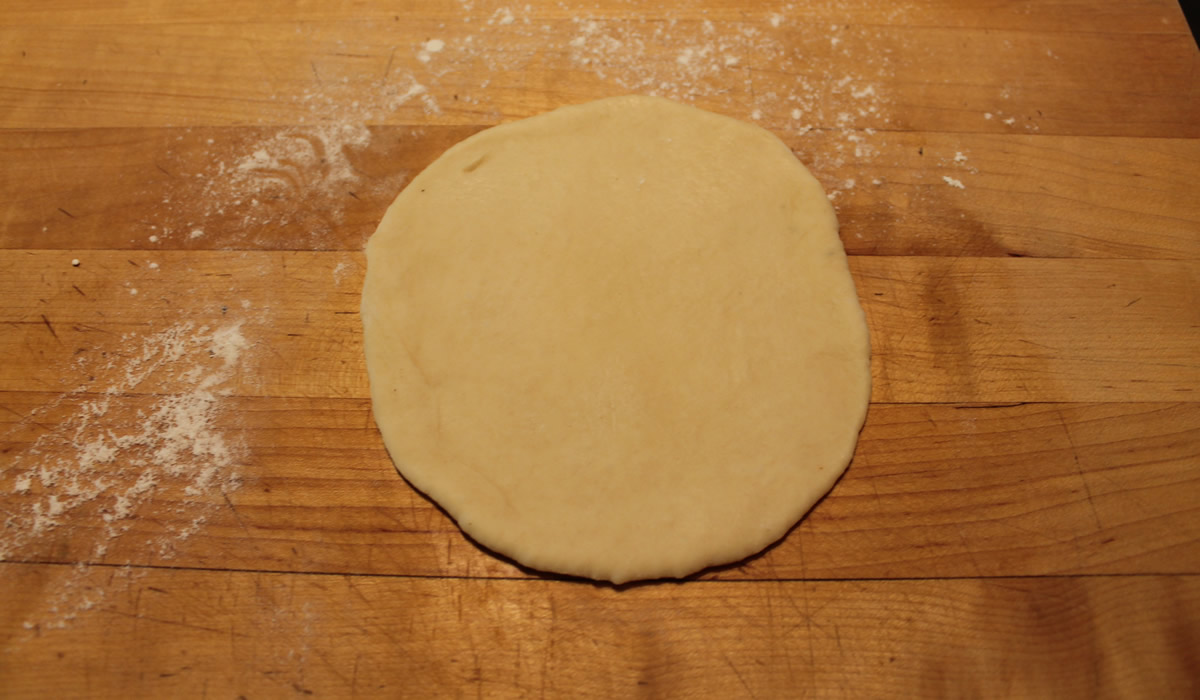
Roll or press a dough ball into a 5-inch circle.
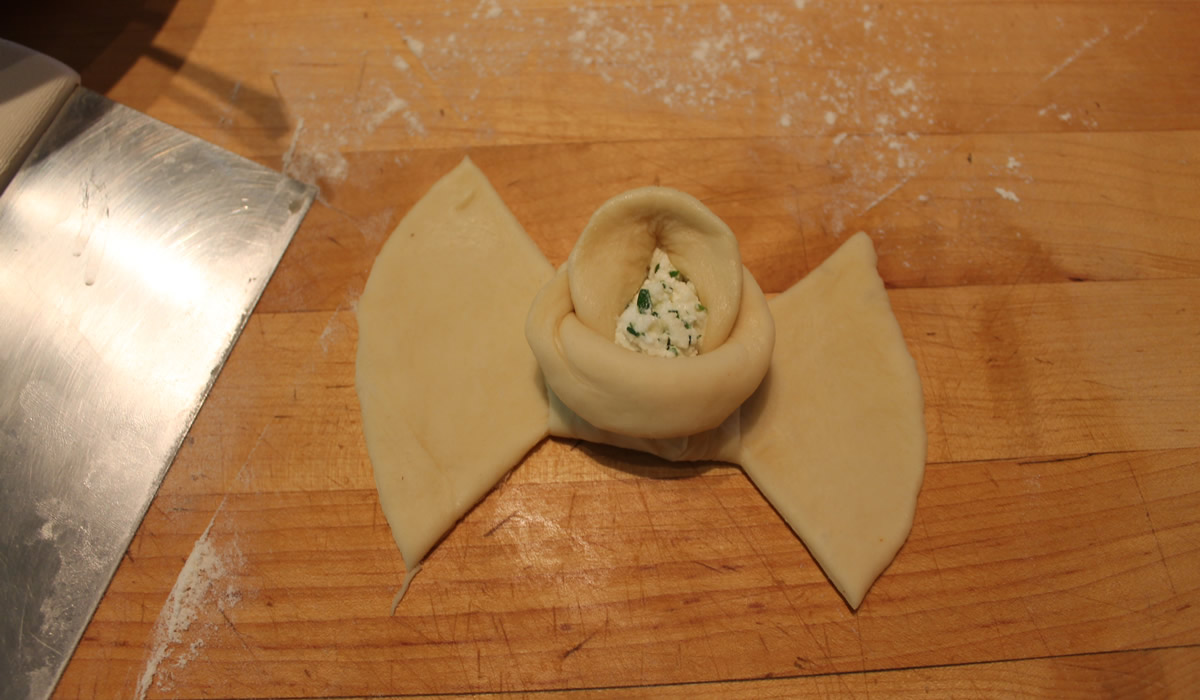
Starting from the edge and heading toward the center, cut four evenly spaced slits, each about 1-1/2 inches long, into the circle.
Place about 1-1/2 tablespoons of the filling in the center. Wrap one quarter of the dough around the filling; the dough will partially cover but not fully enclose the filling. As you wrap, fold ¼ inch of the top of the dough edge back to form an open petal.
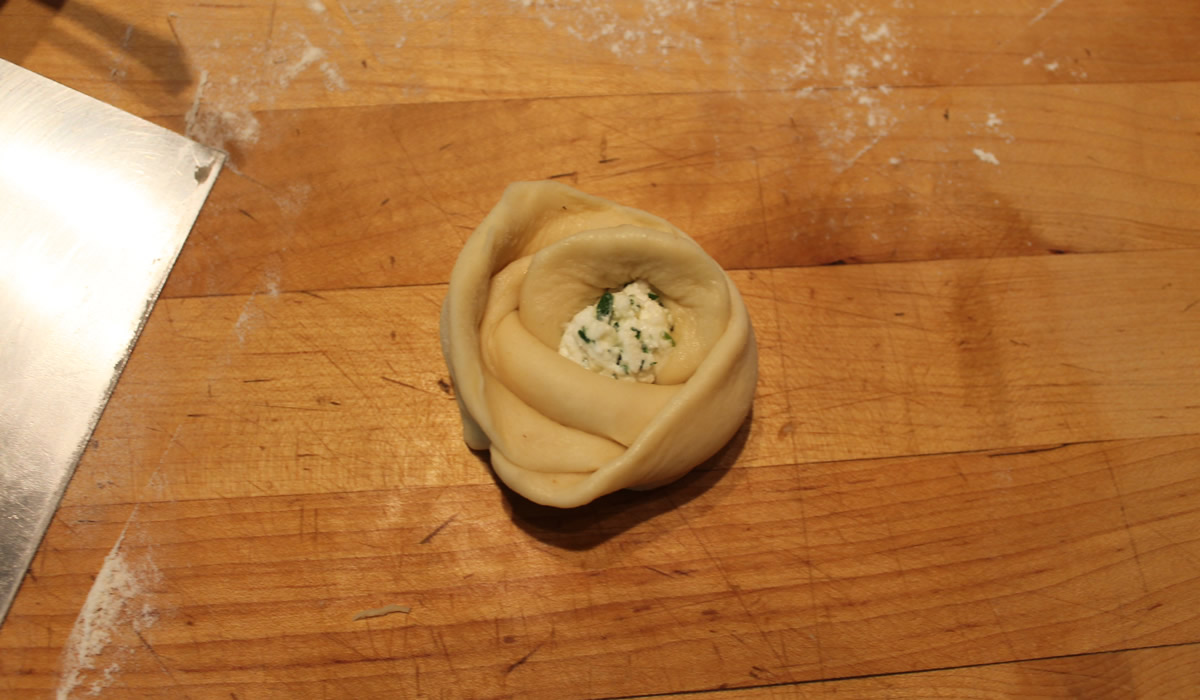
Fold the dough quarter opposite the first quarter around the filling and fold back the top to form an open petal. Secure the dough on the bottom with a pinch.
Wrap and fold a third quarter in the same manner.
Then, when folding the final quarter over, tuck the edges underneath the rose, and pinch to secure.
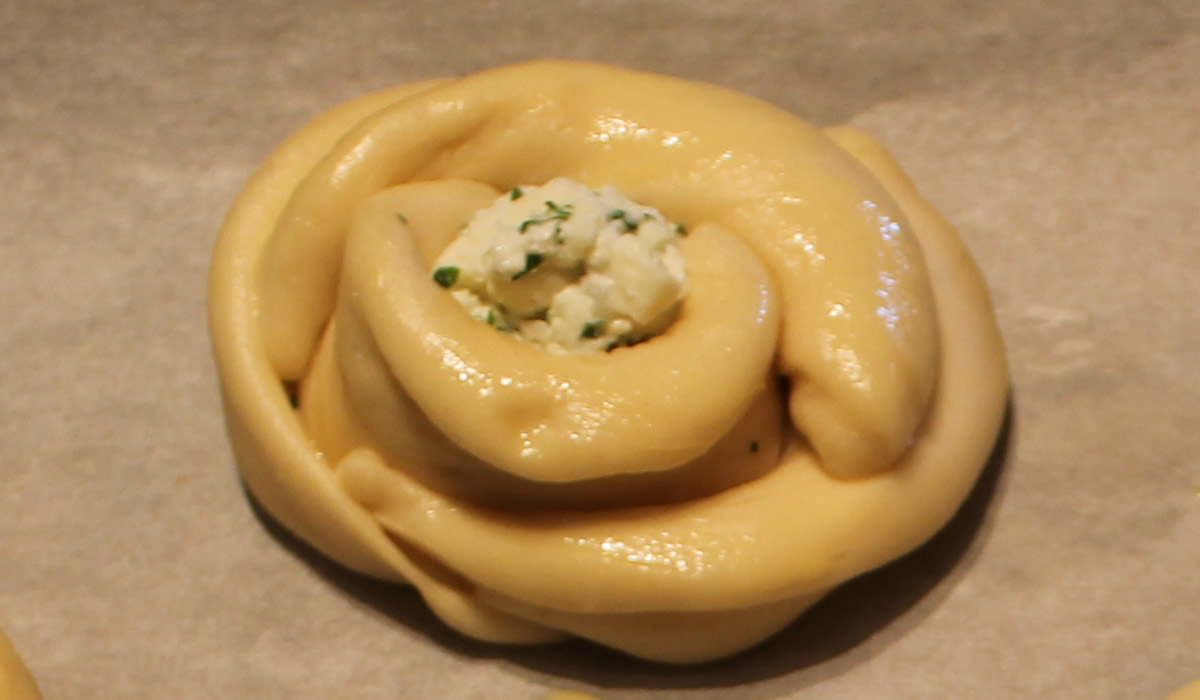
Place on the prepared baking sheet leaving at least 2 inches between the rolls. Let rise at room temperature, until almost doubled, 30 to 45 minutes.
Preheat the oven to 350°F. Whisk the egg and milk. Lightly brush the dough with the egg wash.
Bake, swapping and rotating the pans about halfway through, until golden brown, 25 to 30 minutes.
Serve warm or at room temperature.


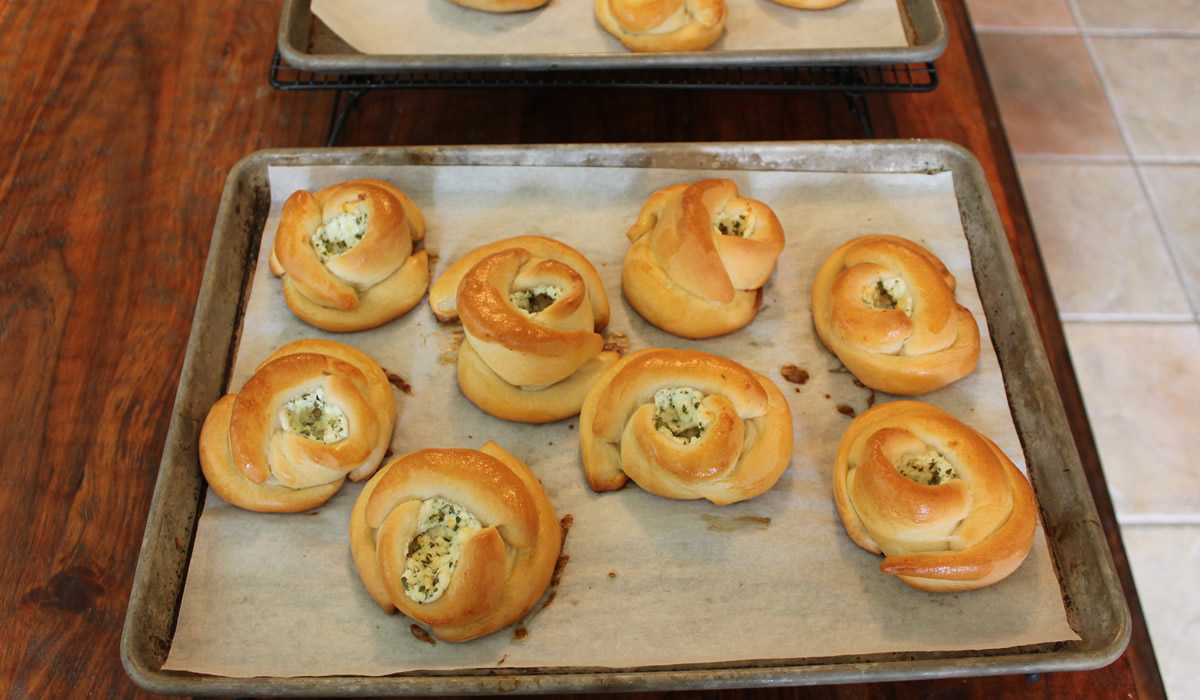
One thing I noted was I wasn't careful enough in pinching the ends of the petals. You really do need to be firm with this step - some of the rolls really did come apart. It's not changing the flavor, but esthetically, they could be more flower-like.
The recipe called for 2 teaspoons of salt. I made it that way but think they would be better with just one.
But they are light, really flavorful, and with just enough cheese filling to flavor but not overwhelm.
I see other shapes and fillings in our future!
Baking with Beer
It's one of those perfect days for Mother Nature's Outdoor Proofing Box. Definitely time to bake some bread.
I don't make a lot of basic sandwich loaf breads - I really do have a penchant for more rustic Italian breads - but every now and again I need to get the bread pans out of the cupboard and see if I can still throw together a tender loaf or two.
I have to admit I succeeded, today!

I had a fun conversation with a woman at work the other day about baking bread. She loves it - and will only use her bread machine for the dough. She bakes her bread in the oven, but uses the machine to make the dough. She just finds it easier.
My thought is more power to ya if you're going to make fresh bread. It doesn't matter how you make the dough - by hand or by any number of machines - as long as you make it!
My absolutes and opinions on food and cooking have changed so much over the years, it's sometimes hard to keep track. I remember years ago when a product called Sta-White or some such thing came out. It was to keep lettuce and potatoes and such from browning after cutting. Salad could last on a salad bar for days! It was a miracle! And then, one day, I realized salad staying fresh-looking on a salad bar for days probably wasn't really a good idea. I went through my why make hollandaise sauce when you could buy a can of Aunt Penny's?!? phase, and still have internal arguments with myself about charcoal vs gas grill. Gas grill is winning, right now. I'm too lazy to plan the charcoal cooking, right now, but I really do like the taste. Maybe after I retire...
For years it was just part of the job to keep up with the fads. Now, I'm heading back towards the basics. I'm over putting together a dinner plate with tweezers. I want simpler meals. Lots of flavor - just not neurotic.
Today's bread started out as a recipe from my Mom's cook book. She really was quite the baker in her day and was never afraid to take a recipe and make it her own.
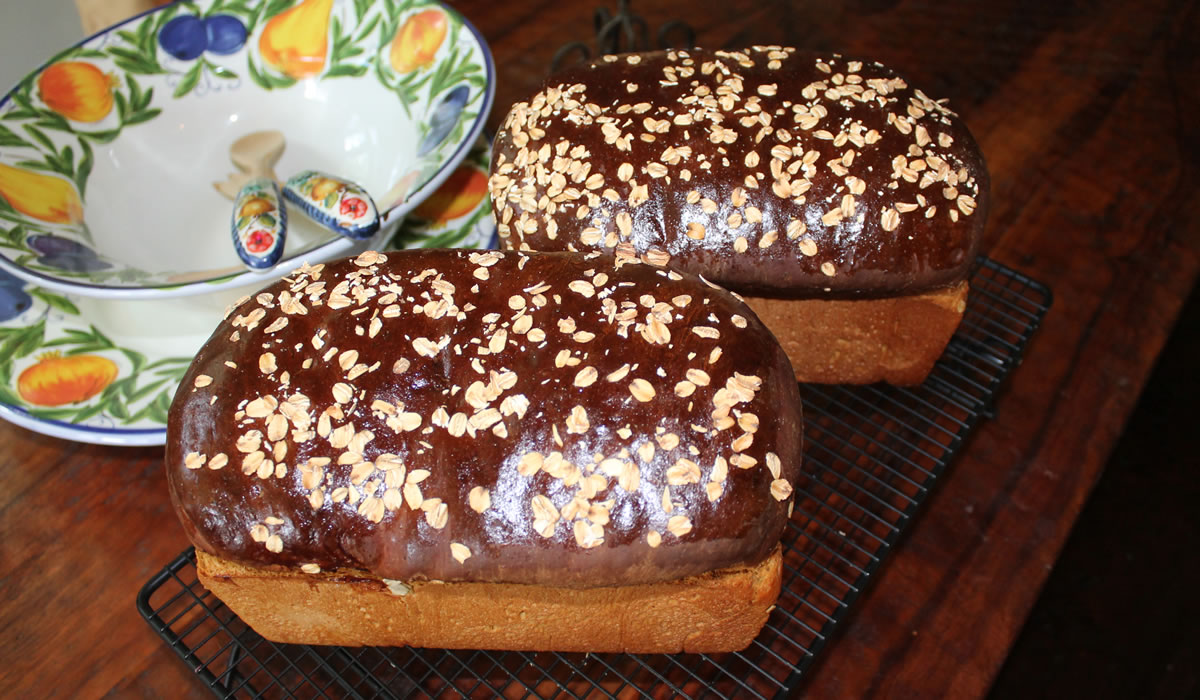
After looking through the cabinets at ingredients, I finally settled on a Molasses Oatmeal Bread. It's an interesting recipe because the first rise is two hours in the refrigerator. So much for my outdoor proofing box. But the second rise outside was perfect.
I more or less followed the recipe, but the cup and a half of water became a 12oz beer - Avalanche Amber Ale - and the shortening became butter. I pretty much never have shortening in the house and we have a few beers sitting around that neither of us are going to drink... Time to use them up!

The biggest difference in making bread pan loaves and rustic loaves is the amount of liquid. The rustic loaves tend to be a bit drier and I have to resist adding more flour. You do need to play with just about any bread recipe a bit. There are a score of factors in play that affect a loaf - from temperature and humidity to moisture content of the flour - and you learn to feel different doughs and see what they need. And you need to know when not to listen to yourself!
The end result, today, was a damned good loaf. It's properly soft, the crust has just the right amount of chew, and it's going to work for dinner tonight, breakfast toast, and a sandwich for lunch.
The perfect all-purpose bread.
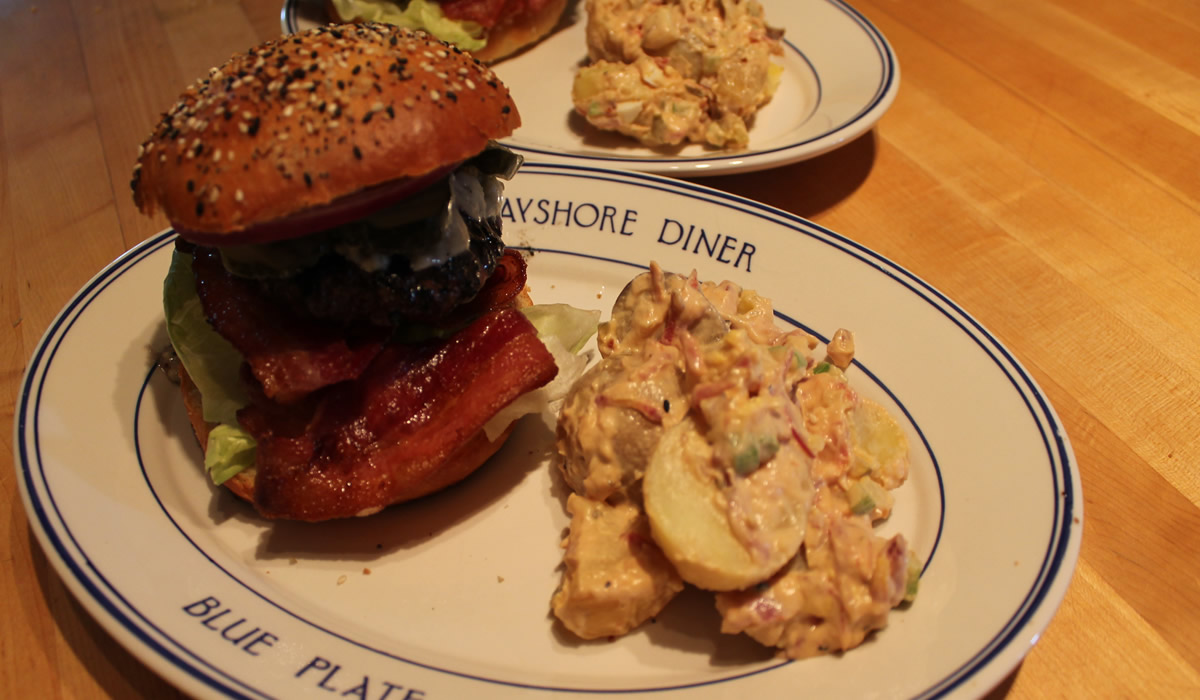
Holiday Hamburgers
Baking bread on hot, muggy days may seem counter-intuitive, but Mother Nature's Outdoor Proofing Box is just too good to pass up. I get such a great rise from the dough, it's worth having the air conditioning on.
I have been making this particular bread since first seeing the recipe in Bon Appetit a few years ago. I've made it as dinner rolls and pull-apart bread loaves. This is my first foray into burger buns - and from the taste of things, it shan't be my last.
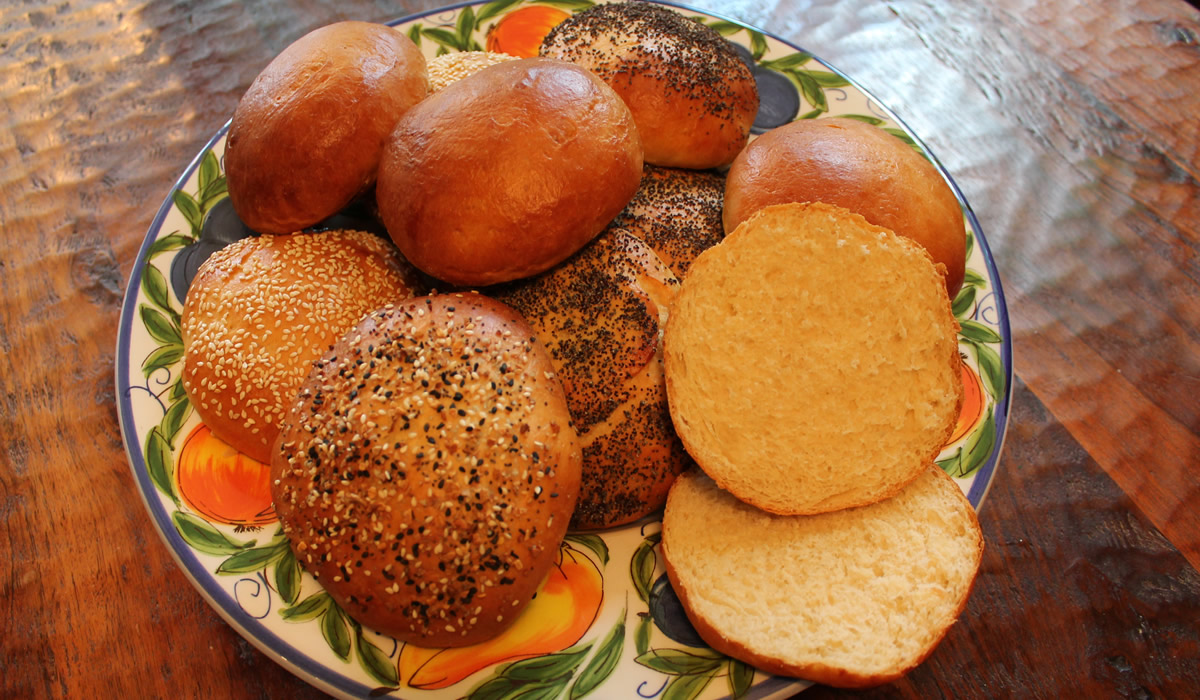
It's a bit different in its preparation, in that you start off by cooking a bit of flour and water together. I know there's a scientific reason for doing so, but I'm dragging my food-chemistry days behind me. Suffice to say that the butter, eggs, and heavy cream make for a very tender crumb.
Milk Bead
Ingredients
- 5⅓ cups bread flour, divided
- 1 cup heavy cream
- ⅓ cup mild honey
- 3 tablespoons nonfat dry milk powder
- 2 tablespoons active dry yeast
- 2 tablespoons kosher salt
- 3 large eggs
- 4 tablespoons unsalted butter, cut into pieces, room temperature
- Flaky sea salt, sesame seeds, poppy seeds, or other toppings, optional
Preparation
Cook ⅓ cup flour and 1 cup water in a small saucepan over medium heat, whisking constantly, until a thick paste forms (almost like a roux but looser), about 5 minutes. Add cream and honey and cook, whisking to blend, until honey dissolves. Cool to no more than 110°F.
Transfer mixture to the bowl of a stand mixer fitted with a dough hook and add milk powder, yeast, kosher salt, 2 eggs, and 5 cups flour. Knead on medium speed until dough is smooth, about 5 minutes.
Add butter, a piece at a time, fully incorporating into dough before adding the next piece, until dough is smooth, shiny, and elastic, about 4 minutes.
Coat a large bowl with nonstick spray and transfer dough to bowl, turning to coat. Cover with plastic wrap and let rise in a warm, draft-free place until doubled in size, about 1 hour.
If making rolls, lightly coat a 6-cup jumbo muffin pan with nonstick spray. Turn out dough onto a floured surface and divide into 6 pieces. Divide each piece into 4 smaller pieces (you should have 24 total). They don’t need to be exact; just eyeball it. Place 4 pieces of dough side-by-side in each muffin cup.
If making a loaf, lightly coat a 9x5" loaf pan with nonstick spray. Turn out dough onto a floured surface and divide into 6 pieces. Nestle pieces side-by-side to create 2 rows down length of pan.
If making split-top buns, lightly coat two 13x9" baking dishes with nonstick spray. Divide dough into 12 pieces and shape each into a 4"-long log. Place 6 logs in a row down length of each dish.
Let shaped dough rise in a warm, draft-free place until doubled in size (dough should be just puffing over top of pan), about 1 hour.Preheat oven to 375°. Beat remaining egg with 1 tsp. water in a small bowl to blend. Brush top of dough with egg wash and sprinkle with sea salt or other seasonings, if desired. Bake, rotating pan halfway through, until bread is deep golden brown, starting to pull away from the sides of the pan, and is baked through, 25–35 minutes for rolls, 50–60 minutes for loaf, or 30–40 minutes for buns. If making buns, slice each bun down the middle deep enough to create a split-top.
Let milk bread cool slightly in pan on a wire rack before turning out; let cool completely.
The burgers were basic ground beef with bacon, red onion, lettuce, pickles, mayonnaise, catsup, and roquefort cheese, along with a generous helping of Mom's Potato Salad.
The Holiday Weekend is off to a good start!
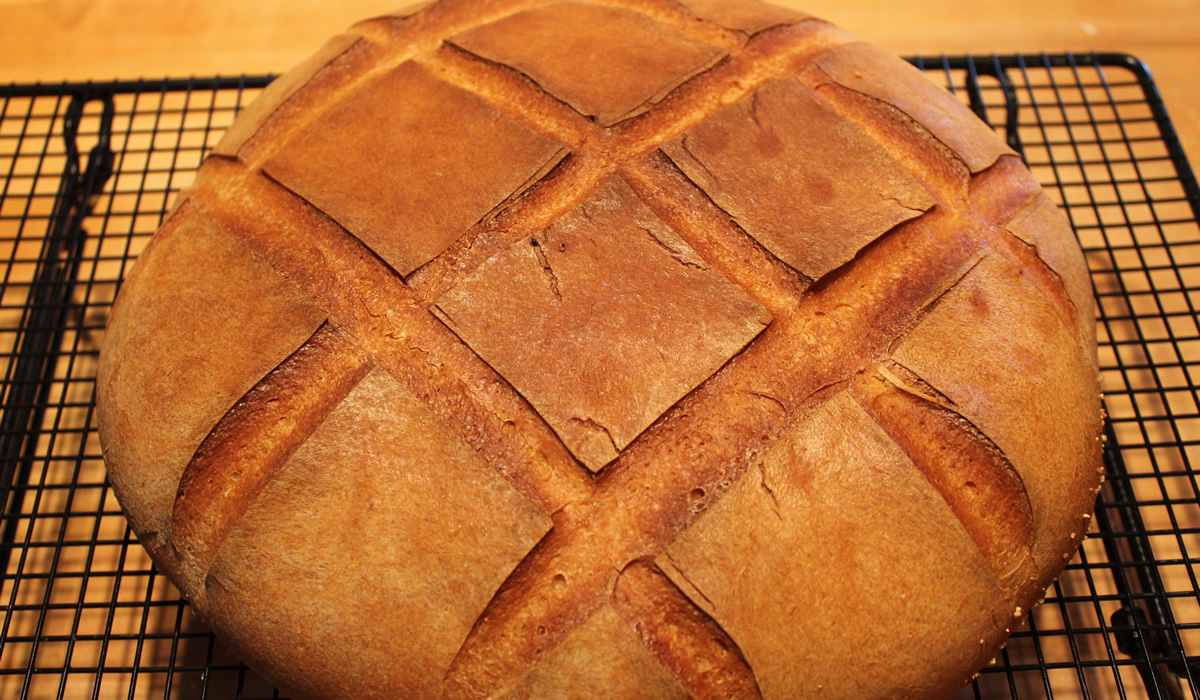
San Francisco Sourdough
It's 84° outside - that's 29°C for the rest of the world - perfect weather for baking bread.
I really do like baking bread on hot days - proofing the dough outside in Mother Nature's All-Natural Proofing Box makes for some great bread. And today's loaf is some great bread.
Sometimes the stars all align and the bread gods smile down and everything just falls into place. This was one of those times.
As a kid growing up, I never paid attention to bread. It was just always good. The crusty end of any loaf was then - and is now - my favorite slice.
Back in the day, the two main bread makers in San Francisco were Parisian and Larraburu. My father drove a Larraburu Bread truck before joining the SFFD - hence my personal favorite as a child. Both were started during the Gold Rush and both had starters over 100 years old - and both tasted different from one another. I don't remember Boudin Bakery at all - and it's the only one left - and it's not nearly as good as a loaf of Larraburu!
This recipe is one from my Mom and it's an interesting mix - after the first rise, you mix in up to another cup of flour, shape the loaf, and proof, again. The dough did come out with that perfect bread dough consistency - soft, supple, and firm. It just felt right from the beginning!
I've made Mom's other sourdough bread a lot over the years - this was my first on this one. It shan't be my last! I'm not sure where this recipe originated but it makes a damned good loaf of bread.

I made one large flat round - a shape I don't see much of anymore but was really popular in my youth. Crusty, crunchy, and chewy crust with a really nice crumb. I could easily see it as two long loaves, as well, but I use an old pizza stone for baking and, for me, it's just easier to do a round.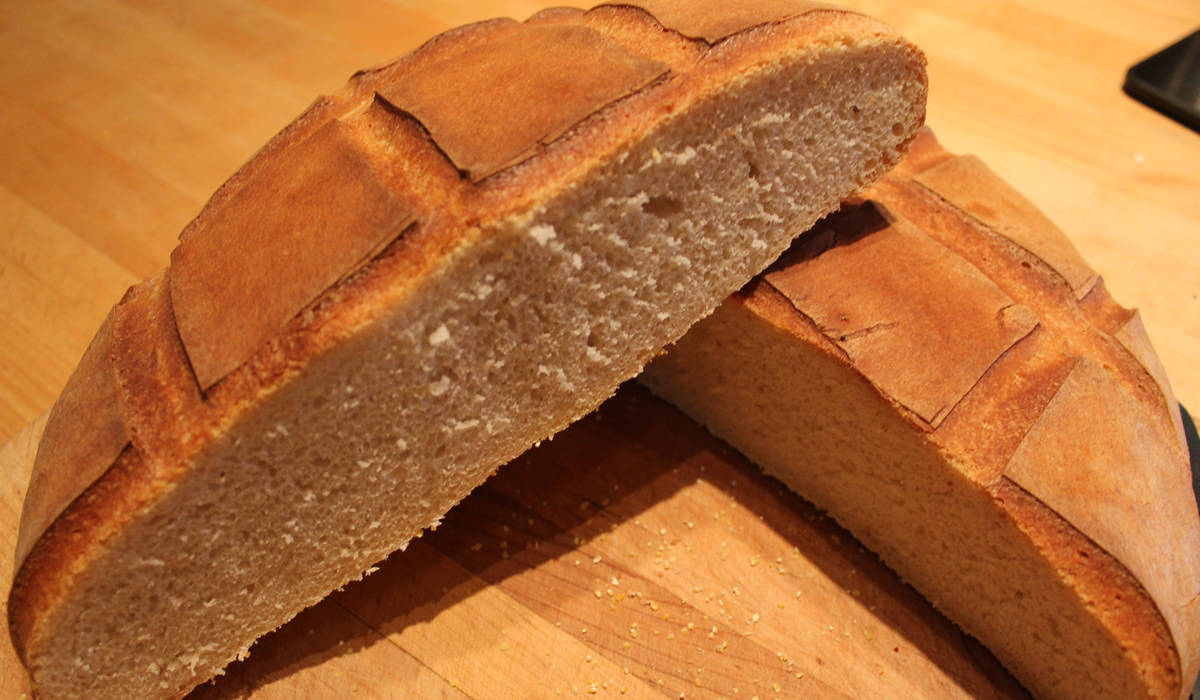
This is going to make some really good toast tomorrow morning - and will go great with the cold fried chicken for dinner tomorrow night.
It's nice to have options...
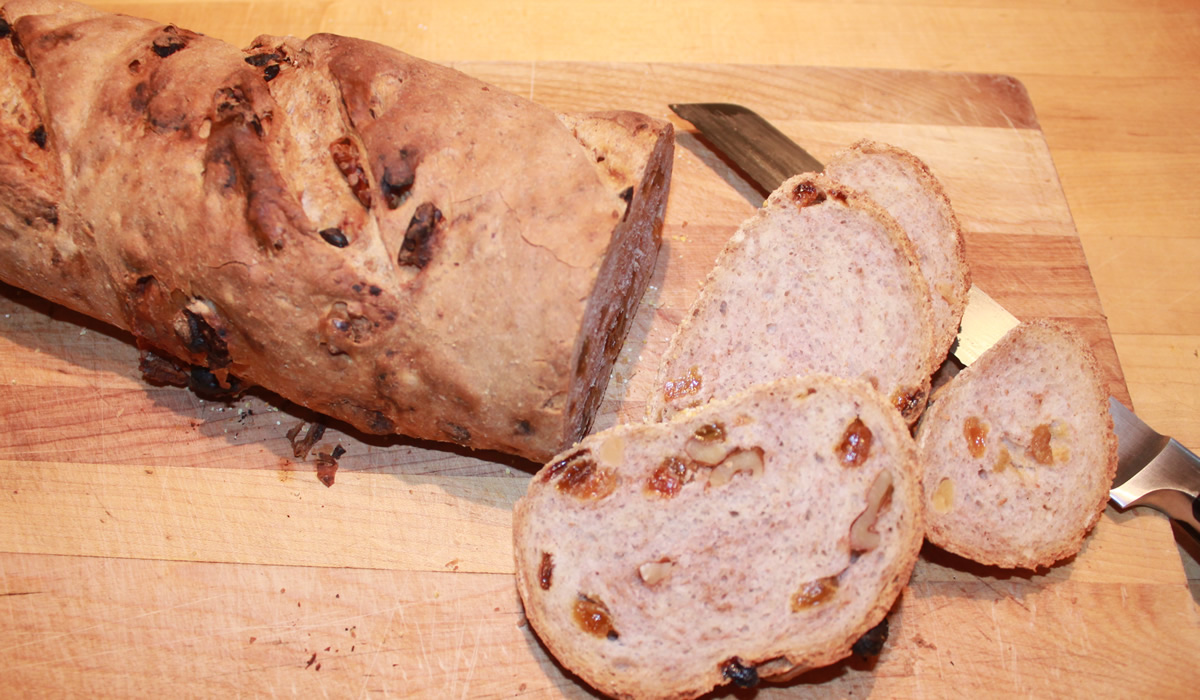
Walnut Raisin Bread
What fun to be back in the kitchen! It's been a fun week with Victor cooking - and a day at the ballpark eating junk food - but it's always fun to be back making messes. (And some of my messes are legendary!)
Today's fun was a loaf of Walnut Raisin Bread. I came up with this one several years ago, based upon a basic sourdough I've made forever. It's ridiculously easy to make - and, according to my notes - foolproof.
It needs a starter, so it takes a bit of planning. I made the starter yesterday morning and it was sufficiently-sour for today. It's a yeast starter - not a wild yeast takes lots of time starter. I had a starter like that for quite a few years and ended up tossing it at some point - maybe a move or something. I don't really remember, but it may be time to make another one.
Some other day.
In the meantime, we have a great loaf of bread, tonight!

Walnut Raisin Bread
starter
- 2 tsp active dry yeast
- 3/4 cup water 110°
- 1 3/4 cups flour
Sprinkle yeast into the warm water. Stir to dissolve. Stir in flour. Cover bowl with clean towel and leave at room temperature for 2-3 days.
dough
- 1 tsp active dry yeast
- 3/4 cup water 110°
- 1 cup starter
- 2 cups all-purpose flour
- 1/3 cup rye flour
- 1/4 cup whole wheat flour
- 1 1/2 tsp salt
- 1 cup raisins
- 1/2 cup chopped walnuts
Sprinkle yeast into water in mixing bowl. Stir to dissolve. Add starter, flours, and salt.
Mix on low speed with dough hook for about 5 minutes or until dough is smooth and elastic. Add raisins and walnuts and continue mixing another 5 or so minutes.Knead by hand for a minute or two on a lightly-floured surface to make sure the nuts and raisins are evenly distributed.. Place the dough into a clean bowl and cover with a kitchen towel.
Let rise until doubled – up to 2 hours. Punch dough down and let rest for about 10 minutes before forming the loaf.
Shape the dough into a cylindrical loaf and place on a bread peel generously coated with coarse cornmeal. Cover with a kitchen towel and let rise again until doubled – about an hour.
Preheat oven with baking stone to 425°.
Make three parallel slashes across the top. Slide dough onto stone and bake for 45 min to 1 hour.
Replenish starter with about 3/4 cup flour and 1/2 cup water.
I'm thinking that next time I make this I need to do it as an Olive and Pignoli Bread. Dry-cured olives... toasted pine nuts, maybe some garlic and basil?!?
We need to finish this one up, quick!
On another note...
There's a school of thought that says you should really allow the dough a first rise before adding things like nuts and raisins - it allows the dough to develop before getting bogged down with additions. I've never bothered to but it's something you may want to think about. I also never soak my raisins - although I will for other recipes.
The notes say foolproof... have fun with it!
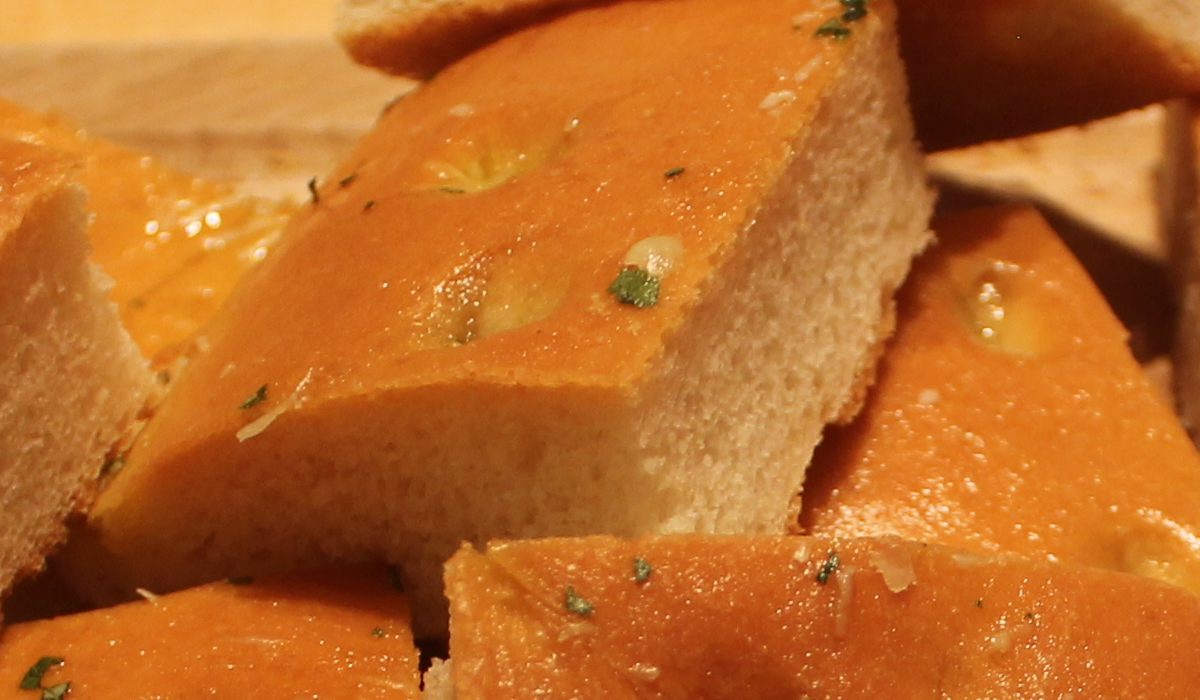
Focaccia Genovese
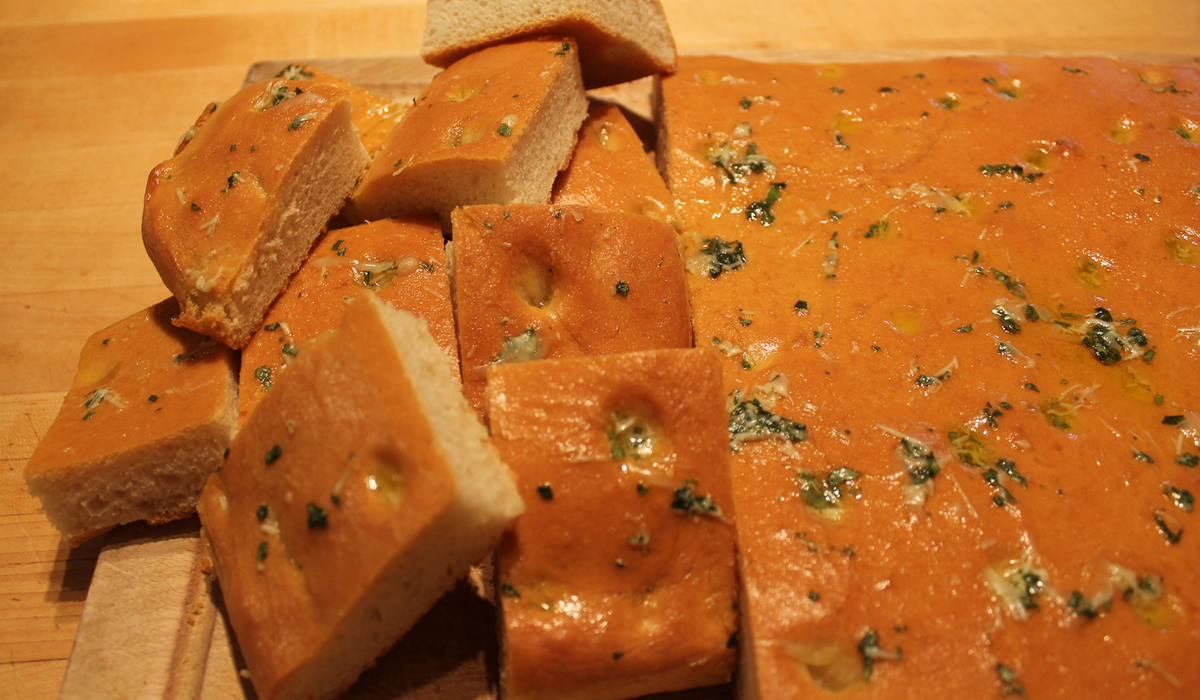
While I was working, Saturday, Victor was cooking - shades of what retirement is going to be like in a couple of weeks! We're both looking forward to this. As much as I like to cook, it will be nice not having that "5 o'clock" deadline looming when I get home.
When I walked in, the first thing I smelled was baking bread. There are not a lot of scents out there that can top that one - especially since it included fresh basil... This is not a bad way to start the weekend unwind...
The recipe comes from one of our many Lidia Bastianich cook books - Lidia’s Commonsense Italian Cooking. They're excellent cook books.
Focaccia Genovese
adapted from Lidia's Commonsense Italian Cooking.
For the focaccia:
- 1 pkt yeast
- 1 tsp sugar
- 6 tbsp olive oil
- 6 cups flour
- 2 tsp kosher salt
For the topping:
- 3 tbsp olive oil
- 1/2 cup chopped basil
- 3 tbsp grana padano, grated
Dissolve the yeast and sugar in ½ cup warm water (90 to 110 degrees F). Let the mixture sit a few minutes, until the yeast is bubbly.
Put the proofed yeast in a mixer fitted with the dough hook attachment. Pour in another 1½ cups warm water and 2 tablespoons olive oil. Add the flour, holding back about ½ cup of the total measured amount. Add the salt. Mix on low speed to combine into a wet dough. If the dough is still dry or seems tight, add up to ½ cup more warm water, a little at a time. If it seems too wet, add up to the remaining ½ cup flour, a little at a time. Knead the dough on medium speed until it is soft and springy and leaves the sides of the bowl clean, about 3 to 4 minutes.
Dump the dough on a floured counter, and knead a few times by hand to bring together into a ball. Oil a large bowl, and toss the dough to coat. Cover, and let rise until doubled in size, about
1 to 1½ hours, depending on the temperature of your room.
Punch down the dough. Oil a half sheet pan with olive oil, and dump the dough into the sheet pan. Press with your fingers to fit dough to the edges of the pan. Let rise another 30 minutes, uncovered. Preheat oven to 400 degrees F. Once the dough has risen, gently press indentations in the dough with your fingertips, about 1 inch apart. Bake until set, about 10 to 15 minutes, pull out of oven, and brush with 1 tablespoon olive oil. Finish baking until the focaccia is golden brown on the top and bottom, about 25 minutes in all.
While the dough finishes baking, in a bowl stir together the basil, grated cheese, and the remaining olive oil. As soon as you remove focaccia from oven, spread with the basil mixture.
Crispy exterior, light interior - the perfect bread. I made grilled cheese sandwiches with it for lunch, today.
I'm going to have fun getting used to this...
Oh... and dinner?!?
Bucatini with Clam Sauce.
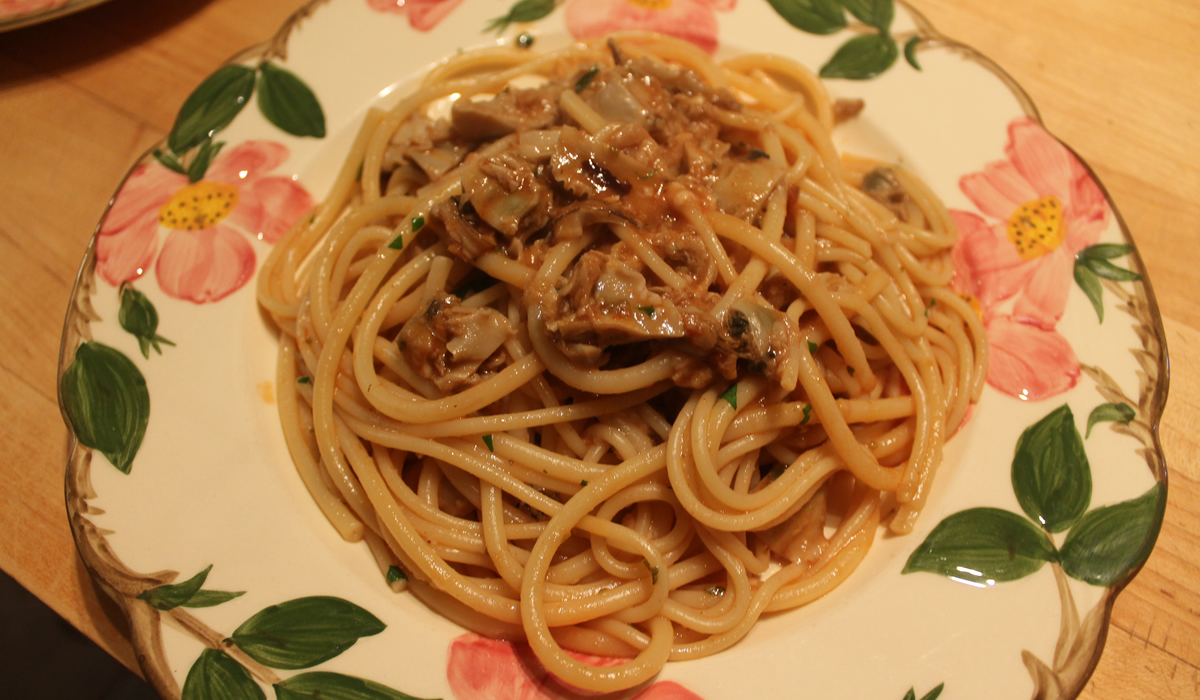
Yeah... I'm spoiled...
Bacon and Tomato Swirl
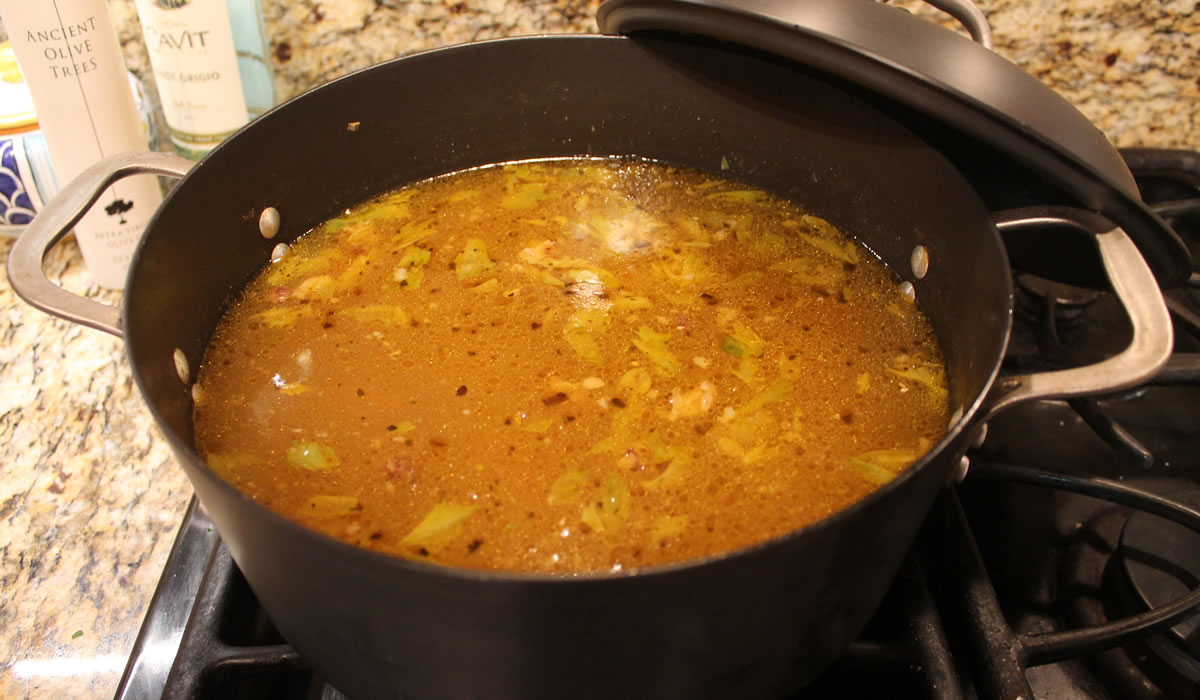
It's a bit rainy and cold out, today - perfect for some homemade soup and bread!
We had our Easter ham bone in the freezer, so I pulled it out and Victor made Bean Soup. While he busied himself with that, I made bread.
It's rather fun what one can create with a bone and some water. Add heat, some vegetables, some legumes - and dinner is served!
It's really the same thing with bread. Some flour, some yeast, and a bit of imagination brings everything together.
The recipe for the bread comes from my Mom's Cook Book. It was something she cut out of a newspaper 50 or so years ago and, while I'm not sure if she ever made it while I was at home, it's definitely one of those recipes she would have embellished. I can see her adding cheese and all sorts of things to it.
Today, however, I played it straight. So to speak.
I followed the recipe as written - and made one loaf of bread and six rolls. This is where those double ovens really come into play - the loaf up top for 40 minutes and the rolls down below for 25.
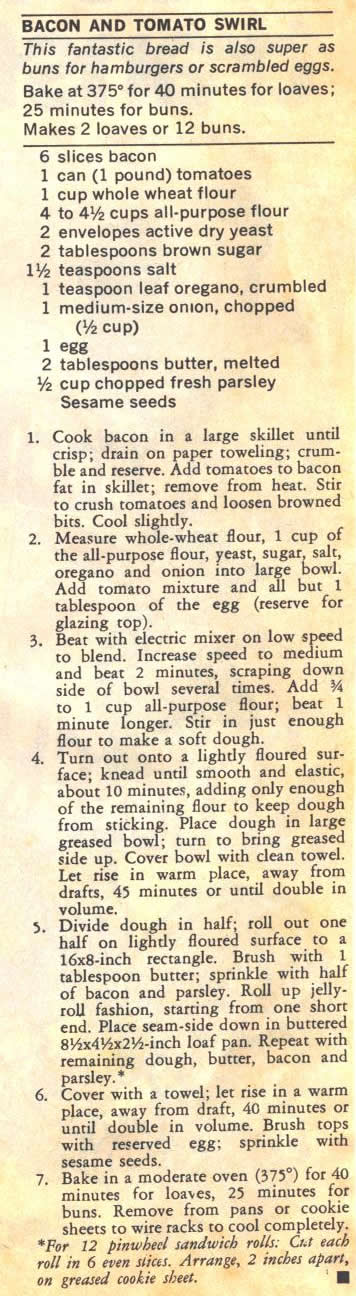
This was the first one I rolled out - for the bread loaf.

It went right into the pan...
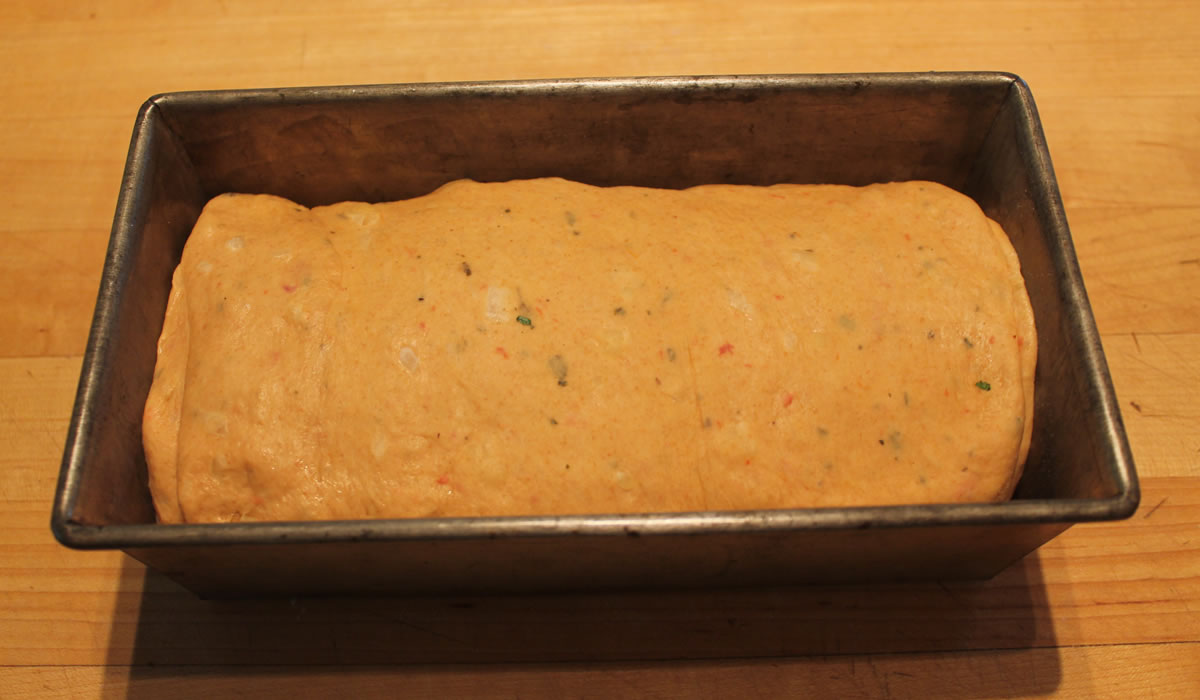
Proofed...
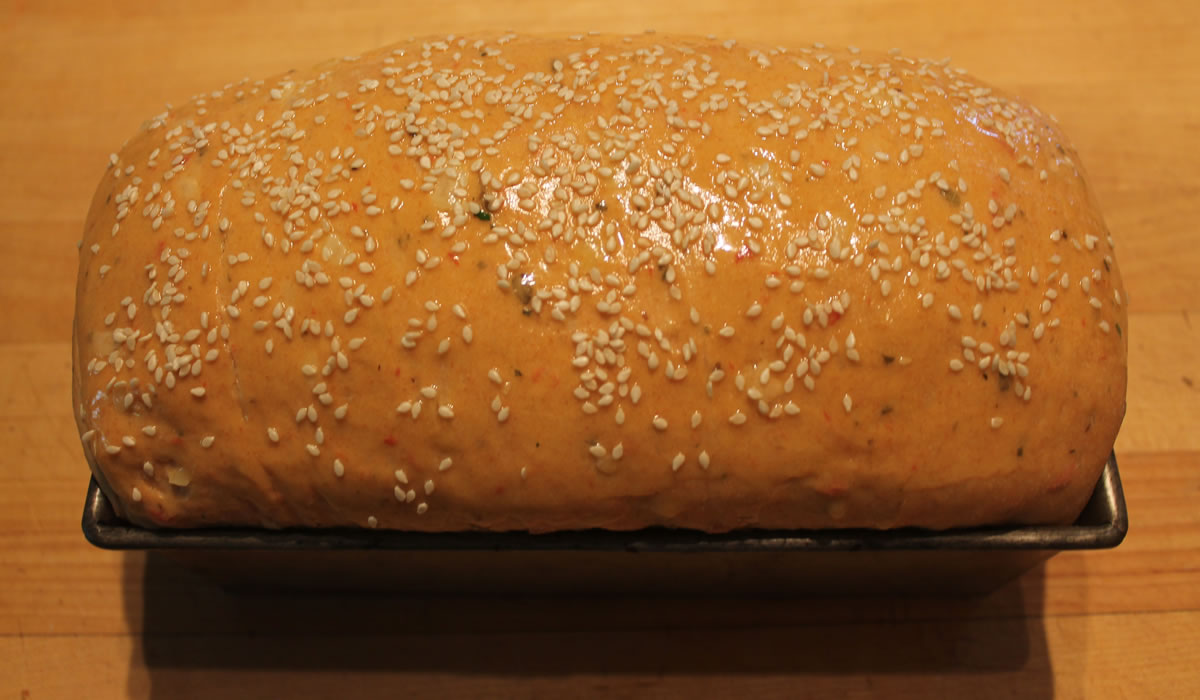
And came out perfect!
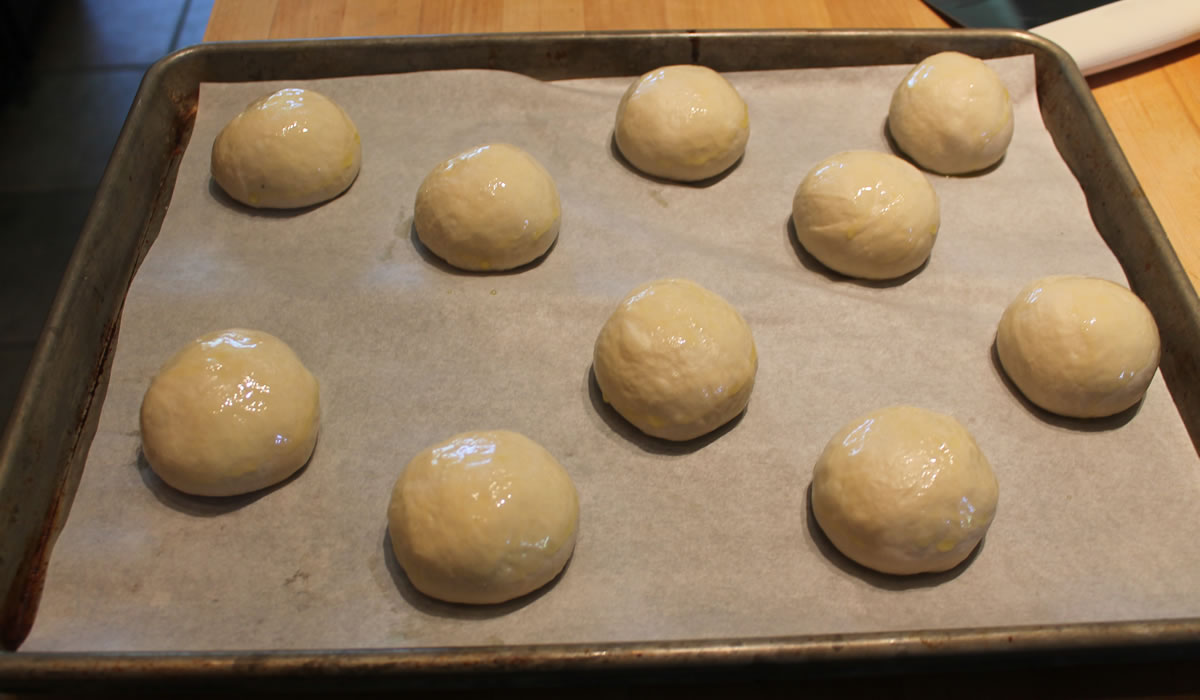
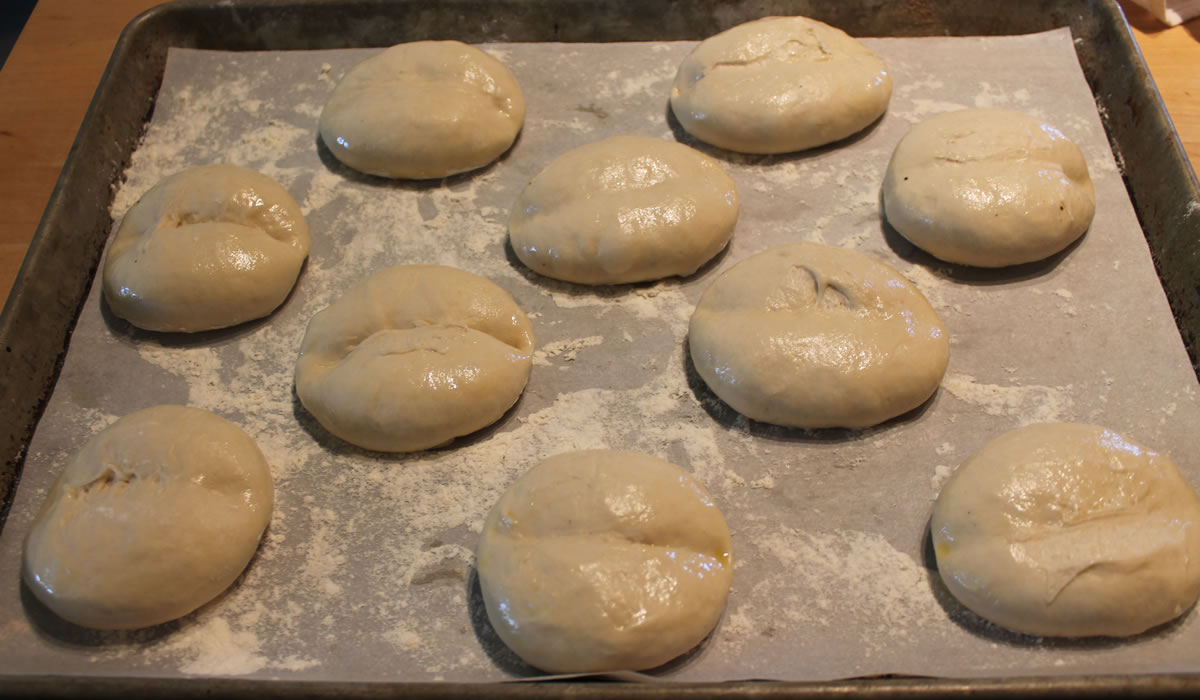
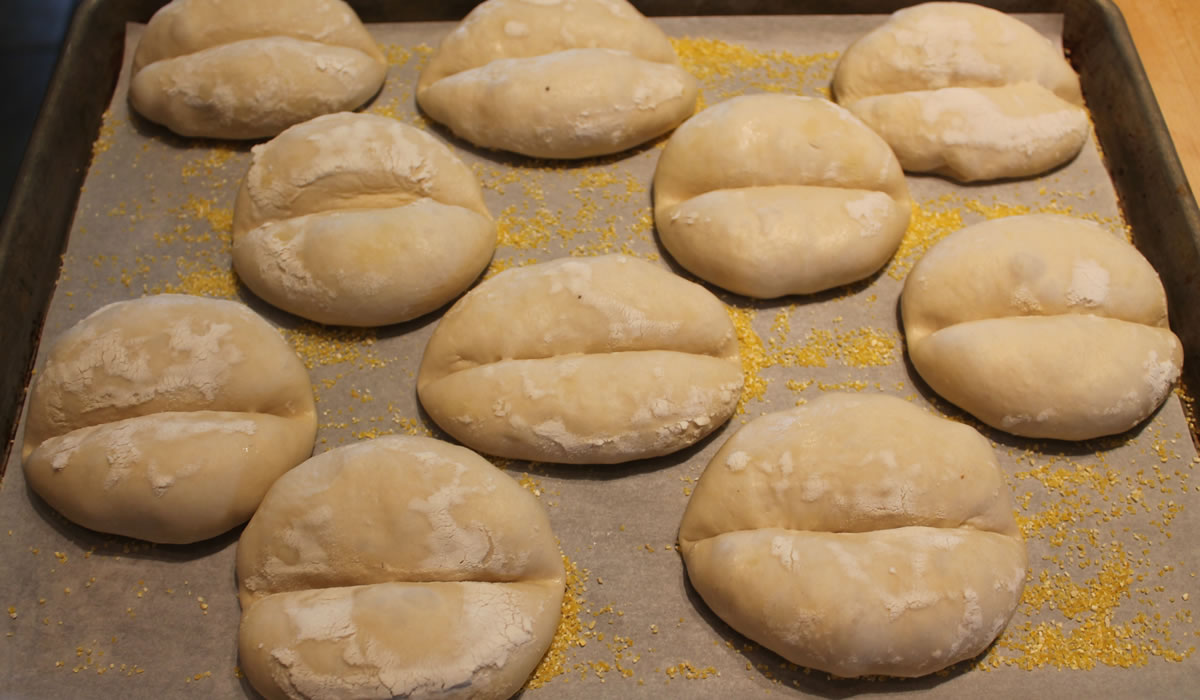
Same with the rolls... Rolled and formed...

Proofed...
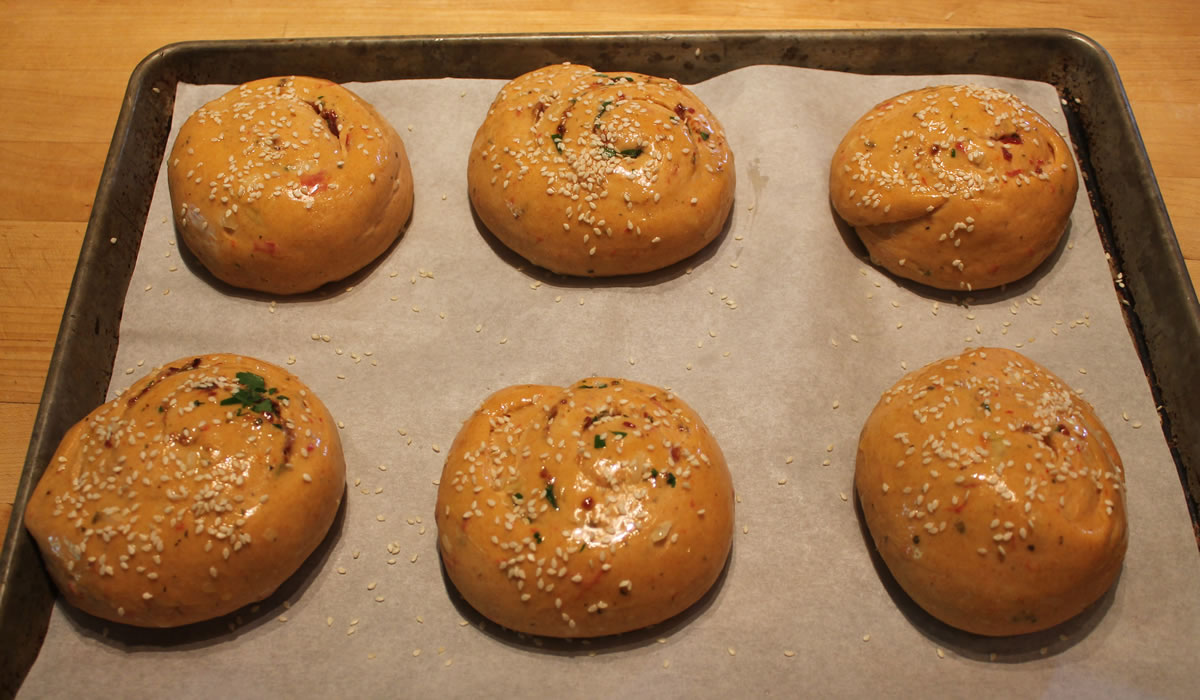
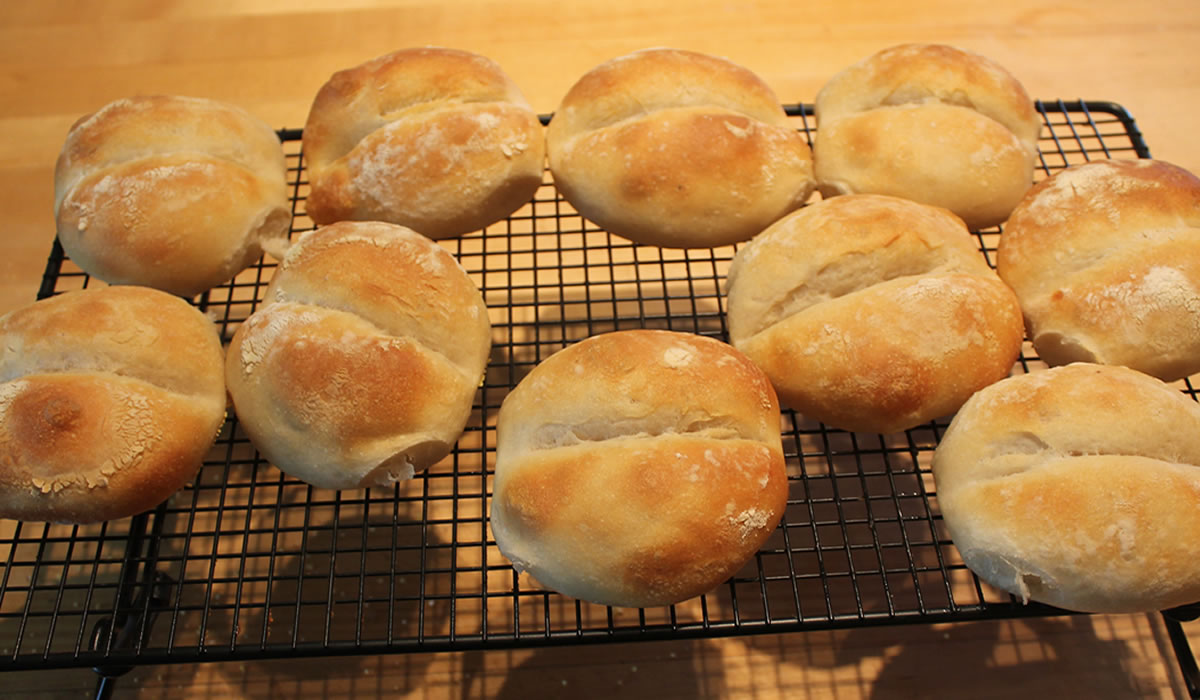
And baked to perfection!

Really easy to pull together and we're set with bread for the next few days.
I'm thinking that maybe we should have burgers for dinner tomorrow night.....
Mafaldine and Semelle
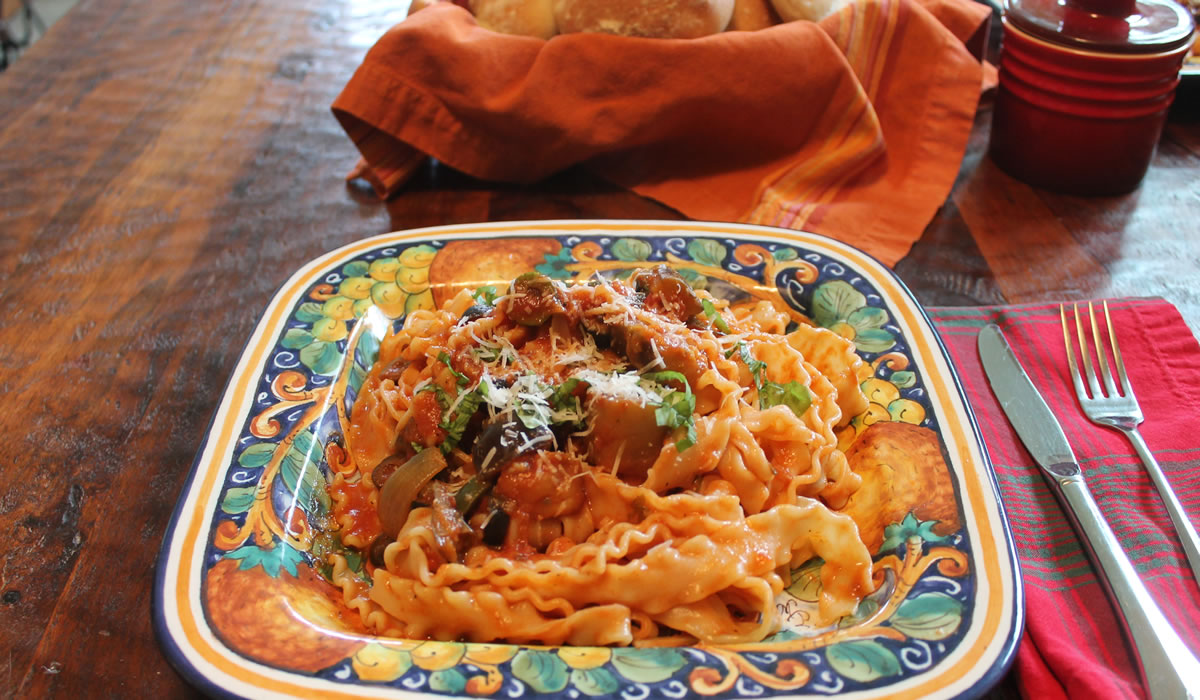
We just had a quiet dinner at home. Nonna is off with her eldest son, so it was time to break out the long noodles and bake some bread.
Nonna's no longer a fan of noodles - spaghetti, linguine, pappardelle - so we don't have them as often as we used to. Tonight, we broke out the last of the meter-long mafaldine and baked little rolls from Florence. We're such rebels.
Victor made a sauce by blending a jar of his homemade sauce with a jar of the eggplant I canned last summer. He mixed in some freshly grated cheese and we had total perfection. Simply topped with fresh basil and more freshly-grated cheese. We served it on the dishes we bought in Florence and it was the perfect touch. It's amazing how things really can taste differently based on what they're served on. It's one of the reasons we have so many different styles of plates - and never use paper no matter how large the crowd. If you're going to take the time to make it - serve it right!
The rolls were a take on a recipe from Carol Field's The Italian Baker. I bought this book 30 years ago and it's still my favorite bread book. I just found out that Carol Field died last month - she was only 76... She will definitely live on in our house.
I wanted to make rolls instead of a loaf of bread, and thought the Semele rolls would be fun. I had some biga in the 'fridge that needed using up - biga is an Italian starter - so I played with her recipe to incorporate it and still make 10 rolls. If you don't use a biga, increase the flour to about 3 1/2 cups. And use all-purpose instead of the Italian "00".
Semelle are little rolls from Florence. I went through the pictures we took of Florence and didn't see any in the places where we ate, but ... we didn't eat everywhere or go to every bakery. The rolls are really good!
Semelle
Adapted from The Italian Baker by Carol Field
- 2 1/4 tsp (1 packet) active dry yeast
- 1 1/4 cups warm water
- 2 cups "00" flour
- 1 cup biga
- 2 tsp salt
- Olive oil for brushing
Stir the yeast into the water and let stand until creamy. Add the flour and biga. Mix until the dough is solid and elastic - 6-8 minutes.
First Rise.
Place the dough in a lightly oiled bowl, cover, and let rise until doubled, about 1 hour.
Shaping and Second Rise.
Cut the dough into ten equal pieces and shape each piece into a ball. Brush a little oil over each and let rest 10 minutes under a towel.
With the edge of your hand, make a deep indentation down the center of each ball - be sure to press down firmly.
Place the rolls, cleft side down, on floured parchment paper. Cover with a towel and let rise until doubled, about 1 hour.
Baking.
Preheat the oven to 425ºF. Just before baking, turn each roll over and reemphasize the cleft. Place the rolls - cleft side up - on a baking sheet dusted with corn meal.
Bake 15 to 18 minutes, spraying the rolls three times with water in the first 10 minutes.
The whole batch of dough weighed 30 ounces, so it was easy to make 10 rolls of 3 ounces each.
They had a great chewy crust and a really light interior. I think without the indentation, these would make a great hamburger bun.
These are super easy to make - I know I'll be making more...
Sunday Bread-Baking
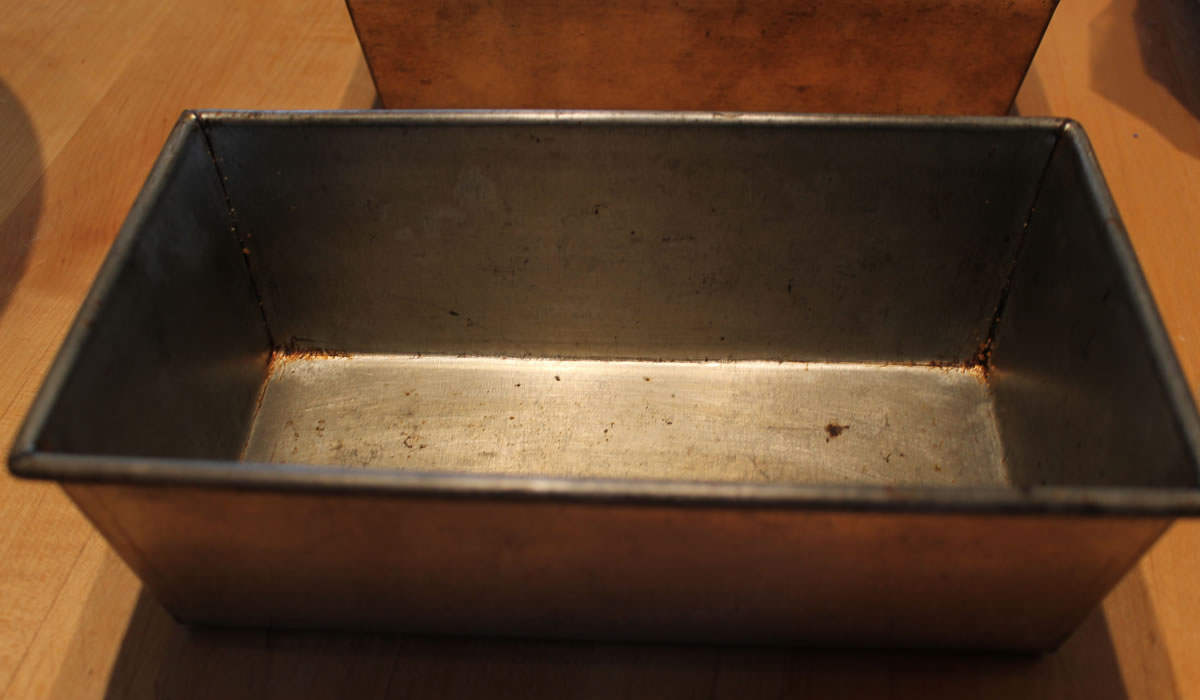
I have had two metal bread pans for as long as I can remember. I really don't know where or when I got them. They have just always been there.
It's funny. There are some things that I can tell you practically date and time where I got something - the round cake pans were all bought when I did Mike & Debbie's wedding cake in 1985. I borrowed Debbie's Kitchenaid mixer to make it and bought my own a few months later. We got our canisters at Macy's Herald Square in 2001 shortly after moving here - carried them home on the train. My desk came from Ikea in Emeryville, CA in 1998 when we bought our house in San Leandro. Victor's mirror image desk was bought at Ikea in Plymouth Meeting in March of 2001 when we moved here. He was on a business trip and I was unemployed and remodeling, decorating, and, generally, just spending money on the new house.
Like our Christmas ornaments, there's a story behind just about everything we have. The pictures on the wall, the salt and pepper shakers from all over the world. The arm bands from the San Francisco Gay Pride Parade in 1995 when we were the honor guards for Ninia Baehr and Genora Dancel - the two women who were the first to win gay marriage rights in Hawai'i. And the wine rack/booze cabinet in the kitchen that was made by a childhood friend, Mike Monestere, not long after he got out of prison. We're surrounded by stories.
The glass Cat That Swallowed The Canary was a birthday gift from Alice Dean LaCroix in 1969.

Alice was a little old lady who I met at Pirro's way back in the day. She came in several nights a week for her half-order of spaghetti and a tablespoon of sauce. She was a very interesting woman. She was originally from Tarrytown, New York, drove a 1957 black VW Beetle, wrote Black poetry - she was very white but believed she had been African in a former life - and through her I was able to meet Maya Angelou and Gerri Lange. We went out to breakfast at least once a month and as a Christmas present to her in 1970, I took her to the Palace Hotel Champagne Brunch at the ungodly of price of $25.00 per person and supported her when she was part of a marathon poetry reading at City Lights - her reading time was 3am.
She bought me the little blown glass piece because she said it reminded her of me - I always looked like the cat who had swallowed the canary! Basically, guilty but no one could prove it. Almost 48 years later, things haven't changed much, have they... Who, me?!?
Her daughter and I threw her a surprise 75th birthday party - in 1975 - and she cried like a baby. In 75 years, no one had ever thrown her a surprise party. She was the Belle of the Ball and had the time of her life. When not writing Black Poetry, Alice was a Graphoanalyst doing handwriting analysis. By the time we met she was pretty much retired but was still being called up regularly to be an expert witness for one crime or another. Interesting, indeed.
From bread pans to birthday parties... my, how the mind wanders down that rabbit hole...
And we're back to bread...
It came about because we were watching an episode of Martha Stewart where she has the culinary students on the show. She is just so pretentious it's fun to watch, but every once in a while she has a recipe that really sounds like fun. This one was a bread dough that can be made three different ways - and you know me and bread! I immediately printed out the recipes.
What really caught my eye during the show was the cinnamon raisin bread. 2 loaves from the batch of dough. I thought I would make 1 loaf of the regular and 1 loaf cinnamon raisin. What I didn't realize until I was starting to form the loaves is the basic recipe is for one large loaf of white bread and the cinnamon variation is for two loaves - so I got a loaf of raisin bread and a small loaf of white bread instead of the monster loaf she showed on TV. In the grand scheme of things, that was not a bad thing.

Here are the two recipes:
Japanese-Style White Bread
From Martha Stewart
- 1/4 cup warm water (110 degrees)
- 1 1/2 teaspoons active dry yeast
- 1 1/2 teaspoons plus 1 tablespoon sugar
- 3 1/4 to 3 1/2 cups bread flour, plus more for work surface
- 1 1/2 teaspoons coarse salt
- 1 cup warm milk (110 degrees)
- 4 tablespoons (1/2 stick) unsalted butter, room temperature, plus more for bowls, pans, and brushing
- Nonstick cooking spray
- Place warm water in a small bowl. Sprinkle over yeast and 1 1/2 teaspoons sugar and whisk to combine. Let stand until creamy, about 5 minutes.
- Whisk together 3 1/4 cups flour, salt, and remaining tablespoon sugar in bowl of a standing mixer. Attach dough hook, and mix on low speed adding yeast mixture, milk, and egg. Increase speed to medium and mix until dough comes together, scraping down sides of bowl as necessary. If dough does not come together, add more flour, 1 tablespoon at a time, up to 1/4 cup.
- Continue kneading for 10 minutes. Add butter and mix until incorporated and dough is smooth, 5 to 8 minutes. (Dough may come apart before coming back together.)
- Meanwhile, butter a large bowl. Turn dough onto a lightly floured work surface and shape it into a ball. Transfer dough to the prepared bowl, turning dough to coat. Cover lightly with plastic wrap sprayed with cooking spray and let stand in a warm place until doubled in bulk, 45 to 60 minutes.
- Place dough, top-side down, on lightly floured work surface to deflate. Shape dough into a ball and return to the buttered bowl. Cover lightly with plastic wrap sprayed with cooking spray, and let stand in a warm place until doubled in bulk, 45 to 60 minutes.
- Butter a 4 1/2-inch-by-8 1/2-inch loaf pan. Place dough, top-side down, on lightly floured work surface to deflate. Pat dough into a 7-inch square using your hands. Fold bottom edge two thirds of the way up, and fold again so that the top edge meets the bottom edge as you would a business letter. Pat dough a second time into a 7-inch square. Roll dough to form a tight log and pinch to seal. Pat the ends just enough to fit into the pan, and place the dough seam side down into the prepared pan.
- Cover with plastic wrap sprayed with cooking spray. Let stand in a warm place until dough has risen about 3 inches beyond the top of the pan and leaves an indentation when gently pressed with a fingertip, 60 to 75 minutes.
- Preheat oven to 425 degrees (or 400 degrees for a convection oven) with rack set in the center.
- Remove plastic wrap, and spritz surface of dough lightly with water. Transfer to oven and bake for 15 minutes. Reduce oven temperature to 375 degrees (or 350 degrees for a convection oven) and continue to bake until deep golden-brown and an instant-read thermometer registers 190 degrees when inserted into the center of the loaf, about 25 minutes more. If browning too quickly, tent lightly with foil.
- Transfer to a wire rack to cool slightly; turn out loaf. Brush top with butter to coat and let cool almost completely before slicing.

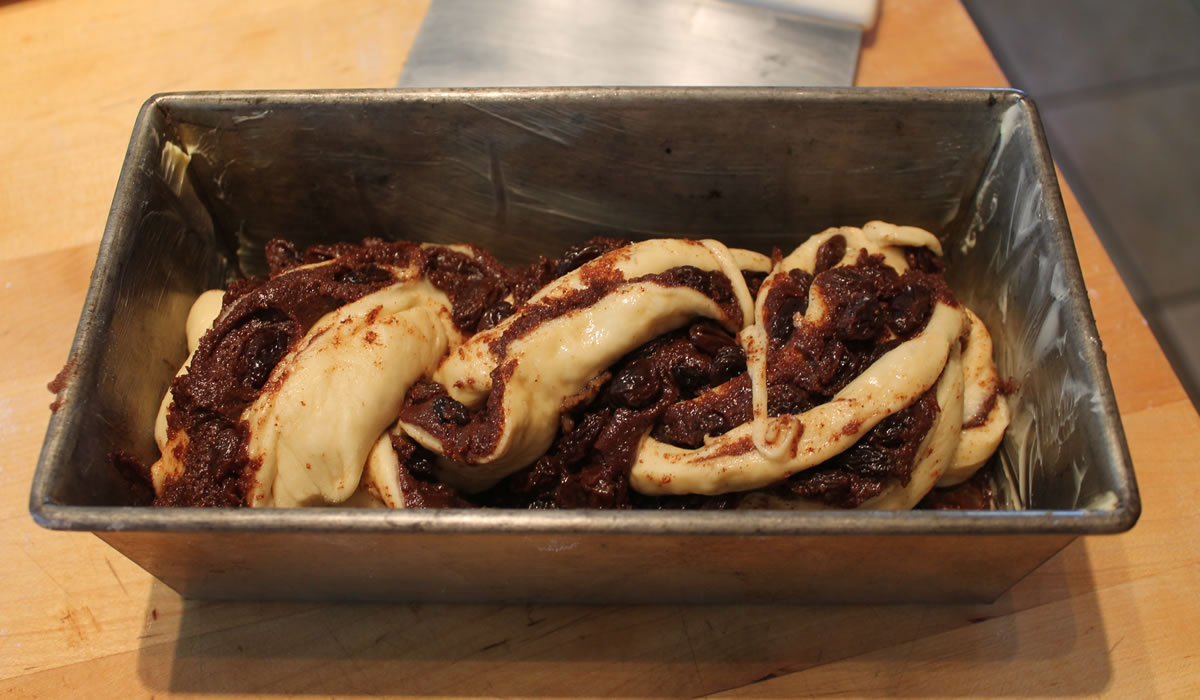
Cinnamon-Raisin Swirl Bread
FOR THE DOUGH
- 1/2 cup raisins
- 1/2 cup orange juice
- 1/4 cup warm water (110 degrees)
- 1 1/2 teaspoons active dry yeast
- 1 1/2 teaspoons plus 1 tablespoon sugar
- 3 1/4 to 3 1/2 cups bread flour, plus more for work surface
- 1 1/2 teaspoons coarse salt
- 1 cup warm milk (110 degrees)
- 1 large egg, lightly beaten
- 4 tablespoons (1/2 stick) unsalted butter, room temperature, plus more for bowls, pans, and brushing
- Nonstick cooking spray
FOR THE FILLING
- 1 cup packed dark-brown sugar
- 6 tablespoons unsalted butter, at room temperature
- 4 teaspoons ground cinnamon
- Prepare the dough: Combine raisins and orange juice in a small bowl. Cover and refrigerate overnight. Drain raisins and place on a paper towel-lined plate to absorb excess moisture. Alternatively, combine raisins and orange juice in a small bowl and microwave for 20 seconds; let stand at room temperature for 15 minutes.
- Place cup warm water in a small bowl. Sprinkle over yeast and 1 1/2 teaspoons sugar and whisk to combine. Let stand until creamy, about 5 minutes
- Whisk together 3 1/4 cups flour, salt, and remaining tablespoon sugar in the bowl of a standing mixer. Attach dough hook, and mix on low speed, adding yeast mixture, milk, and egg. Increase to medium speed and mix until dough comes together, scraping down sides of bowl as necessary. If dough does not come together, add more flour, 1 tablespoon at a time and up to 1/4 cup.
- Continue kneading for 10 minutes. Add butter and mix until incorporated and dough is smooth, 5 to 8 minutes. (Dough may come apart before coming back together.) Add reserved raisins and knead to combine.
- Meanwhile, butter a large bowl. Turn dough onto a lightly floured work surface and shape into a ball. Transfer dough to the prepared bowl, turning to coat. Cover lightly with plastic wrap sprayed with cooking spray and let stand in a warm place until doubled in bulk, 45 to 60 minutes.
- Place dough, topside down, on lightly floured work surface to deflate. Shape dough into a ball and return to the buttered bowl. Cover lightly with plastic wrap sprayed with cooking spray, and let stand in a warm place until doubled in bulk, 45 to 60 minutes.
- Butter two 4 1/2-inch-by 8 1/2-inch loaf pans. Prepare the filling: Combine brown sugar, butter, and cinnamon in a medium bowl and stir to form a smooth paste. Cover with plastic wrap and set aside.
- Place dough, top side down, on lightly floured work surface to deflate. Pat dough into a 7-inch square using your palms and fingertips. Fold bottom edge two-thirds of the way up, and fold again so that the top edge meets the bottom edge as you would a business letter. Cut the dough in half crosswise with a bench scraper.
- On a lightly floured surface, roll half of the dough out into a 7-inch-by-13-inch rectangle. Spread dough evenly with half of the filling using an offset spatula. Roll dough to form a tight log and pinch to seal. Use a sharp knife to cut the dough in half lengthwise. Place one piece of dough, cut side up, on top of the other to form an "X." Working from the "X", twist dough together, pinching ends and tucking under dough to form a loaf. Transfer dough, cut side-up, to prepared pan. Repeat process with the remaining dough and filling. Alternatively, the loaves may be shaped by rolling to form a tight log before pinching ends, and tucking under.
- Cover each loaf with plastic wrap sprayed with cooking spray. Let stand in a warm place until dough has risen 1 to 2 inches above edge of pan and an indentation forms when gently pressed with a fingertip, 45 to 60 minutes.
- Preheat oven to 425 degrees (or 400 degrees for a convection oven) with rack set in the center.
- Remove plastic wrap and transfer pans to oven and bake for 15 minutes. Reduce oven temperature to 375 degrees (or 350 degrees for a convection oven) and continue to bake until deep golden-brown and they reach 190 degrees on an instant-read thermometer when inserted into the center of a loaf, about 20 minutes more. If browning too quickly, tent lightly with foil.
- Transfer to a wire rack to cool slightly; turn out loaf. Brush top with melted butter and let cool almost completely before slicing.

The cinnamon loaf smells absolutely fantastic. It's for breakfast in the morning - toasted and slathered in butter.

Knotted Dinner Rolls
I have a pot roast in the oven and pot roast requires bread or rolls to sop up all that luscious gravy. With a million and one options, I decided on knotted dinner rolls - something I haven't made in a while.
The recipe is a tiny bit convoluted - the shaping, rising, topping, and baking times are a bit different - but the final rolls are worth the weirdness.
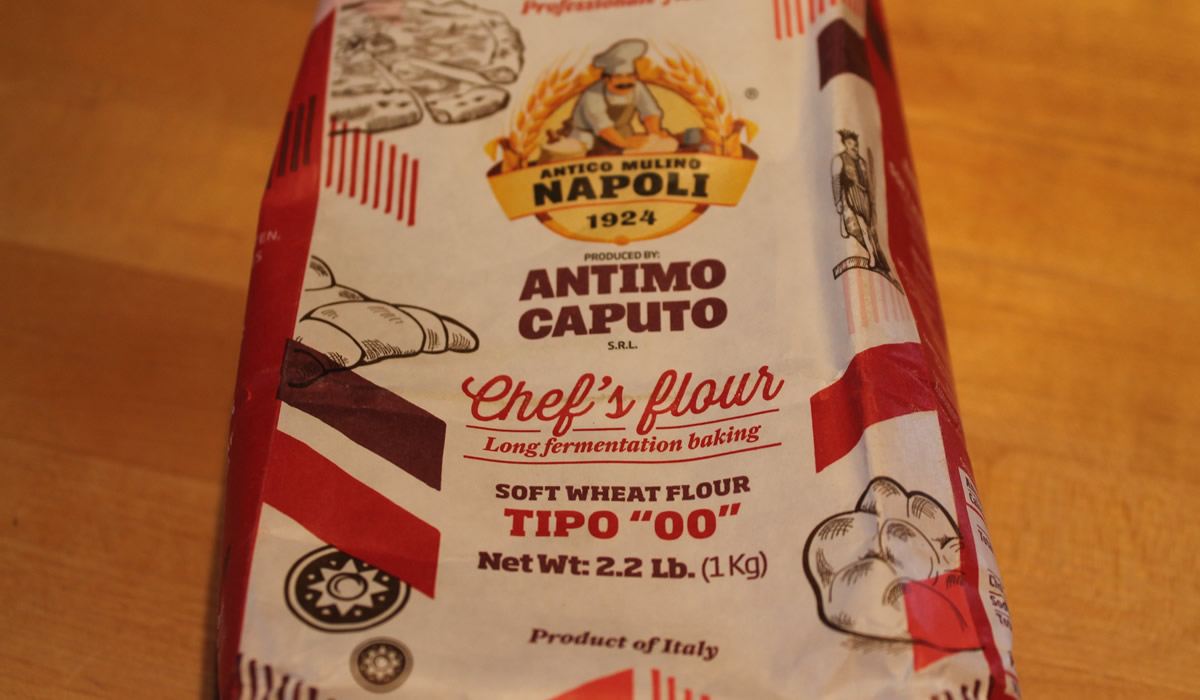
The one constant I have in baking is my flour. I have used every flour imaginable, from national grocery store brands to local organic, big name, small name, store brands to you name it. The one flour that constantly and continually gives me perfect results is Antimo Caputo Tipo "00" from Italy.
Yes, among other things, I'm a flour snob. But I really can't argue with success.
The recipe comes from Fine Cooking magazine.
Knotted Dinner Rolls
For the dough
- 1-1/2 cups whole milk; more as needed
- 1 packet (1/4 oz. or 2-1/4 tsp.) instant or active dry yeast
- 1/4 cup vegetable oil; more as needed
- 1 oz. (2 Tbs.) unsalted butter
- 1/4 cup granulated sugar
- 1 lb. 7 oz. (5-1/4 cups) unbleached bread flour; more as needed
- 1-1/4 tsp. table salt or 2 tsp. kosher salt
- 1 large egg
For shaping and baking
- Vegetable oil spray
- 1 large egg
- Poppy or sesame seeds for garnish (optional)
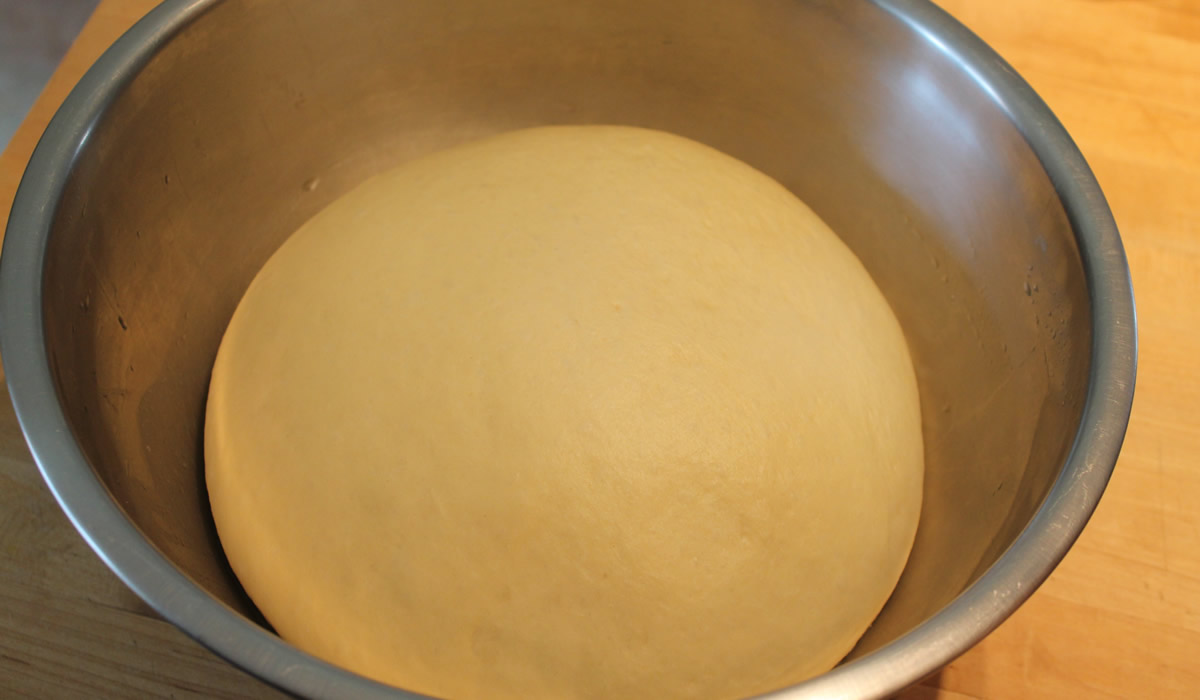
Make the dough
In a small saucepan, heat the milk until lukewarm (about 95°F). Remove from the heat and whisk in the yeast until it dissolves. Add the oil and butter—the butter may begin to melt, but it’s OK if it doesn’t melt completely—and then whisk in the sugar. Let rest until the yeast just begins to float to the surface, about 5 minutes.
In a stand mixer fitted with the paddle attachment (or in a large bowl), combine the flour, salt, and egg. Add the yeast mixture and mix on low speed (or with a large spoon) until a coarse ball of dough forms, about 1 minute. Let rest for 5 minutes.
Replace the paddle attachment with the dough hook and mix on medium-low speed (or knead by hand on a lightly oiled work surface) until the dough feels soft, supple, and pliable, about 3 minutes; it should feel tacky to the touch, but not sticky, and pull away from your finger when poked instead of sticking to it. If the dough is too sticky, add 1 Tbs. flour at a time, kneading to incorporate. If it’s stiff, knead in 1 Tbs. of milk at a time.
Rub a little vegetable oil on a work surface to create an 8-inch circle and put the dough on this spot. Stretch and fold the dough over itself from all four sides to the center, crimping it where the folded ends meet, to form it into a tight, round ball.
Put the dough seam side down in a lightly oiled bowl that’s twice the size of the dough. Tightly cover with plastic wrap. Let sit at room temperature until doubled in size, about 90 minutes.
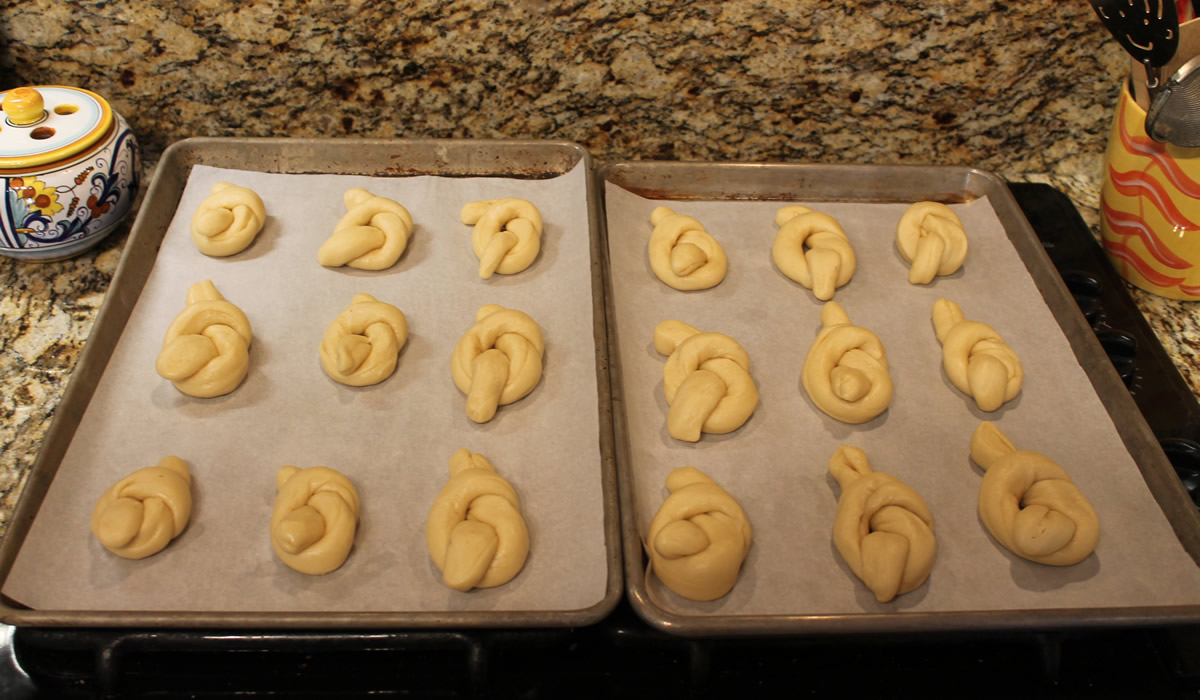
Shape the rolls
Line two 13×18-inch rimmed baking sheets with parchment or nonstick baking liners and lightly mist them with vegetable oil spray.
Using a bench knife, divide the dough into eighteen pieces (about 2-1/4 oz. each).
With your hands, roll one piece into a 12-inch-long rope. If the dough starts to stick, mist your work surface lightly with vegetable oil spray or wipe it with a damp towel. Don’t use flour.
Wrap the dough around your fingers into a loose knot; there should be about 2 inches of dough free at each end. Wrap the left end of the dough up and over the loop. Wrap the right end down and under the loop. Lightly squeeze the two ends of dough together in the center to secure them. (I left them as open knots, this time around.)
Gently squeeze the whole piece of dough into a nice rounded shape. Put the roll, pretty side up, on a baking sheet. Repeat with the remaining dough. Mist the top of the rolls with vegetable oil spray and cover loosely with plastic wrap.
Let the rolls sit at room temperature or refrigerated until they just begin to swell, 30 minutes to 1 hour for room-temperature dough, 1 to 1-1/2 hours for refrigerated dough.
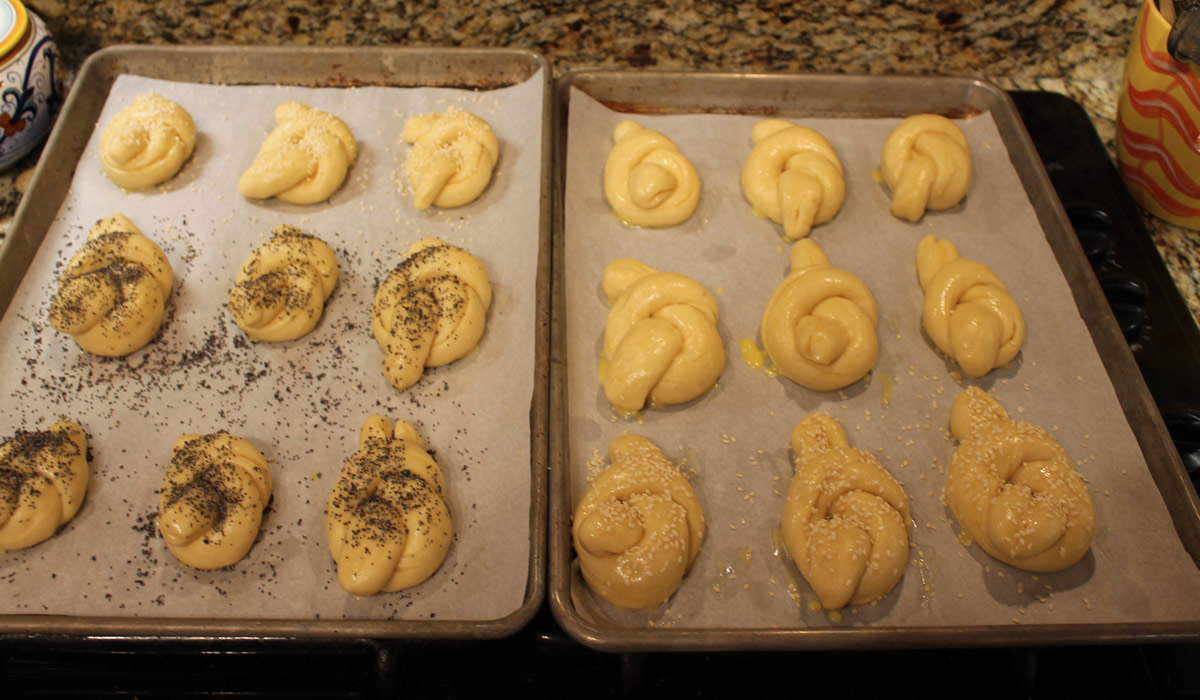
Bake the rolls
Position racks in the upper and lower thirds of the oven. If using a convection oven, heat it to 375°F; if using a conventional oven, heat it to 400°F.
Thoroughly whisk the egg with 1 Tbs. water and brush all over each roll. Sprinkle poppy or sesame seeds (if using) on the rolls.
While the oven heats, let the rolls continue to rise at room temperature, 20 to 40 minutes. They should be 1-1/2 to 2 times their original size before they go in the oven. (Once in the oven, they will rise about 20 percent more.)
Put the baking sheets in the oven and bake for 6 minutes. Rotate the sheets 180 degrees and swap their placement on the racks. Continue baking until the rolls turn rich golden-brown on top and develop some browning underneath, another 6 to 8 minutes. Let the rolls cool on the sheets or on a cooling rack for 15 minutes before serving.


I can't wait for the pot roast to be ready!
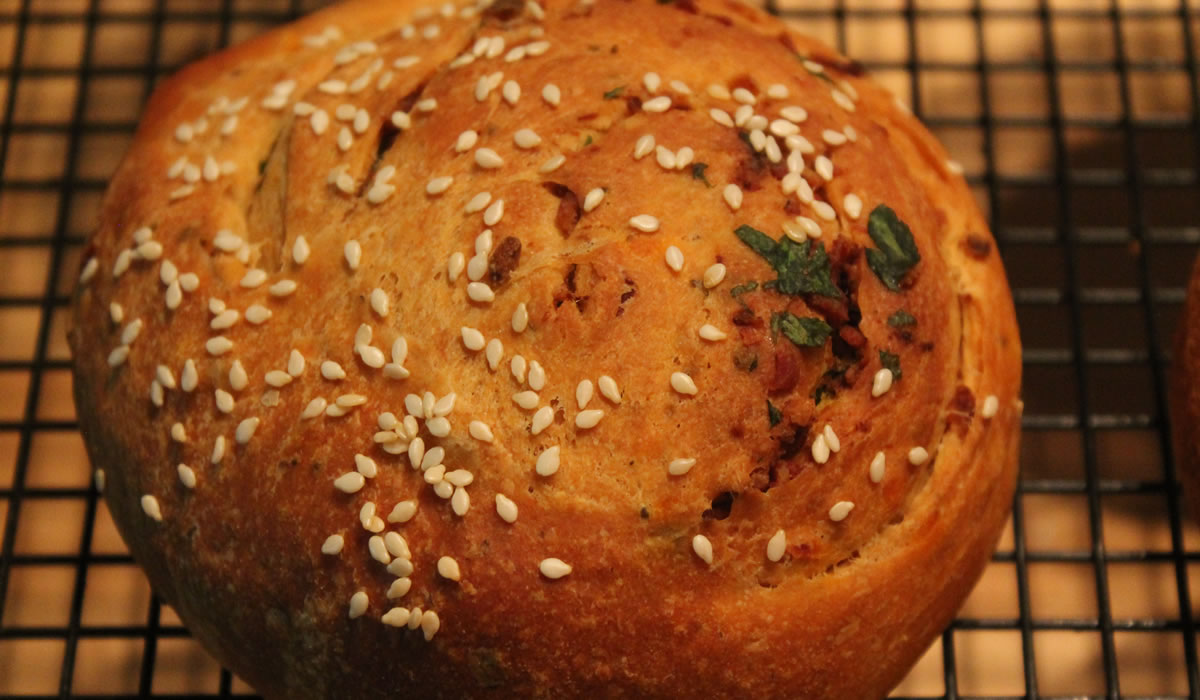
Wisconsin Spicy Cheese Bread
We were watching PBS a few weeks ago - we're Liberal Elites, you know - and on came Cooks Country - a spin-off of America's Test Kitchen and Cooks Illustrated. It can be an informative show at times, but my one complaint is they often take a basic recipe and over-complicate it to make it better, or they change it so much that their new and improved version doesn't even resemble the original.
But, as can also often happen, a recipe came up that caught my eye. It was a Wisconsin Spicy Cheese Bread - and you know me... bread is my friend. I am always ready to try another loaf or twelve. My mom had a recipe for a Fondue Bread that is similar, but this one called for adding crushed red pepper into the dough and sprinkling on top. After bread, spicy is probably my next most favorite thing. Put the two together and I'm in gastronomic heaven. And we were going over to Victor's family for a New Year Nosh - a perfect excuse to make it.
I followed the recipe pretty much as written and was just a little bit concerned about the texture - there's not a lot of actual water in the dough and it felt a little dense as I was rolling it into a ball. It looked more supple on the TV show but one thing I have learned with the Cooks Illustrated family, is the recipes generally work as written.

I did a couple of things different, of course... I used conventional active dry yeast and not rapid-rise. I proofed the yeast in half of the water and then added the rest of the liquid ingredients before adding the flour/sugar/salt and in place of the provolone, I used a fondue cheese left over from Christmas.
It all came together great but I think I could have used up to a quarter-cup more water in the dough. I'll play with it a bit more next time...
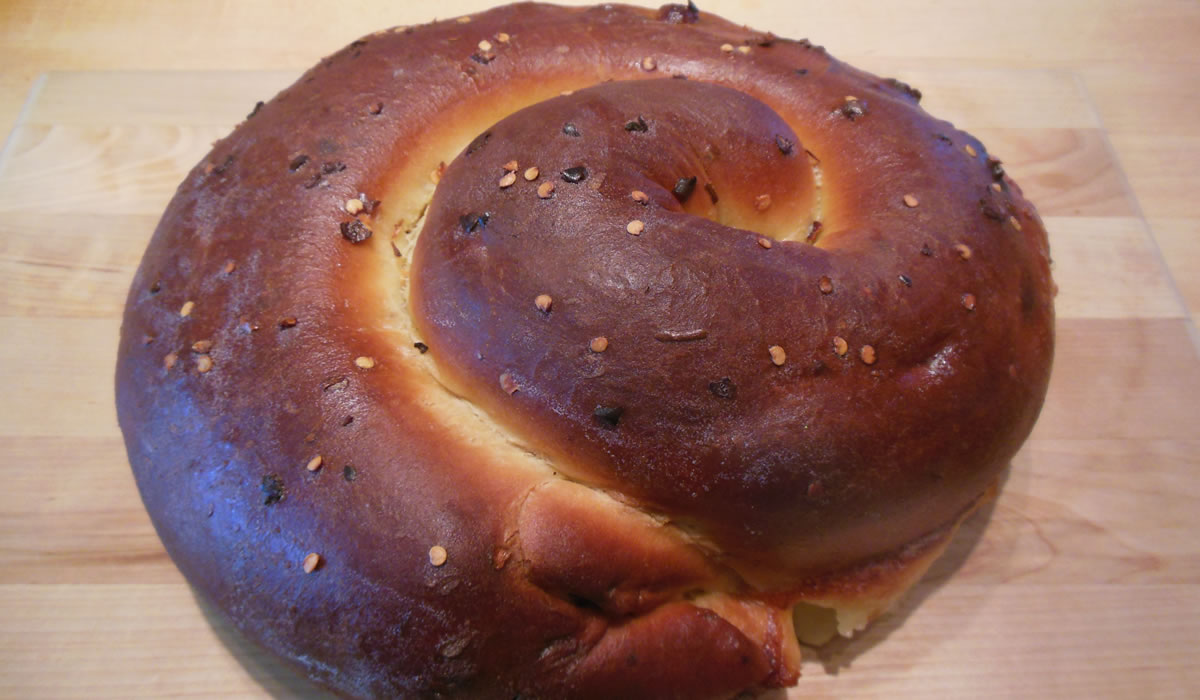
I had planned on taking pictures throughout the making, forming, and baking process, but... I forgot. I did get a picture of the formed loaf in the oven, though.
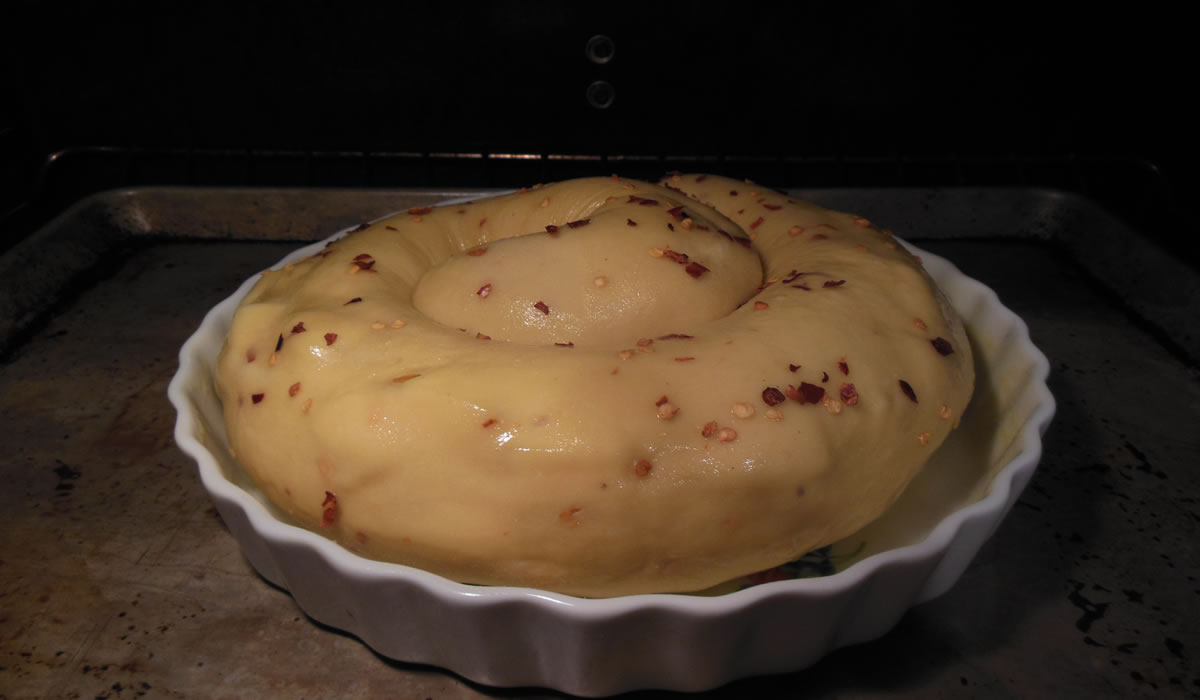
It was a pretty loaf going in - and even prettier coming out!
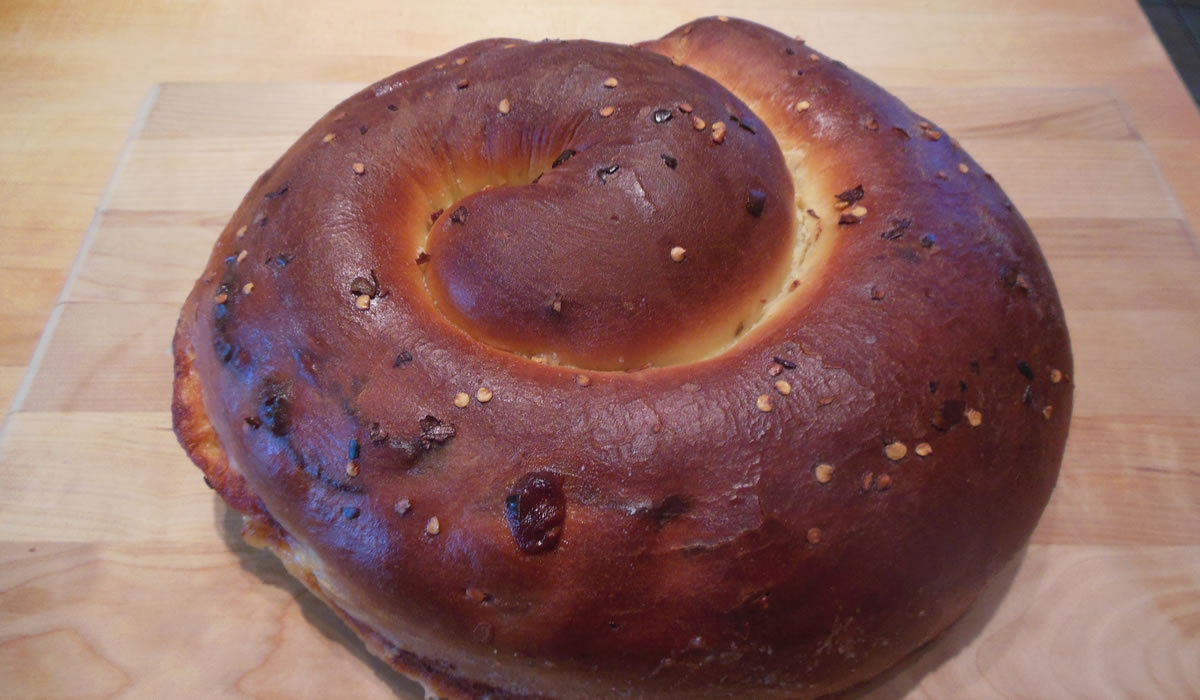
And it was really tasty, too!
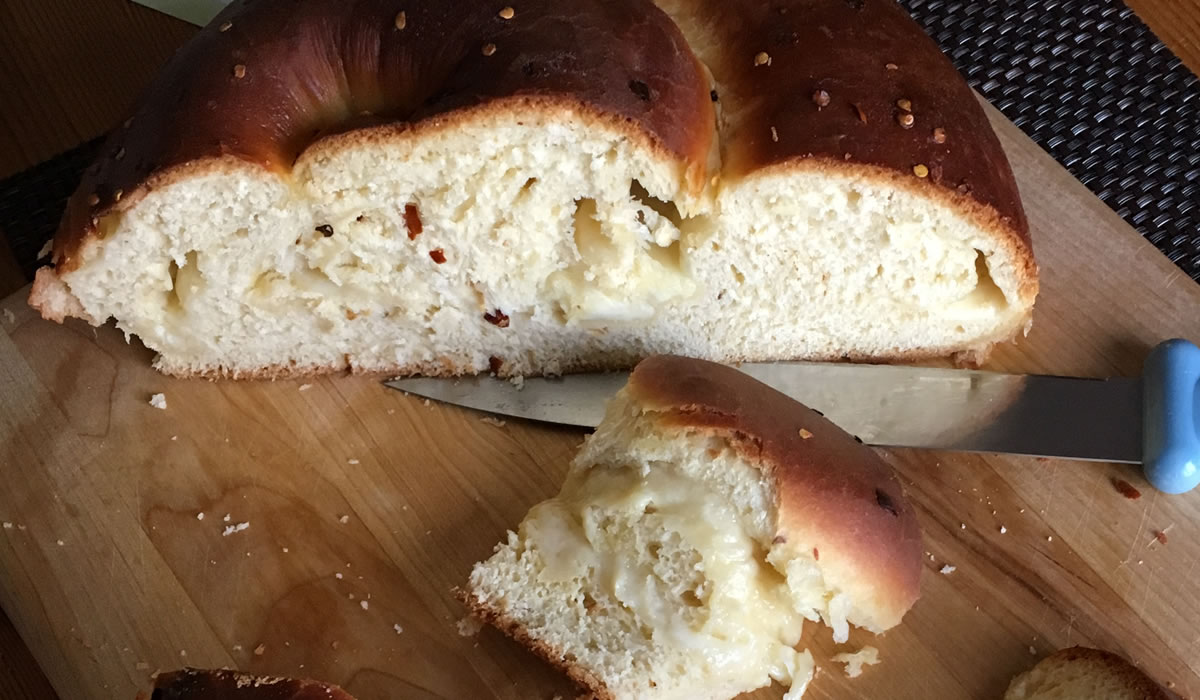
It was just a little bit dry, but not horribly so and the fondue cheese was a bit of a mistake - it was a bit too runny for the bread and more leaked out in the pan than probably would have had I used the right cheese - but it was a hit nonetheless.

I can see another loaf of this happening, but we'll definitely need a crowd. It's not something you make for two...