

On our first Valentine’s Day, I think I got Victor something like 20 pounds of chocolates – and he pretty much did the same to me. See’s Tuxedo Hearts, little stuffed animals… roses for days… all became the norm. We’ve done goofy, we’ve done silly, we’ve sent flowers to our places of work… Romantic dinners… We have run the gamut.
After 25 years of celebrating Valentine’s Day together, spending it in the kitchen with each other is a lot more fun than boxes of candy or anything else.
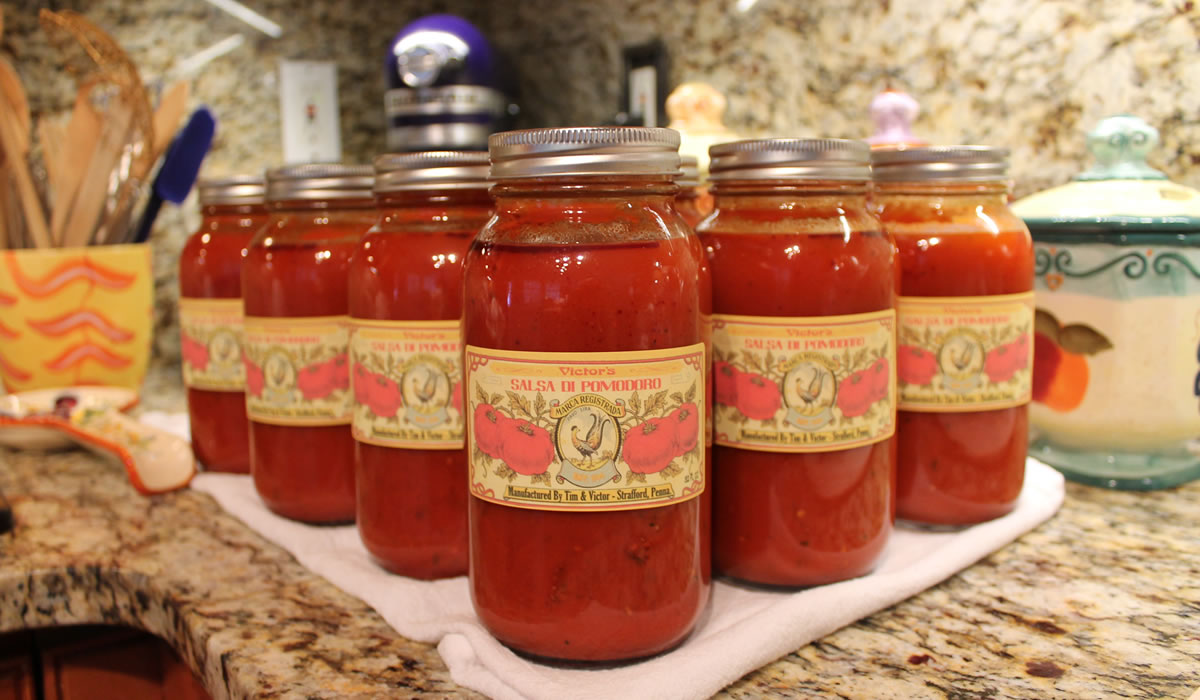
The day started out with Victor making a batch of pasta sauce. We were down to one jar – the last one made from our summer tomatoes – and we both start getting nervous when there’s no sauce in the house. I picked up a case of San Marzano tomatoes and he went to town. This is something we now have down to a science. He makes the sauce and I can it. Putting up 14 or more quarts of sauce can either be a chore or it can be fun. We make labels and make it fun.
Here’s the scaled-down version – we generally do this times six.
Victor’s Pasta Sauce
- 2 – 28oz cans of crushed tomatoes
- 1 – Sm can tomato paste
- 1-2 cloves of garlic (or to taste if you like more) chopped fine
- Olive oil
- Dried Italian seasonings
- freshly-dried Oregano
- Hot red pepper flakes (a tsp or more or less to taste)
- Salt and Pepper to taste
- Red wine (always cook with a decent wine, never “cooking” wine) about a cup or cup and a half
- Meat – such as Italian sausage or some nice beef or pork ribs or pork chops
Ok…I ALWAYS make my sauce with meat, so start with a deep, heavy pot and add about 3-4 TBS of olive oil. On high heat, once the oil is hot, start frying the sausage or pork, Let the meat get good and caramelized although you don’t have to cook it all the way through because you’ll add it back to the sauce to finish. Once the meat is browned take it out of the pot, put it on a plate and set aside.
Lower the heat to medium and sauté the tomato paste for a couple of minutes until it begins to “melt”. Add the chopped garlic and sauté with the tomato paste for just a minute (no longer or it will burn). Then add about a cup of the red wine and deglaze the pan with it, scrapping up all the good bits that stuck to the bottom when cooking the meat.
When the wine reduces by about ½ start adding the canned tomatoes. Add one can of hot water for every can of tomatoes you use.
Now start adding the dried Italian seasonings. I eyeball it but I would guess a good 2 TBS is fine. Add about another ½ cup of red wine, with red pepper flakes, salt and pepper. Stir everything into the sauce. It will be very thin at this point.
Add back the cooked meat. Now this is important….at the bottom of the plate you let the meat rest on will be some of the oil and juices that seeped out. Pour that back into the pot. It has a lot of flavor in it.
Bring the sauce back to a boil then turn the heat down low and let it simmer for at least 1 and a half hours, stirring every 15 to 20 minutes to keep it from burning. It should reduce by about a third or a little less and get thicker. The meat will absorb the sauce and get very tender.
When I make meatballs, I don’t fry them, I bake them on a sheet pan. When I do, I add them to the simmering sauce when they’re done so they also absorb the flavor.
I usually make the sauce early in the day and after it’s done, just let it sit on the stove until dinner then I re-heat it. This should make enough sauce for a couple of dinners or good sized lasagna.
While the sauce was simmering, I made bread. We need crusty bread for the pasta dish Victor is making for us, tonight. We’re not having his sauce – but we will tomorrow night. Tonight he’s making a Spicy Spaghetti with Caramelized Onions… More on the in the next post.
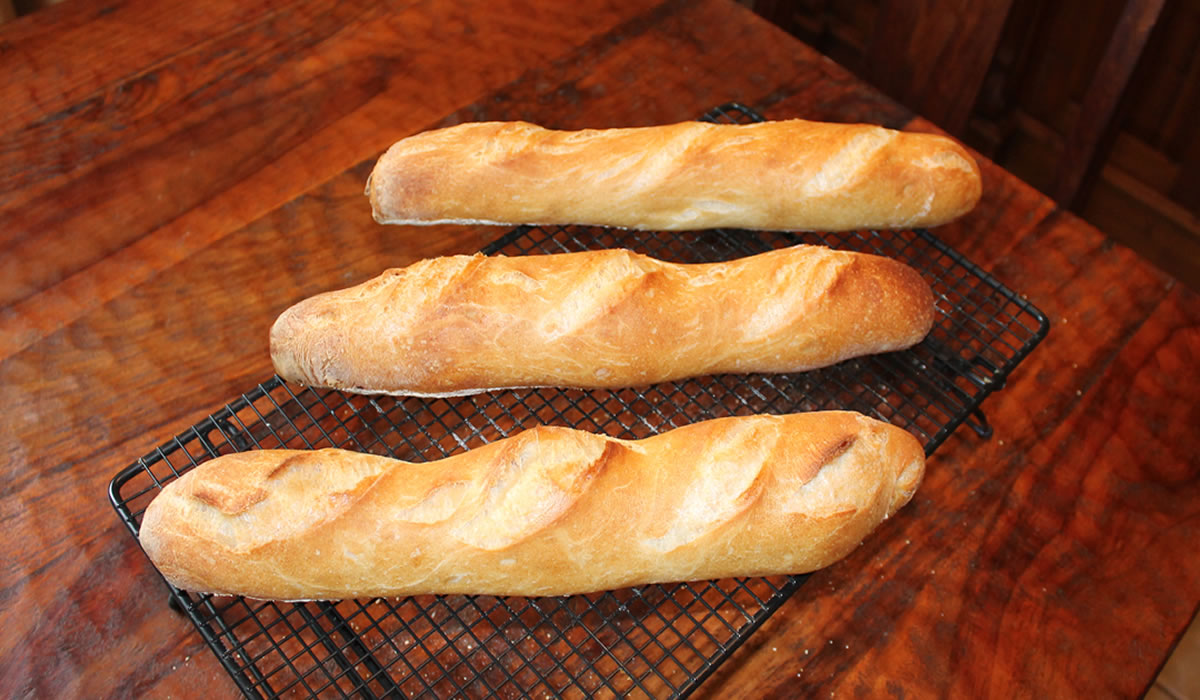
I definitely wanted something crusty, so I looked into the files and found this one originally from Martha Stewart. It takes a while to put together but it is easy.
The starter needs to stand for 12 to 15 hours, so plan accordingly!
Crusty Baguettes or Rolls
adapted from Martha Stewart Living
Starter
- 11 ounces all-purpose flour (2 1/4 cups plus 1 tablespoon), plus more for dusting
- Pinch of active dry yeast
- 5 1/2 ounces cool water (75 degrees to 78 degrees; 2/3 cup)
For the Dough
- 11 ounces all-purpose flour (2 1/4 cups plus 1 tablespoon)
- 1 3/4 teaspoons active dry yeast
- 6 ounces cool water (75 to 78 degrees; 3/4 cup)
- 1 3/4 teaspoons fine sea salt
Directions
1. Make the starter: Stir together flour, yeast, and water with a rubber spatula in a medium bowl. Cover with plastic wrap, and let stand at cool room temperature until it has risen slightly and bubbles cover entire surface, 12 to 15 hours.
2. Make the dough: Whisk together flour and yeast in a large bowl. Add water and starter, and stir with spatula until mixture comes together in a slightly sticky, loosely formed ball of dough. Cover with plastic wrap and let rest for 20 minutes.
3. Gently turn dough onto an unfloured work surface. Sprinkle with salt.
4. To knead: Gather dough, lifting it above work surface. Hold one end of dough close to you while you cast the other end in front of you, onto the surface. Pull the end of dough in your hands toward you, stretching it gently, then fold the dough in half on top of itself. Repeat. Lift, cast, stretch, and fold. Knead the dough until it is smooth, supple, and elastic, 8 to 10 minutes. Use a dough scraper to clean the surface as needed, adding the scraps to the dough. (Dough will be very sticky, but avoid adding more flour until the end, when it may be necessary to add a very small amount. Add the flour to your fingers, not the dough.) Form into a ball.
5. Place dough in a lightly oiled bowl. Cover with oiled plastic wrap. Let rise at cool room temperature for 45 minutes.
6. Gently turn dough onto a lightly floured surface. (Do not punch down.) Fold into thirds, as you would a business letter. Then fold it in half crosswise. Return to bowl, cover, and let rise at cool room temperature until it has almost doubled, at least 75 minutes.
7. Gently turn dough onto a lightly floured surface. Using a dough scraper or a knife, divide dough into equal portions (3 if making baguettes, 2 if making boules or rolls). Cover with oiled plastic wrap, and let rest for 20 minutes.
8. On a lightly floured surface, spread each portion of dough into a rectangle that’s roughly 10 by 6 inches. Fold dough into thirds again, as you would a business letter, pressing seams with your fingers. Shape portions into baguettes, rolls, or boules.
To Make French Rolls
1. Working with 1 portion of dough at a time, keeping remaining dough covered, fold dough in half lengthwise to form a tight, narrow log. Gently press edges with lightly floured fingertips to seal. Using a dough scraper or a knife, cut into 8 pieces.
2. Gather edges, and gently pull and tuck them underneath the dough to create a round shape, pinching to seal.
3. Place dough on the work surface. Cup one hand around dough, and rotate it in circles until a smooth, taut ball forms.
4. Place rolls on a generously floured linen towel or a parchment-lined baking sheet. Cover loosely with oiled plastic wrap, and let rise at cool room temperature until rolls have almost doubled and a floured finger pressed into side leaves a slight indentation, 30 to 40 minutes.
5. Place a skillet on oven rack adjusted to lowest position and a baking stone on middle oven rack. Preheat oven to 500 degrees. If using a linen towel, gently transfer rolls to a parchment-lined baking sheet. Just before baking, use a lame or a razor blade to slash the surface of each roll, forming an X. Pour 1/2 cup hot water into skillet in oven. Slide rolls and parchment onto baking stone.
6. Immediately reduce oven to 450 degrees. Bake until rolls are deep golden brown, sound hollow when bottoms are thumped, and interiors register 205 degrees on an instant-read thermometer, 35 to 40 minutes. Let cool on racks.
In the grand scheme of things, I can’t think of a better or more fun way to spend Valentine’s – or any day for that matter.
Talk about livin’ the dream…
