We had our annual Christmas with Linda and David, today. It is always a fun time and we always think up some fun foods to have with them. They do the same when we hit their home in July. It’s a twice-a-year food-fest that we all really enjoy.
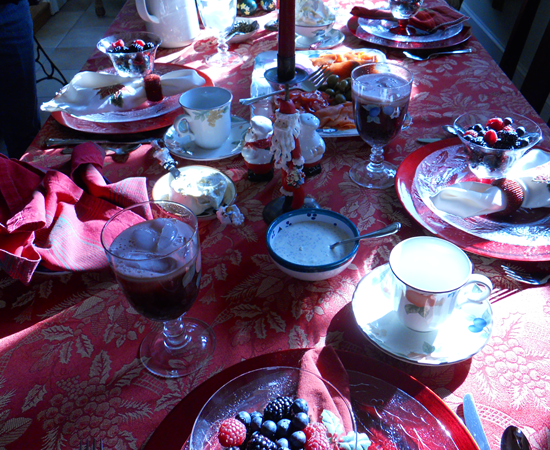
Victor came up with the idea of a huge Lox-and-Bagels platter. Smoked salmon, bagels, cream cheeses (as in plain, garlic, herb), red onions, capers, sliced tomatoes, olives, chopped eggs… Plus thin-sliced whole-grain rye bread and fresh berries with a honey and poppy seed creme fraiche. Sparkling beverages and lots of coffee.
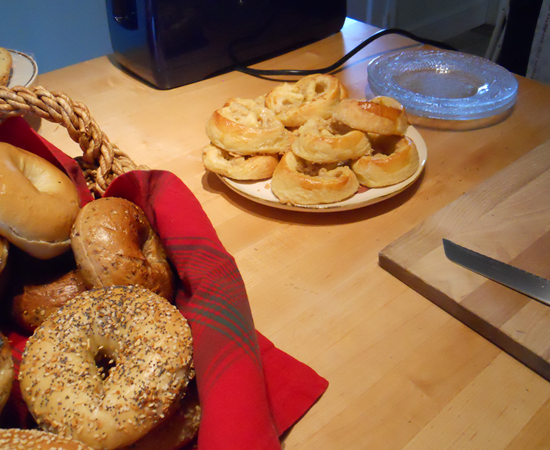
But to start, we had fresh-from-the-oven Danish pastries.
I’ve already told the story of learning to roll Danish pastry when I was a mere child 50 years ago. And then there was the making of thousands upon thousands of sweet rolls on the aircraft carrier… Like riding a bike, you just don’t forget.
The Danish were a lot of fun. A lot of work, but a lot of fun. And… I made the full batch of dough knowing I was only going to use a fourth of it today. The rest is for Christmas Morning! It will be fun to have while we’re opening gifts.
The Danish were light, buttery, soft, and downright delicious! They were a bit misshapen, but that was because I was trying for a shape I only had a vague recollection of. Because I made the miniature Danish, they didn’t retain the shape as well as if they had been full-sized. For Christmas I’ll just do a traditional roll and work on the other shape some other time.
I used the recipe from The Love To Bake Pastry Cookbook from Fantasia Confections in San Francisco, written by founder, Ernest Weil.
As I’ve noted before, Mr. Weil was a great baker, but his recipe-writing can be a bit daunting. It is important to always read through recipes completely before starting anything – and especially important with these.
The Danish Pastry is composed of several recipes and then a final set of instructions for putting them together and baking them.
It’s not difficult. It is time-consuming. Everything needs to be made in advance of the rolling out and baking, but it can also be made the day before – or in several steps over several days.
Danish Pastry Dough
Butter Rich & Flaky… Use to Bake Your Favorite Coffeecake or Pastries
Preparation Time: To prepare the coffeecake is time consuming and involves an overnight process, but to have the aroma of fresh baked coffeecake is worth the effort.
Yeild: 4 Wreathcakes or 4 Danish Krinkles or 3 to 5 Bundt Kuchen, depending on the size of the tins, or 20 4″ Danish Pastries or 30 3″ miniature Danish pastries or 20 Pecanrolls or any combination.Advance preparation:
Depending on your choice of coffeecake you have tyo prepare baking pans.Equipment:
Upright electric mixer, rolling pin, baking pans.Ingredients:
- 1 1/4 cup milk (heated to approx. 120)
- 2 packages active dry yeast
- 2 tsp. sugar
- 2 tbsp all purpose flour
- 1/2 tsp salt
- 1/4 cup sugar
- 1 tbsp lemon zest
- 2 tsp vanilla
- 1 whole egg
- 1 egg yolk
- 1/2 cube butter, melted (2oz)
- 3 cups all-purpose flour
- 2 1/2 cubes butter (10oz)
- 2 tbsp butter
Procedure:
Heat milk to approx 120 and pour into mixing bowl with dough hook attached. Add yeast, 2 tsp. sugar, 2 tbsp. all-purpose flour and stir well.When this mixture bubbles in about 5-10 minutes, add the salt, sugar, lemon zest, vanilla, egg, egg yolk, and melted butter. Stir on the lowest speed for about 1 minute.
Continue on slow speed and add 2 1/2 cups of the 3 cups of flour. Mix on slow speed for 2 minutes. Scrape bottom and sides of bowl with plastic spatula. Turn mixer to slow speed and slowly add the remaining 1/2 cup of flour. You may have to add an extra 1/4 cup of flour. Take the dough from the mixing bowl and place on a well-floured tabletop. Shape into a rectangle and let rest for 10 minutes. In the meantime, take out of the refrigerator the 2 1/2 cubes of butter cut into small pieces. Sprinkle 2 tbsp of flour all over the butter. With your hands, mix flour and butter to make pliable to place on dough.
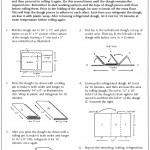
Three Fold Process for dough
It was easier to reproduce the book pages than try and explain this!
Vanilla Butter Cream
Ingredients:
- 4 large egg whites
- 1 cup granulated sugar
- 1/4 tsp salt
- 2 tsp vanilla extract
- 2 tsp vegetable oil
- 3 cubes unsalted butter, soft (12 oz)
Equipment and Utensils:
Upright or handheld mixer, wire whip, plastic spatula, medium size pot for water bath, candy thermometer.Procedure:
Place bowl of the electric mixer in a pot filled with enough water to submerge the bowl 1/3 of the way in the pot. Combine egg whites, sugar, salt, and vanilla in this bowl and heat to approx 165 while constantly mixing with a wire whip. This might take 3 to 4 minutes. Remove from the heat and attach the bowl to the electric mixer.Using the wire whip attachment, run on medium speed until the mixture cools down to 120 (approx 1 minute.) Then run an additional 2 minutes on hgh until a stiff meringue forms. Stop the machine and p[lace 1/3 of the meringue into a small bowl and set aside. Run the mixer on medium speed and gradually place in small amounts, the butter and oil into the rest of the meringue. When the ingredients are incorporated and smooth (without any lumps) add the meringue that was set aside. Run the mixer on medium speed approx 2 minutes until all is incorporated.
Use within 2 days if kept at room temperature. Stored in a closed container and refrigerated, it will keep for up to 5 days. It is not recommended to freeze. Before using, bring to room temperature and mix with a wire whip until smooth, soft, and easy to apply.
Butter Streusel
Yield: Approx 5 cups
Ingredients:
- 2 cubes unsalted butter (8 oz)
- 1/2 cup sugar
- 2 1/4 cups all-purpose flour
- 2 tsp vanilla extract
- 2 tsp cinnamon
- 1 whole egg, beaten
Equipmemnt and Utensils:
Food processor, upright mixer with flat beater, or mix by hand.Procedure:
Cut up the cold butter into small pieces and place with all the other ingredients except the egg into the bowl of the food processor. Pulse until it forms a coarse meal and then dd the egg. Continue pulsing until the mixture forms small crumbs. If it is too dry, add 1 egg yolk. Palce on a tray to allow for drying and set aside until ready to use. If there is any left over you can keep it covered in a container for a few days at room tyemperature or you can freeze it or make only half the recipe.
Apriocot Glaze:
Ingredients:
- 1/2 cup water
- 1/4 cup sugar
- 1 cup apricot jam
Procedure:
Combimne the water and sugar in a small sauce pan and bring to a boil. Add the apricot jam and bring back to a boil. Remove from the heat and press through a sieve. Set aside until needed. To apply, heat until hot enough to brush on Danish Pastries or wreath cake.
Danish Pastries
Yield: 21 individual 4″ Danish pastries or 30 3″ individual miniature Danish Pastries.
Advance preparation:
Preheat oven to 375.
Since it takes 2 to 3 hours for the dough to be ready to be baked, preheat the oven 2 hours after you start making the Danidh pastries.Ingredients:
- 1 full recipe Danish dough rolled to 24″ x 16″ rectangle
- 2 cups Vanilla Cream
- 1/2 cup sugar mixed with 1 tsp cinnamon
Toppings:
Your choice per pastry
- 1 or 2 tbsp jam, custard, or butter streusel
- Fresh fruit such as berries, or slices ofpeach, apricot, or apple
- 2 whol;e eggs beaten in a small bowl
- 1 cup apricot glaze
Optional:
For raisin Danish use 2 cups raisinsEquipment and Utensils:
3 to 4 12″ x 16″ baking trays lined with baking paper, offset metal spatula, small bowl, pastry brush, rolling pin.Procedure:
Dust board with flour and place the 24″ width of dough horizontally on the board. Spread the butter cream on the dough and sprinkle with the cinnamon sugar, leaving about a 1 1/2″ margin, without filling at the bottom edge of the dough. Brush this part with egg.Starting at the top, roll the dough down to form a long roll, pressing the end of the dough down onto the egg-brushed part to seal the roll. The seam of the roll should end up on the bottom.
If the dough becomes too soft, refrigerate for 309 minutes before cutting. otherwise, slice approx 21 slices of Danish rolls and place on 2 or 3 baking trays far apart. They will almost double in size. Brush the top with egg. Set the trays in a warm, draft-free environment so the pastries will almost double in size. Aftyer approx 30 minutes you can top the pastries with your favorite toppings. (Check to see if you have any leftover toppings or fillings from previous baking, so you can use them.) The doubling in size can take 1 to 2 hours.
Bake at 375 fopr approx 15 to 20 minutes until the pastries are golden brown (miniature Danish, 12 to 15 minutes.) With a metal spatula you can lift up the bottom of the pastries to see if they are baked. Take tray out of the oven and brush with the hot apricot glaze. (Be careful not to disturb the toppings.)
Danish pastries are best served fresh and warm. They can be kept frozen for 2 months, boxed and well-wrapped in foil, and reheated in foil before serving.
It looks daunting. It’s not.
And they really, really taste good!


