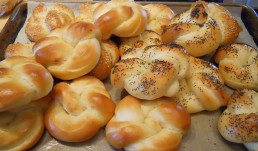
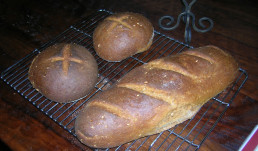
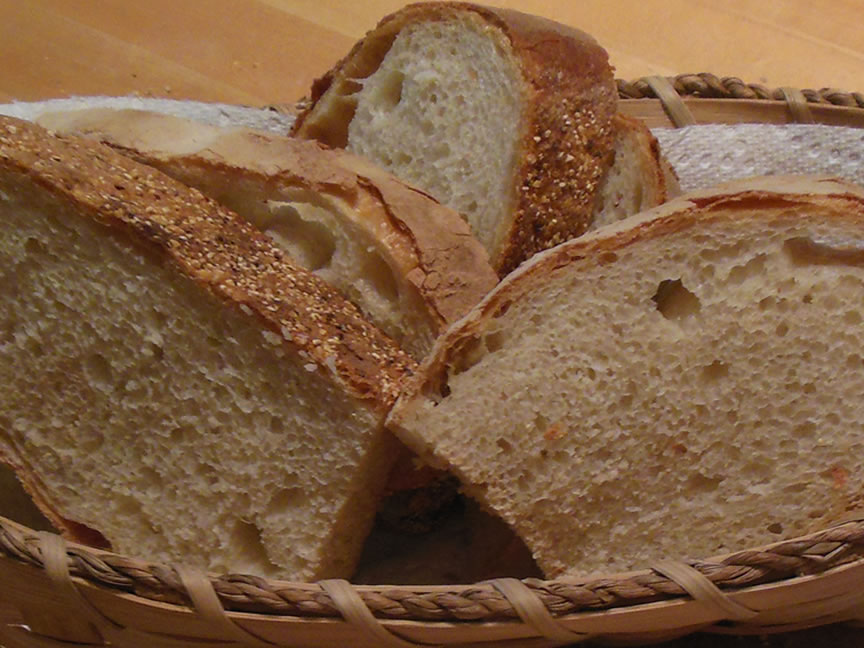
Knotted Dinner Rolls


adapted from From Fine Cooking Magazine
For the dough
- 1-1/2 cups whole milk; more as needed
- 1 packet (1/4 oz. or 2-1/4 tsp.) instant or active dry yeast
- 1/4 cup vegetable oil; more as needed
- 1 oz. (2 Tbs.) unsalted butter
- 1/4 cup granulated sugar
- 1 lb. 7 oz. (5-1/4 cups) unbleached bread flour; more as needed
- 1-1/4 tsp. table salt or 2 tsp. kosher salt
- 1 large egg
For shaping and baking
- Vegetable oil spray
- 1 large egg
- Poppy or sesame seeds for garnish (optional)
Make the dough
In a small saucepan, heat the milk until lukewarm (about 95°F). Remove from the heat and whisk in the yeast until it dissolves. Add the oil and butter—the butter may begin to melt, but it’s OK if it doesn’t melt completely—and then whisk in the sugar. Let rest until the yeast just begins to float to the surface, about 5 minutes.
In a stand mixer fitted with the paddle attachment (or in a large bowl), combine the flour, salt, and egg. Add the yeast mixture and mix on low speed (or with a large spoon) until a coarse ball of dough forms, about 1 minute. Let rest for 5 minutes.
Replace the paddle attachment with the dough hook and mix on medium-low speed (or knead by hand on a lightly oiled work surface) until the dough feels soft, supple, and pliable, about 3 minutes; it should feel tacky to the touch, but not sticky, and pull away from your finger when poked instead of sticking to it. If the dough is too sticky, add 1 Tbs. flour at a time, kneading to incorporate. If it’s stiff, knead in 1 Tbs. of milk at a time.
Rub a little vegetable oil on a work surface to create an 8-inch circle and put the dough on this spot. Stretch and fold the dough over itself from all four sides to the center, crimping it where the folded ends meet, to form it into a tight, round ball.
Put the dough seam side down in a lightly oiled bowl that’s twice the size of the dough. Tightly cover with plastic wrap. Let sit at room temperature until doubled in size, about 90 minutes.
Shape the rolls
Tip: Need help shaping your rolls? Check out our step-by-step guide on how to shape knotted dinner rolls.
Line two 13×18-inch rimmed baking sheets with parchment or nonstick baking liners and lightly mist them with vegetable oil spray.
Using a bench knife, divide the dough into eighteen pieces (about 2-1/4 oz. each).
With your hands, roll one piece into a 12-inch-long rope. If the dough starts to stick, mist your work surface lightly with vegetable oil spray or wipe it with a damp towel. Don’t use flour.
Wrap the dough around your fingers into a loose knot; there should be about 2 inches of dough free at each end. Wrap the left end of the dough up and over the loop. Wrap the right end down and under the loop. Lightly squeeze the two ends of dough together in the center to secure them.
Gently squeeze the whole piece of dough into a nice rounded shape. Put the roll, pretty side up, on a baking sheet. Repeat with the remaining dough. Mist the top of the rolls with vegetable oil spray and cover loosely with plastic wrap.
Let the rolls sit at room temperature or refrigerated until they just begin to swell, 30 minutes to 1 hour for room-temperature dough, 1 to 1-1/2 hours for refrigerated dough.
Bake the rolls
Position racks in the upper and lower thirds of the oven. If using a convection oven, heat it to 375°F; if using a conventional oven, heat it to 400°F.
Thoroughly whisk the egg with 1 Tbs. water and brush all over each roll. Sprinkle poppy or sesame seeds (if using) on the rolls.
While the oven heats, let the rolls continue to rise at room temperature, 20 to 40 minutes. They should be 1-1/2 to 2 times their original size before they go in the oven. (Once in the oven, they will rise about 20 percent more.)
Put the baking sheets in the oven and bake for 6 minutes. Rotate the sheets 180 degrees and swap their placement on the racks. Continue baking until the rolls turn rich golden-brown on top and develop some browning underneath, another 6 to 8 minutes. Let the rolls cool on the sheets or on a cooling rack for 15 minutes before serving.
- 2-Day Rise Pizza Dough
- A Wholesome Loaf
- Aleppo Tomato Bread
- Anjero
- Bacon and Tomato Swirl
- Bagels
- Barmbrack
- Basic White Bread
- Braided French-Style Bread
- Breadsticks
- Brioche Dough
- Buttermilk Bulgur Bread
- Cheddar Beer Bread Rolls
- Chocolate Bread
- Ciabatta
- Cinnamon-Raisin Swirl Bread
- Crusty French Rolls
- Crusty Italian Bread
- Crusty Italian Sourdough
- Danish Pastries
- Dinner Rolls
- Double Wheat Whole Wheat Bread
- Dutch Crunch Rolls
- Five Grain Bread with Walnuts
- Focaccia
- Focaccia
- Focaccia Genovese
- Focaccia Ragusata
- Grandmother’s Dinner Rolls
- Guinness Rye Bread
- Hamburger Buns
- Hamburger Buns
- Hamburger Buns
- Honey Corn Rolls
- Hot Cross Buns
- Irish Country Bread
- Italian Easter Bread (Pinza)
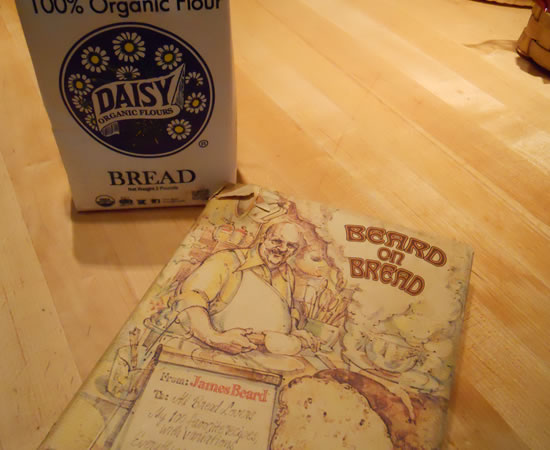
- James Beard Basic White Bread
- James Beard Single Rise Loaf
- James Beard’s French-Style Bread
- Japanese-Style White Bread
- Kanelsnurror
- Knotted Dinner Rolls
- Kolaches
- Kosovo Pitalke
- Medieval Bread
- Milk Bread
- Molasses Oatmeal Bread
- Multi Grain Sandwich Bread
- Multi-Grain Seeded Bread
- No Knead Artisan Bread
- No-Knead Walnut Raisin Bread
- No-Knead White Bread
- Oma’s Christmas Stollen
- Onion Poppy Seed Bread
- Pain Francais
- Pan Rustico – Rustic Spanish Bread
- Pane al Pistacchio
- Pane all’Olio
- Pane Bianco
- Pane di Como Antico
- Pane Pugliese
- Pane Siciliano
- Panettone
- Panini con erbe aromatiche
- Pecorino Cheese Bread
- Pepper Bread
- Pepper Bread
- Pistachio Onion Bread
- Pistachio, Onion, and Cheese Bread
- Pistolet
- Pita
- Pogaca Rolls
- Pumpkin Rolls
- Russian Black Bread
- Rustic Bread
- Rustic Potato Bread
- Rustic Red Fife Bread Flour
- Rye Berry Rye Bread
- Rye Bread
- San Francisco-Style Sourdough
- Sausage, Pecorino, and Leek Bread
- Semelle
- Soft Pretzels
- Sourdough Country Bread
- Taboun Flatbread
- Tartine’s Sourdough Bread
- Tomato Bread
- Walnut Raisin Bread
- Walnut Raisin Bread
- Walnut Raisin Sourdough Bread
- Whole Wheat Buttermilk Bread
- Wisconsin Spicy Cheese Bread
- Zupfe Loaf with Asiago, Parmesan, and Romano
Danish Pastries
from Fantasia Confections in San Francisco, written by founder, Ernest Weil.
The Danish Pastry is composed of several recipes and then a final set of instructions for putting them together and baking them.
It’s not difficult. It is time-consuming. Everything needs to be made in advance of the rolling out and baking, but it can also be made the day before – or in several steps over several days.
Danish Pastry Dough
Butter Rich & Flaky… Use to Bake Your Favorite Coffeecake or Pastries
Preparation Time: To prepare the coffeecake is time consuming and involves an overnight process, but to have the aroma of fresh baked coffeecake is worth the effort.
Yeild: 4 Wreathcakes or 4 Danish Krinkles or 3 to 5 Bundt Kuchen, depending on the size of the tins, or 20 4″ Danish Pastries or 30 3″ miniature Danish pastries or 20 Pecanrolls or any combination.
Advance preparation:
Depending on your choice of coffeecake you have tyo prepare baking pans.
Equipment:
Upright electric mixer, rolling pin, baking pans.
Ingredients:
- 1 1/4 cup milk (heated to approx. 120)
- 2 packages active dry yeast
- 2 tsp. sugar
- 2 tbsp all purpose flour
- 1/2 tsp salt
- 1/4 cup sugar
- 1 tbsp lemon zest
- 2 tsp vanilla
- 1 whole egg
- 1 egg yolk
- 1/2 cube butter, melted (2oz)
- 3 cups all-purpose flour
- 2 1/2 cubes butter (10oz)
- 2 tbsp butter
Procedure:
Heat milk to approx 120 and pour into mixing bowl with dough hook attached. Add yeast, 2 tsp. sugar, 2 tbsp. all-purpose flour and stir well.
When this mixture bubbles in about 5-10 minutes, add the salt, sugar, lemon zest, vanilla, egg, egg yolk, and melted butter. Stir on the lowest speed for about 1 minute.
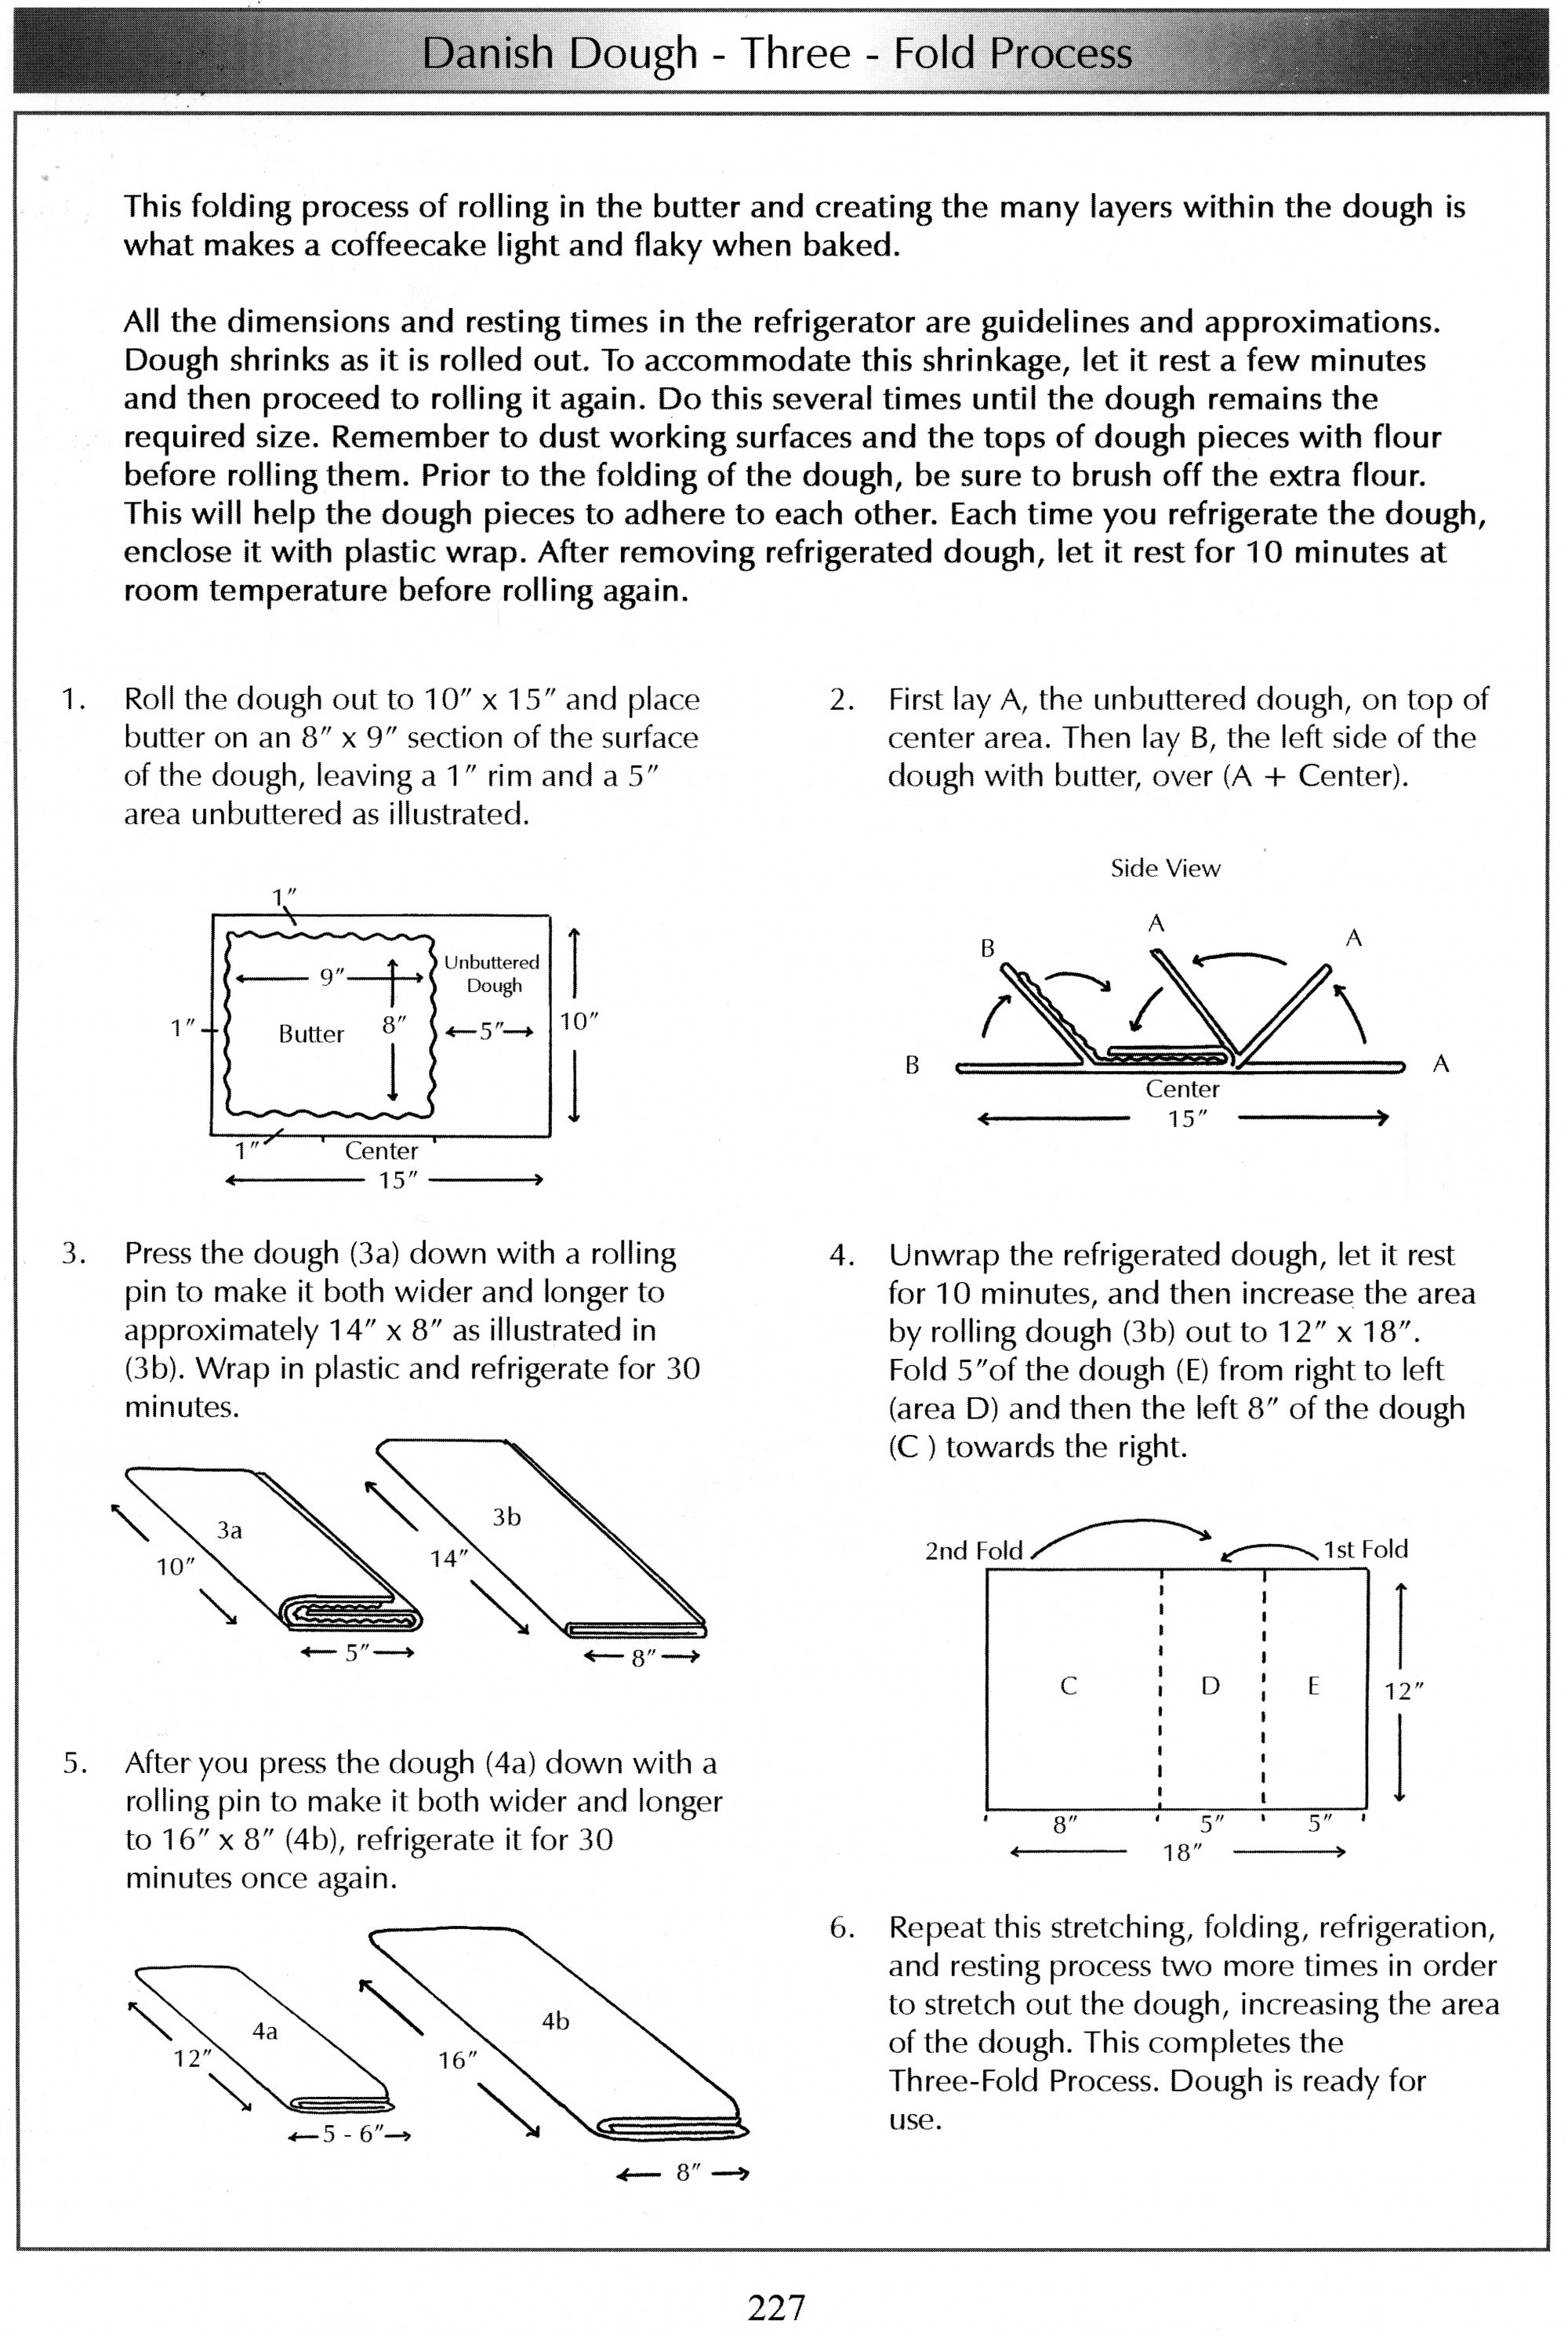
Continue on slow speed and add 2 1/2 cups of the 3 cups of flour. Mix on slow speed for 2 minutes. Scrape bottom and sides of bowl with plastic spatula. Turn mixer to slow speed and slowly add the remaining 1/2 cup of flour. You may have to add an extra 1/4 cup of flour. Take the dough from the mixing bowl and place on a well-floured tabletop. Shape into a rectangle and let rest for 10 minutes. In the meantime, take out of the refrigerator the 2 1/2 cubes of butter cut into small pieces. Sprinkle 2 tbsp of flour all over the butter. With your hands, mix flour and butter to make pliable to place on dough.
Three Fold Process for dough
It was easier to reproduce the book pages than try and explain this!
Vanilla Butter Cream
Ingredients:
- 4 large egg whites
- 1 cup granulated sugar
- 1/4 tsp salt
- 2 tsp vanilla extract
- 2 tsp vegetable oil
- 3 cubes unsalted butter, soft (12 oz)
Equipment and Utensils:
Upright or handheld mixer, wire whip, plastic spatula, medium size pot for water bath, candy thermometer.
Procedure:
Place bowl of the electric mixer in a pot filled with enough water to submerge the bowl 1/3 of the way in the pot. Combine egg whites, sugar, salt, and vanilla in this bowl and heat to approx 165 while constantly mixing with a wire whip. This might take 3 to 4 minutes. Remove from the heat and attach the bowl to the electric mixer.
Using the wire whip attachment, run on medium speed until the mixture cools down to 120 (approx 1 minute.) Then run an additional 2 minutes on hgh until a stiff meringue forms. Stop the machine and p[lace 1/3 of the meringue into a small bowl and set aside. Run the mixer on medium speed and gradually place in small amounts, the butter and oil into the rest of the meringue. When the ingredients are incorporated and smooth (without any lumps) add the meringue that was set aside. Run the mixer on medium speed approx 2 minutes until all is incorporated.
Use within 2 days if kept at room temperature. Stored in a closed container and refrigerated, it will keep for up to 5 days. It is not recommended to freeze. Before using, bring to room temperature and mix with a wire whip until smooth, soft, and easy to apply.
Butter Streusel
Yield: Approx 5 cups
Ingredients:
- 2 cubes unsalted butter (8 oz)
- 1/2 cup sugar
- 2 1/4 cups all-purpose flour
- 2 tsp vanilla extract
- 2 tsp cinnamon
- 1 whole egg, beaten
Equipmemnt and Utensils:
Food processor, upright mixer with flat beater, or mix by hand.
Procedure:
Cut up the cold butter into small pieces and place with all the other ingredients except the egg into the bowl of the food processor. Pulse until it forms a coarse meal and then dd the egg. Continue pulsing until the mixture forms small crumbs. If it is too dry, add 1 egg yolk. Palce on a tray to allow for drying and set aside until ready to use. If there is any left over you can keep it covered in a container for a few days at room temperature or you can freeze it or make only half the recipe.
Apriocot Glaze:
Ingredients:
- 1/2 cup water
- 1/4 cup sugar
- 1 cup apricot jam
Procedure:
Combimne the water and sugar in a small sauce pan and bring to a boil. Add the apricot jam and bring back to a boil. Remove from the heat and press through a sieve. Set aside until needed. To apply, heat until hot enough to brush on Danish Pastries or wreath cake.
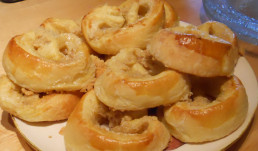
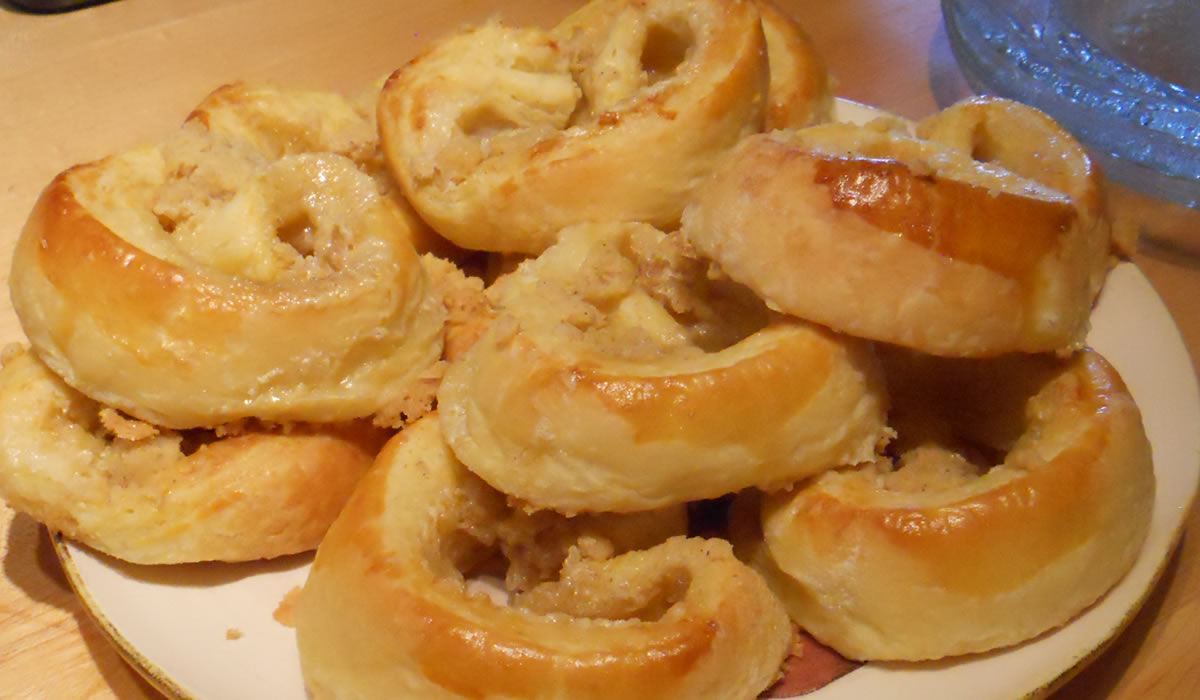
Danish Pastries
Yield: 21 individual 4″ Danish pastries or 30 3″ individual miniature Danish Pastries.
Advance preparation:
Preheat oven to 375.
Since it takes 2 to 3 hours for the dough to be ready to be baked, preheat the oven 2 hours after you start making the Danidh pastries.
Ingredients:
- 1 full recipe Danish dough rolled to 24″ x 16″ rectangle
- 2 cups Vanilla Cream
- 1/2 cup sugar mixed with 1 tsp cinnamon
Toppings:
Your choice per pastry
- 1 or 2 tbsp jam, custard, or butter streusel
- Fresh fruit such as berries, or slices ofpeach, apricot, or apple
- 2 whol;e eggs beaten in a small bowl
- 1 cup apricot glaze
Optional:
For raisin Danish use 2 cups raisins
Equipment and Utensils:
3 to 4 12″ x 16″ baking trays lined with baking paper, offset metal spatula, small bowl, pastry brush, rolling pin.
Procedure:
Dust board with flour and place the 24″ width of dough horizontally on the board. Spread the butter cream on the dough and sprinkle with the cinnamon sugar, leaving about a 1 1/2″ margin, without filling at the bottom edge of the dough. Brush this part with egg.
Starting at the top, roll the dough down to form a long roll, pressing the end of the dough down onto the egg-brushed part to seal the roll. The seam of the roll should end up on the bottom.
If the dough becomes too soft, refrigerate for 309 minutes before cutting. otherwise, slice approx 21 slices of Danish rolls and place on 2 or 3 baking trays far apart. They will almost double in size. Brush the top with egg. Set the trays in a warm, draft-free environment so the pastries will almost double in size. Aftyer approx 30 minutes you can top the pastries with your favorite toppings. (Check to see if you have any leftover toppings or fillings from previous baking, so you can use them.) The doubling in size can take 1 to 2 hours.
Bake at 375 fopr approx 15 to 20 minutes until the pastries are golden brown (miniature Danish, 12 to 15 minutes.) With a metal spatula you can lift up the bottom of the pastries to see if they are baked. Take tray out of the oven and brush with the hot apricot glaze. (Be careful not to disturb the toppings.)
Danish pastries are best served fresh and warm. They can be kept frozen for 2 months, boxed and well-wrapped in foil, and reheated in foil before serving.
- 2-Day Rise Pizza Dough
- A Wholesome Loaf
- Aleppo Tomato Bread
- Anjero
- Bacon and Tomato Swirl
- Bagels
- Barmbrack
- Basic White Bread
- Braided French-Style Bread
- Breadsticks
- Brioche Dough
- Buttermilk Bulgur Bread
- Cheddar Beer Bread Rolls
- Chocolate Bread
- Ciabatta
- Cinnamon-Raisin Swirl Bread
- Crusty French Rolls
- Crusty Italian Bread
- Crusty Italian Sourdough
- Danish Pastries
- Dinner Rolls
- Double Wheat Whole Wheat Bread
- Dutch Crunch Rolls
- Five Grain Bread with Walnuts
- Focaccia
- Focaccia
- Focaccia Genovese
- Focaccia Ragusata
- Grandmother’s Dinner Rolls
- Guinness Rye Bread
- Hamburger Buns
- Hamburger Buns
- Hamburger Buns
- Honey Corn Rolls
- Hot Cross Buns
- Irish Country Bread
- Italian Easter Bread (Pinza)
- James Beard Basic White Bread
- James Beard Single Rise Loaf
- James Beard’s French-Style Bread
- Japanese-Style White Bread
- Kanelsnurror
- Knotted Dinner Rolls
- Kolaches
- Kosovo Pitalke
- Medieval Bread
- Milk Bread
- Molasses Oatmeal Bread
- Multi Grain Sandwich Bread
- Multi-Grain Seeded Bread
- No Knead Artisan Bread
- No-Knead Walnut Raisin Bread
- No-Knead White Bread
- Oma’s Christmas Stollen
- Onion Poppy Seed Bread
- Pain Francais
- Pan Rustico – Rustic Spanish Bread
- Pane al Pistacchio
- Pane all’Olio
- Pane Bianco
- Pane di Como Antico
- Pane Pugliese
- Pane Siciliano
- Panettone
- Panini con erbe aromatiche
- Pecorino Cheese Bread
- Pepper Bread
- Pepper Bread
- Pistachio Onion Bread
- Pistachio, Onion, and Cheese Bread
- Pistolet
- Pita
- Pogaca Rolls
- Pumpkin Rolls
- Russian Black Bread
- Rustic Bread
- Rustic Potato Bread
- Rustic Red Fife Bread Flour
- Rye Berry Rye Bread
- Rye Bread
- San Francisco-Style Sourdough
- Sausage, Pecorino, and Leek Bread
- Semelle
- Soft Pretzels
- Sourdough Country Bread
- Taboun Flatbread
- Tartine’s Sourdough Bread
- Tomato Bread
- Walnut Raisin Bread
- Walnut Raisin Bread
- Walnut Raisin Sourdough Bread
- Whole Wheat Buttermilk Bread
- Wisconsin Spicy Cheese Bread
- Zupfe Loaf with Asiago, Parmesan, and Romano

James Beard Basic White Bread
Yield : 1 large loaf or two smaller loaves
Ingredients
- 1 package active dry yeast
- 1½ to 2 cups warm water (l00° to 115°, approximately)
- 2 teaspoons granulated sugar
- 3¾ to 4 cups all-purpose flour (approximately 1 pound)
- 1 tablespoon salt
- 1½ to 2 tablespoons softened butter for buttering bowl and pan
Directions
First, proof the yeast, which means testing it to make sure it is still active. To do this, pour the contents of the package into ½ cup of the warm water (about 100° to 115°), add the sugar, stir well, and set aside. After a few minutes the fermentation of the yeast will become apparent as the mixture swells and small bubbles appear here and there on the surface.
1. While the yeast is proofing, measure 3¾ cups unsifted flour into a 2- to 3-quart bowl with rounded sides. (Save the other ¼ cup flour for kneading, if necessary.) Add the tablespoon of salt and blend well.
2. Pour approximately ¾ cup warm waters into the flour and stir it in with a wooden spoon or with your hands. Add the yeast mixture, and continue stirring until the ingredients are thoroughly blended and tend to form a ball that breaks away from the sides of the bowl. (If the dough is very stiff, add a tiny bit more water.) Transfer the dough to a lightly floured marble slab, bread board, or counter top.
3. Now begin the kneading process, which evenly distributes the fermenting yeast cells through the dough. There are several ways to knead,4 but I prefer this one-handed method: Sprinkle the dough lightly with flour and also flour your working hand. Push the heel of your hand down into the dough and away from you. Fold the dough over, give it a quarter turn, and push again with the hand. Continue the sequence of pushing, folding, and turning until it becomes a rhythmic motion. Knead until the dough no longer feels sticky and has a smooth, satiny, elastic texture, adding more flour, if necessary; this will take anywhere from 4 to 10 minutes, depending on the character of the flour and the warmth and humidity of the room. To test whether the dough has been kneaded enough, make an indentation in it with your fingers; it should spring back. Sometimes blisters will form on the surface of the dough and break, which is another sign that the kneading is sufficient.
4. When the dough has reached the consistency described above—with experience you will know what this means by the feel of it—it is ready for the first rising. (Rising allows the fermenting yeast to produce tiny bubbles of carbon dioxide, which stretches the gluten in the flour and thus leavens the bread.) First, rest the dough on the board for several minutes. Meanwhile, wash out the mixing bowl; dry it, and rub it with 1 to l½ tablespoons of softened butter.
5. Place the ball of dough in the bowl, and roll it around so that it becomes completely coated with butter. (This will keep the surface from drying out and cracking as the dough rises.) Cover the bowl with a piece of plastic wrap or foil or with a towel and set in a warm, draft-free place. (The term “draft-free,” which you will encounter repeatedly, is used because the yeast must be pampered with constant warmth to keep it active.) Find a protected corner or shelf, or use a cool oven (it won’t hurt if the pilot light is on). Allow the dough to double in bulk, which will take about 1 to 2 hours.
It is difficult for a beginner to tell when dough has actually doubled in volume, but the increase is dramatically more than one might expect. You can get the idea best by pouring 4 cups of water into the empty bowl (before it has been greased) and then pouring in the same amount again, noting how high up the water comes. Fortunately there is another, surer test to show when the dough is properly risen. When it looks ready, simply make an indentation in it with two fingers. If the dough does not spring back, then it is ready. It will not hurt should it rise a little too much, but excessive rising will affect the flavor and texture of the finished bread. If for some reason you must prolong a rising, place the bowl of dough in the refrigerator to slow down the action of the yeast.
The dough must now undergo a second rising, which will take place in the baking pan. Thoroughly butter one or two heavily tinned loaf pans.
6. Then remove the cover from the bowl and deflate the dough by pushing down into it with your fist. Transfer it to a floured board, knead it rather well for about 3 minutes, then pat it into a smooth round or oval shape. Let it rest for 4 to 5 minutes, then form it into a loaf about 8 inches long and 3 inches wide.
7. Lift it carefully, drop it into the loaf pan, and smooth it out.Cover the loaf pan, as you did the bowl, and set it in a warm, draft-free place to double in bulk, at which point the loaf will have risen slightly above the edge of the pan. The second rising will take anywhere from 40 minutes to 1¼ hours, according to the warmth of the room and the way you have worked the dough. Don’t rush the process, and watch the dough carefully. Meanwhile, set the oven for 400°.
8. There are various ways to treat the loaf before it goes into the oven. For this recipe, merely brush the dough with cold water, which helps to give the top a textured crust.
9 Then, with a sharp knife make three diagonal slashes about ½ inch deep across the top of the loaf, both for a more professional look and to prevent cracking.
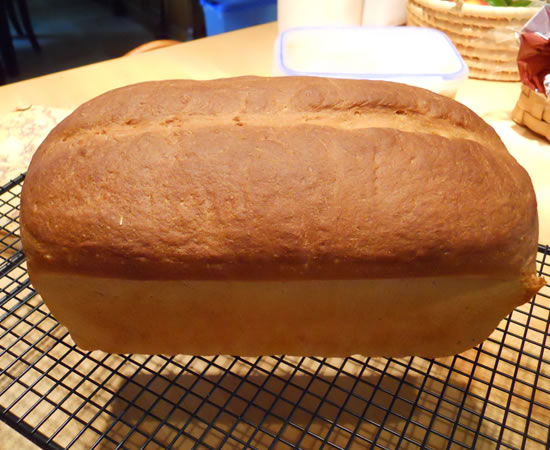
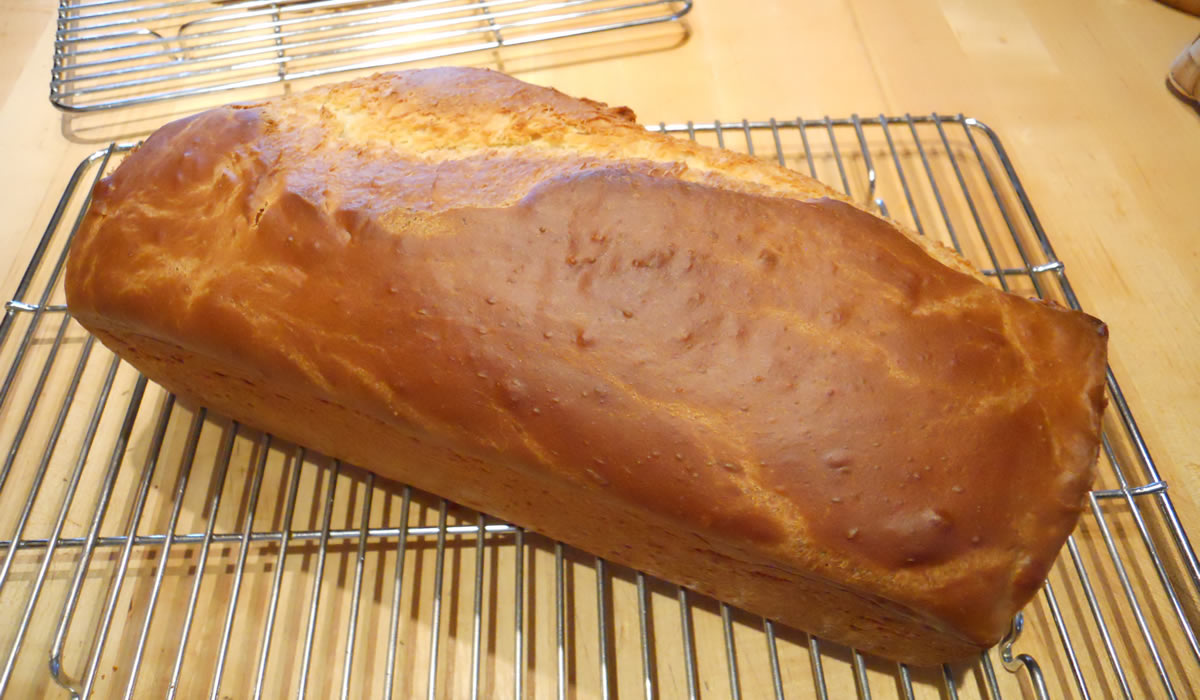
10 Place the pan near the center of the lower oven rack and set a timer for 35 minutes. Begin testing after that time, even though the total baking time may be as much as 50 minutes. To test, rap the top of the loaf with your knuckles. When done, it will sound hollow. Invert the loaf onto a towel held in one hand and test the bottom as well for that hollow sound. If it does not seem quite firm enough and needs only a little more baking, place the loaf directly on the oven rack to crisp the bottom, watching it carefully to prevent it from burning. If the test shows that the bottom is somewhat soft, slide the loaf back into the heated pan and return it to the oven to bake for 5 or 6 minutes more. Test the bottom again, and when firm enough, bake the unmolded loaf a few minutes for the final crisping. When completely baked, remove from the oven and set on a bread rack to cool.
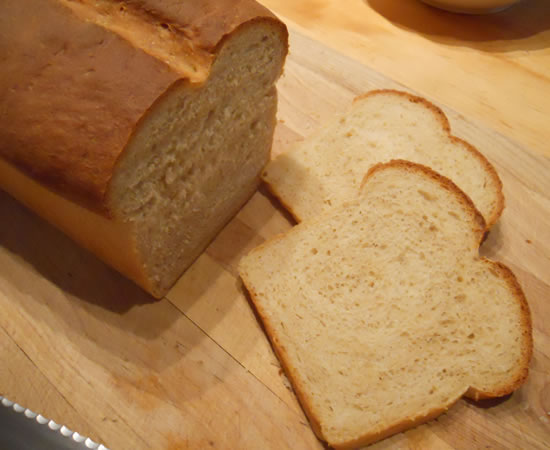
After 2 or 3 hours the bread is good for slicing. When it is thoroughly cooled it can be stored in a plastic bag, in or out of the refrigerator, for several days. It also freezes well, and a frozen loaf, wrapped airtight, can be stored for a month. To reheat, remove from the freezer, wrap in aluminum foil, and heat in a 350° oven for about 20 to 40 minutes.
VARIATION
Whole-Wheat Bread: This same recipe can be used to make a whole-wheat loaf. Merely use 2 cups whole-wheat flour and 1¾ to 2 cups white flour. For a slightly richer loaf, add 3 to 4 tablespoons olive oil or peanut oil to the flour before adding the water, and use slightly less water to compensate for the oil.
- 2-Day Rise Pizza Dough
- A Wholesome Loaf
- Aleppo Tomato Bread
- Anjero
- Bacon and Tomato Swirl
- Bagels
- Barmbrack
- Basic White Bread
- Braided French-Style Bread
- Breadsticks
- Brioche Dough
- Buttermilk Bulgur Bread
- Cheddar Beer Bread Rolls
- Chocolate Bread
- Ciabatta
- Cinnamon-Raisin Swirl Bread
- Crusty French Rolls
- Crusty Italian Bread
- Crusty Italian Sourdough
- Danish Pastries
- Dinner Rolls
- Double Wheat Whole Wheat Bread
- Dutch Crunch Rolls
- Five Grain Bread with Walnuts
- Focaccia
- Focaccia
- Focaccia Genovese
- Focaccia Ragusata
- Grandmother’s Dinner Rolls
- Guinness Rye Bread
- Hamburger Buns
- Hamburger Buns
- Hamburger Buns
- Honey Corn Rolls
- Hot Cross Buns
- Irish Country Bread
- Italian Easter Bread (Pinza)
- James Beard Basic White Bread
- James Beard Single Rise Loaf
- James Beard’s French-Style Bread
- Japanese-Style White Bread
- Kanelsnurror
- Knotted Dinner Rolls
- Kolaches
- Kosovo Pitalke
- Medieval Bread
- Milk Bread
- Molasses Oatmeal Bread
- Multi Grain Sandwich Bread
- Multi-Grain Seeded Bread
- No Knead Artisan Bread
- No-Knead Walnut Raisin Bread
- No-Knead White Bread
- Oma’s Christmas Stollen
- Onion Poppy Seed Bread
- Pain Francais
- Pan Rustico – Rustic Spanish Bread
- Pane al Pistacchio
- Pane all’Olio
- Pane Bianco
- Pane di Como Antico
- Pane Pugliese
- Pane Siciliano
- Panettone
- Panini con erbe aromatiche
- Pecorino Cheese Bread
- Pepper Bread
- Pepper Bread
- Pistachio Onion Bread
- Pistachio, Onion, and Cheese Bread
- Pistolet
- Pita
- Pogaca Rolls
- Pumpkin Rolls
- Russian Black Bread
- Rustic Bread
- Rustic Potato Bread
- Rustic Red Fife Bread Flour
- Rye Berry Rye Bread
- Rye Bread
- San Francisco-Style Sourdough
- Sausage, Pecorino, and Leek Bread
- Semelle
- Soft Pretzels
- Sourdough Country Bread
- Taboun Flatbread
- Tartine’s Sourdough Bread
- Tomato Bread
- Walnut Raisin Bread
- Walnut Raisin Bread
- Walnut Raisin Sourdough Bread
- Whole Wheat Buttermilk Bread
- Wisconsin Spicy Cheese Bread
- Zupfe Loaf with Asiago, Parmesan, and Romano

No-Knead White Bread

- 4-4 1/2 cups flour
- 1/4 cup sugar
- 1 tbsp salt
- 2 pkg active dry yeast
- 1 cup milk
- 1 cup water
- 1/4 cup oil
- 1 egg
Grease 9×5 loaf pan.
Combine 2 cups flour, yeast, sugar, and salt in a mixing bowl. Lightly warm milk, water, and oil. Pour into flour and mix well. Add 1 egg and continue mixing.
Add an additional 2 cups flour to form a stiff batter.
Cover, and allow to rise until doubled – about an hour.
Stir down dough and spoon into greaded pan.
Bake at 375°F for 45-50 minutes. Immediately remove from pan and cool on rack.
- 2-Day Rise Pizza Dough
- A Wholesome Loaf
- Aleppo Tomato Bread
- Anjero
- Bacon and Tomato Swirl
- Bagels
- Barmbrack
- Basic White Bread
- Braided French-Style Bread
- Breadsticks
- Brioche Dough
- Buttermilk Bulgur Bread
- Cheddar Beer Bread Rolls
- Chocolate Bread
- Ciabatta
- Cinnamon-Raisin Swirl Bread
- Crusty French Rolls
- Crusty Italian Bread
- Crusty Italian Sourdough
- Danish Pastries
- Dinner Rolls
- Double Wheat Whole Wheat Bread
- Dutch Crunch Rolls
- Five Grain Bread with Walnuts
- Focaccia
- Focaccia
- Focaccia Genovese
- Focaccia Ragusata
- Grandmother’s Dinner Rolls
- Guinness Rye Bread
- Hamburger Buns
- Hamburger Buns
- Hamburger Buns
- Honey Corn Rolls
- Hot Cross Buns
- Irish Country Bread
- Italian Easter Bread (Pinza)
- James Beard Basic White Bread
- James Beard Single Rise Loaf
- James Beard’s French-Style Bread
- Japanese-Style White Bread
- Kanelsnurror
- Knotted Dinner Rolls
- Kolaches
- Kosovo Pitalke
- Medieval Bread
- Milk Bread
- Molasses Oatmeal Bread
- Multi Grain Sandwich Bread
- Multi-Grain Seeded Bread
- No Knead Artisan Bread
- No-Knead Walnut Raisin Bread
- No-Knead White Bread
- Oma’s Christmas Stollen
- Onion Poppy Seed Bread
- Pain Francais
- Pan Rustico – Rustic Spanish Bread
- Pane al Pistacchio
- Pane all’Olio
- Pane Bianco
- Pane di Como Antico
- Pane Pugliese
- Pane Siciliano
- Panettone
- Panini con erbe aromatiche
- Pecorino Cheese Bread
- Pepper Bread
- Pepper Bread
- Pistachio Onion Bread
- Pistachio, Onion, and Cheese Bread
- Pistolet
- Pita
- Pogaca Rolls
- Pumpkin Rolls
- Russian Black Bread
- Rustic Bread
- Rustic Potato Bread
- Rustic Red Fife Bread Flour
- Rye Berry Rye Bread
- Rye Bread
- San Francisco-Style Sourdough
- Sausage, Pecorino, and Leek Bread
- Semelle
- Soft Pretzels
- Sourdough Country Bread
- Taboun Flatbread
- Tartine’s Sourdough Bread
- Tomato Bread
- Walnut Raisin Bread
- Walnut Raisin Bread
- Walnut Raisin Sourdough Bread
- Whole Wheat Buttermilk Bread
- Wisconsin Spicy Cheese Bread
- Zupfe Loaf with Asiago, Parmesan, and Romano

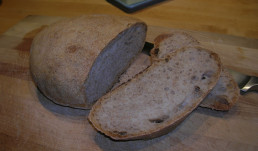
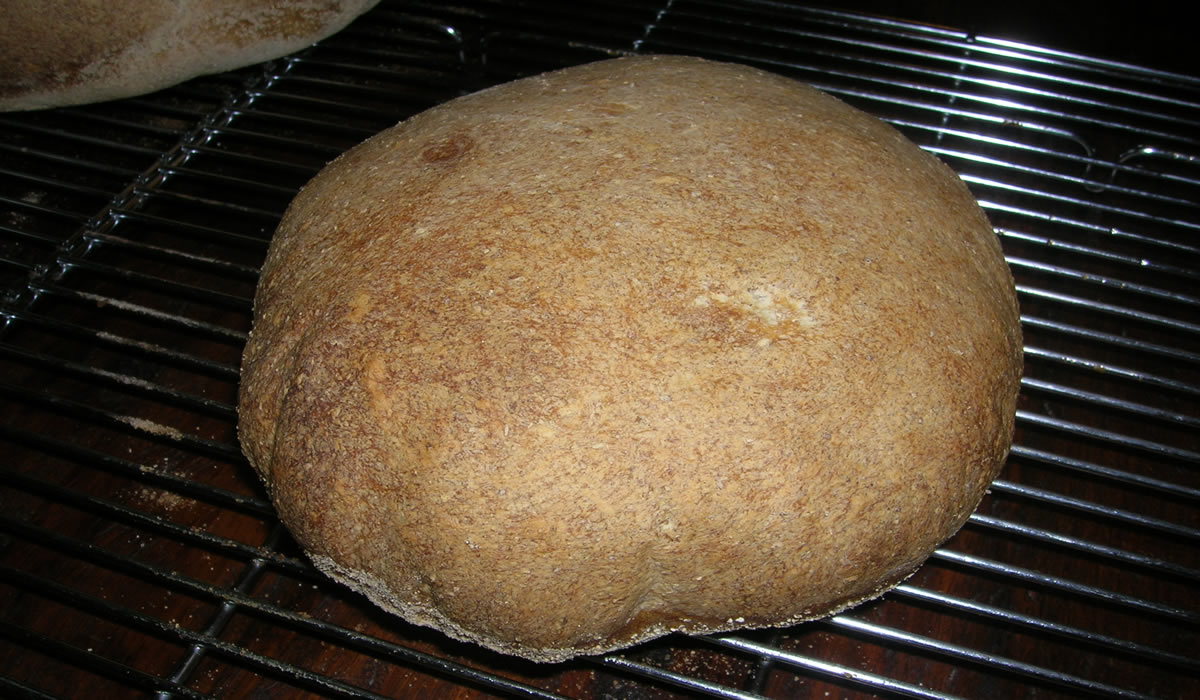
Rustic Bread
- 1 1/2 cups lukewarm water
- 1-1/2 tbsp yeast (1 packet)
- 3/4 tbsp kosher salt salt
- 3 cups flour
- 1/4 cup rye flour
- 1/4 cup whole wheat flour
Mix all ingredients. Let proof about 2 hours.
Refrigerate. (Dough is ready at this point but handles better when chilled.)
Preheat oven to 450°.
Form ball of dough into loaf.
Let rise about 30 minutes.
Bake for 25 minutes.
Cool before slicing.
- 2-Day Rise Pizza Dough
- A Wholesome Loaf
- Aleppo Tomato Bread
- Anjero
- Bacon and Tomato Swirl
- Bagels
- Barmbrack
- Basic White Bread
- Braided French-Style Bread
- Breadsticks
- Brioche Dough
- Buttermilk Bulgur Bread
- Cheddar Beer Bread Rolls
- Chocolate Bread
- Ciabatta
- Cinnamon-Raisin Swirl Bread
- Crusty French Rolls
- Crusty Italian Bread
- Crusty Italian Sourdough
- Danish Pastries
- Dinner Rolls
- Double Wheat Whole Wheat Bread
- Dutch Crunch Rolls
- Five Grain Bread with Walnuts
- Focaccia
- Focaccia
- Focaccia Genovese
- Focaccia Ragusata
- Grandmother’s Dinner Rolls
- Guinness Rye Bread
- Hamburger Buns
- Hamburger Buns
- Hamburger Buns
- Honey Corn Rolls
- Hot Cross Buns
- Irish Country Bread
- Italian Easter Bread (Pinza)
- James Beard Basic White Bread
- James Beard Single Rise Loaf
- James Beard’s French-Style Bread
- Japanese-Style White Bread
- Kanelsnurror
- Knotted Dinner Rolls
- Kolaches
- Kosovo Pitalke
- Medieval Bread
- Milk Bread
- Molasses Oatmeal Bread
- Multi Grain Sandwich Bread
- Multi-Grain Seeded Bread
- No Knead Artisan Bread
- No-Knead Walnut Raisin Bread
- No-Knead White Bread
- Oma’s Christmas Stollen
- Onion Poppy Seed Bread
- Pain Francais
- Pan Rustico – Rustic Spanish Bread
- Pane al Pistacchio
- Pane all’Olio
- Pane Bianco
- Pane di Como Antico
- Pane Pugliese
- Pane Siciliano
- Panettone
- Panini con erbe aromatiche
- Pecorino Cheese Bread
- Pepper Bread
- Pepper Bread
- Pistachio Onion Bread
- Pistachio, Onion, and Cheese Bread
- Pistolet
- Pita
- Pogaca Rolls
- Pumpkin Rolls
- Russian Black Bread
- Rustic Bread
- Rustic Potato Bread
- Rustic Red Fife Bread Flour
- Rye Berry Rye Bread
- Rye Bread
- San Francisco-Style Sourdough
- Sausage, Pecorino, and Leek Bread
- Semelle
- Soft Pretzels
- Sourdough Country Bread
- Taboun Flatbread
- Tartine’s Sourdough Bread
- Tomato Bread
- Walnut Raisin Bread
- Walnut Raisin Bread
- Walnut Raisin Sourdough Bread
- Whole Wheat Buttermilk Bread
- Wisconsin Spicy Cheese Bread
- Zupfe Loaf with Asiago, Parmesan, and Romano
Brioche Dough

adapted from Artisan Bread in 5 Minutes a Day
(makes about 4 loaves)
- 1 1/2 cups lukewarm water
- 1 1/2 tablespoons granulated yeast (2 packets)
- 1 1/2 tablespoons kosher salt
- 8 large eggs, lightly beaten
- 1/2 cup honey (this is my all time favorite!)
- 1 1/2 cups (3 sticks) unsalted butter, melted
- 7 1/2 cups unbleached all-purpose flour
Mix the yeast, salt, eggs honey and melted butter with the water in a 5-quart bowl, or lidded (not airtight) food container.
Mix in the flour, using a spoon until all of the flour is incorporated.
Cover (not airtight), and allow to sit at room temperature for about two hours.
The dough can be used as soon as it is chilled. This dough is way too sticky to use after the initial rise, but once it is chilled it is very easy to handle.
Preheat oven to 350°F, and then line baking sheets with parchment paper. Divide the dough into 3 ounce pieces, and roll into a ball on a lightly floured surface.
Place the baking sheet in the fridge for 15 minutes and then bake for 15-19 minutes until golden brown.
- 2-Day Rise Pizza Dough
- A Wholesome Loaf
- Aleppo Tomato Bread
- Anjero
- Bacon and Tomato Swirl
- Bagels
- Barmbrack
- Basic White Bread
- Braided French-Style Bread
- Breadsticks
- Brioche Dough
- Buttermilk Bulgur Bread
- Cheddar Beer Bread Rolls
- Chocolate Bread
- Ciabatta
- Cinnamon-Raisin Swirl Bread
- Crusty French Rolls
- Crusty Italian Bread
- Crusty Italian Sourdough
- Danish Pastries
- Dinner Rolls
- Double Wheat Whole Wheat Bread
- Dutch Crunch Rolls
- Five Grain Bread with Walnuts
- Focaccia
- Focaccia
- Focaccia Genovese
- Focaccia Ragusata
- Grandmother’s Dinner Rolls
- Guinness Rye Bread
- Hamburger Buns
- Hamburger Buns
- Hamburger Buns
- Honey Corn Rolls
- Hot Cross Buns
- Irish Country Bread
- Italian Easter Bread (Pinza)
- James Beard Basic White Bread
- James Beard Single Rise Loaf
- James Beard’s French-Style Bread
- Japanese-Style White Bread
- Kanelsnurror
- Knotted Dinner Rolls
- Kolaches
- Kosovo Pitalke
- Medieval Bread
- Milk Bread
- Molasses Oatmeal Bread
- Multi Grain Sandwich Bread
- Multi-Grain Seeded Bread
- No Knead Artisan Bread
- No-Knead Walnut Raisin Bread
- No-Knead White Bread
- Oma’s Christmas Stollen
- Onion Poppy Seed Bread
- Pain Francais
- Pan Rustico – Rustic Spanish Bread
- Pane al Pistacchio
- Pane all’Olio
- Pane Bianco
- Pane di Como Antico
- Pane Pugliese
- Pane Siciliano
- Panettone
- Panini con erbe aromatiche
- Pecorino Cheese Bread
- Pepper Bread
- Pepper Bread
- Pistachio Onion Bread
- Pistachio, Onion, and Cheese Bread
- Pistolet
- Pita
- Pogaca Rolls
- Pumpkin Rolls
- Russian Black Bread
- Rustic Bread
- Rustic Potato Bread
- Rustic Red Fife Bread Flour
- Rye Berry Rye Bread
- Rye Bread
- San Francisco-Style Sourdough
- Sausage, Pecorino, and Leek Bread
- Semelle
- Soft Pretzels
- Sourdough Country Bread
- Taboun Flatbread
- Tartine’s Sourdough Bread
- Tomato Bread
- Walnut Raisin Bread
- Walnut Raisin Bread
- Walnut Raisin Sourdough Bread
- Whole Wheat Buttermilk Bread
- Wisconsin Spicy Cheese Bread
- Zupfe Loaf with Asiago, Parmesan, and Romano
No Knead Artisan Bread

adapted from Artisan Bread in Five Minutes a Day
makes four 1 pound loaves.
- 3 cups lukewarm water
- 1-1/2 tablespoons granulated fast acting yeast (2 packets)
- 1-1/2 tablespoons kosher or other coarse salt
- 6-1/2 cups unsifted, unbleached all purpose white flour
Mixing and Storing the Dough
1. Warm the water slightly. It should feel just a little warmer than body temperature, about 100 degrees F. Warm water will rise the dough to the right point for storage in about 2 hours.
2. Add yeast and salt to the water in a 5 quart bowl or a plastic container with a lid.
3. Mix in the flour – kneading is unnecessary. Add all of the flour at once, measuring the flour by scooping it and leveling it off with a knife. Mix with a wooden spoon – do not knead. You’re finished when everything is uniformly moist, without dry patches. This step is done in a matter of minutes. The dough should be wet and loose.
4. Allow to rise. Cover with a lid (not airtight). Lidded plastic buckets designed for dough storage can be purchased many places. (I used a plastic square food storage container at my local grocery store. I just make sure that the lid is not snapped on completely). You want the gases to be able to escape a little. Allow the mixture to rise at room temperature until it begins to collapse (or at least flattens on top), about two hours. Longer rising times will not hurt your dough. You can use a portion of the dough any time after this period. Fully refrigerated wet dough is less sticky and is easier to work with than dough at room temperature. So, the first time you try this method, it’s best to refrigerate the dough overnight (or at least 3 hours) before shaping a loaf.
Baking
5. Shape your loaf. Place a piece of baking parchment paper on a pizza peel (don’t have a pizza peel – use an unrimmed baking sheet or turn a rimmed baking sheet upside down). Sprinkle the surface of your dough in the container with flour. Pull up and cut off about a 1-pound piece of dough (about the size of a grapefruit), using scissors or a serrated knife. Gently stretch the surface of the dough around to the bottom on all four sides, rotating the ball as you go. Dust your hands with flour if you need to. This is just to prevent sticking – you don’t want to incorporate the flour into the dough. The top of the dough should be smooth – the object here is to create a “gluten cloak” or “surface tension”. It doesn’t matter what the bottom looks like, but you need to have a smooth, tight top. This whole step should take about 30 seconds! Place the dough onto your parchment paper.
6. Let the loaf rise for about 40 minutes (it does not need to be covered). If it doesn’t look like it has risen much, don’t worry – it will in the oven. This is called “oven spring”.
7. Preheat a baking stone on the middle rack in the oven for at least 20 minutes at 450 degrees F. Place an empty rimmed baking pan or broiler pan on a rack below the baking stone. This pan is for holding water for steam in the baking step. (If you don’t have a baking stone, you can use a baking sheet, but you will not get the crisp crust on the bottom. You will still have a great loaf of bread. Baking stones are cheap and easy to find – Target carries them – and are a must for making pizzas, so go out and get one as soon as you can.)
8. Dust the loaf with a little flour and slash the top with a knife. This slashing is necessary to release some of the trapped gas, which can deform your bread. It also makes the top of your bread look pretty – you can slash the bread in a tic tac toe pattern, a cross, or just parallel slashes. You need a very sharp knife or a razor blade – you don’t want the blade to drag across the dough and pull it. As the bread bakes, this area opens and is known as “the bloom”. Remember to score the loaves right before baking.
9. Bake. Set a cup of water next to your oven. Slide the bread (including the parchment paper) right onto the hot baking stone. Quickly pour the water right into the pan underneath the baking stone and close the oven door. This creates the necessary steam to make a nice crisp crust on the bread. Bake at 450 F for about 25 – 30 minutes. When you remove the loaf from the oven, you will hear it crackle for a while. In baking terms, this is called “sing” and it is exactly what you want.
10. Cool. Allow the bread to cool for the best flavor and texture. It’s tempting to eat it when it’s warm, and that’s fine, but the texture is better after the bread has cooled.
11. Store the remaining dough in the refrigerator in your lidded (not airtight) container and use for up to 14 days. Every day your bread will improve in flavor. Cut off and shape more loaves as you need them. When your dough is gone, don’t clean the container. Go ahead and mix another batch – the remaining bits of dough will contribute flavor to the next batch, much like a sourdough starter does!
- 2-Day Rise Pizza Dough
- A Wholesome Loaf
- Aleppo Tomato Bread
- Anjero
- Bacon and Tomato Swirl
- Bagels
- Barmbrack
- Basic White Bread
- Braided French-Style Bread
- Breadsticks
- Brioche Dough
- Buttermilk Bulgur Bread
- Cheddar Beer Bread Rolls
- Chocolate Bread
- Ciabatta
- Cinnamon-Raisin Swirl Bread
- Crusty French Rolls
- Crusty Italian Bread
- Crusty Italian Sourdough
- Danish Pastries
- Dinner Rolls
- Double Wheat Whole Wheat Bread
- Dutch Crunch Rolls
- Five Grain Bread with Walnuts
- Focaccia
- Focaccia
- Focaccia Genovese
- Focaccia Ragusata
- Grandmother’s Dinner Rolls
- Guinness Rye Bread
- Hamburger Buns
- Hamburger Buns
- Hamburger Buns
- Honey Corn Rolls
- Hot Cross Buns
- Irish Country Bread
- Italian Easter Bread (Pinza)
- James Beard Basic White Bread
- James Beard Single Rise Loaf
- James Beard’s French-Style Bread
- Japanese-Style White Bread
- Kanelsnurror
- Knotted Dinner Rolls
- Kolaches
- Kosovo Pitalke
- Medieval Bread
- Milk Bread
- Molasses Oatmeal Bread
- Multi Grain Sandwich Bread
- Multi-Grain Seeded Bread
- No Knead Artisan Bread
- No-Knead Walnut Raisin Bread
- No-Knead White Bread
- Oma’s Christmas Stollen
- Onion Poppy Seed Bread
- Pain Francais
- Pan Rustico – Rustic Spanish Bread
- Pane al Pistacchio
- Pane all’Olio
- Pane Bianco
- Pane di Como Antico
- Pane Pugliese
- Pane Siciliano
- Panettone
- Panini con erbe aromatiche
- Pecorino Cheese Bread
- Pepper Bread
- Pepper Bread
- Pistachio Onion Bread
- Pistachio, Onion, and Cheese Bread
- Pistolet
- Pita
- Pogaca Rolls
- Pumpkin Rolls
- Russian Black Bread
- Rustic Bread
- Rustic Potato Bread
- Rustic Red Fife Bread Flour
- Rye Berry Rye Bread
- Rye Bread
- San Francisco-Style Sourdough
- Sausage, Pecorino, and Leek Bread
- Semelle
- Soft Pretzels
- Sourdough Country Bread
- Taboun Flatbread
- Tartine’s Sourdough Bread
- Tomato Bread
- Walnut Raisin Bread
- Walnut Raisin Bread
- Walnut Raisin Sourdough Bread
- Whole Wheat Buttermilk Bread
- Wisconsin Spicy Cheese Bread
- Zupfe Loaf with Asiago, Parmesan, and Romano
Buttermilk Bulgur Bread

- 1 tbsp active dry yeast
- 3 tbsp honey
- 1/2 cup bulgur
- 1/3 cup butter, melted
- 2 cups whole wheat flour
- 2 tbsp Cornmeal
- 1/4 cup warm water (110 degrees)
- 2 tsp tomato paste
- 1-1/2 cups buttermilk, warmed
- 1/2 tsp salt
- 2 cups white flour
Place yeast in a large bowl. Cover with warm water; let stand until yeast begins to soften, about 3 minutes. Add honey and tomato paste, and whisk until smooth. Stir in bulgur and buttermilk; let stand 20 minutes.
Stir the butter and salt into the bulgur mixture. Then stir in the whole wheat flour and about 1-1/2 cups unbleached white flour to make a stiff dough. Turn out onto a lightly floured surface. Knead for 15 minutes, adding more flour if necessary to keep dough from sticking. Transfer the dough to a lightly oiled bowl, turn once to coat and cover with plastic wrap. Let rise in a warm place until doubled in volume (about 1-1/2 hours).
Turn dough out onto a lightly floured surface; punch down and divide in half. Roll and pull each half until it resembles a loaf of French or Italian bread.
Sprinkle a baking sheet with coarse cornmeal and place the loaves on the sheet. Brush loaves lightly with water; cover loosely with a towel and let rise in a warm place until doubled in volume, 45 minutes to an hour.
Preheat oven to 400F.
With a sharp knife, slash the surface of the loaves four or five times; brush again with water. Bake until crisp and hollow sounding when tapped with your finger, about 25 minutes. Cool on a wire rack.
- 2-Day Rise Pizza Dough
- A Wholesome Loaf
- Aleppo Tomato Bread
- Anjero
- Bacon and Tomato Swirl
- Bagels
- Barmbrack
- Basic White Bread
- Braided French-Style Bread
- Breadsticks
- Brioche Dough
- Buttermilk Bulgur Bread
- Cheddar Beer Bread Rolls
- Chocolate Bread
- Ciabatta
- Cinnamon-Raisin Swirl Bread
- Crusty French Rolls
- Crusty Italian Bread
- Crusty Italian Sourdough
- Danish Pastries
- Dinner Rolls
- Double Wheat Whole Wheat Bread
- Dutch Crunch Rolls
- Five Grain Bread with Walnuts
- Focaccia
- Focaccia
- Focaccia Genovese
- Focaccia Ragusata
- Grandmother’s Dinner Rolls
- Guinness Rye Bread
- Hamburger Buns
- Hamburger Buns
- Hamburger Buns
- Honey Corn Rolls
- Hot Cross Buns
- Irish Country Bread
- Italian Easter Bread (Pinza)
- James Beard Basic White Bread
- James Beard Single Rise Loaf
- James Beard’s French-Style Bread
- Japanese-Style White Bread
- Kanelsnurror
- Knotted Dinner Rolls
- Kolaches
- Kosovo Pitalke
- Medieval Bread
- Milk Bread
- Molasses Oatmeal Bread
- Multi Grain Sandwich Bread
- Multi-Grain Seeded Bread
- No Knead Artisan Bread
- No-Knead Walnut Raisin Bread
- No-Knead White Bread
- Oma’s Christmas Stollen
- Onion Poppy Seed Bread
- Pain Francais
- Pan Rustico – Rustic Spanish Bread
- Pane al Pistacchio
- Pane all’Olio
- Pane Bianco
- Pane di Como Antico
- Pane Pugliese
- Pane Siciliano
- Panettone
- Panini con erbe aromatiche
- Pecorino Cheese Bread
- Pepper Bread
- Pepper Bread
- Pistachio Onion Bread
- Pistachio, Onion, and Cheese Bread
- Pistolet
- Pita
- Pogaca Rolls
- Pumpkin Rolls
- Russian Black Bread
- Rustic Bread
- Rustic Potato Bread
- Rustic Red Fife Bread Flour
- Rye Berry Rye Bread
- Rye Bread
- San Francisco-Style Sourdough
- Sausage, Pecorino, and Leek Bread
- Semelle
- Soft Pretzels
- Sourdough Country Bread
- Taboun Flatbread
- Tartine’s Sourdough Bread
- Tomato Bread
- Walnut Raisin Bread
- Walnut Raisin Bread
- Walnut Raisin Sourdough Bread
- Whole Wheat Buttermilk Bread
- Wisconsin Spicy Cheese Bread
- Zupfe Loaf with Asiago, Parmesan, and Romano
Pane Pugliese

Pane Pugliese is a rustic bread from Puglia – in Italy’s heel – and comes from The Italian Baker by Carol Field.
This bread requires a starter – biga – that needs to be made the day before you want to bake the loaf.
Biga
- 1/2 tsp active dry yeast = 1.4 g or 1/10 package fresh yeast** ≈ 1.5 g
- 1/4 cup warm water = 60 ml
- 1 1/4 cup water (room temperature) = 300 ml
- 3 3/4 cups unbleached all-purpose flour = 470 g
Stir the yeast into the warm water and let stand until creamy – about 10 minutes. Stir in the remaining water and then the flour, one cup at a time.
Mix with the paddle attachment on the mixer at the lowest speed about 2 minutes.
Remove to a slightly oiled bowl, cover, and let rise at cool room temperature for 6 to 24 hours. The starter will triple in volume and still be wet and sticky when ready. Cover and refrigerate until ready to use.
Pane Pugliese
- 1 packet dry yeast = 7 g
- 1/4 cup warm water = 60 ml
- 3 cups water (room temperature) = 710 ml
- 1 cup biga** ≈ 230 g (depends on hydration level)
- 7 1/2 cups all-purpose flour = 940 g
- 1 tbsp salt = 18 g
Proof the yeast in the warm water. Add 1 1/2 c water and the biga, mix till blended. Add flour and salt, mix till dough comes together and pulls off the sides of the bowl. Knead 3-5 minutes in a mixer, longer by hand. Dough will be very soft and elastic. Let rise about 3 hours, shape into 2 small round loaves or 1 big flattish one. If you have baking stones, place loaves on baking peel or on baking sheets sprinkled corn meal. Let rise about 1 hour. Preheat oven to 450°, and 10 minutes before baking flour the loaf tops and dimple them with your fingers. Bake 50-60 minutes for big loaves, 30-35 minutes for small. Tap the loaves to test for doneness (hollow=done) and cool on a rack.
- 2-Day Rise Pizza Dough
- A Wholesome Loaf
- Aleppo Tomato Bread
- Anjero
- Bacon and Tomato Swirl
- Bagels
- Barmbrack
- Basic White Bread
- Braided French-Style Bread
- Breadsticks
- Brioche Dough
- Buttermilk Bulgur Bread
- Cheddar Beer Bread Rolls
- Chocolate Bread
- Ciabatta
- Cinnamon-Raisin Swirl Bread
- Crusty French Rolls
- Crusty Italian Bread
- Crusty Italian Sourdough
- Danish Pastries
- Dinner Rolls
- Double Wheat Whole Wheat Bread
- Dutch Crunch Rolls
- Five Grain Bread with Walnuts
- Focaccia
- Focaccia
- Focaccia Genovese
- Focaccia Ragusata
- Grandmother’s Dinner Rolls
- Guinness Rye Bread
- Hamburger Buns
- Hamburger Buns
- Hamburger Buns
- Honey Corn Rolls
- Hot Cross Buns
- Irish Country Bread
- Italian Easter Bread (Pinza)
- James Beard Basic White Bread
- James Beard Single Rise Loaf
- James Beard’s French-Style Bread
- Japanese-Style White Bread
- Kanelsnurror
- Knotted Dinner Rolls
- Kolaches
- Kosovo Pitalke
- Medieval Bread
- Milk Bread
- Molasses Oatmeal Bread
- Multi Grain Sandwich Bread
- Multi-Grain Seeded Bread
- No Knead Artisan Bread
- No-Knead Walnut Raisin Bread
- No-Knead White Bread
- Oma’s Christmas Stollen
- Onion Poppy Seed Bread
- Pain Francais
- Pan Rustico – Rustic Spanish Bread
- Pane al Pistacchio
- Pane all’Olio
- Pane Bianco
- Pane di Como Antico
- Pane Pugliese
- Pane Siciliano
- Panettone
- Panini con erbe aromatiche
- Pecorino Cheese Bread
- Pepper Bread
- Pepper Bread
- Pistachio Onion Bread
- Pistachio, Onion, and Cheese Bread
- Pistolet
- Pita
- Pogaca Rolls
- Pumpkin Rolls
- Russian Black Bread
- Rustic Bread
- Rustic Potato Bread
- Rustic Red Fife Bread Flour
- Rye Berry Rye Bread
- Rye Bread
- San Francisco-Style Sourdough
- Sausage, Pecorino, and Leek Bread
- Semelle
- Soft Pretzels
- Sourdough Country Bread
- Taboun Flatbread
- Tartine’s Sourdough Bread
- Tomato Bread
- Walnut Raisin Bread
- Walnut Raisin Bread
- Walnut Raisin Sourdough Bread
- Whole Wheat Buttermilk Bread
- Wisconsin Spicy Cheese Bread
- Zupfe Loaf with Asiago, Parmesan, and Romano
Rye Bread

adapted from James Beard
- 1 pkg active dry yeast
- 3 tbsp honey
- 1/4 cup warm water
- 1 cup warm milk combined with 1/2 cup warm water
- 2 tbsp softened butter
- 1 heaping tbsp salt
- 1 tbsp caraway seeds
- 2 1/2 cups rye flour
- 3 cups all-purpose flour (or more, if needed)
- 1/4 cup cornmeal
- 1 egg white beaten lightly with 2 tbsp water
Disolve the yeast and honey in the warm water and allow the mixture to proof for 4 or 5 minutes.
Combine the warm milk and warm water with the softened butter and add to the yeast mixture along with the salt and caraway seeds.
Add the flour, 1 cup at a time, stirring well after each addition. When you have addeed about 4 1/2 cups the dough will become difficult to stir and quite sticky, but continue to add the remaining flour a tablespoon at a time.
Scrape out the dough onto a floured board, and using a baker’s scraper or a large metal spatula, scrape under the dough and fold the dough over. Continue to lift and fold, and with your free hand start pressing down and away from you on these folded areas, adding more flour as needed to dust your hands and to sprinkle the board.
After 2 or 3 minutes of this procedure you can eliminate the scraper.
Flour both hands and knead for about 10 minutes, until the dough is soft, velvety, and elastic.
Shape the dough into a ball and place in a well-buttered bowl, turning to coat with the butter. Cover with plastic wrap and place in a warm, draft-free area to double in bulk, which will take from 1 to 2 hours.
Punch down, turn out on a lightly floured board, and divide into two equal pieces.
Let the dough rest for 2 or 3 minutes, and then shape into two loaves, either free-form or for well-buttered 8 x 4 x 2-inch loaf pans.
If you are making free-form loaves allow them to rise, covered, on a buttered baking sheet sprinkled with cornmeal until almost doubled in size, and then quickly invert them and brush with the egg and water mixture.
Otherwise, let the loaves rise, covered, in their pans until they have doubled in bulk and then brushing the tops with the egg white and water mixture.
Bake at 400° from 45 to 50 minutes or until the loaves sound hollow when tapped with the knuckles.
Cool thoroughly on racks before slicing.
- 2-Day Rise Pizza Dough
- A Wholesome Loaf
- Aleppo Tomato Bread
- Anjero
- Bacon and Tomato Swirl
- Bagels
- Barmbrack
- Basic White Bread
- Braided French-Style Bread
- Breadsticks
- Brioche Dough
- Buttermilk Bulgur Bread
- Cheddar Beer Bread Rolls
- Chocolate Bread
- Ciabatta
- Cinnamon-Raisin Swirl Bread
- Crusty French Rolls
- Crusty Italian Bread
- Crusty Italian Sourdough
- Danish Pastries
- Dinner Rolls
- Double Wheat Whole Wheat Bread
- Dutch Crunch Rolls
- Five Grain Bread with Walnuts
- Focaccia
- Focaccia
- Focaccia Genovese
- Focaccia Ragusata
- Grandmother’s Dinner Rolls
- Guinness Rye Bread
- Hamburger Buns
- Hamburger Buns
- Hamburger Buns
- Honey Corn Rolls
- Hot Cross Buns
- Irish Country Bread
- Italian Easter Bread (Pinza)
- James Beard Basic White Bread
- James Beard Single Rise Loaf
- James Beard’s French-Style Bread
- Japanese-Style White Bread
- Kanelsnurror
- Knotted Dinner Rolls
- Kolaches
- Kosovo Pitalke
- Medieval Bread
- Milk Bread
- Molasses Oatmeal Bread
- Multi Grain Sandwich Bread
- Multi-Grain Seeded Bread
- No Knead Artisan Bread
- No-Knead Walnut Raisin Bread
- No-Knead White Bread
- Oma’s Christmas Stollen
- Onion Poppy Seed Bread
- Pain Francais
- Pan Rustico – Rustic Spanish Bread
- Pane al Pistacchio
- Pane all’Olio
- Pane Bianco
- Pane di Como Antico
- Pane Pugliese
- Pane Siciliano
- Panettone
- Panini con erbe aromatiche
- Pecorino Cheese Bread
- Pepper Bread
- Pepper Bread
- Pistachio Onion Bread
- Pistachio, Onion, and Cheese Bread
- Pistolet
- Pita
- Pogaca Rolls
- Pumpkin Rolls
- Russian Black Bread
- Rustic Bread
- Rustic Potato Bread
- Rustic Red Fife Bread Flour
- Rye Berry Rye Bread
- Rye Bread
- San Francisco-Style Sourdough
- Sausage, Pecorino, and Leek Bread
- Semelle
- Soft Pretzels
- Sourdough Country Bread
- Taboun Flatbread
- Tartine’s Sourdough Bread
- Tomato Bread
- Walnut Raisin Bread
- Walnut Raisin Bread
- Walnut Raisin Sourdough Bread
- Whole Wheat Buttermilk Bread
- Wisconsin Spicy Cheese Bread
- Zupfe Loaf with Asiago, Parmesan, and Romano