
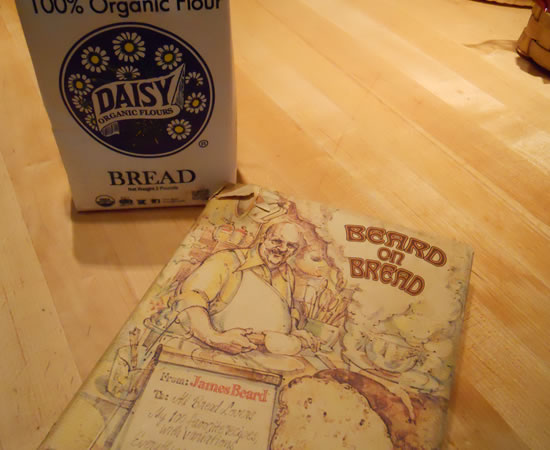
Yield : 1 large loaf or two smaller loaves
Ingredients
- 1 package active dry yeast
- 1½ to 2 cups warm water (l00° to 115°, approximately)
- 2 teaspoons granulated sugar
- 3¾ to 4 cups all-purpose flour (approximately 1 pound)
- 1 tablespoon salt
- 1½ to 2 tablespoons softened butter for buttering bowl and pan
Directions
First, proof the yeast, which means testing it to make sure it is still active. To do this, pour the contents of the package into ½ cup of the warm water (about 100° to 115°), add the sugar, stir well, and set aside. After a few minutes the fermentation of the yeast will become apparent as the mixture swells and small bubbles appear here and there on the surface.
1. While the yeast is proofing, measure 3¾ cups unsifted flour into a 2- to 3-quart bowl with rounded sides. (Save the other ¼ cup flour for kneading, if necessary.) Add the tablespoon of salt and blend well.
2. Pour approximately ¾ cup warm waters into the flour and stir it in with a wooden spoon or with your hands. Add the yeast mixture, and continue stirring until the ingredients are thoroughly blended and tend to form a ball that breaks away from the sides of the bowl. (If the dough is very stiff, add a tiny bit more water.) Transfer the dough to a lightly floured marble slab, bread board, or counter top.
3. Now begin the kneading process, which evenly distributes the fermenting yeast cells through the dough. There are several ways to knead,4 but I prefer this one-handed method: Sprinkle the dough lightly with flour and also flour your working hand. Push the heel of your hand down into the dough and away from you. Fold the dough over, give it a quarter turn, and push again with the hand. Continue the sequence of pushing, folding, and turning until it becomes a rhythmic motion. Knead until the dough no longer feels sticky and has a smooth, satiny, elastic texture, adding more flour, if necessary; this will take anywhere from 4 to 10 minutes, depending on the character of the flour and the warmth and humidity of the room. To test whether the dough has been kneaded enough, make an indentation in it with your fingers; it should spring back. Sometimes blisters will form on the surface of the dough and break, which is another sign that the kneading is sufficient.
4. When the dough has reached the consistency described above—with experience you will know what this means by the feel of it—it is ready for the first rising. (Rising allows the fermenting yeast to produce tiny bubbles of carbon dioxide, which stretches the gluten in the flour and thus leavens the bread.) First, rest the dough on the board for several minutes. Meanwhile, wash out the mixing bowl; dry it, and rub it with 1 to l½ tablespoons of softened butter.
5. Place the ball of dough in the bowl, and roll it around so that it becomes completely coated with butter. (This will keep the surface from drying out and cracking as the dough rises.) Cover the bowl with a piece of plastic wrap or foil or with a towel and set in a warm, draft-free place. (The term “draft-free,” which you will encounter repeatedly, is used because the yeast must be pampered with constant warmth to keep it active.) Find a protected corner or shelf, or use a cool oven (it won’t hurt if the pilot light is on). Allow the dough to double in bulk, which will take about 1 to 2 hours.
It is difficult for a beginner to tell when dough has actually doubled in volume, but the increase is dramatically more than one might expect. You can get the idea best by pouring 4 cups of water into the empty bowl (before it has been greased) and then pouring in the same amount again, noting how high up the water comes. Fortunately there is another, surer test to show when the dough is properly risen. When it looks ready, simply make an indentation in it with two fingers. If the dough does not spring back, then it is ready. It will not hurt should it rise a little too much, but excessive rising will affect the flavor and texture of the finished bread. If for some reason you must prolong a rising, place the bowl of dough in the refrigerator to slow down the action of the yeast.
The dough must now undergo a second rising, which will take place in the baking pan. Thoroughly butter one or two heavily tinned loaf pans.
6. Then remove the cover from the bowl and deflate the dough by pushing down into it with your fist. Transfer it to a floured board, knead it rather well for about 3 minutes, then pat it into a smooth round or oval shape. Let it rest for 4 to 5 minutes, then form it into a loaf about 8 inches long and 3 inches wide.
7. Lift it carefully, drop it into the loaf pan, and smooth it out.Cover the loaf pan, as you did the bowl, and set it in a warm, draft-free place to double in bulk, at which point the loaf will have risen slightly above the edge of the pan. The second rising will take anywhere from 40 minutes to 1¼ hours, according to the warmth of the room and the way you have worked the dough. Don’t rush the process, and watch the dough carefully. Meanwhile, set the oven for 400°.
8. There are various ways to treat the loaf before it goes into the oven. For this recipe, merely brush the dough with cold water, which helps to give the top a textured crust.
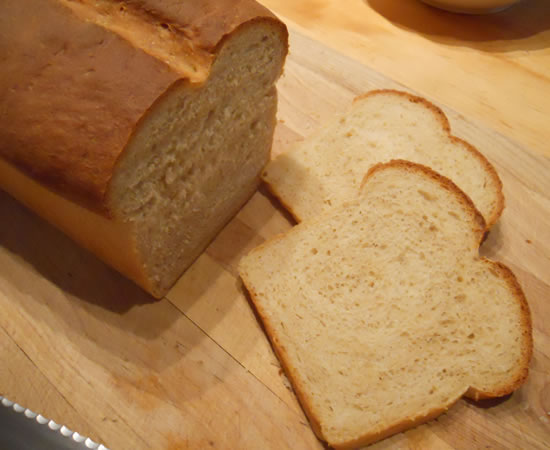
9 Then, with a sharp knife make three diagonal slashes about ½ inch deep across the top of the loaf, both for a more professional look and to prevent cracking.
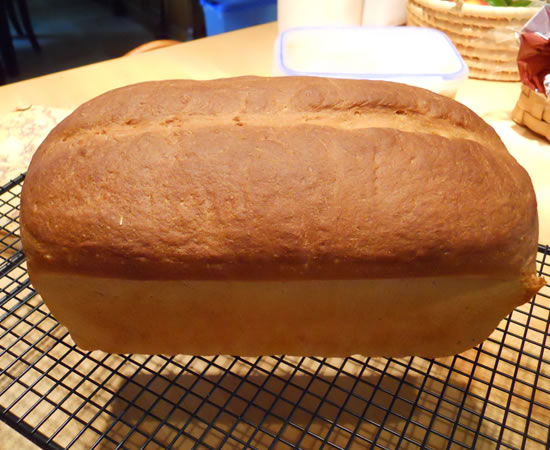
10 Place the pan near the center of the lower oven rack and set a timer for 35 minutes. Begin testing after that time, even though the total baking time may be as much as 50 minutes. To test, rap the top of the loaf with your knuckles. When done, it will sound hollow. Invert the loaf onto a towel held in one hand and test the bottom as well for that hollow sound. If it does not seem quite firm enough and needs only a little more baking, place the loaf directly on the oven rack to crisp the bottom, watching it carefully to prevent it from burning. If the test shows that the bottom is somewhat soft, slide the loaf back into the heated pan and return it to the oven to bake for 5 or 6 minutes more. Test the bottom again, and when firm enough, bake the unmolded loaf a few minutes for the final crisping. When completely baked, remove from the oven and set on a bread rack to cool.
After 2 or 3 hours the bread is good for slicing. When it is thoroughly cooled it can be stored in a plastic bag, in or out of the refrigerator, for several days. It also freezes well, and a frozen loaf, wrapped airtight, can be stored for a month. To reheat, remove from the freezer, wrap in aluminum foil, and heat in a 350° oven for about 20 to 40 minutes.
VARIATION
Whole-Wheat Bread: This same recipe can be used to make a whole-wheat loaf. Merely use 2 cups whole-wheat flour and 1¾ to 2 cups white flour. For a slightly richer loaf, add 3 to 4 tablespoons olive oil or peanut oil to the flour before adding the water, and use slightly less water to compensate for the oil.
- 100% Rye Bread
- 2-Day Rise Pizza Dough
- A Wholesome Loaf
- Aleppo Tomato Bread
- All-Purpose Enriched Bread
- Anjero
- Bacon and Tomato Swirl
- Bagels
- Barmbrack
- Basic White Bread
- Boule
- Braided French-Style Bread
- Breadsticks
- Brioche Dough
- Buttermilk Bulgur Bread
- Cheddar Beer Bread Rolls
- Chocolate Bread
- Ciabatta
- Cinnamon-Raisin Swirl Bread
- Crusty French Rolls
- Crusty Italian Bread
- Crusty Italian Sourdough
- Danish Pastries
- Dinner Rolls
- Double Wheat Whole Wheat Bread
- Dutch Crunch Rolls
- Five Grain Bread with Walnuts
- Focaccia
- Focaccia
- Focaccia Genovese
- Focaccia Ragusata
- Grandmother’s Dinner Rolls
- Guinness Rye Bread
- Hamburger Buns
- Hamburger Buns
- Hamburger Buns
- Honey Corn Rolls
- Hot Cross Buns
- Irish Country Bread
- Italian Easter Bread (Pinza)
- James Beard Basic White Bread
- James Beard Single Rise Loaf
- James Beard’s French-Style Bread
- Japanese-Style White Bread
- Kanelsnurror
- Knotted Dinner Rolls
- Kolaches
- Kosovo Pitalke
- Medieval Bread
- Milk Bread
- Molasses Oatmeal Bread
- Multi Grain Sandwich Bread
- Multi-Grain Seeded Bread
- No Knead Artisan Bread
- No-Knead Walnut Raisin Bread
- No-Knead White Bread
- Oma’s Christmas Stollen
- Onion Poppy Seed Bread
- Pain Francais
- Pan Rustico – Rustic Spanish Bread
- Pane al Pistacchio
- Pane all’Olio
- Pane Bianco
- Pane di Como Antico
- Pane Pugliese
- Pane Siciliano
- Panettone
- Panini con erbe aromatiche
- Pecorino Cheese Bread
- Pepper Bread
- Pepper Bread
- Pistachio Onion Bread
- Pistachio, Onion, and Cheese Bread
- Pistolet
- Pita
- Pogaca Rolls
- Pumpkin Rolls
- Russian Black Bread
- Rustic Bread
- Rustic Potato Bread
- Rustic Red Fife Bread Flour
- Rye Berry Rye Bread
- Rye Bread
- San Francisco-Style Sourdough
- Sausage, Pecorino, and Leek Bread
- Semelle
- Soft Pretzels
- Sourdough Country Bread
- Taboun Flatbread
- Tartine’s Sourdough Bread
- Tomato Bread
- Walnut Raisin Bread
- Walnut Raisin Bread
- Walnut Raisin Sourdough Bread
- Whole Wheat Buttermilk Bread
- Wisconsin Spicy Cheese Bread
- Zupfe Loaf with Asiago, Parmesan, and Romano
