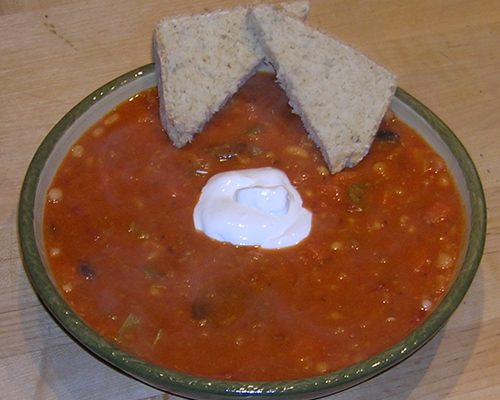
Bean Soup and Beer Bread
When it started snowing last night - and the pundits were forecasting the end of the world - I thought that regardless of how much snow we may (or may not) get, I was going to be in the mood for beans. I took a 1-pound bag of navy beans out of the cupboard and soaked them overnight. (We didn't get nearly what was forecasted, but it sure was a nice, quite day around the neighborhood!)
Today, bean soup sounded like a winter winner. And soup calls for bread - homemade bread.
Navy Bean Soup
- 1 pound navy beans, soaked overnight
- 1/4 cup bacon grease
- 1 onion, diced
- 2 cloves garlic, minced
- 1 qt water
- 1 ham hock
- 1 qt chicken broth
- 6 ribs celery, chopped
- 6 carrots, chopped
- 1 can diced tomatoes
- 1 can tomato paste
- 2 bay leaves
- 1 tsp herbs d'provence
- 1 tbsp Hungarian paprika
- salt and pepper, to taste
Cook diced onion in bacon grease in soup pot until wilted. Add garlic and continue cooking until browned. Add water and ham hock, bring to a boil, reduce heat, and simmer about an hour, or until beans are almost done.
Add remaining ingredients and cook until vegetables and beans are tender.
Can be made early and then reheated.
It really is a throw stuff in a pot soup. Add sausages, linguica, chunks of ham or pork... Go for it.
The bread is my favorite beer bread, compliments of George and Suzanne.
Beer Bread
- 3 cups self-rising flour
- 2 tbsp sugar
- 12 oz beer
Use a 4" x 8" bread pan. Mix and bake at 350° about 1 hour. Top with melted butter.
It really is that easy. I used a pumpkin ale for today's bread. It was really good!
The snow stopped, the roads look clear, and it's back to work, tomorrow. It was a perfect dayt off.
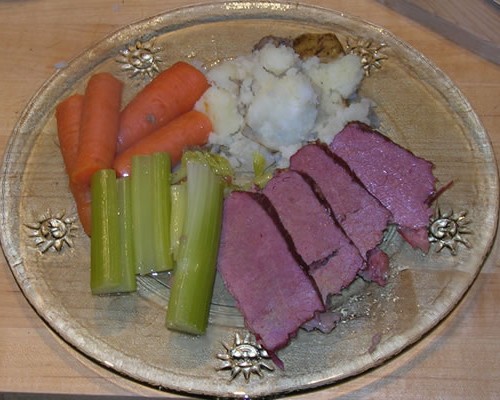
Corned Beef - No Cabbage. Bread, Instead.
I bought a corned beef quite a while ago and it's been sitting in frozen storage ever since. Last night before going to bed, I decided I wanted that corned beef! Out it came to thaw, and off to bed I went.
About noon it went into a pot filled with water. At 4pm it came out. At 4:30pm, a couple of whole potatoes went into the pot. At 5:15pm, in went some carrots and celery. At 5:45pm, dinner was served.
I also popped a loaf of bread into the oven about 4:15pm, inbetween taking the corned beef out of the pot and putting the potatoes in... Organization is key in all thinks.
The bread was my most favorite Quick Beer Bread. I used a bottle of Guinness thin time around.

Since Victor doesn't really care for cabbage all that much, I didn't make any. Actually, since it was snowing outside, I decided not to go shopping today. I was planning to cook some for myself.
Oh well. It was really good without it!
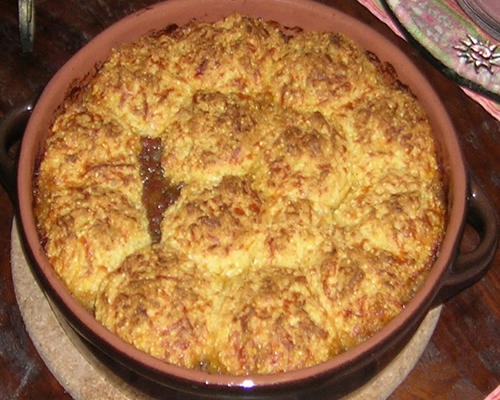
Spiced Beef Cornbread Cobbler
I thawed some burger yesterday, but didn't want any of my basic burger dishes. I hit epicurious.com and found this:
Spiced Beef Corn Bread Cobbler
- 1 medium onion, chopped
- 4 tablespoons vegetable oil
- 2 garlic cloves, finely chopped
- 1 pound ground beef chuck
- 1 teaspoon sugar
- 1/2 teaspoon ground cinnamon
- 1/2 teaspoon cayenne
- 1/4 teaspoon ground allspice
- 1/4 teaspoon black pepper
- 3/4 teaspoon ground ginger
- 1 1/4 teaspoons salt
- 1 (14- to 15-ounce) can diced tomatoes in juice
- 2/3 cup yellow cornmeal
- 1/3 cup all-purpose flour
- 1 teaspoon baking powder
- 1/3 cup whole milk
- 1 large egg
- 2 ounces coarsely grated sharp Cheddar (1/2 cup plus 2 tablespoons)
Put oven rack in middle position and preheat oven to 400°F. Lightly oil a 9 1/2-inch (6-cup capacity) pie plate.
Cook onion in 2 tablespoons oil in a deep 10-inch heavy skillet over moderate heat, stirring occasionally, until edges are golden, 3 to 4 minutes. Add garlic and cook, stirring, 1 minute. Add beef and cook, breaking up large lumps, until no longer pink, 4 to 5 minutes. Add sugar, spices, and 1 teaspoon salt and cook, stirring, 1 minute. Add tomatoes with juice and briskly simmer, stirring occasionally, until liquid is reduced to about 1/4 cup, 8 to 10 minutes.
While beef simmers, whisk together cornmeal, flour, baking powder, and remaining 1/4 teaspoon salt in a medium bowl. Whisk together milk, egg, and remaining 2 tablespoons oil in a small bowl, then stir into cornmeal mixture until just combined. Fold in 1/2 cup cheese.
Spoon cooked spiced beef into pie plate with a slotted spoon, reserving juices in skillet. Skim off and discard fat from juices if desired, then pour juices over beef in pie plate.
Spoon 4 mounds of corn bread batter over beef, then sprinkle remaining 2 tablespoons cheese over batter. Bake until a wooden pick or skewer inserted into center of corn bread comes out clean, 15 to 25 minutes.
Serve cobbler warm.
It was actually pretty good! I used a quarter teaspoon of some really great Guamanian hot pepper we got from Marie's nephew, Jay, and it was juuuuust this side of fire. It was most excellent!
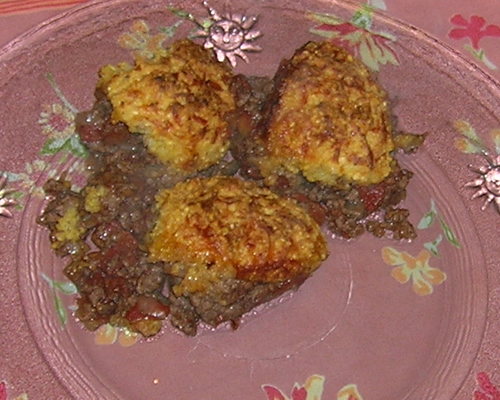
It took a lot of willpower not to keep going back for more - and more - and more! perfect comfort food on a cold night!
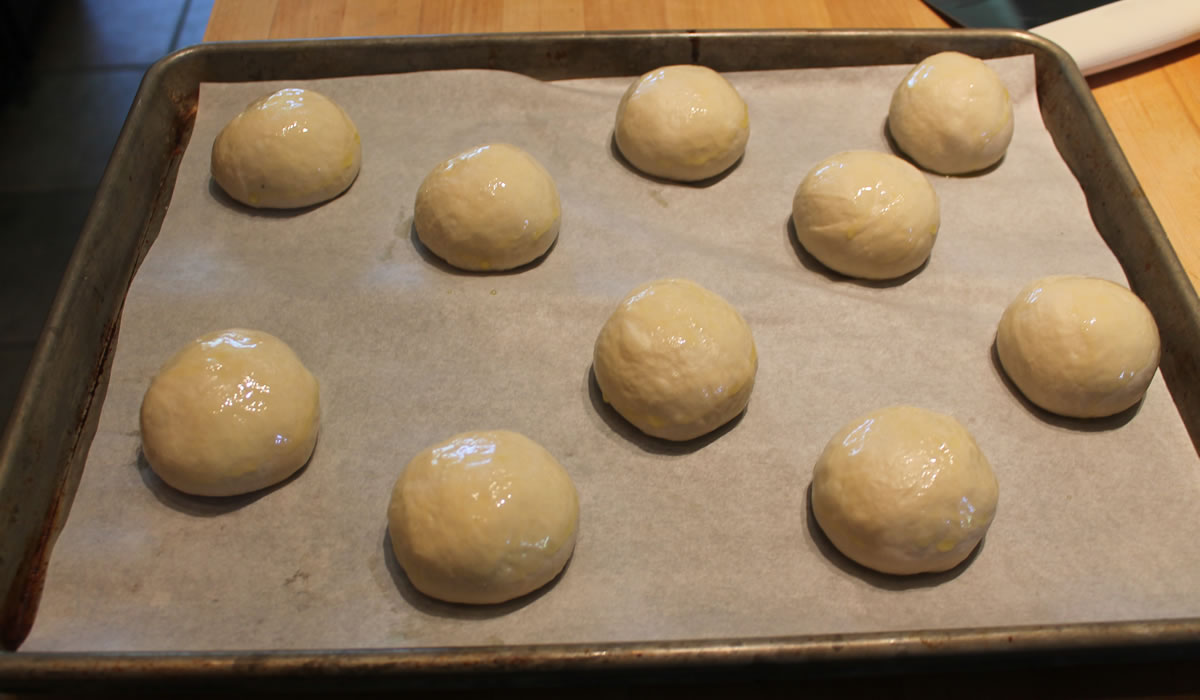
Pugliese Rolls

Well... that biga from a few weeks back has been taking up space in the 'fridge, so I decided I had to do something with it,. today. This is such a totally easy bread to make, I have no excuses.
I followed the direction exactly as stated with the original recipe but made it into rolls instead of loaves. I baked at 450° for about 20 minutes.
And then - because I now had these fabulous rolls, I had to make sandwiches for dinner!
I marinated chicken breasts in Dale's Marinade, pounded them, then grilled. On the rolls went Duke's Mayonnaise (which is as good as I was told! It's my new favorite!!!) and then avocado, tomato, and roasted peppers. The sandwiches were total messes! It took me 4 napkins to get through - and it was worth every one of them!

I'm stuffed. I've been doing some serious eating all day.
And there's still Peach Upside Down Cake in the kitchen.....
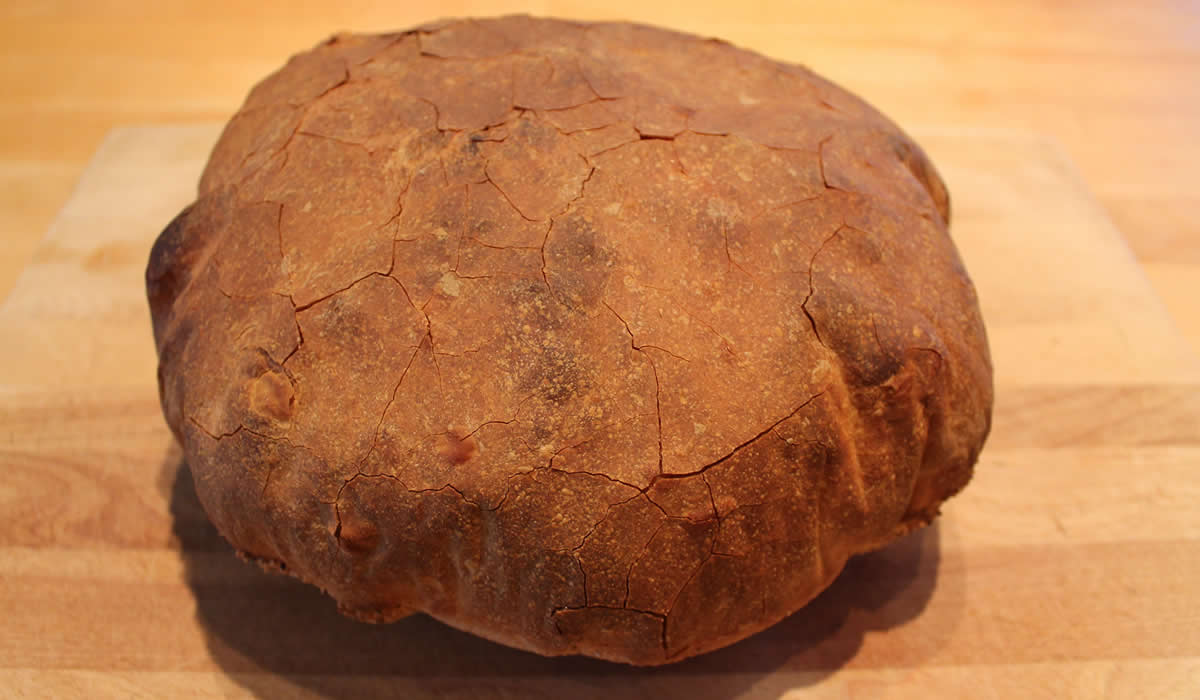
Pane Italiano, parte due
Okay... so it was a day later than anticipated, but OMG! what a fantastic bread! I've been making this particular bread for years, and it never disappoints. It is just perfect every time.
It is a crusty, crusty bread with a really light interior. There's no fat - just light, fresh, crusty, crunchy goodness!

Pane Pugliese
- 1 packet dry yeast
- 1/4 cup Warm water
- 1 1/2 cups Water; room temp
- 1/2 cup Biga
- 4 cups All-purpose flour
- 2 teaspoons Salt
Proof the yeast in the warm water. Add 1 1/2 c water and the biga, mix till blended. Add flour and salt, mix till dough comes together and pulls off the sides of the bowl. Knead 3-5 minutes in a mixer, longer by hand. Dough will be very soft and elastic. Let rise about 3 hours, shape into 2 small round loaves or 1 big flattish one. If you have baking stones, place loaves on baking peel or on baking sheets sprinkled corn meal. Let rise about 1 hour. Preheat oven to 450F, and 5 to 10 minutes before baking flour the loaves' tops and dimple them with your fingers. Bake 50-60 minutes for big loaves, 30-35 minutes for small. Tap the loaves to test for doneness (hollow=done) and cool on a rack.
Victor is making a pasta dish right now that he saw on Lidia's TV show yesterday. It's made with almonds, cherry tomatoes, and garlic... And it's from Pulia! How perfect is that?
My stomach is smiling. :)

I'm back. I'm stuffed. My stomach is really smiling! WOW! What a great pasta! The sauce is almonds, cheese, cherry tomatoes, fresh basil, olive oil, garlic, fresh oregano... All ground up in the food processor.
It was really fantastic.
YUM!
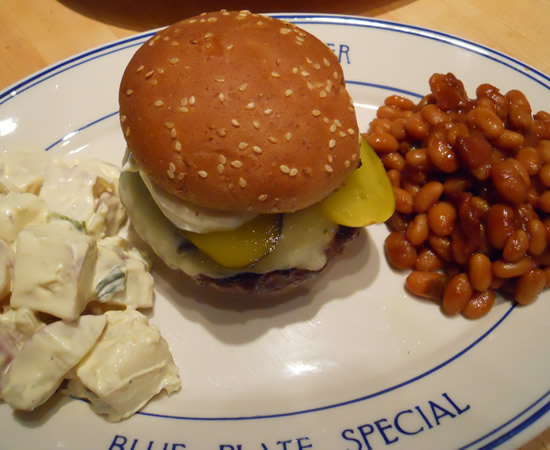
Bacon Bleu Cheese Burger

Ready for a heart attack on a homemade bun? This was definitely one of my better burgers!
Okay... other than the bacon and the blue cheese (and the avocado) it wasn't really all that bad - I did use 90% lean beef!
Freshly baked buns (I had some leftover dough in the freezer...) beef patty, thick slices of white onion, half an avocado, 3 strips of bacon, sliced tomato, sliced pickles, bleu cheese, and alfalfa sprouts... Pure heaven.
And... since I cooked the bacon on a sheet pan in the oven, I put the fries on the same pan and cooked them in the bacon grease. OMG they were good.
I don't really eat like this often, but when i decide to be bad - I'm bad!
And that burger was g-o-o-d!
Italian Bread
In one of my rare TV-viewing moments, I caught an episode of Modern Marvels on the History Channel. It was all about bread making. It showed Wonder Bread being made (the first sliced bread - who knew?!?) as well as every conceivable bread, from cornbread to pitas to tortillas to Ethiopian injera, bagels, San Francisco sourdough, braided challah, and artisan breads of every stripe. It made me want to bake bread. But, it was 8pm when the show ended. It was a bit too late to start baking - but not too late to make a biga - an Italian starter.
So... into the kitchen I headed and pulled out my trusty copy of The Italian Baker. I picked up this book sometime in the 1980's and have carted it around forever - mostly for one recipe of Pane Pugliese. It's a great rustic bread made with flour, water, and salt. It's amazing the amount of flavor that can come from such simple ingredients. The secret, of course, is the Biga!
Biga is classic starter that produces a natural flavor and fantastic aroma. Once upon a time, I always had a starter in my refrigerator. I even had a sourdough starter I got from my mom who had had hers for years. I'd love to have THAT right now... Unfortunately (stupidly!) I got rid of it for one reason or another, figuring I could always get more from Mom. When I finally decided I wanted it, again, she no longer had hers. But I digress...
The classic Biga recipe:
- 1/2 tsp active dry yeast
- 1/4 cup warm water
- 1 1/4 cup water (room temperature)
- 3 3/4 cups unbleached all-purpose flour
Stir the yeast into the warm water and let stand until creamy - about 10 minutes. Stir in the remaining water and then the flour, one cup at a time.
Mix with the paddle attachment on the mixer at the lowest speed about 2 minutes.
Remove to a slightly oiled bowl, cover, and let rise at cool room temperature for 6 to 24 hours. The starter will triple in volume and still be wet and sticky when ready. Cover and refrigerate until ready to use.
Tomorrow after work, I'm making the Pane Pugliese. It should be ready by this time tomorrow!
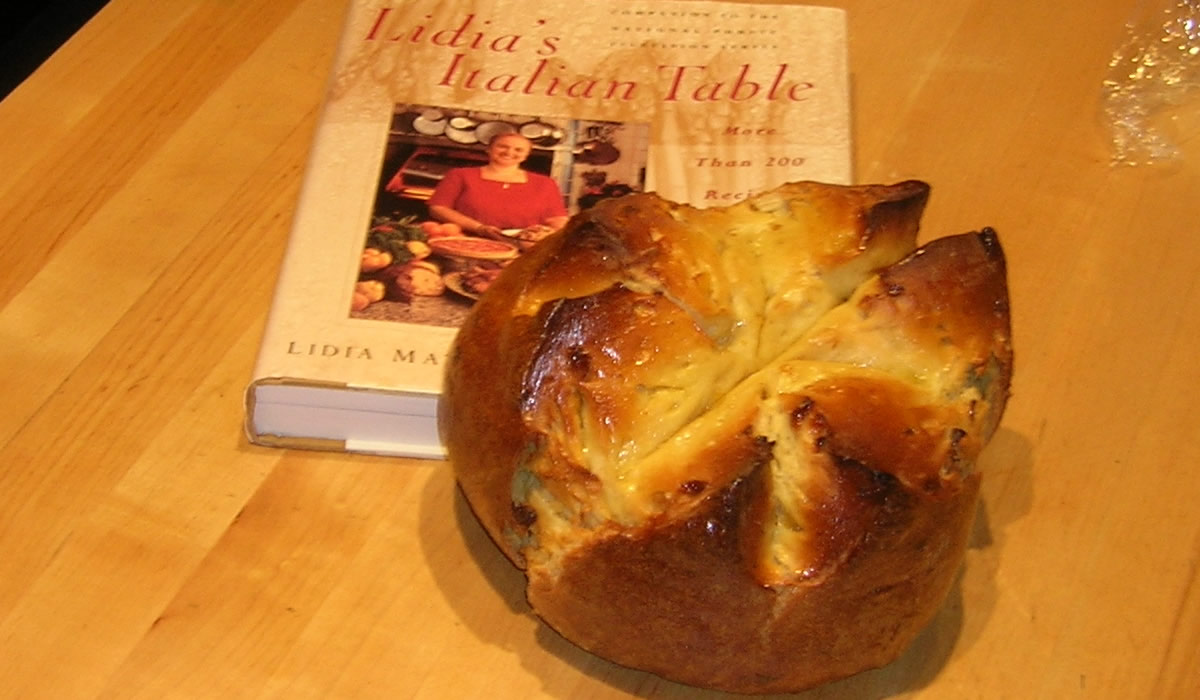
Italian Easter Bread (Pinza)
Having never made something before has never stopped me from 1) making it, and 2) serving it to a large gathering of people. My thought process is the worst thing that can happen is it's inedible and I throw it away. Since that really hasn't happened in 30 or so years, I don't worry about it.
And on that note, I started making Lidia's Easter Bread. Her Pinza.
I love Lidia's cooking. For the most part it is simple mixing of simple flavors to get anything-but-simple results. But every once in awhile she throws a curve-ball. And the Pinza is one...
Reading through the recipe, I realize that this is going to be a process. I didn't have the probably 12 hour stretch the bread needs to make, so I figured I'd break it up over a couple of days. It worked, more or less (actually, the flavor of the bread came out fantastic!) but I do think that I 1) needed more yeast, and 2) really should have let it rise more.
The recipe calls for 4 ea 3/5 oz cakes of fresh yeast or 4 ea 1 oz packages of dry yeast. Basic dry yeast comes in 1/4 oz packages and I haven't used fresh yeast in 45 years - since I worked at The Donut Center. Having done a considerable amount of baking in my time, I thought that even using 4 packages of yeast for three loaves of bread was a lot. I figured the 1 oz was a typo. But I put in 4 packages, nonetheless.
So... Friday after work I started the bread. It doesn't take much work, but there is a lot of wait time. At $3.50 a gallon for heating oil, our house is not exactly a baker's paradise. It easily took 2 1/2 hours for the first risings. I completed the next step - the 5 cups of flour, and then placed it in the fridge. (It was late and I didn't want to leave it out overnight. I probably should have...)
When I got home from work on Saturday, I took it out and started where I had left off. Again, not the warmest place in town. It took forever just to reach room temperature. It sat out while we all colored eggs.
I finally got it formed into the three balls and late Saturday night and it went back into the fridge. Early Sunday morning, it was back out, again.
I made the traditional cuts along the top and set it out to warm and rise. I turned on the heat, I turned on the oven. I set them in the sun. S-L-O-W-L-Y they were rising. Very slowly. They had not completely doubled in size when I had to get them in the oven. We had to be at Steve and Marie's at 2. It was 12:30pm. The bread had been out for almost 6 hours.
They came out delicious! Having never made them before, I still don't know exactly how they should have turned out, but I do think they should have been a bit lighter. They were absolutely wonderful the way they were, but... I don't think they were quite right. Folks raved about it and everyone was going back for more so I know it wasn't folks just taking a 'polite' piece - they really did like it!
I'm going to make it again one of these days - when I have the time to complete them start-to-finish in one day.
I'll let ya know how they come out!
Easter Bread
Lidia Matticchio Bastianich
- 1 1/2 cups golden raisins
- 1/2 cup dark rum
- 1 cup milk
- 1 cup granulated sugar plus 2 tablespoons
- Four 3/5-ounce cakes fresh yeast, crumbled (1/3 cup), or four 1-ounce packages instant dry yeast
- 9 cups unbleached all-purpose flour, or as needed, sifted
- 3 large eggs, at room temperature
- 6 large eggs yolks, at room temperature
- 1/2 cup (1 stick) unsalted butter, at room temperature, plus more for the bowl of dough
- 1/2 cup Vin Santo, Verduzzo, or other sweet white wine
- Grated zest (yellow part only, without the underlying white pith) of 2 large lemons
- Grated zest (orange part only, without the white pith) of 1 orange
- 1 1/2 teaspoons salt
- 2 teaspoons pure vanilla extract
- 2 tablespoons water
Combine the raisins with the rum in a small bowl and toss to mix. Let soak, tossing occasionally, while preparing the bread.
In a medium-size saucepan, heat the milk over medium heat to lukewarm, about 100°F.
Pour the warmed milk into a large bowl and add 1/2 cup of the sugar and the yeast. Stir until they are dissolved. Add 1 cup of the flour and stir until the mixture is smooth.
Cover the bowl with a kitchen towel and let it rise in a warm, draft-free place (such as on top of the refrigerator or in a gas oven with the pilot light on) until frothy. (If it doesn’t get frothy, that means the yeast is no longer active and you will have to start again with fresh yeast.)
Stir the dough with a fork to deflate it, then let it rise and froth two more times, stirring it down thoroughly and covering it again after each time. Depending on the environment, these three risings can take from 20 minutes to 45 minutes each.
In the bowl of a heavy-duty electric mixer fitted with the paddle attachment, whip 2 of the whole eggs, 2 of the yolks, and the remaining 1/2 cup sugar together at medium speed until foamy and pale yellow.
Add 1/4 cup (1/2 stick) of the butter, the wine, zests, salt, and vanilla. Beat until only small pieces of butter remain. Scrape the yeast mixture into the mixer bowl and beat until blended. Change to the dough hook attachment of the mixer and reduce the speed to low.
Add 5 cups of the remaining flour, 1 cup at a time, beating until the mixture forms a sticky dough. Wait for each cup of flour to be incorporated before adding the next and stop the machine occasionally to scrape any unmixed ingredients from the sides and bottom of the bowl into the dough. The dough will be quite sticky; form it into a rough ball, clean the sides of the bowl, and cover the bowl with a kitchen towel. Let the dough rise in a warm, draft-free place until doubled in bulk, 1 to 2 hours.
Return the bowl of dough to the mixer fitted with the dough hook.
Mix the dough at medium-low speed until deflated. Add the remaining 4 egg yolks and 1/4 cup (1/2 stick) butter and beat until incorporated. Gradually add enough of the remaining flour — about 2 cups — to form a firm but slightly sticky dough, stopping the mixer occasionally to scrape any unmixed ingredients from the bottom of the bowl into the dough. Add the raisins and rum and mix until incorporated. Dough will be quite wet and sticky at this point.
Turn the dough out onto a well-floured surface.
Knead the dough, adding as much of the remaining 1 cup flour as necessary to prevent the dough from sticking to your hands and to the table, until the dough is smooth, soft, and only very slightly sticky if left to rest a minute.
Place the dough in a large lightly buttered bowl and turn the dough to butter all sides of it.
Cover the bowl with a kitchen towel and set the dough to rise in a warm, draft-free place until doubled in bulk, 1/2 to 2 hours, depending on the environment.
Turn the risen dough out onto the floured work surface and knead until deflated.
Cut the dough into three equal pieces and knead each into a ball, gathering and pinching the seam side of the dough together to form as smooth a ball as possible. (These formed loaves can be tightly wrapped in plastic wrap and refrigerated overnight. Allow extra time for refrigerated loaves to rise in the following step.)
Line two baking sheets with parchment paper.
Place two loaves on one of the baking sheets, leaving as much space between them and the edges of the pan as possible. Place the third loaf in the center of the other baking sheet. With a pair of kitchen scissors, make three 1 1/2-inch-deep, 3-inch long intersecting cuts that meet at the center to form a six-pointed star pattern on the rounded top of each loaf. The cuts should be quite deep — at least halfway through the loaf — to allow the dough to rise up from the center and form the traditional crests on the loaf.
Cover the loaves lightly with kitchen towels and let rise in a warm, draft-free place until doubled in bulk, 1 to 2 hours.
Preheat oven to 325°F.
Bake the bread for 35 minutes. Whisk the remaining whole egg with the remaining 2 tablespoons sugar and the water until very smooth and the sugar is dissolved. Brush the pinze with this egg mixture, return them to the oven, and continue baking until very deep golden brown and a knife inserted into the center of the loaves comes out clean, about another 20 minutes.
Cool the pinze completely on a wire rack before slicing.
A Simple Sandwich
I can't believe how maligned bread has become. I love bread in all its many guises - from crusty baguettes to focaccia, beer bread to soda bread, flat bread to Italian pane. Even squishy white bread has its place for a Thanksgiving turkey sandwich.
But... it seems folks just don't appreciate bread anymore. Bread has somehow become evil. It is responsible for weight-gain everywhere. It is to be avoided at all cost - and then eaten only if it is whole wheat. Then it's okay. Granted, whole wheat bread has more nutrients, but if you're going to make a sandwich, your nutrients can come from your filling, and the bread can be something to compliment - not compete. Bread itself is not evil. And breads made with white flour can be extremely good.
Which brings me to tonight's dinner...
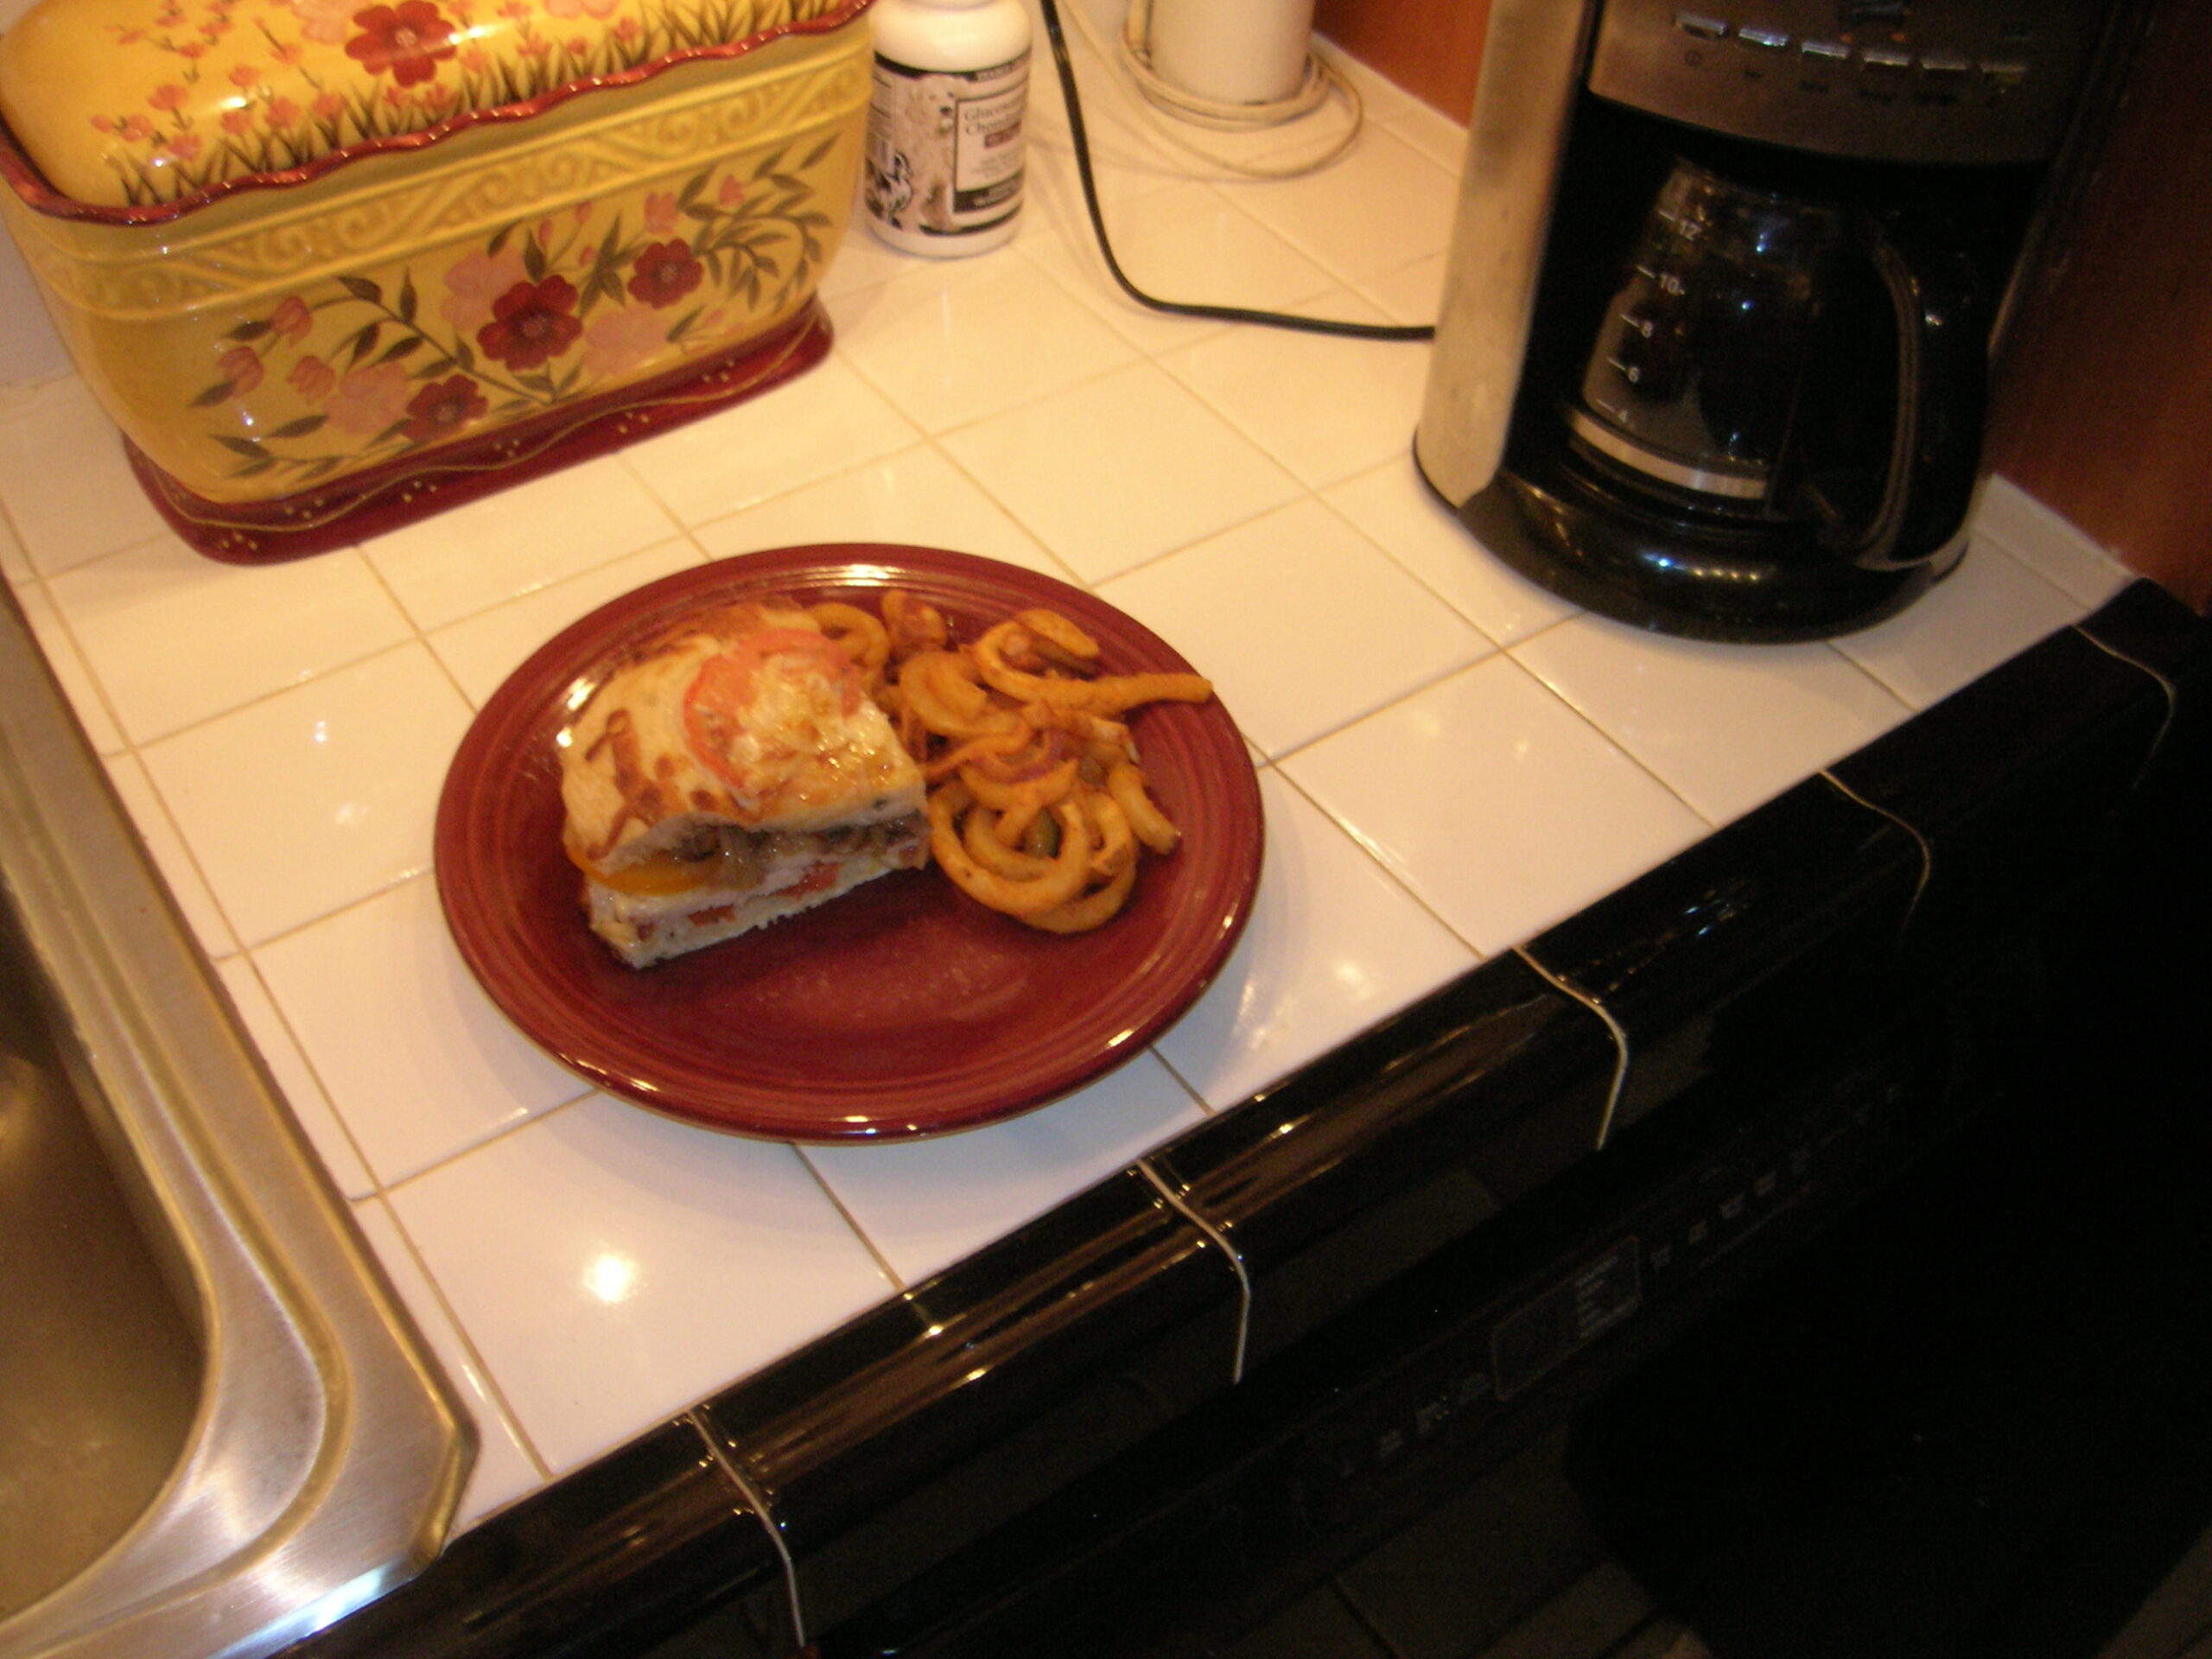
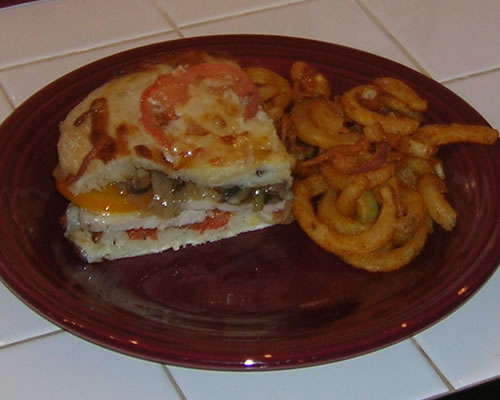
I had cooked a pork loin the other night and had a goodly amount left over. I hadn't any real thought in mind when I cooked it - I just knew there would be leftovers and at least one meal I didn't have to think much about. That was tonight. Pork Sandwiches on Focaccia.
OMG! I did good!
I sliced the focaccia in half and on the bottom I layered roasted red and yellow peppers and then topped with sliced pork loin. I sauteed about 6oz of mushrooms with a small onion in roasted garlic butter that Victor had made a few days ago. (Oven-roasted garlic cloves cooled and then mixed into slightly softened butter. Use for everything!!)
They went onto the top half, topped with sliced yellow and orange tomatoes and then covered with sliced Iberico Cheese. Onto a sheet pan and into the oven until everything was hot, and the cheese soft and gooey.
With the help of a big ol' spatula, I got the top half onto the bottom half, cut it into quarters, and Voila! Dinner was served!
I had some curly fries in the freezer, and they were baked off and served on the side.
20 minutes start-to-finish. And it was a mighty fine dinner.

Self-Rising Flour

I've gone all my life without using self-rising flour. Until today, that is...
A while back a great couple I know gave me a recipe for a quick beer bread. Really easy. Very basic. As is typical with me, I get a recipe, and then file it away for weeks or months, and then finally decide to make it.
I'm making a pot of Mulligatawny Soup today and thought that the beer bread would be good with it. That, and there's actually beer in the house from the party last Saturday. (The Asinine Socialist Pennsylvania Liquor Laws force one to go to a 'beer distributor' to purchase beer - by the case only. No single bottle or 6-pack sales allowed. That, somehow, promotes responsible drinking. Needless to say, we don't often have beer in the house.) But I digress...
I have beer in the house. I don't drink it, often, so I might as well cook with it, right?!?
First thing I did was pull out the recipe and notice that it calls for self-rising flour. Now... I can make my own self-rising flour (2 tbsp baking powder and 2 tsp salt per pound of four) but I also just got my first issue of Gourmet magazine (a freebie from Amazon.com) and it's all about Southern cooking - and lots of the recipes call for self-rising flour. So, during my weekly shopping trek today, I bought some.
I must admit I am intrigued! I've gone from never, ever having it in the house to seeing how many recipes I can now use it with. Thank goodness it's wintertime! the oven is going to be going full-tilt-boogie!
Mike's Crusty Cornbread
I have been having a great time chatting with and getting recipes from a friend down in South Carolina. His name is Mike and has a great wife, Barbara, who bakes - and wins all sorts of ribbons and such. Lots of them. I admire folks who have the patience to create recipes and enter contests. It's a lot of work. And I really love recipes with a story. Real food with history.
I won 2nd Prize in a Cherry Pie Bakeoff once - and the People's Choice Award for my White Bean Chili when I was on staff at UCSF. Neither were State fair-type competitions, but they were fun. But I digress...

This recipe (as all great recipes do) comes with a great story - and pictures!
Crusty Cornbread
Mike Amason
Rural South Carolina during and after the Great Depression was a lot like a third world country. There was little to eat if you didn’t produce it on the farm. Everyone had a few chickens and a couple of hogs, both very efficient animals at producing meat from whatever could be foraged. Lots of farms had a single cow for milk and butter. With chickens came eggs. The only groceries that were purchased were coffee, flour, salt, corn oil, and on occasion a bag of sugar. Everything else was grown at home or done without.
Many farms had small patches of corn of a variety suitable for grinding at the grist mill for grits and cornmeal (My grandfather grew a white corn called “Hickory King” just for this purpose). The miller ground and bagged your corn and kept a portion as his payment which he later sold. Biscuits ruled at breakfast, but cornbread was the staple quick bread for lunch and dinner. Many a child in the South in the 30s and 40s went to school carrying a pint jar of buttermilk and a large slice of cornbread for lunch, with a slice of fried fatback if times were good.
The secret to the crust:

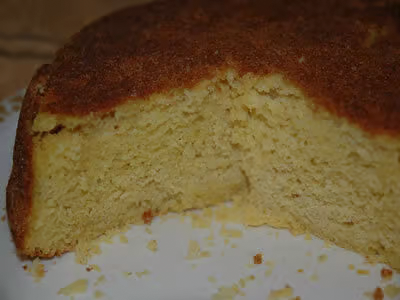
This is the way all six of my great aunts and my grandmother made it, baking it in a cast iron frying pan which gives it a crust like no other bread in the world. Cast iron holds heat better than anything else, and that is really the secret of this bread. You can make suitable cornbread in a roasting pan or a casserole dish if you have to, and some modern cookware may be up to the task, but I have never been able to get this crust from any other cookware I have owned. Other materials simply lose too much heat while you are pouring the batter into the pan. If you don’t have a cast iron pan, you can pick one up at a junk store or thrift shop for a couple of dollars. I use a 7” pan for mine, but an 8” works just as well. My Mother still uses a 6”pan she bought in 1944 for fifteen cents, and her cornbread beats mine every time. But I think she cheats.
Serves 6-8 Quick breads are only good the day they are baked. Leftovers don’t freeze well for reheating to eat, but should be frozen to use later in pan dressing to go with chicken or turkey. If you already have a freezer full, toss the leftovers out for the birds. They love it.
Ingredients:
Preheat oven to 450.
- Two cups self-rising white or yellow cornmeal, or add 3 tsp baking powder and 1 tsp salt to plain cornmeal
- 1 Tbsp sugar
- One egg, beaten
- 3 Tbsp vegetable oil or melted fat
- 1-1/4 cups buttermilk (or plain milk with 2 tsp vinegar to sour it)
- 1/4 cup vegetable oil to coat pan
Take the 1/4 cup of the vegetable oil and put it in the frying pan. Turn the pan to coat the bottom and sides well. Too much is better than not enough. You should be able to see a shallow pool of oil in the bottom of the pan. Put pan in oven to heat.
Put dry ingredients in a bowl and mix well. Add the wet ingredients all at once and stir to make the batter.
When the oil is HOT! (smoking slightly), pour the batter into the pan and enjoy the sizzle. Return it to the oven for 20 minutes. It is done when a knife inserted into the top comes out clean.
Turn out of pan upside-down onto a plate. Stand and be amazed at the reddish brown crackled crust approximately 1/8” thick covering it. Do not sample at this point if you plan to serve for dinner. You may not have any left by the time everyone gets to the table. It slices better when it cools for a few minutes, anyway.
Outstanding with any vegetables (especially a thick vegetable soup!) or by itself with butter.
WARNING: South of Pennsylvania it is illegal to serve collard or turnip greens or any type of beans without cornbread.
It is a capital offense in some states to serve black-eyed peas and collards with pepper vinegar on New Year’s Day and not cook a cornbread to accompany them. And it well should be.


Variations:
1) Any type of onions are great chopped and sautéed for a couple of minutes before adding to the batter. The result is like a hush puppy but not as greasy.
2) A chopped jalapeno pepper added to the batter improves any bland side dish.
3) ½ cup whole corn makes a good addition. Drain whole corn well if you use it. For creamed corn, use ¾ cup, reduce the milk to 3/4 cup and reduce sugar to 1 tsp.
4) ½ cup finely chopped broccoli florets gives the bread a flavor that surprised me the first time I tried it.
5) Cracklins. Many people have never heard of them. These are bits of pigskin (cured bacon rind) that have been chopped and cooked and are available in groceries all over the South. ½ cup of them make a cornbread you will talk about for years.
French Country Bread

It's cold outside. in fact, not only is it cold outside, but ice has been falling from the sky since yesterday. Welcome to the mid-Atlantic states. It's a mess out there. Not as bad as upstate New York - or Cleveland - but a mess all the same.
Last night, knowing that today was going to be spent indoors, I decided I needed to warm up the house by baking bread. Searching through recipes, I found one for a French Country Bread. It calls for making a sponge the night before baking, so last night I did just that...
Once upon a time I had a sourdough starter that had to have been older than me. It was an original wild yeast starter. I carried it around for years, feeding it, using it. It was great because I could really make bread whenever I wanted, and back in my youth I did bake a lot more bread than I do today. Part of it was the times, part of it was financial. Baking bread is cheap. I have no idea where it finally ended up, but it really made a great loaf of bread. The one I made last night calls for packaged yeast and would shock the purists, but heck - it's still a homemade loaf of bread, not squishy-white from the grocery store!
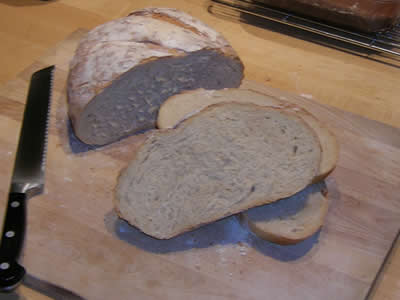
This particular bread is made with both whole wheat and white flour and has no oil or fat, so it's basically a use-the-day-you-bake-it bread.
The basic recipe is:
French Country Bread
Sponge:
• 1/2 cup wheat flour
• 1/2 cup bread flour
• 1-1/2 teaspoons active dry yeast
• 1/2 cup water
• 1-1/2 teaspoons dark corn syrupCombine the two flours and the yeast in a mixing bowl. Add the water and corn syrup and stir until well blended. Cover with a kitchen towel and allow to stand at room temperature overnight.
To prepare the dough:
• 3/4 cup water
• 1-1/2 teaspoons salt
• 3/4 cup wheat flour
• l-1/2 cups bread flourAdd the water, salt and wheat flour to the sponge. Stir in the bread flour, adding an extra tablespoon or two if the dough seems sticky. Knead until smooth and elastic, about 8 minutes. Place the dough in a greased bowl and cover with plastic wrap. Let rise until doubled in size, about 1 hour and 45 minutes.
When the first rise is complete, punch the dough down. Shape into a ball or an oval. Flatten slightly. Place on a greased baking sheet that has been sprinkled with cornmeal. Cover with a kitchen towel and let triple in size - 2 to 2 1/2 hours.
Place an empty pie plate on the bottom oven shelf. Preheat the oven and the pan to 425 degrees. Five minutes before adding the bread, carefully pour 1 cup hot water into the pan. Careful here! This causes a big burst of steam!
Sprinkle the loaf with flour, and Using a sharp knife, cut 3 diagonal slashes across the surface of the loaf. Bake 30 to 35 minutes, until golden brown. Remove from the pan and cool.
The bread is on its first rise right now... More details to follow.....
What a great bread! It has an extremely delicate crumb. Soft and moist, with a great chewy, crusty crust! Perfect for dipping into soup or stew, slathering butter, or making hefty sandwiches. it was incredibly easy to make, too.
I shall be making this, again. And again.