Freezing Greens
As Kermit told us so many years ago... It's not easy being green.
It's especially not easy if you're a big, green, leaf. Outside of the South, collards and other greens just don't have the appeal - or history - that other foods have. In the grocery stores, the big, fresh, leafy greens passed over for pre-cut, pre-chopped, and pre-washed bags of limp lettuce that probably have less nutritional value than the plastic they're packaged in. Because we know all about "today's busy lifestyles."
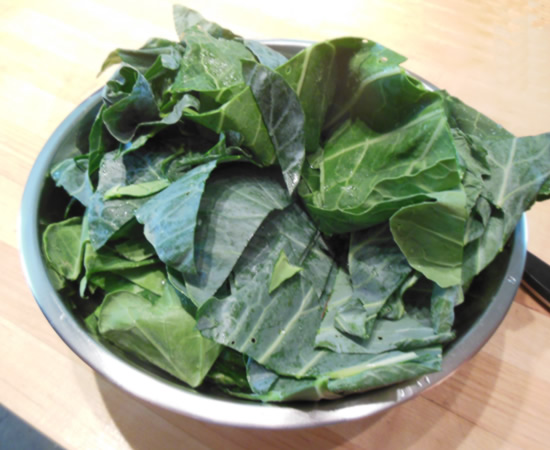
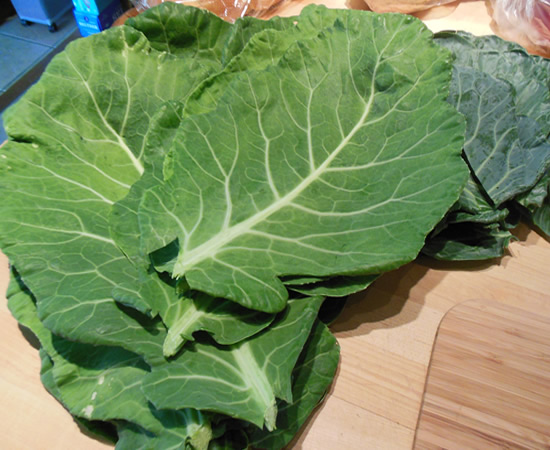
So I was thrilled to receive a big bunch of collards and brussels sprout leaves from our neighbor and friend, Anne. Fresh from her garden.
I knew I wasn't going to be using them right away, and I also knew I wasn't letting them go to waste. This is where the FoodSaver comes into play!
We bought the FoodSaver years ago so we could vacuum-pack things in manageable quantities as well as take advantage of sales and deals on things that a mere two people could not immediately consume. It has paid for itself over and over.
Taking care of the greens was easy. First, I removed the tough center rib. Then, I chopped the leaves into manageable sizes. I dropped them into a pot of boiling salted water to blanch and set their color. I let them cook a few minutes to help reduce their natural bitterness.
From the pot they went into the food processor.
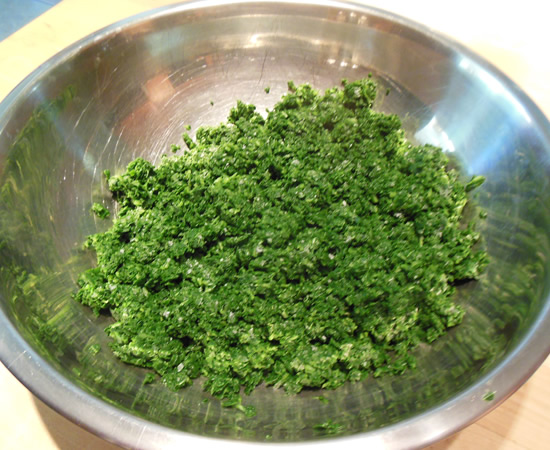
They received a really good chop - just short of a puree - and from there, went into freezer bags.
These are going to be excellent in pots of soup this winter. When my body is craving greens and vitamins k, a, and c, we will have the perfect ingredient right in the freezer.
And this works for anything that comes out of your garden, neighbors, or CSA. We have tomatoes for later in the winter - I refuse to buy Florida tomatoes - and a few other odds and ends that make the winter soups and stews interesting!
And ya know... if you don't have a vacuum sealer, you can still freeze things with ziplock freezer bags.
No excuses.
Apple Upside-Down Cake
One of my most-favorite cakes is Pineapple Upside-Down cake. Well--- just about any upside-down cake will do. There's something about that caramelized fruit-and-cake combination that just gets me every time.
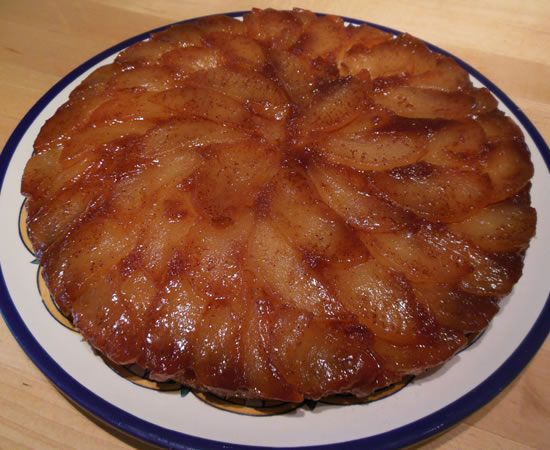
So you can imagine my delight when the latest issue of Fine Cooking magazine arrived and it had a recipe for an Apple Upside-Down cake. I knew at some point I would have to make it.
That point became today since we're heading over to Victor's family for Sunday Dinner.
We've been eschewing the desserts around here in an attempt to cut out sugar and lose a few pounds - and it's been working. But once a baker, always a baker. I want to bake even if I'm not going to devour the whole thing. besides - bringing a dessert means I can have a taste and leave the rest...
The recipe was a bit convoluted and I made a mess that impressed even me - the Mess King (or Queen depending upopn your take...)
But it cake out great. It's worth the several dirty pots, bowls, pans, and other paraphernalia!
Apple Upside Down Cake
adapted from Fine Cooking magazine
For the apples
- 2 lb. (about 4 large) sweet apples that hold their shape when cooked (such as Braeburn, Golden Delicious, or Jonagold), peeled, quartered, and cored, each quarter sliced into 3 wedges
- 1 large lemon, finely grated to yield 1 Tbs. zest (reserve for the cake) and squeezed to yield 1 Tbs. juice
- 3 oz. (6 Tbs.) unsalted butter, cut into 6 pieces
- Pinch table salt
For the topping
- Unsalted butter, softened, for the pan
- 1 cup granulated sugar
- 1 tsp. ground cinnamon
For the cake
- 4-1/2 oz. (1 cup) unbleached all-purpose flour
- 1 tsp. baking powder
- 1/4 tsp. ground cardamom
- 1/4 tsp. table salt
- 3 oz. (6 Tbs.) unsalted butter, cut into 1/2-inch cubes and slightly softened
- 3/4 cup granulated sugar
- 1 tsp. pure vanilla extract
- 1 large egg
- 2 large egg yolks
- 1/2 cup whole milk
Prepare the apples
In a large bowl, toss the apples with the lemon juice.In a heavy skillet, cook the butter over medium heat about 4 minutes. Add the apples and salt and toss gently until well coated. Cook, stirring gently, until some of the apples begin to brown and any liquid has evaporated about 10 minutes. Set aside until cool enough to handle.
Make the topping
Butter a 9x2-inch round cake pan, line the bottom with parchment, and butter the parchment.Put the sugar, cinnamon, and 1/3 cup water in a 2- to 3-quart saucepan and cook over medium heat, stirring, until the sugar dissolves. Continue to cook, without stirring, until the caramel begins to color; then swirl the pan until the caramel turns an even, deep amber, about 3 minutes. Immediately pour the caramel into the prepared cake pan, swirling to evenly coat the bottom. Let cool.
Starting in the center of the pan, arrange the cooled apple slices on the caramel in slightly overlapping circles. Set aside.
Make the cake
Position a rack in the lower third of the oven and heat the oven to 350°.Blend the flour, baking powder, cardamom, and salt.
Beat the butter on medium speed until smooth and creamy, about 1 minute. Scrape the bowl and beater. Add 1/4 cup of the sugar, lemon zest, and vanilla and beat on medium-high speed until well combined, about 1 minute. Scrape the bowl and beater.
With the mixer on medium speed, slowly sprinkle in the remaining 1/2 cup sugar, taking 20 to 30 seconds to add it. Increase the speed to medium high and beat until pale and creamy, 3 to 4 minutes, stopping once to scrape the bowl and beater.
Add the egg and beat on medium speed until combined, about 1 minute. Add the yolks and beat until incorporated, 1 minute. (It’s OK if the batter looks curdled.)
With the mixer on low speed, alternately add the dry ingredients in three additions and the milk in two additions; scrape the bowl and beater as necessary and mix each addition just until smooth.
Spread the batter evenly over the apples. Tap the pan down on the counter once or twice to settle the batter. Bake until the cake springs back when gently pressed and a toothpick inserted in the center comes out clean, 40 to 45 minutes.
Cool the cake in the pan for 20 minutes.
Invert the cake onto a cake plate and slowly remove the pan and the parchment. Let the cake cool for at least 1 hour before serving.
Slightly convoluted, but worth it!
Cheese Tortellini with Chicken
I had a hankerin' for pasta but had taken a couple of chicken breasts out of the freezer. The only sensible thing to do in a situation like that is to take the chicken and make a nice, creamy sauce to go with the pasta.
And being the ever-sensible person that I am, that's exactly what I did!
Yes, sensibility abounds in the Dineen/Martorano household. Well... at least it does in my mind - and that's really the only thing that matters, right?!? Right.
So... donning my sensibility cap, I started out.
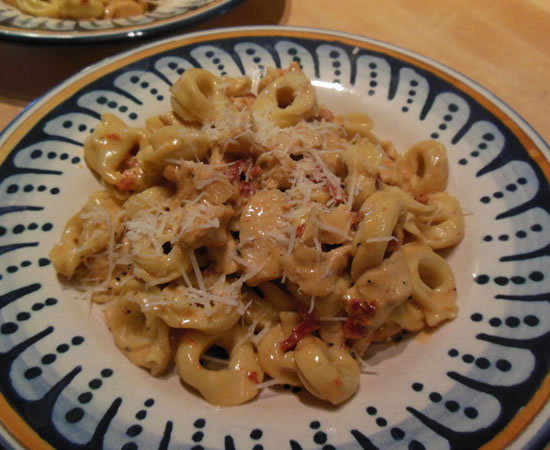
Into the pot went the tortellini. They take about 8 minutes to cook.
I cut up the chicken into small cubes - maybe 1/2" - and quickly sauteed them in a drizzle of olive oil. I minced a garlic clove and added that to the skillet, and then chopped a couple tablespoons of sun-dried tomatoes in oil and added them.
I then added about 3/4 cup of heavy cream and a pinch of salt and pepper. I let it boil and thicken while I drained the pasta.
I added a hefty handful of freshly-grated pecorino romano, stirred it in, and then added the tortellini.
Simplicity.
It definitely came out good. The sauce thickened nicely and the tomato and cheese - and garlic - added a nice bite.
And it took less than 15 minutes to get it on the table!
So sensible.
Pork Tenderloin
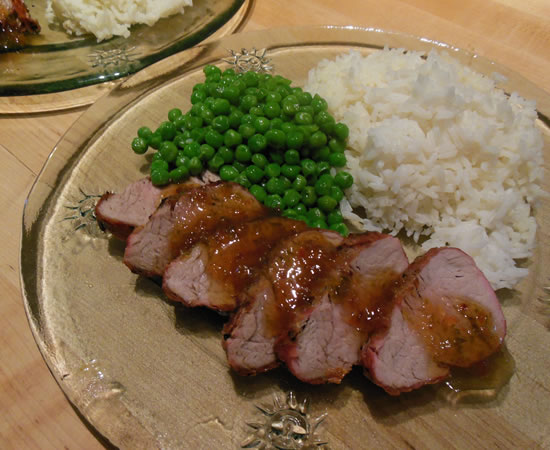
After making a ton of Apricot Pepper Jelly, the question ofttimes asked is... "What do I do with it?" Why... you top a lovely pork tenderloin with it, says I!
And that is precisely what I did!
This stuff came out good! It packs juuuuuust enough of a punch to be interesting, without searing your taste-buds to smithereens. I didn't do anything special to the pork - just a bit of S&P before putting it on the grill.
I'm thinking there are a lot of things that can be done with this stuff... And I'm already working on a Thanksgiving hors d'oeuvre...
I'm lovin' me some peppers!
Canning Peppers
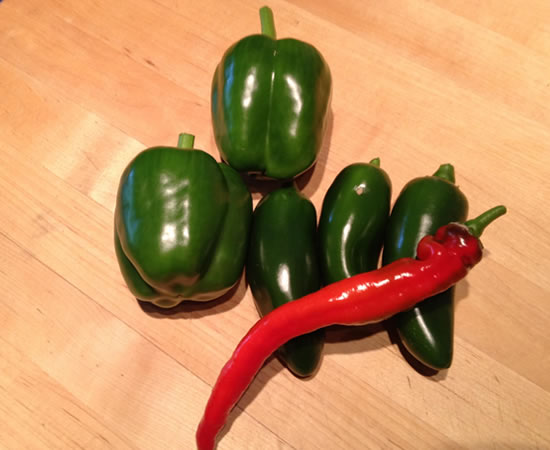
We definitely have a bumper-crop of peppers, this year! Jalapeños, cowhorns, cayenne, bell... They've just been doing great. of course, two people can only eat so many peppers at one time - and they're ripening faster than we can consume.
The obvious thing is to can them. And that's just what I've started doing.
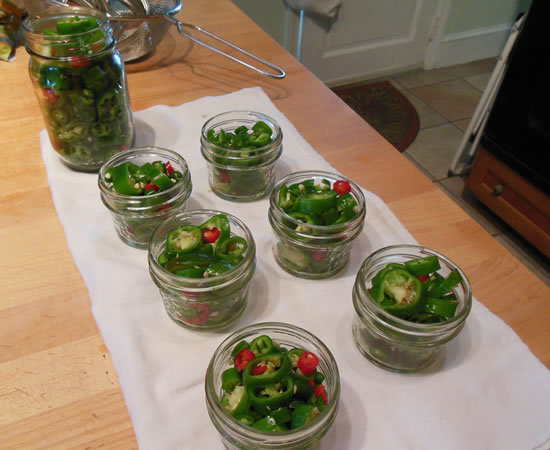
Monday, I started with a concoction of cowhorns and cayennes. I sliced them up - seeds and all - packed them into 1/2-cup jars, and pickled them. Really easy...
Canning is not difficult. You just need to pay attention and make sure everything you're using is clean.
Hot Pickled Peppers
(makes about 10 1/2-cup jars
- 4 lbs assorted hot peppers
- 4 cups distilled white vinegar
- 1 cup water
- 2 tsp sugar
- 4 tsp kosher salt
Wash and cut peppers to desired size. (I made rings. )
Pack peppers into mason jars leaving about 1/2" headroom.
Combine and heat sugar, salt, vinegar, and water. Bring to boil and then simmer about 5-6 minutes.
Pour over peppers, leaving the same 1/2" headroom.
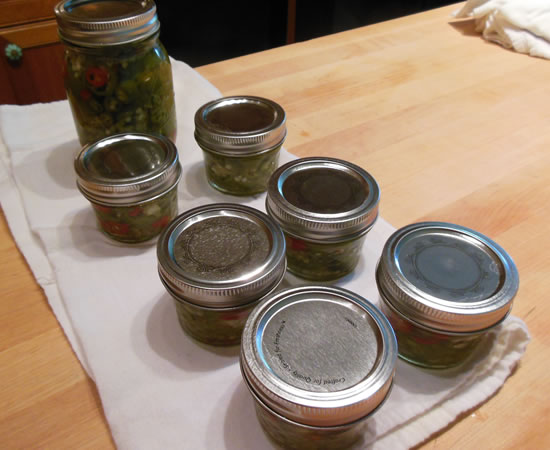
Wipe rims of jars, top with lids and rings.
Process in a boiling water bath about 10 minutes.
That's it!
I had some on a hot dog today and they came out G-O-O-D! Some of them may be going out as Christmas presents...
There's a lot more peppers. I know I'll be canning more...
Another thing I wanted to make was a pepper jelly. Our friend, Trevor, made an excellent pepper jelly a while back - you can read all about it here and here - and I've been thinking about making a version ever since. With our current plethora of peppers, I decided today was the day.
Since apricots are one of my more favorite fruits, I though an apricot pepper jelly would be fun. When cooking or baking, I generally go for a California slab apricot because they're so sweet, but because I was going to add a ton of sugar, I went for an organic Turkish apricot. A lot of flavor but not quite as sweet.
This was fun because again, all the peppers came from our backyard.
Apricot Pepper Jelly
(makes about 14 1/2-cup jars)
- 1 1/2 cups chopped dried apricots
- 1 cup chopped bell pepper
- 1/2 cup chopped jalapeño peppers
- 2 cups white balsamic vinegar
- 4 cups sugar
- 1 pkg powdered fruit pectin
Cover apricots with boiling water and let sit for about 10 minutes. Drain.
Finely mince apricots and peppers in food processor along with 1 cup of the vinegar.
Mix pectin with 1/2 cup of the sugar. Add it, along with the pepper mixture and remaining vinegar to saucepan. Heat to boil, stirring occasionally.
Add remaining sugar, stirring well, and let boil at a full rolling boil about 2 minutes, stirring occasionally.
Remove from heat, skim foam from top, and place in hot sterile jars.
Wipe rims, top with lids and rings, and process in boiling water bath about 15 minutes.
This one also came out stellar!
I'm going to serve it atop a pork tenderloin tonight... More on that, later.
If you're new to canning or need some tips, here's a good place to check out... The National Center for Home Food Preservation.
And have fun!
'Tis The Season...
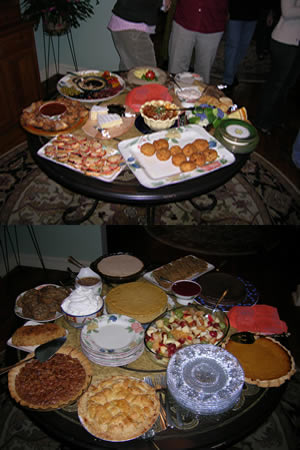
It's still officially summer for another week and a half, but my mind has already started focusing on The Holidays.
I like to plan ahead and not get blindsided by them. I mean... Christmas falls on December 25th every year. It doesn't change, it doesn't rotate... It's December 25th. Thanksgiving is a little trickier - the 4th Thursday in November - but still... a little planning never hurts.
We'll be hosting Thanksgiving at our house, again this year. It's pretty much tradition, so we'll have to start planning the ridiculous excess next month some time. I actually create an excel spreadsheet of what we're making, who will be here, and then I look back at blog posts to see what we did and what it looked like.
Organized.
It's how I quantity cook without getting stressed. It helps to have a plan.
We do the same thing with the Christmas baking, although quantities there have been drastically reduced over the years. At our height, we were baking between 6 and 8 thousand cookies every year. It started to get a bit ridiculous - not to mention expensive. We'll be making considerably less - although still way too many.
And then there's the fruitcakes, the stollen, the Christmas pudding... The last three items need to be made way in advance so they can properly age before Christmas. Stir-Up Sunday is about 5 weeks before Christmas - the last Sunday before Advent - and a traditional day to make Christmas puddings, but that's also the Sunday after Thanksgiving and our Decorating Weekend. Methinks I'll be scheduling fruitcakes and pudding for late October and early November...
Yep... It's beginning to look a lot like Christmas - even if the weather still says summer!
Stuffed Chicken Breasts with Escarole and Cannellini Beans
I decided to do my weekly grocery shopping this morning, since I have things to do tomorrow. Instead of a clean-out-the-refrigerator meal, we had a real one from scratch. What a concept!
I had recently seen a recipe for escarole and cannellini beans and as I was browsing the fresh produce, there was a head of escarole. Part of dinner was done!
I then noticed a really small piece of fresh farmer's cheese and the rest of dinner fell into place.
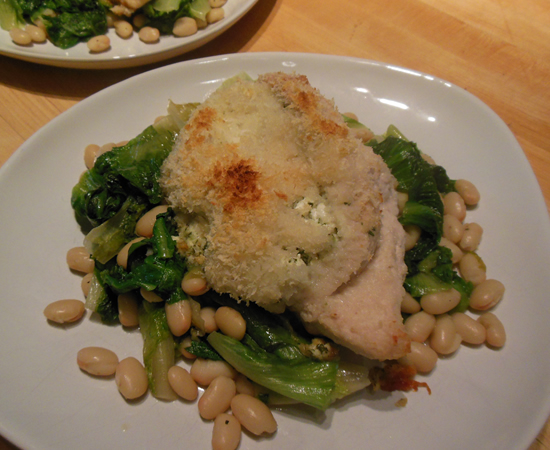
Stuffed Chicken Breasts and Escarole and Cannellini Beans.
Can we say "yum" boys and girls?!?
The chicken was totally no-brainer. I took the cheese and added some fresh chopped parsley and a clove of minced garlic - and a bit of black pepper. I made a deep slit into the chicken breasts and packed the cheese in... At the last minute I sprinkled panko breadcrumbs on top, but they weren't really necessary. Into a 375° oven for about 30 minutes.
The escarole and beans was even easier! I rinsed the leaves, did a rough chop, and placed them into a large skillet with a drizzle of olive oil and a pat of butter - and a clove of minced garlic. When they had cooked down a bit, I added a can of drained and rinsed cannellini beans and a pinch of salt and pepper. That was it.
They went on the plate, the chicken went on top, and we had a mighty fine meal!
Other than bean salads now and again, we don't really eat a lot of beans during the summer - and I miss them. I'm looking forward to the cooler weather and a pot of beans simmering on the stove!
Bread and Rolls
What's the old adage... When life hands you lemons, make lemonade?!? That's kinda how today is...
We had plans for a fun day with friends and Victor threw his back out last night. Not good. And definitely not up for an hour drive in the car.
Regroup.
Now having to plan a couple of meals I wasn't planning on cooking, I took stock of the larder; plenty of food, lots of sandwich-fixin's - but no bread. My choice was to drive the mile to the grocery store and buy a loaf - or bake some. It's not everyone who will think it's easier to bake a loaf of bread than run to the store, but, for me, not having to deal with a grocery store on a Saturday is a good thing. Besides, have you ever looked at the ingredient list on a basic loaf of grocery store bread?!? Yuck.
So out came Mom's trusty cook book.
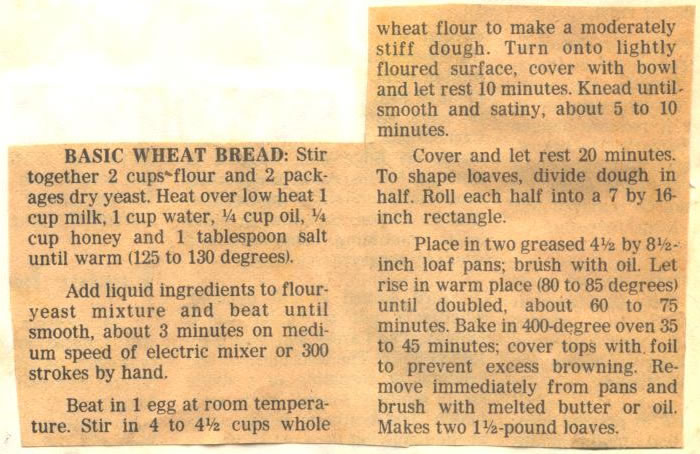
She had a recipe for a basic wheat bread that I default to whenever I want a quick couple of loaves. It is really good, really easy, and pretty quick to pull together. I really haven't been making a lot of loaves of bread, lately. They have been mostly free-form rustic breads. I thought it time to break out the loaf pans and have at it.
The recipe calls for two loaves and I knew we'd never go through them before it went stale, so I decided one loaf and a few rolls would work.
I started the process, went to get the whole wheat flour - and noticed there wasn't any! I had rye, buckwheat, graham, whole wheat pastry, and unbleached cake, all-purpose, and bread flours. No whole wheat. Whole wheat bread became white bread. I'll live with it.
I followed the recipe as written, except I used the bread flour and omitted the egg.
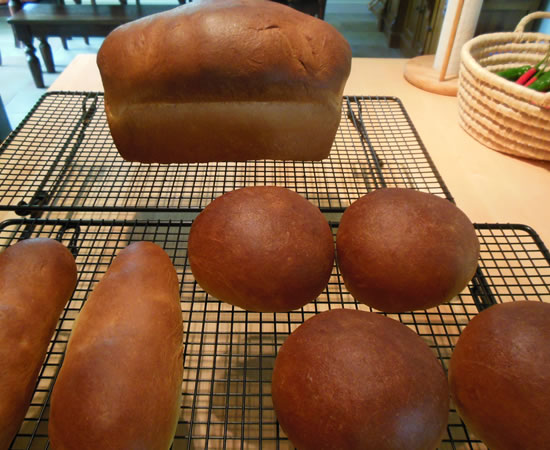
I baked the rolls for about 20 minutes and the bread for maybe 38 minutes. It also rose a lot faster today than usual - white flour will generally rise quicker than a more-dense wheat, anyway - but it's hot and muggy outside... the perfect summer proofing box.
It all came out great. Perfectly light, really flavorful, lots of body - and the long rolls were perfect for leftover sausage and peppers.
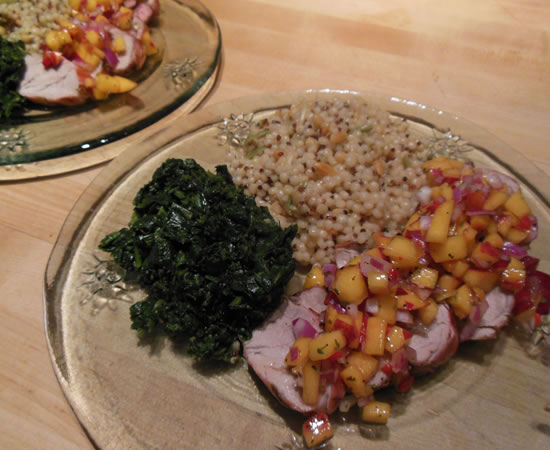
Pork Tenderloin and Peach Salsa
I think this is one of my most favorite food combinations. Peaches, onions, and hot peppers atop well... just about anything. I've used this on flank steak, chicken, pork, fish, and even with tortilla chips. Versatile, indeed.
Peaches are pretty much my favorite summer fruit. I remember the pies my grandmother made from peaches from her neighbor, Mrs. MacNamee. Summertime was always great at their house. Grandma and Grandpa had strawberries and grapes - and a chicken coop! - and Mr Brown on the other side of them grew watermelons. My brother and I actually stole his seed melon one year - it was the biggest in his yard - and, while he knew we did it, couldn't prove it. We barely escaped that one. Boy, was he pissed. We laid low for a long time.
But back to peaches...
My sister, Arlene, lived on a peach orchard for many years and we definitely had our share of juice-down-the-arm peaches. From salsa to pies, to jams and preserves, we canned, baked, cooked, and otherwise consumed peaches all the time. It was good eating.
Peaches on the east coast haven't always been as good as the California peaches from my youth, but we've been getting a pretty good supply from California the past few years that have made my tummy smile. They're perfect for pies, cobblers, salsas, fruit salads, or just eating out of hand.
Here's my quick salsa recipe. It takes seconds to prepare.
Peach Salsa
- 2 ripe peaches, diced
- 1/2 small red onion, diced
- 2 jalapeño peppers. minced
- 2 tbsp cilantro, minced
- salt and pepper, to taste
Mix ingredients and chill.
This time around I actually used one cayenne pepper from our garden and it added all the heat we needed.
The fruit can be switched out to plums, strawberries, apricots, or whatever suits your fancy.
For the tenderloin, I just rubbed it with a bit of chipotle powder, salt, and pepper before putting it on the grill. Also really basic and simple.
It's going to be sad to see them go for the season...
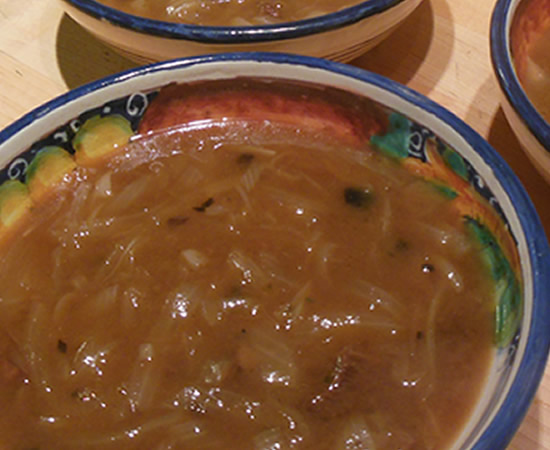
French Onion Soup
It's 80°+ outside, muggier than hell, alternating rain and sunshine, and I made onion soup. Yes, soup. It's one on Nonna's favorites, and since she's heading home tomorrow, I thought I'd make a batch so she could take some with her. Besides, it may be a million degrees outside, but we're doing our part to kill the environment by keeping the air conditioning running. I'm a wuss. What can I say?!?
Onion soup is definitely one of my more favorite meals, as well. It's extremely easy to make - once you peel and slice a bazillion onions, that is. And you do have to pay attention to the caramelizing onions. Ya definitely don't want them to burn.
I usually make a beefy French onion soup - actual chunks of beef in the soup. It's not exactly traditional, but then... neither am I. But dayum, it's good!
I really did make a huge vat - I started with more than 12 pounds of onions - but I plan on freezing the leftovers that Nonna doesn't take so I can drop them off now and then to retain my favorite daughter-in-law status. Whatever it takes, right?!?
French Onion Soup
- 12 pounds onions, sliced
- 6 cloves garlic, minced
- 8 tbsp butter
- 2 pounds cubed beef
- 3 qts beef broth
- 1 tsp herbs d’Provence
- 2 bay leaves
- salt and pepper, to taste
Place onion and garlic in a large soup pot with the butter and cook, stirring occasionally, until onions are deep amber in color. This can definitely take a while. (It took about 1 1/2 hours today.)
When onions start getting close, brown beef in another pan. Add to onions. Add broth, herbs d’Provence, bay leaves, and S&P, to taste.
Bring to a boil and then simmer at least an hour.
I will make it a bit differently from time-to-time, adding red wine and/or brandy or sometimes cooking the beef in bacon fat. I didn't tonight because the wine cellar is getting sparse, but I probably will next time I make it.
Traditionally, it is served with a floating crouton covered with ooey-gooey gruyere cheese, but we eschew the crouton for a crusty loaf of bread and butter.
Who cares what the weather is - this was good!
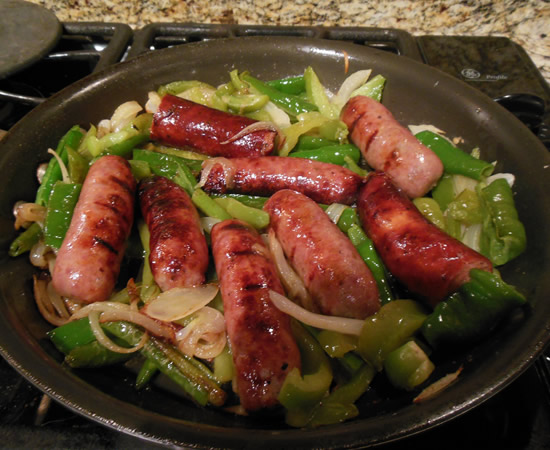
Sausages and Home-Grown Peppers
Goodness! It's been a week since I last took a picture of dinner! Yes, we've been eating, but the meals have been a bit different. Victor's mom has been staying with us as she recuperates from a bit of a hospital stay.
Fortunately all is swell, she's feeling great, getting around fine on her own, and familiarizing herself with the HD channels of our remote control, but we thought it prudent to have her stay here for a while just to make sure everything was okay. Everything is, and she's heading home on Wednesday.
It's funny how one more person in the house changes the routine. Dinner is still at the same time, but there's a bit of pressure to make sure it really is at the same time because of medications. And while we will eat just about anything, an 86 year old has slightly different taste buds. Chicken cutlets, pasta, and more familiar foods have taken precedence over our more exotic fare. She's not a fussy eater and she would eta anything I made, but it's about having her enjoy the food - not just eat it.
So it's been fun and it's been a bit of a challenge, but none of us have lost any weight this week, so something must have been working.
I actually made a huge batch of macaroni and cheese last night and baked off a separate casserole for her. Victor made stuffed peppers and we froze some of those for her to take home.
Actually, they went over today before I did her shopping. Unbeknownst to Mom, Victor gussied up her kitchen a bit this week - new kitchen towels, dish drainer, canisters... I went in today and got rid of all the old condiments and a few other things that had seen better days, so she now has a sparkling refrigerator/freezer with all new goodies. And a few home-cooked meals for good measure.
And cheesecake. She's diabetic and supposed to watch her desserts, but I make them for her, anyway. Small slices and made with just a bit of sugar.
At 86, quality of life is more important than quantity.

