Bacon Wrapped Stuffed Jalapeños
Brad Hart, this is your fault! On the other hand, you're also responsible for me finally fixing the dining room chandelier.
Brad, who lives in Amsterdam, made them and then posted a picture on his Facebook wall. Victor and I saw them this morning and immediately wanted some. Alas, we had no jalapeños in the house. I figured that as long as I was going to leave the house on a Sunday morning, I'd stop next door to the store and get a new dimmer switch.
In a matter of minutes I had the new switch installed and our festively-decorated chandelier was aglow.
Time to hit the kitchen.
I preheated the oven to 475° and opened the windows for the inevitable smoke. Sadly, if our house ever catches fire, no neighbor will call 911. They're so used to seeing billowing clouds of smoke from my cooking that they would just think I was in the kitchen.
But I digress...
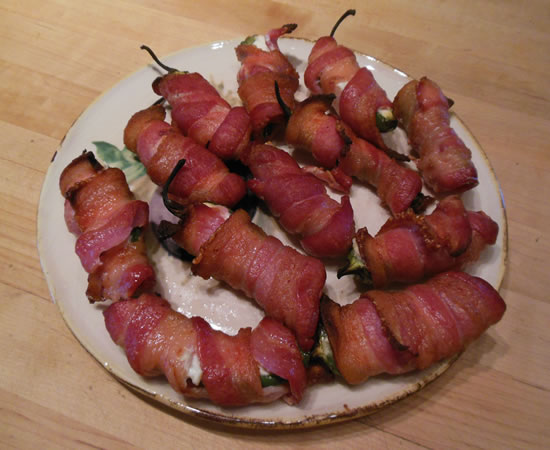
Out came the cream cheese and the bacon. I sliced the jalapeños in half and scraped out the seeds. I then stuffed each half with plain cream cheese. A single slice of thick-sliced bacon was wrapped around each one and onto a rack over a sheet pan they went.

Into the hot oven they went for about 20 minutes.
Oh.My.God.
I cannot even begin to describe these. They are just totally awesome. Chewy-crispy bacon with spicy-cheesy ooey-gooey wonderfulness. I'm sitting here wondering how I have never had them before and trying to figure out how I can have them every day.
Stellar.
I need to work on my wrapping technique a bit, which is good. It means I'm going to have to make more of them. Soon.
I can't wait for more!

Pre-Thanksgiving Cookery
It's beginning to look a lot like Thanksgiving!
This is without doubt, my most favorite holiday. Massive quantities of food. No presents, no drama - just food. Perfect.
We actually started the cooking a couple of days ago with an Egg Nog Cheesecake. Yeah - sounds pretty outrageous, eh?!? I'll get a picture and the recipe posted this weekend. It needs the final egg nog and whipped cream topping... I mean... I could take a picture right now but... I'll wait until it's done...
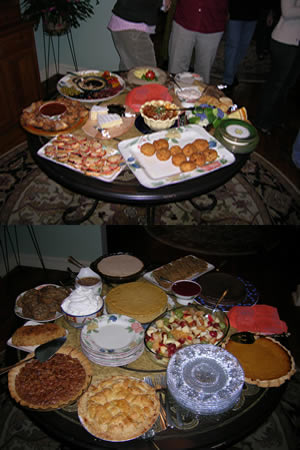
Yesterday I made pie dough. Today we baked pies. I've been making the same pie dough forever and I find it infinitely easier than trying to unfold or unroll something from the frozen food section of the store. Any time I've gotten a pre-made crust I've ended up having to do something with them, anyway. Might as well start off with real butter and go for it.
Pie Dough
for a double crust:
- 2 cups flour
- 1/3 cup cake flour
- 1/2 lb butter, frozen
- pinch salt
- 2 tbsp sugar
- 1/4 cup ice water
Using a food processor, add flour, salt, and sugar. Pulse to mix.
Chop up frozen butter and add. Pulse until butter is incorporated and mixture looks grainy.
Slowly add ice water and pulse until mixed.
Turn out onto counter. Press and form mixture into 2 disks . Wrap in plastic and refrigerate about an hour to allow the flour to properly absorb the water and to relax the gluten.
Roll out crust and place in pie plate. Crimp edges and fill.

The Pumpkin Pies were our basic add-a-bit-of-maple-syrup recipe. It really adds a nice touch.
Pumpkin Pie
- 3/4 cup granulated sugar
- 1/4 cup maple syrup
- 1/2 teaspoon salt
- 2 teaspoon ground cinnamon
- 1/2 teaspoon ground ginger
- 1/4 teaspoon ground cloves
- 1/4 teaspoon freshly ground nutmeg
- 2 large eggs
- 2 cups - or 1 can (15 oz.) pumpkin
- 1 can (12 fl. oz.) evaporated milk
- 1 unbaked 10″ pie shell
- Whipped cream
Preheat oven to 425°. Beat eggs, sugar, maple syrup, and spices in large bowl. Add pumpkin amd mix well. Gradually stir in evaporated milk.
Pour into pie shell. Bake at 425° F. for 15 minutes. Reduce temperature to 350° F.; bake for 40 to 50 minutes or until knife inserted near center comes out clean. Top with whipped cream before serving.
And then the nut and cranberry pie...

Four Nut Cranberry Pie
- 1/2 cup chopped walnuts
- 1/2 cup chopped pecans
- 1/2 cup chopped almonds
- 1/2 cup pistachios
- 3/4 cup packed dark brown sugar
- 1/2 cup Lyle's syrup - or light corn syrup
- 3/4 stick butter
- 3 large eggs
- 2 tbsp molasses
- 1 tsp vanilla
- pinch salt
- 1 1/2 cups cranberries
Preheat oven to 400°F. Roll out pie crust and place in deep-dish pie plate. Gently press into place. Fold overhang under crust and crimp edges. Freeze until firm, about 15 minutes.
Line pie crust with foil and fill with beans or pie weights. Bake until crust is set, about 15 minutes. Remove foil and beans and continue baking until crust just begins to color, about 10 minutes. Cool.
Meanwhile, toast nuts until just golden, about 10 minutes. Cool.
Mix brown sugar, light corn syrup, butter, eggs, molasses, vanilla and salt. Stir in toasted nuts and cranberries. Pour filing into prepared crust. Bake until center of filling is set, about 45 minutes.
Cool and serve with whipped cream, if desired.

Crostatas are pies that you make on a cookie sheet instead of a pie plate. They're super-easy because they're free-form. And no matter how they look - it's how they're supposed to look. I've made variations on a crostata for years. You can go crazy with it adding nuts, raisins, and such or keep it simple as I did, today. I did use a splash of Amaro Massagli a liquore from Lucca we brought back from vacation.
Pear Crostata
- 4 pears, peeled, cored and cubed
- splash liquore of choice
- ½ cup packed brown sugar
- 1/2 tsp cinnamon
- Pinch of nutmeg
- 2 oz butter, melted
- 2 tablespoons all-purpose flour
Preheat oven to 400°.
Mix all ingredients together in a bowl.
Roll dough out to about a 13" circle and place on a parchment-lined sheet pan. Pile pear mixture into center of dough and bring dough up over the filling.
Bake about 35 minutes or until bubbly and browned.

The Pumpkin Cake is a take on the cake I made last week - without the cranberries. I split the layers and filled them with leftover pumpkin mousse I made for Leah's baby shower. The Pumpkin Mousse was really just pumpkin, maple syrup, cinnamon, cloves, nutmeg, and ginger folded into whipped cream. Really basic but also really yummy.
I know this holiday intimidates the hell out of some people, but I just can't think of a way to have more fun!
Happy Thanksgiving!
Cranberry Pumpkin Cake

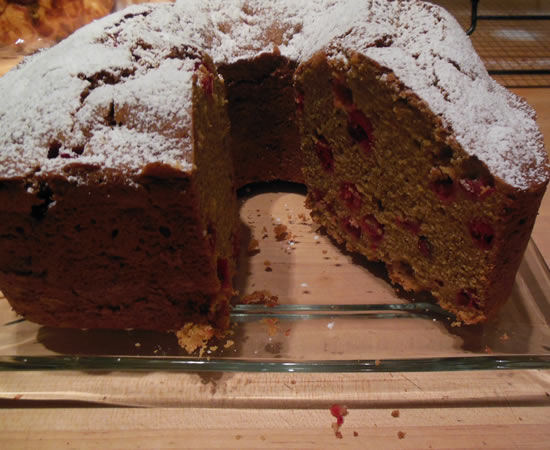
It's still feed a cold, feed a fever time, and since I'm planning the Thanksgiving meal right now, I thought I'd see how an old standby would make it as a cake. I've done a variation on this as a pumpkin bread for years but thought it might make it as a cake. It did! There is just no such thing as too many desserts on Thanksgiving, no matter what Victor says as I pull out ingredients for yet another pie, tart, torte, or whatever...
I made this in a tube pan but I think it would also work as a layer cake - with maybe a maple cream cheese icing. Maybe with chopped or crushed walnuts on top. If I make it for Thanksgiving it will definitely be as shown, though.
I also like using fresh cranberries in this. They add a nice tartness that the dried berries lack. Besides, they're pretty. I also used my roasted pumpkin puree instead of canned but one can of good pumpkin will work.
Cranberry Pumpkin Cake
- 2 cups pumpkin puree
- 2 cups sugar
- 1/2 cup water
- 4 eggs
- 1/2 cup grapeseed oil
- 4 cups flour
- 1 tbsp baking powder
- 1/2 tsp baking soda
- 1 tsp cinnamon
- 1 tsp ginger
- 1/2 tsp cloves
- 1/2 tsp salt
- 1 bag fresh cranberries
Preheat oven to 350°. Butter a tube pan.
Mix pumpkin, sugar, water, eggs, and oil. Mix in flour, baking powder, salt, baking soda, and spices being careful not to overmix. Stir in cranberries and pour batter into pan, spreading evenly.
Bake for 1 hour and 15 minutes, or until a tester comes out clean. Cool in pan about 10 minutes. Remove from pan and completely cool on rack. Top with powdered sugar.
It's definitely a keeper!
2012 Fruitcake
It's never too early to bake a fruitcake. The beauty of them is they get better as they age - and soak up the liquor that is poured onto them.
I must admit that I really do like fruitcake. I even like the store-bought ones, although the odds of me ever eating one of them with their chemicals and artificial ingredients are between slim and none. Low as they may be, I have my standards!
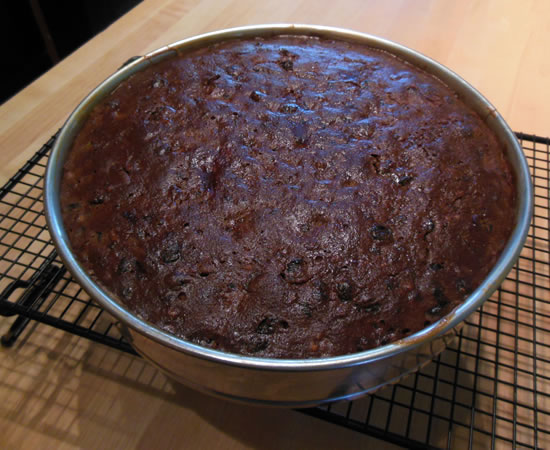
So... I looked at my 2010 recipe and decided it would be easy to update for 2012. And from the scents wafting through the house, it came out great!
I didn't use any candied fruit this year. I thought about making some candied orange or lemon peel and then decided it really wasn't worth it. I went for all dried fruit - soaked in amaretto! As I said, it smells really good!
2012 Fruitcake
- 8 cups assorted dried fruits (I used golden raisins, raisins, currants, apricots, blueberries, cherries, strawberries, dates, and figs.)
- 3/4 cup amaretto
- 1 cup all-purpose flour
- 1/2 cup wholoe wheat flour
- 1/2 tsp baking powder
- 1/2 tsp salt
- 1/2 tsp nutmeg
- 1 tsp ginger
- 1/2 tsp cloves
- 1 cup butter, softened
- 1 cup packed brown sugar
- 5 large eggs
- 1 cup almond meal
- 1 1/2 cups chopped assorted nuts (I used walnuts and pistachios)
- 1/4 cup orange marmalade mixed with 1 tbsp amaretto)
In a large bowl combine all of the fruits with the amaretto and let macerate overnight.
Line the bottom of a well-buttered 9 1/2-inch springform pan with a round of parchment paper and butter the paper. Into a small bowl sift together the flour, the baking powder, and the spices.
Cream together the butter and the brown sugar until the mixture is light and fluffy and beat in 4 of the eggs, 1 at a time, beating well after each addition.
Drain the fruit mixture in a sieve set over the batter and beat the juices into the batter.
Stir the flour mixture into the batter, one fourth at a time, stir in the fruit mixture, the almond meal, and the nuts, stirring until the mixture is just combined, and turn the batter out into the prepared pan.
Put 2 loaf pans, each filled with hot water, in a preheated 300°F. oven and put the springform pan between them. Bake the cake for 1 hour, brush the top with the remaining egg, beaten lightly, and bake the cake for 1 hour more. While the cake is baking, in a saucepan melt the marmalade with the remaining 1 tablespoon amaretto over moderate heat, bring the mixture to a boil, and strain it through a fine sieve into a bowl, pressing hard on the solids.
Cool cake in the pan on a rack for 30 minutes. Remove from pan. Brush the top of the cake with glaze.
The cake will keep, covered, for 6 months.
It will be going down to the basement where it will get a weekly dousing of amaretto until Christmas!
I'll be sure to let you know just how good it was!
'Tis The Season...
It's still officially summer for another week and a half, but my mind has already started focusing on The Holidays.
I like to plan ahead and not get blindsided by them. I mean... Christmas falls on December 25th every year. It doesn't change, it doesn't rotate... It's December 25th. Thanksgiving is a little trickier - the 4th Thursday in November - but still... a little planning never hurts.
We'll be hosting Thanksgiving at our house, again this year. It's pretty much tradition, so we'll have to start planning the ridiculous excess next month some time. I actually create an excel spreadsheet of what we're making, who will be here, and then I look back at blog posts to see what we did and what it looked like.
Organized.
It's how I quantity cook without getting stressed. It helps to have a plan.
We do the same thing with the Christmas baking, although quantities there have been drastically reduced over the years. At our height, we were baking between 6 and 8 thousand cookies every year. It started to get a bit ridiculous - not to mention expensive. We'll be making considerably less - although still way too many.
And then there's the fruitcakes, the stollen, the Christmas pudding... The last three items need to be made way in advance so they can properly age before Christmas. Stir-Up Sunday is about 5 weeks before Christmas - the last Sunday before Advent - and a traditional day to make Christmas puddings, but that's also the Sunday after Thanksgiving and our Decorating Weekend. Methinks I'll be scheduling fruitcakes and pudding for late October and early November...
Yep... It's beginning to look a lot like Christmas - even if the weather still says summer!
Christmas Stollen

I love walking into the house and finding Victor in the kitchen. It always means we're in for a gastronomic treat. I tend to get most of the credit for cooking, but Victor is a fantastic cook. It's not unlike when Ruth and I worked together. Being the showman, I tended to get a lot of the credit for things, but it was Ruth who consistently came up with the brilliant ideas.
And it happens at home, too. Victor and I are very different cooks, but we're fortunate that we like to do different things. We have different "patience levels" and generally complement one another's styles.
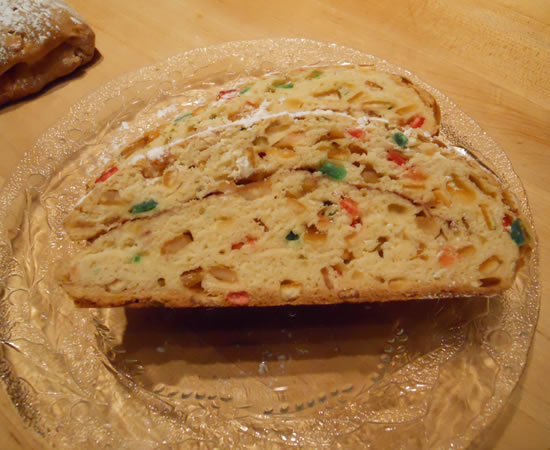
Walking into the kitchen, I was greeted with a very slowly-rising Christmas Stollen! I love stollen but hadn't made my favorite Stollen recipe from our friend Luigi this year. That recipe makes about 8 loaves. Victor found another recipe online and decided to give a single loaf a try.
I had a container of fruitcake fruit - I hadn't made my fruitcakes or Christmas Pudding, either - so he used that along with some raisins.
It came out fantastic!
The recipe calls for a marzipan center. We did have almond paste in the cabinet - for the amaretti I didn't make - but he decided to go without.
It was perfect, nonetheless.
The original recipe comes from the Dorchester Hotel in London... Victor's heading off to London in a couple of weeks and will be staying in Mayfair not far from the Dorchester... (I'm not jealous. Really. I'm. Not. Jealous.) But I digress... Perhaps he can pop in and see if they have any available at High Tea... Or something.
(DEEP breath... Not jealous. Not jealous. Not jealous...)
Christmas Stollen
Ingredients
- 1 tablespoon active dry yeast
- 2/3 cup warm milk (110 degrees F/45 degrees C)
- 1 large egg
- 1/3 cup white sugar
- 1/2 tablespoon salt
- 1/3 cup butter, softened
- 2 1/2 cups bread flour
- 1/3 cup currants
- 1/3 cup sultana raisins
- 1/3 cup red candied cherries, quartered
- 2/3 cup diced candied citron
- 6 ounces marzipan
- 1 tablespoon confectioners' sugar
- 1 teaspoon ground cinnamon
Directions
In a small bowl, dissolve yeast in warm milk. Let stand until creamy, about 10 minutes.
In a large bowl, combine the yeast mixture with the egg, white sugar, salt, butter, and 2 cups bread flour; beat well. Add the remaining flour, 1/4 cup at a time, stirring well after each addition. When the dough has begun to pull together, turn it out onto a lightly floured surface, and knead in the currants, raisins, dried cherries, and citrus peel. Continue kneading until smooth, about 8 minutes.
Lightly oil a large bowl, place the dough in the bowl, and turn to coat with oil. Cover with a damp cloth and let rise in a warm place until doubled in volume, about 1 hour.
Lightly grease a cookie sheet. Deflate the dough and turn it out onto a lightly floured surface. Roll the marzipan into a rope and place it in the center of the dough. Fold the dough over to cover it; pinch the seams together to seal. Place the loaf, seam side down, on the prepared baking sheet. Cover with a damp cloth and let rise until doubled in volume, about 40 minutes. Meanwhile, preheat oven to 350 degrees F (175 degrees C).
Bake in the preheated oven for 10 minutes, then reduce heat to 300 degrees F (150 degrees C), and bake for a further 30 to 40 minutes, or until golden brown. Allow loaf to cool on a wire rack. Dust the cooled loaf with confectioners' sugar, and sprinkle with the cinnamon.
It's a very dense dough and doesn't rise the same way as a traditional yeast bread does, so don't panic if it's not looking exactly how you think it should.
It should still come out just fine.
We had two power outages while this was in the oven and it still came out perfect!
Aunt Dolores' Rum Balls
One of my favorite Christmas memories are Aunt Dolores' Rum Balls. Auntie made them every year and every year we would be allowed "one" and then we would sneak a whole bunch more. Well - maybe one or two more. The Rum Balls were really good - but so was all of the other stuff. Lots of candies and cookies we only saw at Christmas. It was fun going over to their high-rise apartment. Running up and down the stairs, dropping noisy bottles down the trash chute, pushing every button in the elevators.
We were darling children. Really, we were.
But back to the Rum Balls...
The recipe is extremely easy to make and it doesn't take much time to dip them, either. And they are so worth the time!
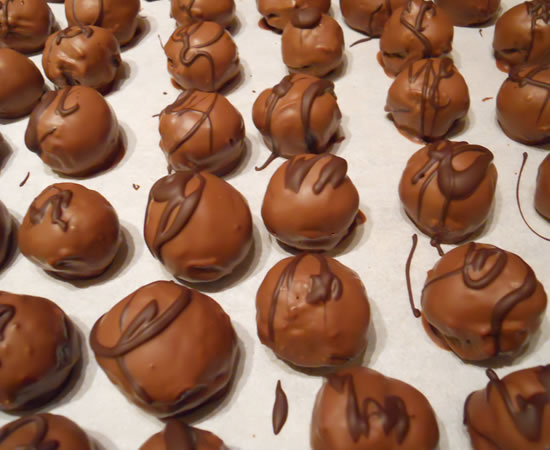
Aunt Dolores made hers with Vanilla Wafers and always rolled them in powdered sugar. They were little snowballs with a kick. My mom gave me her recipe and one year I decided to chocolate dip them. They were fabulous! Rum Ball Truffles! I've been chocolate dipping them ever since.
For the past few years, I've also been making them with chocolate cookies instead of the traditional vanilla wafer. I've also made them with ginger snaps and graham crackers. I've also used Bacardi rum (Auntie always used Bacardi) and I've made them with Meyers Rum (really good) and with Jack Daniels (also really good!) This year, I used Bacardi because we already had it in the house.

Aunt Dolores' Rum Balls
- 1 cup ground vanilla wafers
- 1 cup sifted powdered sugar
- 1 cup chopped nuts – pecans or walnuts
- 2 tbsp cocoa
- 1 1/2 tbsp white corn syrup
- 1/4 cup rum or bourbon
Mix all ingredients. Mix syrup with bourbon. Mix with fork. Roll into ball – then roll in powdered sugar. Store in tight container. Put wax paper in between layers.
Chocolate Walnut Biscotti
We've been baking Christmas cookies forever.
At one point we were literally making thousands of them and buying flour and sugar in multiple 25-pound bags.
We probably still make more than the average family, but we have cut waaaaaaay back. Time, money, and old age are all catching up.
But what we lose in quantity, we definitely gain in quality. The cookies are better than ever.
We have the family favorites that we definitely have to make every year and we've had a niece and nephew come down and assist for the past few years. But while we always make the traditional cookies, we usually make a couple of different cookies each year, just because. Last year we went on a bit of a German binge and made Springerle cookies and Pfeffernüsse cookies - both excellent. This year, we're back in Italy with Chocolate Biscotti.
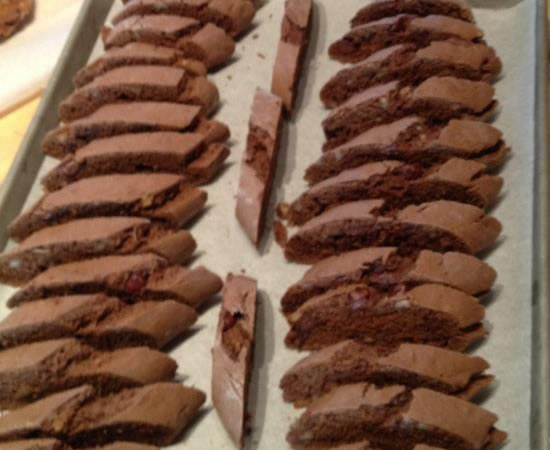
Victor reworked his Uncle Rudy's biscotti recipe for these. Actually, we have reworked that recipe a dozen times for a dozen different variations. The original is for a traditional anise cookie - that is still the family favorite - but the macadamia nut orange, the almond, and now chocolate are always big hits.
This variation is outstanding! And easy to make.
Chocolate Walnut Biscotti
- 2 3/4 cups flour
- 1/3 cup cocoa powder
- 2 tsp baking powder
- 1 cube butter (4 oz)
- 2/3 cup sugar
- 3 eggs
- 1 cup chopped walnuts
- 1 cup chopped chocolate or chocolate chips
- 1 tsp vanilla
Sift together dry ingredients. Cream sugar and butter, add eggs one at a time. Add vanilla. Stir in flour and cocoa. Stir in nuts and chocolate.
Divide dough in half. Shape into logs. Place on greased cookie sheets and bake at 350° for 18-20 minutes.
Cool completely. Slice into 1/4 to 1/2″ slices and toast on both sides in 350° oven.
These really did come out awesome! And they're simple to do.
There are more cookies on the horizon and a special Danish pastry I want to make for Christmas morning. I'm going to be experimenting with it this weekend...
50 years ago - and yes, that is a long time ago - I worked in a neighborhood donut shop/bakery/coffee shop and we made a Danish pastry called a Butterhorn. I have not seen this particular Danish for years and even doing a Google search hasn't resulted in the Danish I remember. I have a Danish Pastry recipe from Fantasia Bakery in San Francisco that I have made before and a butter streusel recipe so Saturday after work I shall be making pastry. It's an hours-long process of rolling, folding, and chilling.
But they're gonna be good! I just know it!
Fantasia Confections, Revisited
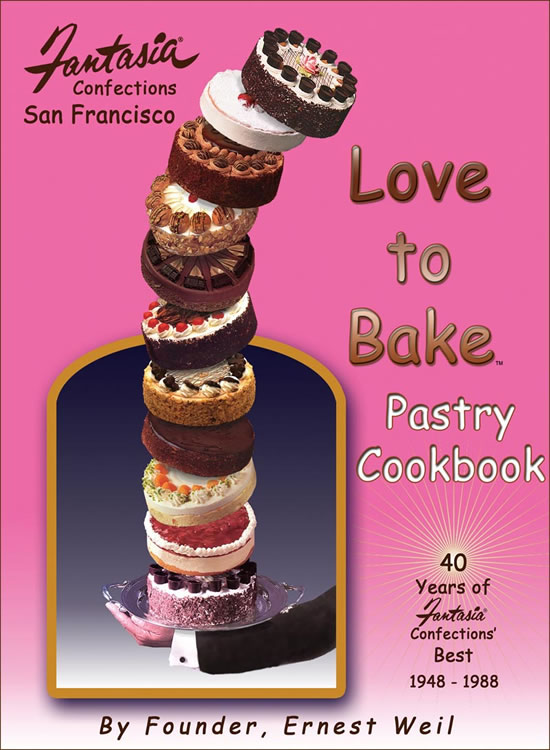
Six years ago I sent away for a cook book straight out of my childhood.
My very first job was in a neighborhood bakery out in the Sunset District of San Francisco - The Donut Center and European Bakery. On the other side of the park in Laurel Village was Fantasia Confections. We made donuts, Danish pastries, fantastic coffee cakes, cookies, and a few cakes. Fantasia made the high-end stuff. Fancy-looking, over-the-top decorated cakes, tortes, tarts, tea cakes... The owner, Ernest Weil, worked at Blum's downtown and created the famous Blum's Coffee Crunch Cake before opening Fantasia in 1948. I also worked at Blum's circa 1967 and it holds the distinction of being the very first job I was ever fired from. (I was a mouthy smart-ass even back then...)
But I digress...
The cook book was everything I hoped it would be - and more. Recipes written by a baker - not a cook book author. The layout could be a bit disconcerting at first for someone who has not worked in a production bakery before. The "instructions" for creating something are a collection of "recipes" for the different components. But once you see the logic, it's extremely easy to navigate. Another nice thing is you may create several different recipes to assemble the finished product. You actually get to focus on each recipe independently. It's much less intimidating!
In a bakery, you don't make pastry cream for cream puffs. You make pastry cream, and pull it out of the refrigerator when you're going to fill cream puffs - or make a Boston Cream Pie, fill Maple Bars, or whatever. One item is used in many different concoctions. The cook book is set up that way and it's a pleasure for me to recall those days of yesteryear when that's the way I worked. It's also great for people who aren't master chefs. As Ernest Weil states, "Not everyone is born to be a perfect pastry chef, so just relax and enjoy the learning experience."
So... the reason for this walk down Memory Lane?!? We have friends coming over next weekend for our annual Christmas Get-together and we decided to do a Brunch. And I thought homemade Danish pastries would be fun to make. Homemade Danish means the recipe from Fantasia - since I don't have the one from The Donut Center. It's extremely versatile and is used for everything from classic Danish to butterhorns, bear claws, and coffee rings - a breakfast cake I haven't seen in years. It is a classic recipe requiring lots of butter, folding, rolling, and refrigeration - and it has to be made the day before.
I have several ideas running around the ol' brain right now - including coffee rings for Christmas...
The possibilities are endless...
The cook book is currently out of print, but you can download a full 248-page .pdf version of the book for making a $25.00 donation to one of several non-profit chlidren's organizations in the bay area and beyond. Details are on their website: www.lovetobakecookbook.com.
It could be a great Christmas gift for your favorite baker and a worthwhile donation at the same time!
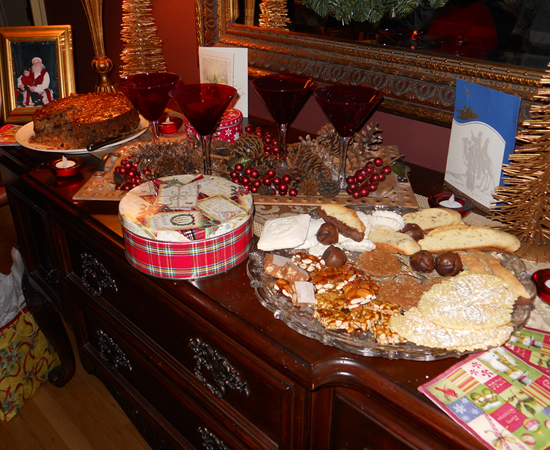
Christmas Eve 2010
'Tis the Season!
We've been here about 18 hours and have been eating for most of them! If I can't be home in San Francisco with all my family, North Jersey and Victor's family is not a bad second.
Tradition here is Christmas Eve Feast of the Seven Fishes - Festa dei Sette Pesci. The Feast of the Seven Fishes originated in Southern Italy and goes back to the medieval Catholic tradition of abstinence.
It's certainly not about abstinence here. More like abundance.
Our brother-in-law, Tom, is the Christmas Eve chef, preparing shrimp, crab, mussels, and whatever is looking the best at the fish monger.
And then he creates his magic.
We started with a crab dip, and I made our friend Luigi's Christmas Eve Killer Shrimp. Killer is an understatement. It rocks!
::insert fuzzy picture here when I get home::
And then there was Linguini with Clams

And breaded and fried tilapia, cod with almonds, mussels with a sweet or spicy marinara...

What am I missing?!?
It was all just too good. With salad and lots of crusty bread to sop up the various sauces...
After way too much food, the tradition continues with neighbors Ben and Barbara and their kids coming over. Barbara brings her homemade Finikia - a Greek cookie of sorts, and we start on desserts...

Because it's all about the desserts!
And then it's up until the wee hours of the morning.....
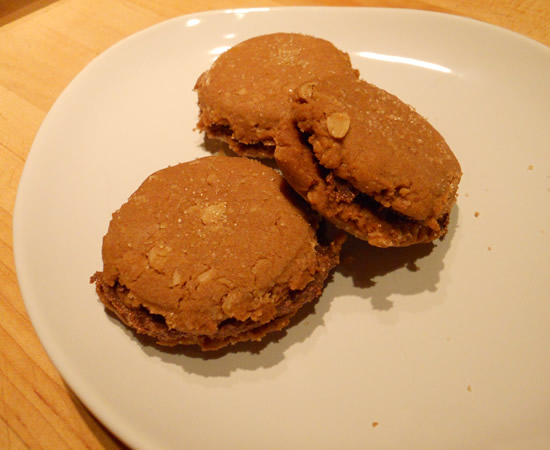
Nutella Sandwich Cookies
I LOVE La Cucina Italiana Magazine. Love it. Where else would one find a recipe to make homemade gianduja - a nutella-like spread - and in another issue, cookies using the spread as an ingredient and as a filling?
My tummy is smiling tonight!
The kudos for both recipes go to pastry chef Karen DeMasco. The cookie recipe is rather unique in that it calls for sauteing rolled oats in butter before adding them to the dough. What a great idea! The whole kitchen smelled great before I even started!
Both the gianduja and cookie recipe will be regulars at our house. The spread will last easily a month on the shelf and three times that in the refrigerator (not that it's likely to last that long around here!)
I used a 1 tablespoon scoop and got 54 cookies from the batch. Those will make 27 sandwich cookies. That's a lot of cookie. These guys are rich!
I used my homemade gianduja, but the recipe was created for off-the-shelf Nutella.
Nutella Sandwich Cookies
Recipe by Karen DeMasco
Ingredients
For the cookies:
- 4 tablespoons (1/2 stick) cold unsalted butter plus 12 tablespoons (1 1/2 sticks) unsalted butter, at room temperature
- 1 cup rolled oats (preferably Quaker)
- 3/4 cup Nutella
- 1/2 cup packed dark brown sugar
- 1/2 cup granulated sugar
- 2 cups unbleached all-purpose flour plus more for dusting
- 2 teaspoons baking soda
- 2 teaspoons kosher salt
- 1/4 cup Demerara sugar (see Note)
For the filling:
- About 1 cup Nutella
Special equipment: parchment paper
Instructions
For the cookies: Heat oven to 350º. Line 3 baking sheets with parchment paper.
In a large skillet, melt 4 tablespoons cold unsalted butter over medium heat. Add oats and cook, stirring frequently, until fragrant and lightly golden, about 5 minutes; transfer oats to a large metal bowl and set aside.
In the bowl of an electric mixer fitted with the whisk attachment, combine room temperature butter, Nutella, brown sugar and granulated sugar. Beat on medium speed, frequently scraping down the sides of bowl, until fluffy and well combined, 3 to 4 minutes.
In a separate bowl, whisk together flour, baking soda and salt. In two additions, add flour mixture to butter mixture, mixing on low speed until well incorporated, then add oats and mix until dough comes together and oats are incorporated.
Lightly flour the palms of your hands. Scoop 1 level tablespoon dough, roll into a ball, then flatten to about 1/8-inch-thick. Place on a prepared baking sheet. Repeat with remaining dough, spacing cookies at least 1 inch apart. Sprinkle with Demerara sugar. Bake, rotating the pans halfway through, until the cookies are puffed and golden, 12 to 15 minutes. Transfer cookies on parchment paper to wire racks to cool completely. (Cookies can be stored, unfilled, in an airtight container at room temperature for up to 3 days.)
To fill the cookies: Using an offset spatula or butter knife, spread about 1 tablespoon Nutella over the flat sides of half of the cookies. Sandwich with remaining cookies, flat sides together.
Once filled, cookies are best same day, but can be kept in an airtight container at room temperature for up to 2 days.
Note: Demerara is a natural brown sugar, an English version of turbinado sugar but with a slightly larger crystal size. When sprinkled on cookies and pie crusts, it adds sparkle and crunch. Turbinado is a good substitute while granulated sugar will work in a pinch.
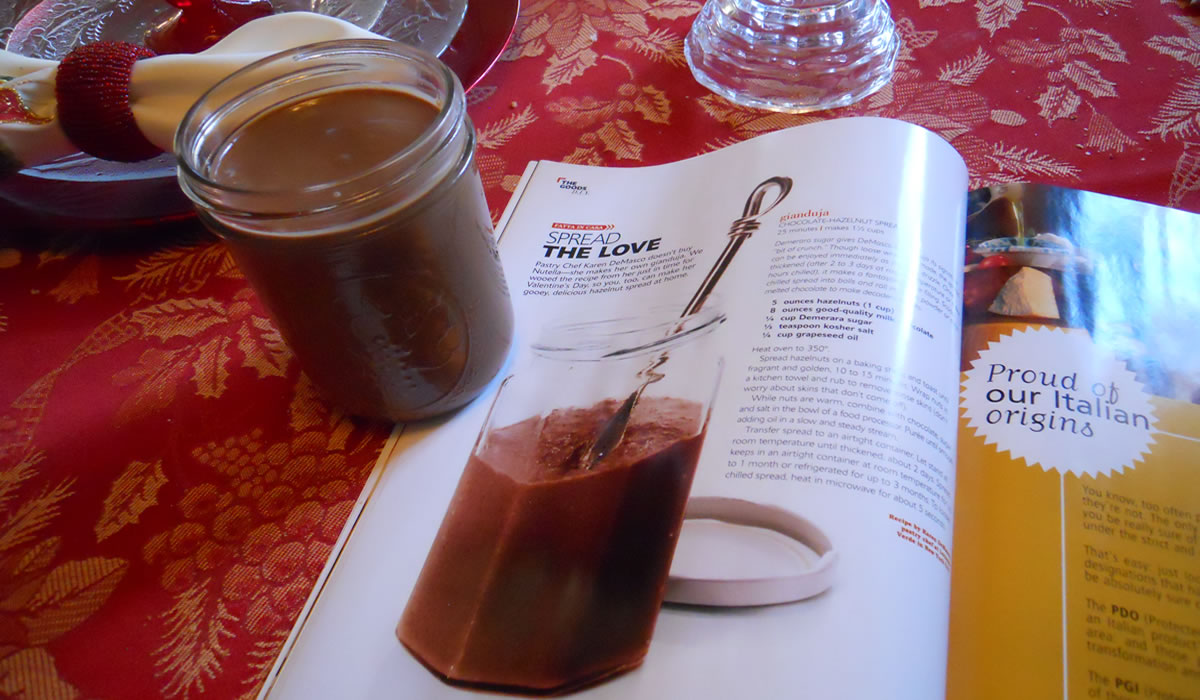
Gianduja
I think this may be the surprise dish of the holiday season. It's mid-December but the February issue of La Cucina Italiana magazine is already here. And I am very glad it is! A past issue had a recipe for Nutella Cookie Sandwiches that seemed perfect as one of our Christmas cookies this year. But since Nutella is not on my regular shopping list, I just keep forgetting to pick it up. Had I not come across this recipe, the cookies would have probably fallen into the ever-growing "I thought about making" category.
And to make good things even better, I just found out that this recipe and the cookie recipe both come from Pastry Chef Karen DeMasco. I've been checking her out online and really like her style. I see more of her ideas coming to town!
Gianduja is a sweet chocolate and hazelnut invented in Turin 1852 by Caffarel Chocolate Company. The better-known to us Nutella came into being in the 1940's in Italy. Nutella is good. This is nothing short of totally amazing. And it literally took minutes to prepare.
I bought hazelnuts already hulled from Oh! Nuts in Brooklyn. They are cheap at $8.99/lb! Plus they arrived in just a couple of days! The Demerara sugar came from Atlantic Spice. I bought it a while back with no particular plan or recipe. I just figured I'd use it, eventually... Around here, nothing ever goes to waste.
One note... since I bought hulled hazelnuts I didn't have to go through the toasting-and-rubbing, but I did put the nuts in the oven for a few minutes to warm them before making the spread.
Gianduja
Chocolate Hazelnut SpreadDemerara sugar gives DeMasco's Gianduja its signature "bit of crunch." Though loose when first made, the spread can be enjoyed immediately as a dip or drizzle. Once thickened (after 2 to 3 days at room temperature or a few hours chilled), it makes a fantastic cookie filling. Scoop chilled spread into balls and roll in cocoa powder or dip in melted chocolate to make decadent truffles.
- 5 ounces hazelnuts (1 cup)
- 8 ounces good-quality milk chocolate
- 1/4 cup Demerara sugar
- 1/2 teaspoon kosher salt
- 1/4 cup grapeseed oil
Heat oven to 350°.
Spread hazelnuts on a baking sheet and toast until fragrant and golden, 10 to 15 minutes. Wrap nuts in a kitchen towel and rub to remove loose skins (don't worry about skins that won't come off).
While nuts are warm, combine with chocolate, sugar, and salt in the bowl of a food processor. Puree until smooth, adding oil in a slow steady stream.
Transfer to an airtight container. Let stand at room temperature until thickened, about 2 days. Spread keeps in an airtight container at room temperature for up to 1 month or refrigerated for up to 3 months. To loosen chilled spread, heat in microwave for about 5 seconds.
And now that the gianduja is done those cookies are going to be made in the next few days.