Springerle Cookies

I am one happy baker today! Really happy!
The springerle cookies came out fantastic! Better than fantastic! They're really, really good!
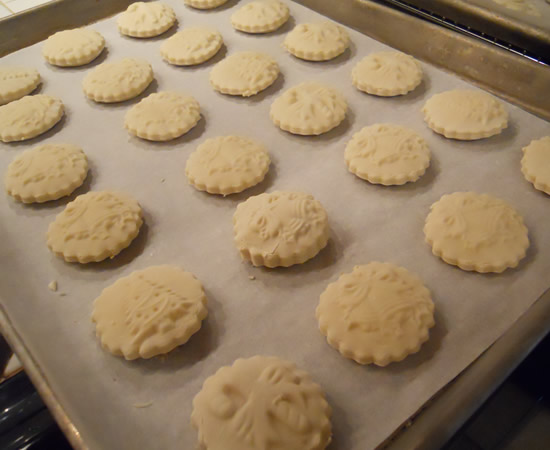
For those not in the know (and that would have been me until a few weeks ago) a springerle cookie is a German cookie that is stamped with a design and then allowed to dry overnight. This sets the design so it doesn't "melt" during baking. They're baked at a low temperature until the bottom is barely browned. The cookie itself stays pretty white. They are also leavened with bakers ammonia - a leavening agent that only reacts with heat - not liquid.
I had never heard of them until our friend Luigi said she was making them. I've made her Oma's stollen for the past few years and love it.
They take a bit of time, but really not a lot of effort. The dough is velvety-smooth and easy to work.

Even a novice baker could make an acceptable cookie with this. The trick - and it's one I am learning - is the pressing and cutting. These cookies came out okay, but I can see where a couple of really good springerele molds would really make a lot of difference.

They really are works of art and while anything will taste good, the artistry is in the pressing and cutting. I shall enjoy practicing!

I did not have a wood-carved traditional springerle mold. I had three ceramic molds that did the trick this year, but I'm going to get a few real ones for next Christmas now that I know how wonderful the cookies are!

I made two shapes with the molds - round where I used a cookie cutter around the imprint and square where I just cut the dough sheet into blocks after pressing.
Both worked well, and while probably not exactly traditional, it does show that just about anyone cold make them at home without having to buy a lot of special equipment.
Luigi doesn't have her Oma's original recipe, but she said the recipe at House on the Hill was pretty close to what she used to make. And they have a ton of springerele molds of every shape, size, and design. Check them out!
This is Nini's Perfection Springerle Cookie Recipe from House on the Hill:
Nini's Perfection Springerle Cookie Recipe
These whisked-egg holiday cookies date back to at least the 1600′s and are made in Bavaria, Switzerland and the Alsace area of France. For eating quality, ease and quality of prints this recipe is just perfection!
What you’ll need:
- 1/2 teaspoon baker’s ammonia (Hartshorn) or baking powder
- 2 tablespoons milk
- 6 large eggs, room temperature
- 6 cups powdered sugar (1 – 1 1/2 #)
- 1/2 cup unsalted butter, softened but not melted
- 1/2 teaspoon salt
- 1/2 teaspoon of anise (if substituting fruit flavored oils, use 3 teaspoons)
- 2 lb. box sifted cake flour (Swansdown or Softasilk)
- grated rind of orange or lemon – optional (enhances flavor of the traditional anise or the citrus flavors)
- more flour as needed
Dissolve hartshorn in milk and set aside. Beat eggs till thick and lemon-colored (10-20 minutes). Slowly beat in the powdered sugar, then the softened butter.
Add the hartshorn and milk, salt, preferred flavoring, and grated rind of lemon or orange, if desired. Gradually beat in as much flour as you can with the mixer, then stir in the remainder of the 2 lbs. of flour to make stiff dough. Turn onto floured surface and knead in enough flour to make a good print without sticking.
Follow general directions for imprinting and drying cookies.Printing Cookies
Method #1 – For most cookies…
Dough will be rolled approximately 1/4″ to 3/8″ thick, like pie crust (deeper molds need thicker dough). Brush confectioner’s sugar or flour on the mold image, then imprint with your press (mold), cut out shape with knife or pastry wheel, dry and bake. Remember to “press and cut, press and cut” so that adjacent images are not distorted.Method #2 – For very deep or large cookies…
Roll out dough to desired thickness and, using a dry, clean pastry brush, apply flour or sugar and cut a piece of dough the approximate size needed for the mold. Press dough into the mold with fingers, working from center outward. You may lightly roll the back side of the cookie to smooth before turning out of the mold. Trim, dry and bake. To check your print, use light from the side – daylight or light from a floor lamp – so the shadows let you see if your prints are good.Drying
Most printed cookies are dried 2-24 hours before baking (depending on your schedule, humidity, etc.) Drying preserves the image during baking.
Baking
Bake on greased or baker’s parchment-lined cookie sheets at 255° to 325° till barely golden on the bottom, 10-15 minutes or more, depending on size of cookie.
Store in airtight containers or in zipper bags in the freezer. They keep for months, and improve with age. Yield 3 to 12 dozen.
The the drying and baking instructions are extremely vague. In one respect they have to be, because there are so many different sizes and shapes of molds and cookies. That didn't help this first-time springerle baker, however.
I preheated the oven to 255° and baked the smaller round cookies for about 22 minutes. I baked the larger squares almost 30 minutes.
As with any baking, a bit of close watching definitely doesn't hurt. Just keep a close eye and pull them when they're "barely golden on the bottom" and you'll have a perfect cookie!
I definitely want to thank the folks at House on the Hill for sharing their recipe! I can see myself making these for many years to come!
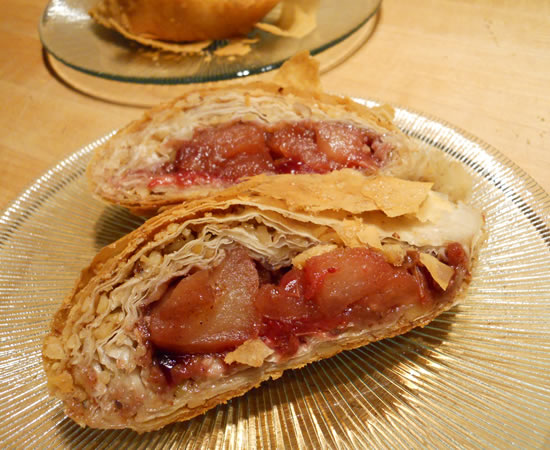
Apple Cranberry Phyllo Rolls
This one got away from me. I really didn't plan to make two huge phyllo rolls. But when you have a one-pound box of frozen phyllo dough thawed, you use it. It's not like it's going to be any good next week.
So... I made two huge phyllo rolls.
And my-oh-my did they come out good! We're definitely set with desserts for a while.
I love phyllo but just don't use it enough. It's good savory, it's good sweet. You can fill it with absolutely anything.
This recipe came about because I had just picked up a couple of apples at the store and had a bag of cranberries sitting in the 'fridge. The phyllo has been in the freezer for a couple of weeks. Time to use stuff!
Buttering every other phyllo layer gives it a bit more substance - and actually cuts down on the calories considerably. Not that I did it for that reason... I wanted a bit more chew in the center and a bit less crumbly. I should freeze one for Thanksgiving...
Cranberry Apple Phyllo Rolls
Makes 2
- 1 tbsp butter
- 5 apples, peeled, cored, and chopped
- 1 cup fresh cranberries
- 1/2 cup packed brown sugar
- 1 teaspoon cinnamon
- 1/2 tsp nutmeg
- 1/2 tsp allspice
- 1 1/2 cups finely-chopped walnuts
- 1/2 cup demerara sugar
- 1 stick butter, melted
- 16 sheets phyllo dough
Preheat the oven to 350. Combine the apples, cranberries, brown sugar and spices in a heavy covered skilletand cook for about 10 minutes or until tender. Cool to room temperature.
Mix walnuts and demerara sugar.
Layer 2 sheets of the phyllo on table and brush with butter. Sprinkle with walnut and sugar mixture. Repeat three times for a total of 4 2-sheet layers per roll.
Heap the apple mixture along (one end if square, long end if rectangular) of the phyllo dough. Carefully roll up, enclosing filling. Place seam-side down on baking sheet lined with parchment paper.
Brush top with butter and sprinkle with additional demerara sugar.
Bake for 35-40 min minutes. Cool and slice.

Seriously. I have two. I need to freeze one!

Pumpkin Cupcakes

Our sister-in-law Marie's birthday was Friday. We've reached the point where we don't really celebrate them. A phone call, a message on Facebook... Very 21st century.
But at the same time, a bit of real-time recognition is always nice.
Pumpkin Cupcakes seemed to fit the bill, today.
If we had baked a whole cake it would have been greeted with heartfelt thanks and a demand to take half of it back home with us. Cupcakes were the perfect idea.
I decided we needed to be seasonal. I had a pumpkin cake recipe I hadn't made in years and lots of homemade pumpkin butter.
As I was getting ingredients together, I realized we had no white sugar in the house! Victor had used the last of it for the peanut butter cookies. I had put it on the shopping list - but hadn't yet gone shopping.
I had plenty of brown sugar so I decided to make a substitution. I've baked long enough to know when ingredients can be changed out and when they can't. I had pretty much made up this recipe in the first place, so I felt comfortable making the change.
And it worked just fine - maybe even better. They came out with a really nice pumpkin/spice flavor.
Pumpkin Cake
Cake:
- 2 1/4 cups cake flour
- 2 1/2 tsp baking powder
- 2 tsp cinnamon
- 1/2 tsp salt
- 1/4 tsp ginger
- 1/4 tsp allspice
- 3/4 cup Pumpkin Butter
- 1/3 cup vanilla yogurt
- 1/3 cup honey
- 1 tbsp vanilla
- 3/4 cup butter
- 1 cup brown sugar
- 3 large eggs
Frosting
- 8oz cream cheese, room temperature
- 1 stick butter, room temperature
- 2 cups powdered sugar (or more)
- 1/2 cup Pumpkin Butter
Make cake:
Preheat oven to 350°. Line cupcake pans with paper holders. Sift flour and next 5 ingredients into medium bowl. Whisk pumpkin, yogurt, honey and vanilla in small bowl to blend. Using mixer, beat butter in large bowl until fluffy. Gradually beat in sugar. Beat in eggs 1 at a time. Mix dry ingredients into butter mixture alternately with pumpkin mixture.
Fill cupcake tins about 2/3 full. Bake about 25 minutes. Cool.
Make frosting:
Beat cream cheese and butter together. Add pumpkin butter and mix well. Add powdered sugar and mix until creamy. Add more sugar, as necessary, to gain desired consistency.
I used large cupcake liners and got 20 cupcakes. Using standard liners would net 24 cupcakes.
And look what Victor just brought home from Marie's!
She made us Caramel Apples!

There is no shortage of desserts tonight at our house!
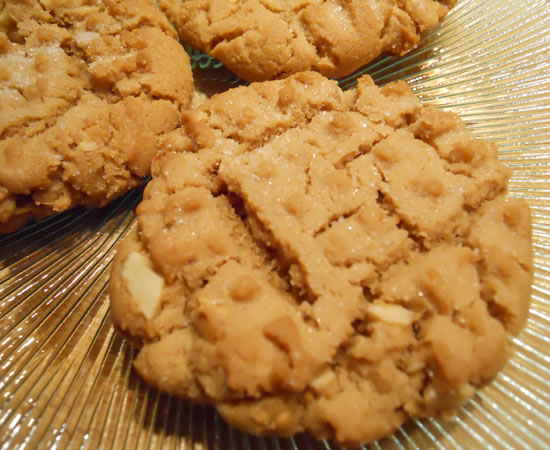
Peanut Butter Cookies
I can't imagine what it would be like to be married to someone who never cooked. Who never ventured into the kitchen except to get ice. It's just so outside my realm of experience.
My mom cooked the majority of meals in our house growing up, but my father definitely did his share of the cooking, too. He was a San Francisco Fireman. He knew his way around a kitchen and didn't fear for his masculinity if he was seen at the grocery store or cooking for his family. His veal cutlets and dirty potatoes were legendary. And those Sunday morning eggs fried in bacon grease.....
::sigh::
Okay, so he wasn't always the most health-conscious of cooks. He was definitely role model, though. A really good role model. I learned a lot from him.
Fast-forward a few years and imagine my joy walking into the house after work and seeing Victor in the kitchen making peanut butter cookies. It's slightly chill outside, but the minute I walk into the house I'm enveloped in warmth and the smell of baking peanut butter wafting through the house.
My stomach started smiling before I did - and I started smiling immediately!
By choice, I do most of the cooking at home. I really do enjoy it. But I also love it when Victor gets into the kitchen - especially when it's unexpected... like coming home to peanut butter cookies in the oven. No matter what sort of day it has been, all is immediately right with the world.
Yes. It is definitely great to share the cooking chores. Especially when there are cookies involved!
His recipe was adapted from an old, battered copy of the Better Homes and Gardens Cook Book.
Peanut Butter Cookies
Ingredients
- 1/2 cup chunky peanut butter
- 1/2 cup butter, softened
- 1/2 cup granulated sugar
- 1/2 cup packed brown sugar
- 3/4 tsp baking soda
- 1/4 tsp salt
- 1 egg
- 1/2 tsp vanilla
- 1-1/4 cups all-purpose flour
- 1/2 cup peanuts
Directions
1. In a large mixing bowl beat peanut butter and butter with electric mixer on medium to high speed for 30 seconds. Add granulated sugar and brown sugar, baking soda, and salt. Beat until combined, scraping sides of bowl occasionally. Beat in egg and vanilla until combined. Beat in as much of the flour as you can with the mixer. Stir in any remaining flour. Add the peanuts. Cover and refrigerate dough about 1 hour or until easy to handle.
2. Preheat oven to 375 degrees F. Shape dough in 1-inch balls. Place balls 2 inches apart on an ungreased cookie sheet. Flatten the cookies by making crisscross marks with fork tines, dipping fork in sugar between flattening each cookie. Bake about 8 minutes or until edges are lightly browned. Transfer to wire racks. Cool. Makes about 3 dozen cookies.
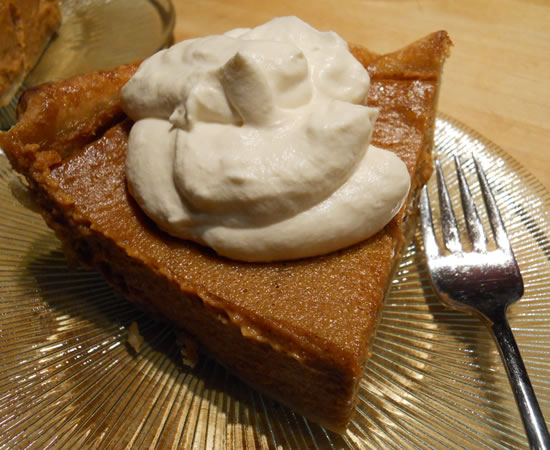
Perfect Pumpkin Pie
Pumpkin Pie. One of my all-time favorite breakfasts. Ah... er... I mean... desserts. With whipped cream, of course.
Victor actually prefers his pie without cream. I don't get it. I am of the opinion that the pie is merely a vehicle to bring the whipped cream to the mouth.
But it's a win-win for me. I get all the whipped cream!
I've been making this particular pie for a while. Secret ingredient is a 1/4 cup of maple syrup. It really adds a subtle flavor. I like.
And the pie crust is homemade, of course. This is enough for two crusts.
Crust:
- 2 cups flour
- 1/3 cup pastry/cake flour
- 2 sticks butter, frozen
- pinch salt
- 2 tbsp sugar
- 1/2 cup ice water
Using a food processor, add flours, salt, and sugar. Pulse to mix.
Chop up frozen butter and add. Pulse until butter is incorporated and mixture looks grainy.
Slowly add ice water and pulse until mixed.
Turn out onto counter. Press and form mixture into two disks . Wrap in plastic and refrigerate about an hour to allow the flour to properly absorb the water and to relax the gluten.
Roll out crust and place in pie plate. Crimp edges and fill.
The filling can be made with a can of pumpkin, but it really is better with fresh.
Pumpkin Pie Filling
- 3/4 cup granulated sugar
- 1/4 cup maple syrup
- 1/2 teaspoon salt
- 2 teaspoon ground cinnamon
- 1/2 teaspoon ground ginger
- 1/4 teaspoon ground cloves
- 1/4 teaspoon freshly ground nutmeg
- 2 large eggs
- 2 cups fresh pumpkin puree (or 1 15 oz can)
- 1 can (12 fl. oz.) evaporated milk
Preheat oven to 425°. Beat eggs, sugar, maple syrup, and spices in large bowl. Add pumpkin amd mix well. Gradually stir in evaporated milk.
Pour into pie shell. Bake at 425° F. for 15 minutes. Reduce temperature to 350° F.; bake for 40 to 50 minutes or until knife inserted near center comes out clean. Top with whipped cream before serving.
It is so easy to make and so good you may just be tempted to have some for breakfast!
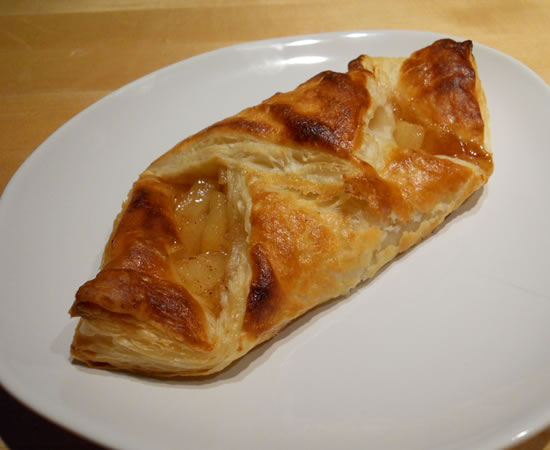
Pear Pastry
Since we can't be at AT&T Park watching the game live and eating garlic fries, we needed something to start tonight's baseball game. We keep seeing our former season ticket seats... It is such an awesome ball park. I miss those seats. Those were fun days.
But I digress...
I picked up a couple of great-looking pears yesterday, thinking they would lend themselves to a fun dessert. They did - except I didn't make the dessert!
We had puff pastry in the freezer...
Victor peeled and cubed the pears and coated them with maybe a quarter-cup of sugar. Into a skillet they went with a tablespoon of butter, a bit of flour, cinnamon and nutmeg.
When they caramelized a bit, he added a splash of apple cider and let that cook down.
Onto the pastry, folded up 2 sides, and baked at 425° for about 15 minutes.
Yum.

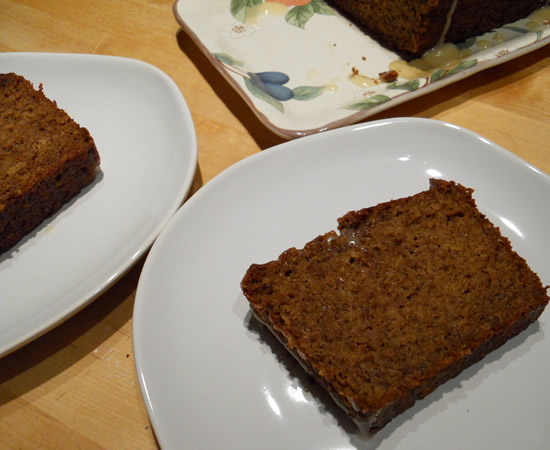
Bananas Foster Bread

I was looking at some pretty ripe bananas yesterday. Really ripe; as in use them right now or throw them away really ripe.
I decided to use them.
Fortunately, the latest issue of Cooking Light magazine was sitting here. The cover picture was - banana bread.
Banana bread is one of those things I just tend to throw together. I've made it enough times over the years that I have a recipe memorized. But... I'm always willing to look at ideas.
There was a recipe for a Bananas Foster Bread that looked promising. Cook the bananas with some butter, brown sugar and brandy before mixing everything together? Sounds like a plan.
I tweaked the ingredients a bit (what a shock!) by adding wheat bran in place of ground flax seed and lots more spices. We ended up with a really good dessert - and possible breakfast!
Bananas Foster Bread
- 2 cups mashed ripe banana
- 1 cup packed brown sugar, divided
- 5 tbsp butter, melted
- 3 tbsp brandy or dark rum
- 1/2 cup vanilla yogurt
- 2 large eggs
- 1 3/4 cups all-purpose flour
- 1/2 cup wheat bran
- 1 tsp baking soda
- 1/2 tsp salt
- 1 tsp cinnamon
- 1/2 tsp allspice
- 1/4 tsp ginger
- pinch nutmeg
- Cooking spray
Glaze:
- 1/3 cup powdered sugar
- 1 tbsp butter, melted
- 1 tbsp brandy or dark rum
1. Preheat oven to 350°.
2. Combine banana, 1/2 cup brown sugar, butter, and brandy in a nonstick skillet. Cook over medium heat until mixture begins to bubble. Remove from heat; cool. Place banana mixture in a large bowl. Add yogurt, remaining 1/2 cup brown sugar, and eggs. Beat with a mixer at medium speed.
3. Combine flour, wheat bran, soda, salt, cinnamon allspice, ginger, and nutmeg. Add flour mixture to banana mixture; beat just until blended. Pour batter into a 9 x 5-inch loaf pan coated with cooking spray. Bake at 350° for 1 hour or until a wooden pick inserted in center comes out clean. Remove from oven; cool 10 minutes in pan on a wire rack. Remove bread from pan; place on wire rack.
4. Combine melted butter, brandy, and powdered sugar; stir until well blended. Drizzle over the warm bread.
It may be the first time I haven't used walnuts or pecans in my banana bread. It worked quite well without them, but would work equally well with. Add 'em if ya have 'em.
And the glaze really makes it special. That little amount of butter with the brandy made for the perfect finish.
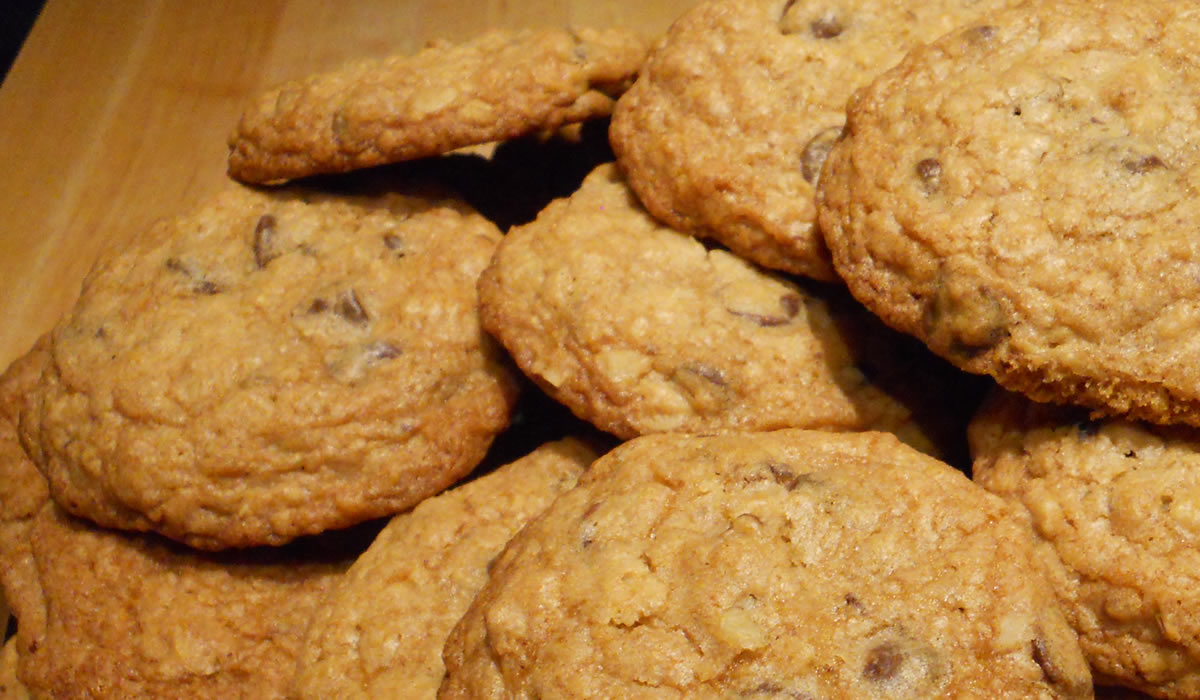
Oatmeal Chocolate Chip Cookies
I needed a cookie fix today. The weather forecasters are calling for torrential, biblical, end-of-the-world, monsoon rains to hit this evening and continue into Friday.
Sounds good to me. I love Mother Nature at her finest.
But... While we can still cook in a possible over-the-top-storm-induced power outage, we have electric ovens. If I wanted cookies, I had to make them today to be safe.
So I did.
These are a pretty simple and basic cookie. The ingredients are what every home should have readily available. And they're really good.
Adding a pinch of baking powder and not flattening the cookies makes for a softer finished cookie without going the expensive-gourmet-bakery-under-baking route. I prefer my cookies cooked but I also like them slightly soft and slightly thick. This seems to work just fine.
If you're feeling adultish, you can switch out a tablespoon of the water with a tablespoon of bourbon or whiskey. Makes for a subtle change that's unexpected but really good!
Oatmeal Chocolate Chip Cookies
- 2 cubes butter (1 cup)
- 1 cup brown sugar, packed
- 1/2 cup granulated sugar
- 2 eggs
- 2 tsp vanilla
- 2 tbsp water
- 2 cups flour
- 1 cup rolled oats
- 1 tsp baking soda
- 1/2 tsp baking powder
- 1 tsp salt
- 2 cups chocolate chips
- 1 cup chopped walnuts
Preheat oven to 375°.
Cream butter and sugars together until light and creamy. Add eggs one at a time and mix well. Add vanilla and water and mix well.
Mix together flour, baking powder, baking soda, and salt. Add slowly to butter mixture, mixing well. Add oats and mix well.
Add chocolate chips and walnuts and mix until blended.
Scoop onto ungreased cookie sheets and bake about 14 minutes. (I use a #30 scoop - about 2 1/2 tbsp per cookie.)
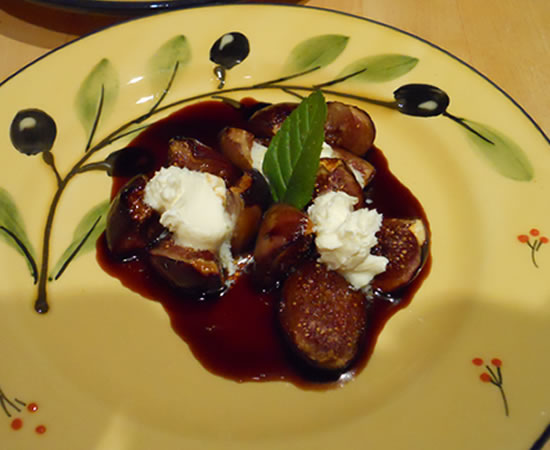
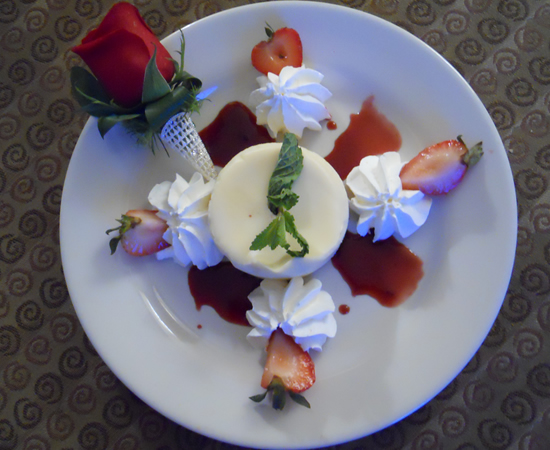
Roasted Figs
Victor found the perfect dessert. He was watching TV yesterday and somewhere saw figs roasted with balsamic vinegar and topped with a dollop of mascarpone.
Wouldn't you know that we just happened to have all three ingredients in the house tonight?!?
They really are simplicity.
Take about 3 figs per person and cut through in quarters about 3/4 through. You want the figs to stay intact.
Place them in a small buttered casserole, sprinkle with a teeny bit of sugar and drizzle with good-quality balsamic vinegar.
Bake at 350° for about 10 minutes.
Place three figs on each plate and drizzle with the accumulated juices. Place a small dollop of mascarpone cheese in the center of each fig, and serve.
This was really good. The perfect ending to the perfect day.
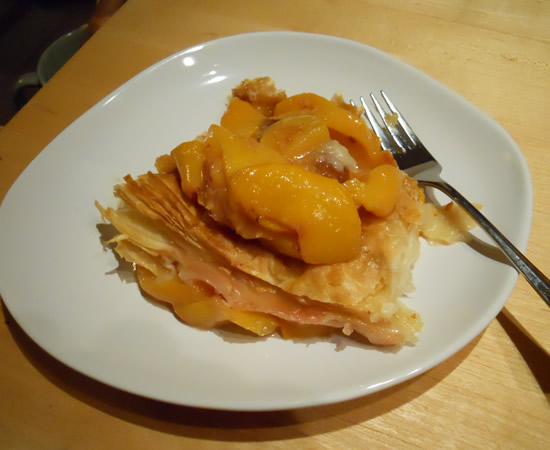
Peaches and Puff Pastry

I had about six peaches that needed using up and a package of puff pastry in the freezer. Almost-instant dessert!
Just for grins and giggles, I actually peeled the peaches - something I rarely do. And they were so sweet I didn't even add sugar to them!
I peeled and sliced them and then mixed them with 3 tbsp flour and 2 tbsp melted butter. Nothing else.
I placed 'em in the baking dish, topped it with the puff pastry, and placed it in a 400° oven for 35 minutes.
Yum.
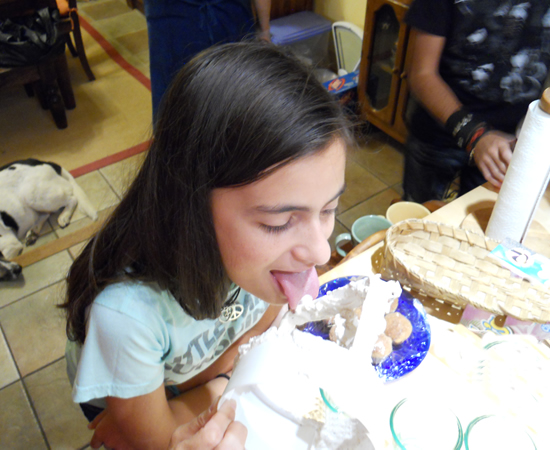
Homemade Ice Cream
We had a little ice cream making party this evening.
Our niece, Elizabeth, is down visiting from North Jersey. She was supposed to be here going to a cooking camp for a week. Alas, it was canceled at the last minute. A definite bummer because she really does like to cook and is getting quite good at it. They decided to come down anyway and has been cooking up a storm at her Aunt Re's.
So... she asked if she could come over and make ice cream with us tonight. Of course we said yes. Ice Cream is my practically most favorite food on the planet!
We let her decide the flavor. She chose Cookies and Cream.
The recipe is for a Cuisinart 1.5 quart ice cream maker. Your results may vary.
Cookies and Cream Ice Cream
- 2 cups heavy cream
- 1 cup milk
- 3/4 cup sugar
- 1 tbsp vanilla
- 1/4 package cream sandwich cookies, broken up
Mix milk, cream, vanilla, and sugar. Stir until sugar dissolves.
Follow manufacturers instructions for freezing ice cream and add broken cookies during final five minutes of mixing.
It was fun having them all over, and even more fun to verify that she and her older brother will be here in December to make Christmas Cookies with us.
Traditions are good.